

The breaker panel upgrade cost in Nova Scotia typically ranges from $1,500 to $4,500, depending on several key factors. Here's what you need to know about pricing:
Common Upgrade Scenarios:
Key Cost Factors:
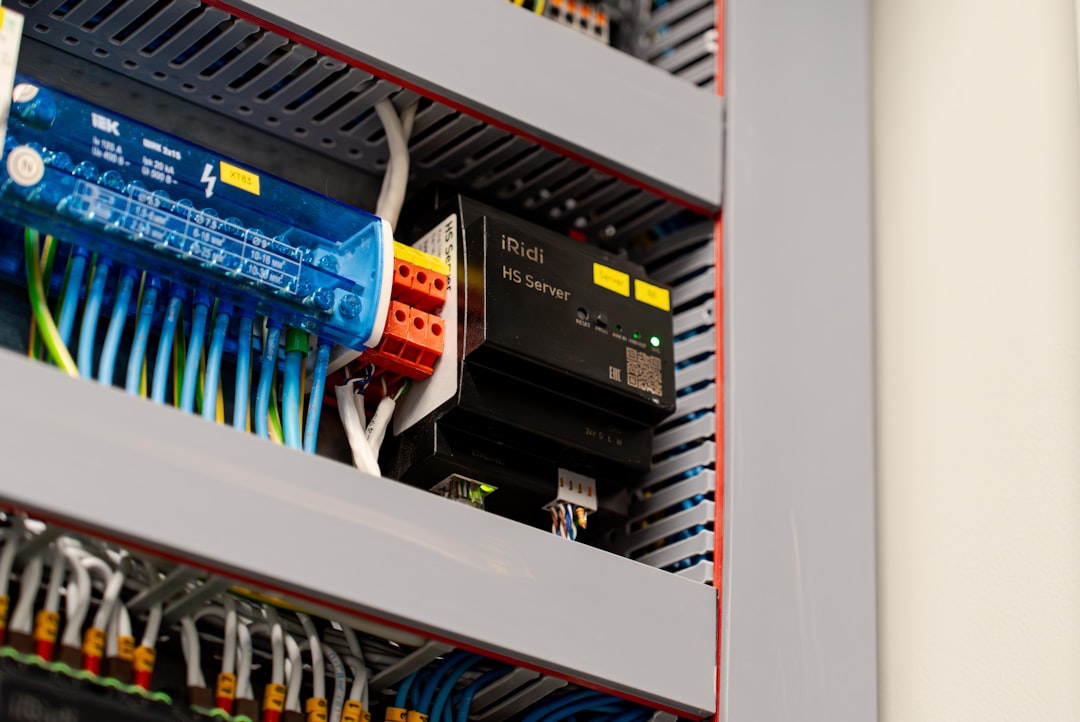
Your home's electrical panel is like the heart of your electrical system - it distributes power safely throughout your property. But as one homeowner finded, "Who wants the lights to go out every time they use the microwave?" This frustrating scenario highlights why many Canadian homes need electrical upgrades.
Modern homes demand significantly more electricity than systems installed decades ago were designed to handle. From electric vehicle chargers to smart home devices, today's electrical needs often exceed what older 60-amp or 100-amp panels can safely provide.
An electrical panel upgrade isn't just about convenience - it's about safety. Electrical issues cause over 51,000 fires annually, making this upgrade a critical investment in your family's protection and your home's value.

Today's homes are power-hungry, with EV chargers, smart appliances, home offices, and multiple streaming devices running simultaneously. Most electrical panels installed decades ago simply weren't designed for this modern lifestyle.
Your home will show warning signs when your electrical system is struggling. Ignoring them can lead to serious safety hazards.
Upgrading your panel is an investment in your family's safety and your home's future, with benefits beyond just preventing tripped breakers.
Understanding the factors that influence the breaker panel upgrade cost helps explain the pricing for this important home improvement. In Nova Scotia, a typical 100-amp to 200-amp upgrade ranges from $2,500 to $3,500. Simpler jobs may cost less, while complex ones can be more.

The final price is a sum of several factors:
We know this is a significant investment, which is why we offer various financing options to help make it more manageable.
Every home is different, but here are the most common upgrade scenarios:
Upgrade ScenarioTypical Cost Range (CAD)NotesFuse box to 100-amp breaker panel$1,500 - $2,500Perfect for older homes still using fuses. This upgrade brings you into the modern world with much better safety and convenience.60-amp to 100-amp service$1,800 - $2,200Common in very old homes. While 100 amps covers basic needs, you might want to consider jumping straight to 200 amps for future-proofing.100-amp to 200-amp service$1,800 - $3,000This is the sweet spot for most homes. A 200-amp panel handles everything you've got now, plus leaves room for that EV charger or hot tub you're dreaming about.200-amp to 400-amp service$3,500 - $5,000+Usually reserved for large homes or properties with serious electrical demands - think heated pools, workshops, or multiple HVAC systems.
Material costs can fluctuate with supply chain issues, which affects the final price.
Your home's unique situation plays a huge role in the final breaker panel upgrade cost.
The bottom line is that company size and overhead affect pricing, which is why getting multiple quotes is so important. We are always happy to provide a detailed, honest estimate.
Knowing what to expect during a breaker panel upgrade can ease anxiety. A professional installation is a well-orchestrated process focused on safety and efficiency.

Your electrical panel is the heart of your home's power system, and a professional installation is essential for your family's safety. Safety regulations exist for a reason; professional electricians are trained in the latest electrical codes for working with high-voltage systems.
The DIY risks of a panel upgrade are significant. It involves disconnecting the main power and working with deadly high voltage, a task that requires years of training to master. With electrical issues causing over 51,000 fires annually, the breaker panel upgrade cost is a reasonable investment to prevent a devastating fire.
Choosing the right electrician is crucial. With over 30 years of experience serving Nova Scotia communities like Kentville, Truro, and Halifax, we understand what defines exceptional electrical work.
We are proud of our commitment to quality across all our work. You can learn more about all of our services, including electrical, HVAC, and insulation, on our website.
There are smart ways to manage your breaker panel upgrade cost without compromising safety.
The goal is long-term value. A properly installed panel will serve your family safely for decades, making it a worthwhile investment.
Here are answers to the most common questions we receive from Nova Scotia homeowners about electrical panel upgrades.
Most standard breaker panel upgrade projects are completed in a single day, taking four to eight hours. However, complex projects with unexpected issues like outdated wiring or panel relocation can take longer. We always provide a realistic timeline upfront.
Expect a temporary power outage for several hours during the installation. We coordinate with your utility company to restore power the same day. Our experienced crews work efficiently to minimize this disruption.
For most modern homes, 200-amp service is essential. Today's homes run numerous devices, from EV chargers to smart appliances, that older 100-amp panels often struggle to handle, leading to tripped breakers and flickering lights.
Future-proofing is key. A 200-amp panel accommodates future additions like an EV, a finished basement, or a hot tub, saving you from another upgrade later. For safety, a 200-amp panel prevents overloading, a common fire hazard.
While very large homes might need 400-amp service, 200 amps is the right choice for most Nova Scotia families, providing adequate capacity without overspending.
While not a dollar-for-dollar return on your breaker panel upgrade cost, an upgrade adds significant value when you sell.
The upfront investment pays long-term dividends in safety, convenience, and your home's appeal to future buyers.
After reviewing the costs, benefits, and process, is a panel upgrade a worthwhile investment? With over 30 years of experience serving Nova Scotia, we can confidently say yes.

Your electrical panel is the heart of your home's power system. When it's healthy, everything functions smoothly. The key benefits are clear:
The upfront breaker panel upgrade cost is a long-term investment. A quality panel lasts 25 to 40 years, breaking down to a small monthly cost over its lifespan. The practical value is immense: preventing costly fire damage, avoiding emergency repairs, and ensuring your home remains insurable.
The boost to market value is real. An upgraded panel is a strong selling point for savvy buyers, removing a major hurdle and potentially speeding up the sale.
Our customers often tell us, "I wish we'd done this sooner." The peace of mind from knowing your electrical system is safe is invaluable.
For over 30 years, Presidential Ventilation Systems Ltd. has helped Nova Scotia families upgrade their electrical systems. We serve communities across the province, including Kentville, Truro, Mount Uniacke, Halifax, Dartmouth, Bridgewater, Windsor, and Bedford. As a leading Daikin Comfort Pro Dealer, we apply our commitment to excellence to all our electrical and HVAC work.
Our licensed and insured electricians ensure your entire system works harmoniously, and we pride ourselves on transparent pricing, quality work, and strong customer relationships.
Don't let an outdated panel put your home at risk. If you're experiencing issues or planning additions, we're here to help.
Ready to take the next step? Contact us for a professional assessment. We'll evaluate your current system, explain your options, and provide transparent pricing for your specific situation. Your family's safety and your home's future are worth the investment.

The breaker panel upgrade cost in Nova Scotia typically ranges from $1,500 to $4,500, depending on several key factors. Here's what you need to know about pricing:
Common Upgrade Scenarios:
Key Cost Factors:
Your home's electrical panel is like the heart of your electrical system - it distributes power safely throughout your property. But as one homeowner finded, "Who wants the lights to go out every time they use the microwave?" This frustrating scenario highlights why many Canadian homes need electrical upgrades.
Modern homes demand significantly more electricity than systems installed decades ago were designed to handle. From electric vehicle chargers to smart home devices, today's electrical needs often exceed what older 60-amp or 100-amp panels can safely provide.
An electrical panel upgrade isn't just about convenience - it's about safety. Electrical issues cause over 51,000 fires annually, making this upgrade a critical investment in your family's protection and your home's value.
Today's homes are power-hungry, with EV chargers, smart appliances, home offices, and multiple streaming devices running simultaneously. Most electrical panels installed decades ago simply weren't designed for this modern lifestyle.
Your home will show warning signs when your electrical system is struggling. Ignoring them can lead to serious safety hazards.
Upgrading your panel is an investment in your family's safety and your home's future, with benefits beyond just preventing tripped breakers.
Understanding the factors that influence the breaker panel upgrade cost helps explain the pricing for this important home improvement. In Nova Scotia, a typical 100-amp to 200-amp upgrade ranges from $2,500 to $3,500. Simpler jobs may cost less, while complex ones can be more.
The final price is a sum of several factors:
We know this is a significant investment, which is why we offer various financing options to help make it more manageable.
Every home is different, but here are the most common upgrade scenarios:
Upgrade ScenarioTypical Cost Range (CAD)NotesFuse box to 100-amp breaker panel$1,500 - $2,500Perfect for older homes still using fuses. This upgrade brings you into the modern world with much better safety and convenience.60-amp to 100-amp service$1,800 - $2,200Common in very old homes. While 100 amps covers basic needs, you might want to consider jumping straight to 200 amps for future-proofing.100-amp to 200-amp service$1,800 - $3,000This is the sweet spot for most homes. A 200-amp panel handles everything you've got now, plus leaves room for that EV charger or hot tub you're dreaming about.200-amp to 400-amp service$3,500 - $5,000+Usually reserved for large homes or properties with serious electrical demands - think heated pools, workshops, or multiple HVAC systems.
Material costs can fluctuate with supply chain issues, which affects the final price.
Your home's unique situation plays a huge role in the final breaker panel upgrade cost.
The bottom line is that company size and overhead affect pricing, which is why getting multiple quotes is so important. We are always happy to provide a detailed, honest estimate.
Knowing what to expect during a breaker panel upgrade can ease anxiety. A professional installation is a well-orchestrated process focused on safety and efficiency.
Your electrical panel is the heart of your home's power system, and a professional installation is essential for your family's safety. Safety regulations exist for a reason; professional electricians are trained in the latest electrical codes for working with high-voltage systems.
The DIY risks of a panel upgrade are significant. It involves disconnecting the main power and working with deadly high voltage, a task that requires years of training to master. With electrical issues causing over 51,000 fires annually, the breaker panel upgrade cost is a reasonable investment to prevent a devastating fire.
Choosing the right electrician is crucial. With over 30 years of experience serving Nova Scotia communities like Kentville, Truro, and Halifax, we understand what defines exceptional electrical work.
We are proud of our commitment to quality across all our work. You can learn more about all of our services, including electrical, HVAC, and insulation, on our website.
There are smart ways to manage your breaker panel upgrade cost without compromising safety.
The goal is long-term value. A properly installed panel will serve your family safely for decades, making it a worthwhile investment.
Here are answers to the most common questions we receive from Nova Scotia homeowners about electrical panel upgrades.
Most standard breaker panel upgrade projects are completed in a single day, taking four to eight hours. However, complex projects with unexpected issues like outdated wiring or panel relocation can take longer. We always provide a realistic timeline upfront.
Expect a temporary power outage for several hours during the installation. We coordinate with your utility company to restore power the same day. Our experienced crews work efficiently to minimize this disruption.
For most modern homes, 200-amp service is essential. Today's homes run numerous devices, from EV chargers to smart appliances, that older 100-amp panels often struggle to handle, leading to tripped breakers and flickering lights.
Future-proofing is key. A 200-amp panel accommodates future additions like an EV, a finished basement, or a hot tub, saving you from another upgrade later. For safety, a 200-amp panel prevents overloading, a common fire hazard.
While very large homes might need 400-amp service, 200 amps is the right choice for most Nova Scotia families, providing adequate capacity without overspending.
While not a dollar-for-dollar return on your breaker panel upgrade cost, an upgrade adds significant value when you sell.
The upfront investment pays long-term dividends in safety, convenience, and your home's appeal to future buyers.
After reviewing the costs, benefits, and process, is a panel upgrade a worthwhile investment? With over 30 years of experience serving Nova Scotia, we can confidently say yes.
Your electrical panel is the heart of your home's power system. When it's healthy, everything functions smoothly. The key benefits are clear:
The upfront breaker panel upgrade cost is a long-term investment. A quality panel lasts 25 to 40 years, breaking down to a small monthly cost over its lifespan. The practical value is immense: preventing costly fire damage, avoiding emergency repairs, and ensuring your home remains insurable.
The boost to market value is real. An upgraded panel is a strong selling point for savvy buyers, removing a major hurdle and potentially speeding up the sale.
Our customers often tell us, "I wish we'd done this sooner." The peace of mind from knowing your electrical system is safe is invaluable.
For over 30 years, Presidential Ventilation Systems Ltd. has helped Nova Scotia families upgrade their electrical systems. We serve communities across the province, including Kentville, Truro, Mount Uniacke, Halifax, Dartmouth, Bridgewater, Windsor, and Bedford. As a leading Daikin Comfort Pro Dealer, we apply our commitment to excellence to all our electrical and HVAC work.
Our licensed and insured electricians ensure your entire system works harmoniously, and we pride ourselves on transparent pricing, quality work, and strong customer relationships.
Don't let an outdated panel put your home at risk. If you're experiencing issues or planning additions, we're here to help.
Ready to take the next step? Contact us for a professional assessment. We'll evaluate your current system, explain your options, and provide transparent pricing for your specific situation. Your family's safety and your home's future are worth the investment.

Maintaining clean, fresh indoor air is essential for a healthy home environment. Many homeowners in Halifax and surrounding communities deal with stale rooms, lingering odors, window condensation, excess humidity, noisy airflow, or uneven comfort from one level of the home to another. These issues are often connected to the way air is moved, exhausted, replaced, filtered, and balanced throughout the building.
Professional ventilation design, air balancing, and energy recovery ventilator systems can help improve how a home breathes. Instead of relying on random air leaks or undersized exhaust fans, a properly designed system brings in controlled outdoor air, removes stale indoor air, supports healthier humidity levels, and distributes airflow more consistently.
Here is a practical overview of how to optimize your home's ventilation system:
Proper air handling is a critical component of modern home comfort. A ventilation system should be designed around the home itself, including floor plan, occupancy, moisture sources, insulation levels, exhaust requirements, and available duct routes. By focusing on custom duct design, advanced air filtration, controlled exhaust, and precise balancing, you can create a healthier living space while supporting efficient system operation.
For homeowners in Halifax, Dartmouth, Bedford, Sackville, Clayton Park, Fall River, Timberlea, Cole Harbour, Eastern Passage, Tantallon, Mount Uniacke, and nearby communities, working with a local ventilation team helps ensure the system is designed for the way homes in the region are built and used.
To achieve optimal indoor comfort, it is essential to understand the different components of a modern ventilation system. Presidential Ventilation offers tailored solutions to meet the unique needs of your property, helping support efficient airflow, balanced pressure, moisture control, and improved indoor air quality.
Our core services include:
For a deeper dive into how whole-home HVAC planning supports comfort and efficiency, explore our full range of ventilation services.
To help you understand the primary ventilation options, we have put together a comparison of key systems:
| Ventilation System | Primary Function | Key Benefits | Ideal Application |
|---|---|---|---|
| Energy Recovery Ventilator (ERV) | Transfers heat and moisture | Controls humidity, improves air quality | Homes in humid climates |
| Heat Recovery Ventilator (HRV) | Transfers heat only | High thermal efficiency, fresh air | Homes in colder, drier climates |
| Dedicated Exhaust Systems | Removes localized contaminants | Eliminates odors and moisture quickly | Kitchens and bathrooms |
| Makeup Air Units | Replaces exhausted air | Maintains balanced building pressure | Commercial and tightly sealed homes |
Understanding the technical aspects of air handling is key to a comfortable home. Learn more about how professional ventilation design can enhance your living environment by visiting Presidential Ventilation.
A well-designed ventilation system should not be treated as a single appliance installed in isolation. It is a connected network of fans, ducts, controls, exhaust points, fresh air intakes, grilles, dampers, and filtration components. When these pieces are designed to work together, the result is quieter airflow, better indoor air quality, and more consistent comfort throughout the home.
The secret to a successful ventilation upgrade is careful planning and professional execution. Installing components without a proper design is one of the main reasons systems fail to deliver expected air quality improvements. Presidential Ventilation follows a detailed process to ensure your system is tailored to your home's specific layout, airflow needs, and long-term comfort goals.
Below is the step-by-step breakdown of how we navigate the installation process smoothly.
Your journey begins by evaluating your home's current airflow and identifying specific needs.
Once the design is finalized, our experienced team begins the installation process.
With the installation completed, we ensure everything is functioning properly.
This step-by-step approach helps prevent common issues such as unbalanced airflow, weak exhaust, excessive humidity, negative building pressure, and ventilation equipment that is difficult to access for routine maintenance.
To keep your ventilation system operating at peak efficiency, it is important to understand the technical standards and maintenance practices required for long-term performance. A good ventilation system depends on the right equipment, but it also depends on duct layout, airflow measurement, sealing, controls, and consistent upkeep.
Keep the following requirements in mind:
A maintenance-focused approach protects the performance of the system and helps homeowners avoid comfort problems that slowly develop over time. For homes in Halifax and surrounding communities, seasonal changes make regular ventilation maintenance especially important.
Air balancing ensures that every room in your house receives the correct amount of conditioned or ventilated air. Without proper balancing, some rooms may feel drafty or stuffy, while others remain uncomfortable. It optimizes the performance of your entire HVAC system and helps create more consistent temperatures and airflow throughout your living space.
Balancing is especially important after duct modifications, renovations, equipment changes, or the installation of an ERV or HRV. A professionally balanced system can also help reduce noise from over-supplied registers and improve airflow to rooms that previously felt stagnant.
A Heat Recovery Ventilator (HRV) transfers heat between the incoming and outgoing air streams, making it a strong option for colder, drier conditions. An Energy Recovery Ventilator (ERV) transfers both heat and moisture, helping to manage indoor humidity levels during humid periods. Our team can help you choose the best option for your home's specific needs.
The right choice depends on your home's construction, occupancy, moisture levels, existing HVAC setup, and indoor air quality goals. Both systems are designed to provide controlled fresh air while reducing the comfort impact of bringing outdoor air into the home.
We recommend having your ventilation system professionally inspected and serviced at least once a year. This includes checking fan operation, cleaning the heat exchange core, inspecting ductwork for leaks, reviewing exterior hoods, confirming drainage, and ensuring the system remains properly balanced.
Homeowners should also inspect or clean filters every three to six months, depending on manufacturer recommendations, household conditions, and system usage. Homes with pets, higher occupancy, or dusty renovation activity may require more frequent filter attention.
Common signs include condensation on windows, persistent bathroom humidity, stale odors, musty areas, uneven airflow, stuffy bedrooms, lingering cooking smells, and rooms that feel closed-in even when the HVAC system is running. These symptoms may point to inadequate exhaust, insufficient fresh air, duct leakage, or an unbalanced air distribution system.
Yes, ventilation improvements can support better humidity control by removing moisture-laden indoor air and bringing in controlled outdoor air through a properly designed system. Bathrooms, kitchens, laundry areas, and finished basements often benefit from improved exhaust and balanced air exchange.
Investing in a professional ventilation and air handling system is the key to a healthier, more comfortable home. By focusing on custom duct design, proper air balancing, efficient ERV/HRV installations, exhaust and makeup air planning, and ongoing ventilation maintenance, you can help ensure your family breathes cleaner, fresher air year-round.
With over 30 years of experience serving Halifax, Dartmouth, Lower Sackville, Bedford, Clayton Park, Cole Harbour, Eastern Passage, Fall River, Tantallon, Timberlea, Mount Uniacke, and surrounding communities, Presidential Ventilation Systems Ltd. is here to make your project seamless. We understand the technical requirements and installation practices needed to design a system that fits your home, supports indoor air quality, and integrates properly with your existing HVAC setup.
Whether you are dealing with stale air, moisture concerns, weak airflow, or an aging ventilation system, a professionally designed solution can make a noticeable difference in daily comfort. Ready to upgrade your home's ventilation and improve your indoor air quality? Contact us today to discuss your project and start your journey: Presidential Ventilation Systems.
If your home feels stuffy, certain rooms never seem to get enough airflow, or indoor odours linger longer than they should, your ventilation system may need professional attention. For homeowners and property managers looking for dependable ventilation, air handling, and HVAC airflow services in Nova Scotia and surrounding regions — including Halifax, Dartmouth, Bedford, Lower Sackville, Cole Harbour, Fall River, Tantallon, and beyond — Presidential Ventilation provides technical solutions designed around comfort, indoor air quality, and long-term system performance.
Our work focuses on practical ventilation improvements, including duct design and installation, air balancing, exhaust and makeup air systems, ERVs/HRVs, ventilation maintenance, and custom sheet metal fabrication. Each project is approached with careful system planning so airflow is delivered where it is needed and stale air is removed effectively.
| Service Area | Who It's For | Primary Benefit |
|---|---|---|
| Duct Design & Installation | Homeowners, builders, and property managers | Better airflow distribution throughout the building |
| Air Balancing & Air Handling | Homes with uneven room comfort or airflow concerns | More consistent ventilation performance |
| ERV/HRV Ventilation Solutions | Homes needing controlled fresh-air exchange | Improved indoor air quality and energy-conscious ventilation |
A well-designed ventilation system can help reduce stagnant air, manage humidity, support cleaner indoor conditions, and improve overall comfort. Whether you are planning a renovation, updating older ductwork, or addressing airflow concerns in an existing home, professional ventilation design helps ensure the system is built for the way the property is actually used.
Nova Scotia's climate presents unique challenges for indoor air quality. Cold winters often mean homes are sealed tightly, which can trap moisture, odours, and pollutants inside. During warmer months, humidity levels can rise, creating conditions that encourage mould growth and discomfort. A properly designed ventilation system accounts for these seasonal shifts and helps maintain balanced indoor conditions year-round.
For additional homeowner planning resources, visit this related guide.
Ductwork is one of the most important parts of any forced-air HVAC system. Poorly designed or aging duct systems can lead to weak airflow, noisy operation, temperature differences between rooms, and reduced ventilation effectiveness. Presidential Ventilation designs and installs duct systems with attention to layout, sizing, airflow delivery, and long-term serviceability.
Many homes across Halifax, Dartmouth, Bedford, and surrounding communities were built with ductwork that no longer meets the demands of modern living. Renovations, room additions, and basement developments can all change how air moves through a home. When the duct system is not updated to reflect these changes, airflow problems often follow.
Our ductwork services may include:
For more localized homeowner information, you can also review this service resource.
Air balancing helps confirm that the right amount of conditioned or ventilated air is reaching each area of the building. When airflow is uneven, some spaces may feel stagnant while others receive too much supply air. Presidential Ventilation assesses airflow delivery, return pathways, duct restrictions, and system configuration to improve balance and performance.
In many Nova Scotia homes, air balancing issues develop gradually. Furniture placement, closed doors, dirty filters, and duct modifications can all contribute to uneven airflow over time. A professional air balancing assessment identifies these issues and provides targeted adjustments to restore proper distribution.
We also support exhaust and makeup air needs for homes and managed properties. Proper exhaust helps remove moisture, odours, and contaminants from areas such as kitchens, bathrooms, laundry rooms, and utility spaces. Makeup air design helps replace exhausted air in a controlled way, supporting healthier and more stable indoor conditions.
For homeowners comparing ventilation options in nearby communities, see this related information page.
Ventilation issues are not always obvious at first. Many homeowners notice symptoms such as stale air, lingering humidity, musty smells, condensation on windows, noisy ductwork, or rooms that never feel properly supplied with air. These signs often point to duct restrictions, poor return airflow, unbalanced supply runs, or ventilation equipment that needs adjustment or repair.
In Nova Scotia, where homes are often closed up for extended periods during the colder months, these symptoms can become more pronounced. Without adequate ventilation, indoor pollutants such as cooking fumes, cleaning product residues, and off-gassing from building materials can accumulate and affect the comfort and health of occupants.
For additional background on residential energy and comfort planning, refer to this homeowner resource.
Presidential Ventilation evaluates the full airflow path rather than focusing on one component in isolation. A professional assessment may include:
Ventilation upgrades can be valuable for older homes, renovated spaces, additions, basement developments, multi-room properties, and buildings where airflow has changed over time. Homeowners and managers may also request service when planning an HVAC system update, improving indoor air quality, or correcting known airflow problems.
Properties throughout Halifax, Dartmouth, Lower Sackville, Bedford, Cole Harbour, Eastern Passage, Fall River, Tantallon, Timberlea, and other communities in the region can benefit from a professional ventilation review. Whether the home is a newer build with tight construction or an older property with outdated ductwork, there are often practical improvements that can make a meaningful difference in comfort and air quality.
The goal is to create a system that supports dependable air movement, controlled ventilation, and a more comfortable indoor environment.
A clear process helps ensure the ventilation solution matches the property, the existing HVAC system, and the homeowner's comfort goals. Presidential Ventilation takes a technical, site-specific approach to ductwork, air handling, ERV/HRV systems, exhaust systems, and ventilation repair.
To better understand how organized project planning supports successful home upgrades, read this related process guide.
Most ventilation projects begin with a review of the existing system and the areas of concern:
This initial review is an important step because it allows our team to understand the full picture before recommending any work. Every home is different, and the ventilation needs of a bungalow in Beaver Bank will differ from those of a multi-level home in Clayton Park or a waterfront property in Herring Cove.
Once the scope is defined, the work is completed with attention to airflow, fit, and system reliability. Depending on the property, service may include:
Our team takes care to minimize disruption during the work and to leave the space clean and ready for use once the project is complete.
Presidential Ventilation provides duct design and installation, custom sheet metal fabrication, air balancing, exhaust and makeup air solutions, ERV/HRV service, ventilation maintenance, and indoor air quality improvements. These services help homeowners address stale air, weak airflow, moisture concerns, and uneven ventilation throughout the home. We serve homeowners across Halifax, Dartmouth, Bedford, Lower Sackville, Cole Harbour, and many other communities throughout the region.
Indoor air quality can often be improved by addressing airflow first. This may include balancing supply and return air, improving exhaust from moisture-prone areas, servicing an ERV or HRV, replacing restrictive or damaged duct sections, and ensuring fresh air is introduced in a controlled way. Regular maintenance of ventilation components, including filter changes and duct inspections, also plays an important role in maintaining good indoor air quality over time. Homeowners in surrounding communities can review this related service page for additional background. You can also read this homeowner comfort guide.
Yes. Thoughtful ventilation design can support energy-conscious comfort by improving airflow delivery, reducing unnecessary system strain, and helping the home exchange air in a controlled manner. ERVs and HRVs are especially useful in Canadian homes because they support fresh-air exchange while helping manage energy loss through ventilation.
Ventilation systems, including ERVs, HRVs, and ductwork, benefit from regular maintenance to ensure they continue operating effectively. Filters should be checked and replaced according to manufacturer recommendations, and the overall system should be inspected periodically to identify any developing issues such as duct leaks, blocked exhaust pathways, or declining airflow performance. Presidential Ventilation can help establish a maintenance schedule that fits the needs of your home and system.
Presidential Ventilation serves homeowners and property managers throughout Nova Scotia, including Halifax, Dartmouth, Lower Sackville, Middle Sackville, Upper Sackville, Clayton Park, Beaver Bank, Bedford, Cole Harbour, Eastern Passage, Fall River, Tantallon, Timberlea, Lawrencetown, Waverley, Mount Uniacke, Spryfield, Fairview, and many other communities in the region.
If your home has stale air, uneven airflow, humidity concerns, or aging ductwork, a professional ventilation assessment can help identify the right path forward. Presidential Ventilation supports homeowners and property managers throughout Nova Scotia and surrounding regions with duct design, installation, air balancing, ERV/HRV service, exhaust and makeup air solutions, indoor air quality improvements, and custom fabrication.
With over 30 years of experience in ventilation and air handling, our team focuses on practical, well-built systems that improve comfort, support healthier indoor air, and fit the needs of each property. As a trusted service provider across Halifax, Dartmouth, Bedford, and communities throughout the region, we are committed to delivering dependable ventilation solutions for every home we work with.
Schedule your consultation today and let us help you improve your home's ventilation and indoor air quality.