

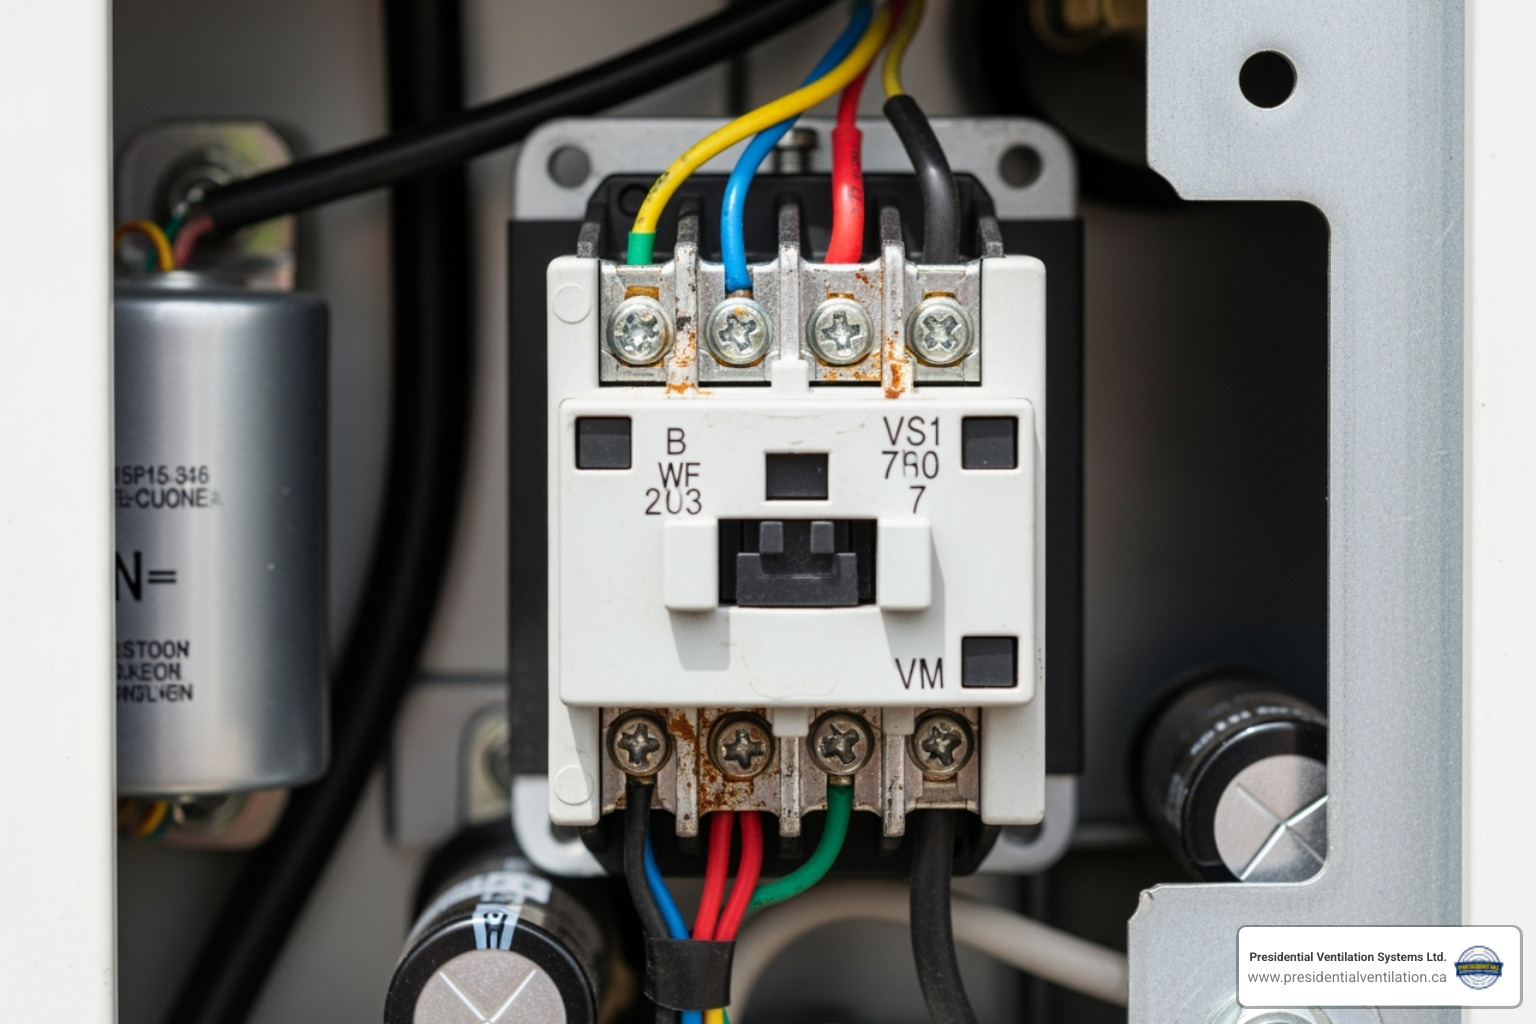
Heat pump contactor replacement is a common repair that can restore your system's ability to heat and cool effectively. A contactor is an electrical switch that controls the flow of high-voltage power to your heat pump's compressor and condenser fan motor when it receives a low-voltage signal from your thermostat.
Quick Answer for Heat Pump Contactor Replacement:
Think of the contactor as a bridge between your thermostat and the heavy-duty components that actually move the heat. When your thermostat calls for heating or cooling, it sends a 24-volt signal to energize the contactor's coil. This closes the contactor's contacts, allowing 240-volt power to flow to your compressor and outdoor fan.
Most heat pumps use either single-pole or double-pole contactors, with amperage ratings typically between 30-40 amps. These components have a finite lifespan - usually around 100,000 cycles or 10-15 years - and will eventually need replacement due to normal wear from electrical arcing.
When a contactor fails, your outdoor unit may not start at all, make unusual humming or chattering noises, or run constantly without proper temperature control. The good news? This is often a straightforward repair that can get your system back up and running quickly.

Your heat pump has been faithfully keeping your home comfortable, but lately something just doesn't seem right. Maybe it's making strange noises, or perhaps it's not responding when you adjust the thermostat. More often than not, these frustrating issues point to one culprit: a failing contactor.
After three decades of servicing heat pumps across Nova Scotia, we've learned to spot the warning signs of heat pump contactor replacement needs from a mile away. The good news? Catching these symptoms early can save you from much more expensive repairs down the road.
Your outdoor unit simply won't turn on - this is the most obvious red flag. The indoor unit may be running, but the outdoor compressor and fan are silent. A failed contactor acts like an open drawbridge, preventing power from reaching the outdoor components.
Strange humming, buzzing, or chattering sounds from the outdoor unit often indicate a problem. These noises usually mean the contactor's electrical contacts are worn and struggling to make a solid connection.
Sometimes the opposite happens, and your unit runs constantly, even after reaching the set temperature. This typically means the contactor is "stuck" closed, continuously sending power to the outdoor unit. This wastes energy and causes unnecessary wear on your equipment.
Inconsistent heating or cooling is another frustrating symptom. If your system works one moment and blows lukewarm air the next, it could be a contactor making intermittent connections.

Visible damage is often the smoking gun. Inside the electrical panel, a failing contactor may have pitted and charred metal contacts from electrical arcing. You might also see corrosion, especially in our Maritime weather, or even melted plastic or burnt wires, which require immediate attention.
Don't ignore these warning signs. A failing contactor puts extra stress on your entire system and can eventually lead to compressor failure - one of the most expensive heat pump repairs you'll ever face. Regular maintenance helps catch these issues before they become major problems.
If you're experiencing any of these symptoms, you're likely looking at a contactor issue. For more insights into what might be affecting your heat pump's performance, check out our detailed guide on common heat pump issues.
For those who are comfortable with electrical work and keen to tackle home repairs, a heat pump contactor replacement can be a feasible DIY project. However, it's crucial to understand the risks and ensure you have the right knowledge and tools. We always advise caution, as working with high-voltage electricity is inherently dangerous.
Before you even think about picking up a screwdriver, there are some very important considerations for a DIY heat pump contactor replacement:
Understanding the fundamental role of this component is key to a successful repair. For a deeper dive into what a contactor is, you can check out this informative page: What is a Contactor?.
Having the right tools is essential for a safe and successful heat pump contactor replacement. Here's what we recommend you have on hand:

Selecting the correct replacement contactor is vital. Using the wrong one can lead to inefficiency, system damage, or even safety hazards.
Once you've gathered your tools and the correct replacement contactor, you're ready to begin the heat pump contactor replacement process. Safety is our top priority at Presidential Ventilation Systems Ltd., so follow these steps carefully.

While this guide provides detailed steps, we understand that working with high voltage can be daunting. If you're ever in doubt, or prefer peace of mind, we're always here to help.
Sometimes the smartest move isn't always the DIY route. While we admire the spirit of homeowners who want to tackle repairs themselves, heat pump contactor replacement involves high-voltage electricity that demands respect and expertise. After three decades of serving families across Nova Scotia, we've learned that some repairs are simply better left to the professionals.
Here's a look at what you're getting into with a DIY approach versus calling in the experts:
| Feature | DIY Replacement | Professional Service |
|---|---|---|
| Cost | Parts only | Parts + labor |
| Time | 1 - 2 hours (experienced DIYer) | 30 minutes - 1 hour |
| Safety | High risk of electrical shock/fire | Minimal risk (trained, insured technician) |
| Warranty | May void heat pump warranty | Repair often warranted, original warranty preserved |
| Expertise | Requires significant electrical knowledge | Highly trained, certified HVAC technician |
| Diagnosis | Limited to obvious contactor issues | Thorough system diagnosis, identifies root causes |
| Tools | Requires specific, often expensive tools | Technician brings all specialized tools |
Electrical work is unforgiving. If you're not comfortable with high-voltage systems or using a multimeter, it's best to call a professional. Our licensed technicians have the training to do the job safely.
Professional help is essential when the problem is complex. What seems like a contactor failure could be a deeper issue with the capacitor, wiring, or compressor. A professional can diagnose the root cause, preventing repeat failures.
Warranty protection is a key factor. Many manufacturers require professional service to keep your warranty valid. A DIY repair could void it, costing you more in the long run.
Beyond the risk of shock, incorrect wiring can create fire hazards or damage expensive components like the compressor. Our insured technicians follow strict safety protocols to protect your home and equipment.
Professional diagnosis often saves money in the long run. We don't just swap parts – we investigate why the contactor failed in the first place. Maybe your system is short-cycling due to a refrigerant issue, or perhaps there's a voltage problem at your electrical panel. Addressing these underlying causes prevents repeated failures and keeps your system running efficiently.
The peace of mind that comes with professional service is hard to put a price on. Our technicians complete most contactor replacements quickly and efficiently, often in less than an hour. We test the entire system afterward to ensure everything is working correctly, and we stand behind our work with solid warranties.
We have teams ready to help across Nova Scotia, from Halifax and Dartmouth to Kentville, Truro, and everywhere in between. When your heat pump isn't cooperating, we're just a phone call away. Learn about our heat pump repair services and find why so many Nova Scotia families trust us to keep their homes comfortable year-round.
Over the years serving homeowners across Nova Scotia, we've noticed that certain questions about heat pump contactor replacement come up time and again. Whether you're dealing with a mysterious humming sound from your outdoor unit or wondering if that old contactor can soldier on for another season, these are the answers we find ourselves sharing most often.
The short answer is: replacement is almost always the better choice. While you can clean surface dirt, the real damage comes from electrical arcing. Each time the contactor operates, tiny arcs create pits and carbon buildup on the metal contacts. This damage is to the conductive material itself, not just surface grime, and prevents a solid electrical connection. Attempting to file or sand the contacts is a temporary fix at best. Given the low cost of a new contactor, replacement is the most reliable and effective solution.
Most heat pump contactors last 10 to 15 years, or about 100,000 cycles, under normal conditions. However, several factors can shorten this lifespan:
Regular maintenance is key to maximizing the contactor's lifespan. An annual inspection can catch early signs of wear before they cause a system failure.
Using a contactor that isn't an exact match for your system's specifications is risky and can lead to significant problems:
Always use a contactor with the correct pole, voltage, and amperage ratings to ensure safety, efficiency, and reliability. That's why we always take the time to match specifications exactly when we're doing repairs. The peace of mind and long-term reliability are worth getting it right the first time.
Your heat pump contactor might be a small component tucked away in your outdoor unit, but it's absolutely essential for keeping your home comfortable year-round. Think of it as the unsung hero of your heating and cooling system - quietly doing its job thousands of times each season to ensure your family stays warm in winter and cool in summer.
Throughout this guide, we've walked you through everything from recognizing the warning signs of a failing contactor to understanding your repair options. Whether you're hearing that telltale humming sound or your outdoor unit has stopped responding entirely, you now know what to look for and how to respond.
The choice between DIY and professional service ultimately comes down to your comfort level with electrical work and your priorities around safety and warranty protection. If you're handy with tools and comfortable working with high voltage, a heat pump contactor replacement can be a rewarding project that saves you some money. But remember - there's no shame in calling the professionals, especially when it comes to your family's safety and your system's reliability.
Correct installation is everything. A properly installed contactor ensures your compressor and condenser fan receive exactly the power they need, when they need it. This translates directly to better efficiency, lower energy bills, and a longer-lasting system. Get it wrong, and you could be looking at much more expensive repairs down the road.
Here's something we always tell our customers: proactive maintenance is your best friend. Annual inspections by qualified technicians can catch contactor issues before they leave you without heat on a frigid February morning or without cooling during a sweltering July afternoon. It's much easier (and cheaper) to replace a contactor during a routine service call than during an emergency repair.
At Presidential Ventilation Systems Ltd., we've been helping Nova Scotia families stay comfortable for over 30 years. As a leading Daikin Comfort Pro Dealer, our certified technicians have seen every type of contactor failure imaginable - and we know exactly how to fix them quickly and safely. We believe in doing the job right the first time, with long warranties and energy-saving solutions custom to your specific needs.
Don't let a faulty contactor disrupt your comfort or leave you wondering if your system will work when you need it most. Our team is ready to help, whether you need emergency repair or want to schedule preventive maintenance to avoid problems altogether.
Ready to get your heat pump running smoothly again? Schedule your professional heat pump repair in Halifax today and experience the peace of mind that comes with expert service.

Heat pump contactor replacement is a common repair that can restore your system's ability to heat and cool effectively. A contactor is an electrical switch that controls the flow of high-voltage power to your heat pump's compressor and condenser fan motor when it receives a low-voltage signal from your thermostat.
Quick Answer for Heat Pump Contactor Replacement:
Think of the contactor as a bridge between your thermostat and the heavy-duty components that actually move the heat. When your thermostat calls for heating or cooling, it sends a 24-volt signal to energize the contactor's coil. This closes the contactor's contacts, allowing 240-volt power to flow to your compressor and outdoor fan.
Most heat pumps use either single-pole or double-pole contactors, with amperage ratings typically between 30-40 amps. These components have a finite lifespan - usually around 100,000 cycles or 10-15 years - and will eventually need replacement due to normal wear from electrical arcing.
When a contactor fails, your outdoor unit may not start at all, make unusual humming or chattering noises, or run constantly without proper temperature control. The good news? This is often a straightforward repair that can get your system back up and running quickly.
Your heat pump has been faithfully keeping your home comfortable, but lately something just doesn't seem right. Maybe it's making strange noises, or perhaps it's not responding when you adjust the thermostat. More often than not, these frustrating issues point to one culprit: a failing contactor.
After three decades of servicing heat pumps across Nova Scotia, we've learned to spot the warning signs of heat pump contactor replacement needs from a mile away. The good news? Catching these symptoms early can save you from much more expensive repairs down the road.
Your outdoor unit simply won't turn on - this is the most obvious red flag. The indoor unit may be running, but the outdoor compressor and fan are silent. A failed contactor acts like an open drawbridge, preventing power from reaching the outdoor components.
Strange humming, buzzing, or chattering sounds from the outdoor unit often indicate a problem. These noises usually mean the contactor's electrical contacts are worn and struggling to make a solid connection.
Sometimes the opposite happens, and your unit runs constantly, even after reaching the set temperature. This typically means the contactor is "stuck" closed, continuously sending power to the outdoor unit. This wastes energy and causes unnecessary wear on your equipment.
Inconsistent heating or cooling is another frustrating symptom. If your system works one moment and blows lukewarm air the next, it could be a contactor making intermittent connections.
Visible damage is often the smoking gun. Inside the electrical panel, a failing contactor may have pitted and charred metal contacts from electrical arcing. You might also see corrosion, especially in our Maritime weather, or even melted plastic or burnt wires, which require immediate attention.
Don't ignore these warning signs. A failing contactor puts extra stress on your entire system and can eventually lead to compressor failure - one of the most expensive heat pump repairs you'll ever face. Regular maintenance helps catch these issues before they become major problems.
If you're experiencing any of these symptoms, you're likely looking at a contactor issue. For more insights into what might be affecting your heat pump's performance, check out our detailed guide on common heat pump issues.
For those who are comfortable with electrical work and keen to tackle home repairs, a heat pump contactor replacement can be a feasible DIY project. However, it's crucial to understand the risks and ensure you have the right knowledge and tools. We always advise caution, as working with high-voltage electricity is inherently dangerous.
Before you even think about picking up a screwdriver, there are some very important considerations for a DIY heat pump contactor replacement:
Understanding the fundamental role of this component is key to a successful repair. For a deeper dive into what a contactor is, you can check out this informative page: What is a Contactor?.
Having the right tools is essential for a safe and successful heat pump contactor replacement. Here's what we recommend you have on hand:
Selecting the correct replacement contactor is vital. Using the wrong one can lead to inefficiency, system damage, or even safety hazards.
Once you've gathered your tools and the correct replacement contactor, you're ready to begin the heat pump contactor replacement process. Safety is our top priority at Presidential Ventilation Systems Ltd., so follow these steps carefully.
While this guide provides detailed steps, we understand that working with high voltage can be daunting. If you're ever in doubt, or prefer peace of mind, we're always here to help.
Sometimes the smartest move isn't always the DIY route. While we admire the spirit of homeowners who want to tackle repairs themselves, heat pump contactor replacement involves high-voltage electricity that demands respect and expertise. After three decades of serving families across Nova Scotia, we've learned that some repairs are simply better left to the professionals.
Here's a look at what you're getting into with a DIY approach versus calling in the experts:
| Feature | DIY Replacement | Professional Service |
|---|---|---|
| Cost | Parts only | Parts + labor |
| Time | 1 - 2 hours (experienced DIYer) | 30 minutes - 1 hour |
| Safety | High risk of electrical shock/fire | Minimal risk (trained, insured technician) |
| Warranty | May void heat pump warranty | Repair often warranted, original warranty preserved |
| Expertise | Requires significant electrical knowledge | Highly trained, certified HVAC technician |
| Diagnosis | Limited to obvious contactor issues | Thorough system diagnosis, identifies root causes |
| Tools | Requires specific, often expensive tools | Technician brings all specialized tools |
Electrical work is unforgiving. If you're not comfortable with high-voltage systems or using a multimeter, it's best to call a professional. Our licensed technicians have the training to do the job safely.
Professional help is essential when the problem is complex. What seems like a contactor failure could be a deeper issue with the capacitor, wiring, or compressor. A professional can diagnose the root cause, preventing repeat failures.
Warranty protection is a key factor. Many manufacturers require professional service to keep your warranty valid. A DIY repair could void it, costing you more in the long run.
Beyond the risk of shock, incorrect wiring can create fire hazards or damage expensive components like the compressor. Our insured technicians follow strict safety protocols to protect your home and equipment.
Professional diagnosis often saves money in the long run. We don't just swap parts – we investigate why the contactor failed in the first place. Maybe your system is short-cycling due to a refrigerant issue, or perhaps there's a voltage problem at your electrical panel. Addressing these underlying causes prevents repeated failures and keeps your system running efficiently.
The peace of mind that comes with professional service is hard to put a price on. Our technicians complete most contactor replacements quickly and efficiently, often in less than an hour. We test the entire system afterward to ensure everything is working correctly, and we stand behind our work with solid warranties.
We have teams ready to help across Nova Scotia, from Halifax and Dartmouth to Kentville, Truro, and everywhere in between. When your heat pump isn't cooperating, we're just a phone call away. Learn about our heat pump repair services and find why so many Nova Scotia families trust us to keep their homes comfortable year-round.
Over the years serving homeowners across Nova Scotia, we've noticed that certain questions about heat pump contactor replacement come up time and again. Whether you're dealing with a mysterious humming sound from your outdoor unit or wondering if that old contactor can soldier on for another season, these are the answers we find ourselves sharing most often.
The short answer is: replacement is almost always the better choice. While you can clean surface dirt, the real damage comes from electrical arcing. Each time the contactor operates, tiny arcs create pits and carbon buildup on the metal contacts. This damage is to the conductive material itself, not just surface grime, and prevents a solid electrical connection. Attempting to file or sand the contacts is a temporary fix at best. Given the low cost of a new contactor, replacement is the most reliable and effective solution.
Most heat pump contactors last 10 to 15 years, or about 100,000 cycles, under normal conditions. However, several factors can shorten this lifespan:
Regular maintenance is key to maximizing the contactor's lifespan. An annual inspection can catch early signs of wear before they cause a system failure.
Using a contactor that isn't an exact match for your system's specifications is risky and can lead to significant problems:
Always use a contactor with the correct pole, voltage, and amperage ratings to ensure safety, efficiency, and reliability. That's why we always take the time to match specifications exactly when we're doing repairs. The peace of mind and long-term reliability are worth getting it right the first time.
Your heat pump contactor might be a small component tucked away in your outdoor unit, but it's absolutely essential for keeping your home comfortable year-round. Think of it as the unsung hero of your heating and cooling system - quietly doing its job thousands of times each season to ensure your family stays warm in winter and cool in summer.
Throughout this guide, we've walked you through everything from recognizing the warning signs of a failing contactor to understanding your repair options. Whether you're hearing that telltale humming sound or your outdoor unit has stopped responding entirely, you now know what to look for and how to respond.
The choice between DIY and professional service ultimately comes down to your comfort level with electrical work and your priorities around safety and warranty protection. If you're handy with tools and comfortable working with high voltage, a heat pump contactor replacement can be a rewarding project that saves you some money. But remember - there's no shame in calling the professionals, especially when it comes to your family's safety and your system's reliability.
Correct installation is everything. A properly installed contactor ensures your compressor and condenser fan receive exactly the power they need, when they need it. This translates directly to better efficiency, lower energy bills, and a longer-lasting system. Get it wrong, and you could be looking at much more expensive repairs down the road.
Here's something we always tell our customers: proactive maintenance is your best friend. Annual inspections by qualified technicians can catch contactor issues before they leave you without heat on a frigid February morning or without cooling during a sweltering July afternoon. It's much easier (and cheaper) to replace a contactor during a routine service call than during an emergency repair.
At Presidential Ventilation Systems Ltd., we've been helping Nova Scotia families stay comfortable for over 30 years. As a leading Daikin Comfort Pro Dealer, our certified technicians have seen every type of contactor failure imaginable - and we know exactly how to fix them quickly and safely. We believe in doing the job right the first time, with long warranties and energy-saving solutions custom to your specific needs.
Don't let a faulty contactor disrupt your comfort or leave you wondering if your system will work when you need it most. Our team is ready to help, whether you need emergency repair or want to schedule preventive maintenance to avoid problems altogether.
Ready to get your heat pump running smoothly again? Schedule your professional heat pump repair in Halifax today and experience the peace of mind that comes with expert service.
What is a VRV HVAC system and how does it benefit a commercial building in nova scotia? A VRV (Variable Refrigerant Volume) system is an advanced multi-zone HVAC technology that circulates refrigerant — rather than air or water — directly to multiple indoor units throughout a building, with each zone independently controlled. For Nova Scotia commercial buildings, the key benefits are:
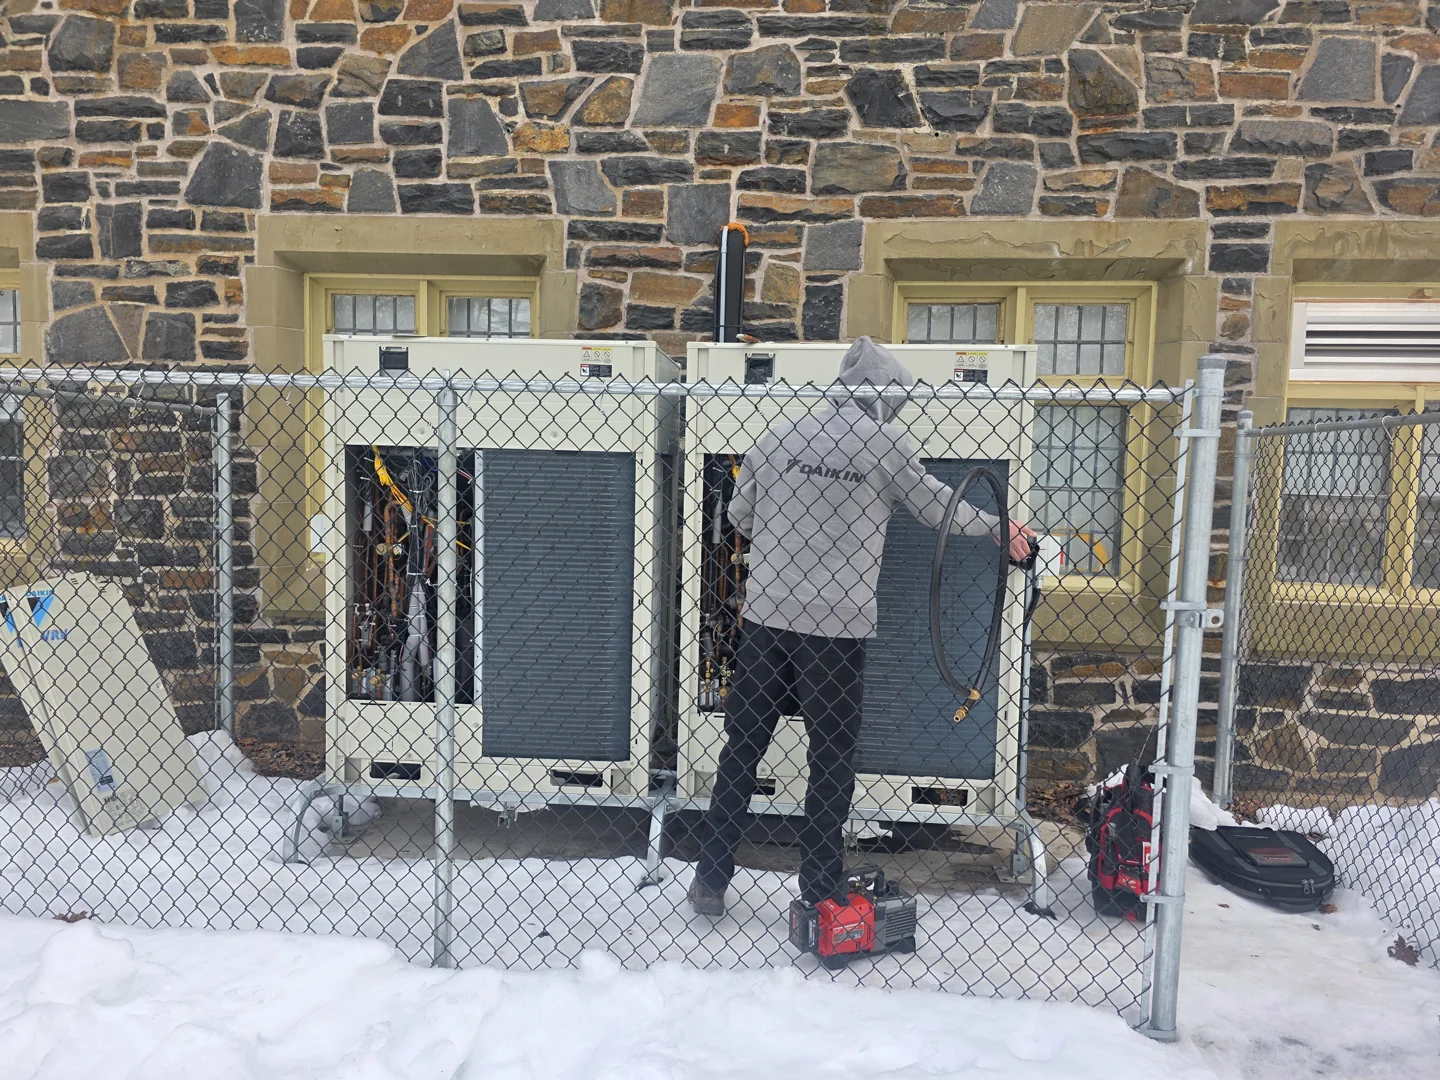
Running a commercial building in Nova Scotia means dealing with cold, demanding winters, high energy costs, and the constant pressure to keep every corner of your space comfortable. Whether you manage an office in Dartmouth, a hotel in Truro, or a mixed-use property in Halifax, your HVAC system is one of your biggest operating expenses — and one of the biggest opportunities for savings. VRV technology was first developed by Daikin in 1982 and has since become one of the most efficient and flexible commercial climate control solutions available. Yet many Nova Scotia building owners are still running older, less efficient systems that waste energy and money every single day.
This guide breaks down exactly how VRV systems work, why they outperform traditional commercial HVAC, and what they mean for your building's comfort, efficiency, and bottom line.

To understand how a Variable Refrigerant Volume system can transform your commercial property, it helps to look at how we manage indoor climates in our region. With high local electricity rates, building managers across Halifax, Dartmouth, and Bedford are actively seeking smarter ways to heat and cool their spaces.
Traditional commercial systems rely on moving massive volumes of conditioned air through bulky sheet-metal ductwork, or circulating treated water through heavy piping. A VRV system takes a completely different approach. It circulates refrigerant directly to the specific zones where climate control is needed. By varying the flow of refrigerant based on the exact real-time demands of each room, it eliminates the energy waste associated with traditional "all-on" or "all-off" systems.
For local businesses, implementing this technology means a dramatic reduction in monthly utility bills. Because our maritime climate is highly variable—often shifting from damp and chilly to warm and sunny in a single afternoon—having a system that adapts instantly to these changes is invaluable. If you operate a facility in Halifax, upgrading to this technology is one of the most effective steps you can take to lower your operational footprint. You can learn more about local commercial climate options in our guide on Commercial HVAC Halifax.
At the heart of Daikin VRV technology is the inverter-driven scroll compressor. Traditional HVAC systems use single-speed compressors that operate like a light switch: they are either running at 100% capacity or they are completely off. This constant cycling on and off consumes an enormous amount of electricity and subjects the mechanical components to heavy wear and tear.
A VRV system behaves more like a dimmer switch. The inverter compressor continuously adjusts its speed to match the precise load of the building. If only two offices in a twenty-room building require heating on a cool morning in Cole Harbour, the compressor runs at a fraction of its total capacity, delivering only the exact amount of refrigerant needed to satisfy those two zones.
This level of precise temperature control ensures that there are no dramatic temperature swings, cold drafts, or stuffy rooms. Each indoor unit—whether it is a sleek wall-mounted unit, a recessed ceiling cassette, or a concealed ducted unit—operates independently. This modularity makes VRV an incredibly flexible option for both new builds and major renovations. When planning a system upgrade, working with specialists who understand local structural designs is key to a seamless transition; explore our insights on Commercial HVAC Installation.
When evaluating a major mechanical upgrade for a commercial property in Dartmouth, Burnside, or Sackville, the decision ultimately comes down to performance, reliability, and long-term value. The advantages of VRV technology are clear:
To maximize these benefits, proper ventilation design must be integrated into the mechanical layout. To see how we approach these designs, read about our Commercial Ventilation Solutions.
Traditional commercial HVAC systems—such as constant-volume packaged rooftop units (RTUs), massive chillers, and older boiler networks—were designed for an era when energy was inexpensive and building controls were simple. These systems typically treat an entire floor, or even an entire building, as a single thermal zone.
The result is a constant compromise: employees on the sunny south side of a Burnside office building are overheating, while those on the shaded north side are freezing. To solve this, traditional systems often cool the air to a low temperature and then use electric reheat coils at individual terminal boxes to warm it back up for specific rooms—a process that essentially wastes energy twice.
VRV systems eliminate this inefficiency entirely. Instead of moving massive volumes of air through ducts that are prone to thermal loss and leakage (which can account for up to 30% of energy loss), VRV moves heat energy through highly insulated, small-diameter copper lines. This decentralized control ensures that energy is only expended exactly where and when it is required. For businesses operating in industrial parks like Burnside, understanding the electrical infrastructure required to support these modern systems is crucial; see our Commercial Electrical Guide Burnside NS for more details.
Variable Air Volume (VAV) systems have long been the standard for medium-to-large commercial buildings. While they are more efficient than constant-volume systems, they still struggle to match the part-load efficiency and zoning flexibility of VRV.
| Performance Metric | Modern VRV HVAC Systems | Traditional VAV Systems |
|---|---|---|
| Energy Medium | Refrigerant (direct expansion) | Conditioned Air (large ductwork) |
| Part-Load Efficiency | Extremely High (inverter-driven) | Moderate (limited by fan energy) |
| Zoning Capabilities | Precise, room-by-room control | Large zones, prone to hot/cold spots |
| Duct Thermal Losses | Near Zero (insulated refrigerant lines) | Up to 10–30% energy loss through leaks/conduction |
| Space Requirements | Minimal (saves ceiling & floor space) | High (requires large vertical chases & plenums) |
| System Redundancy | High (multiple modular compressors) | Low (single fan or chiller failure affects whole building) |
One of the most impressive feats of VRV engineering is the 3-pipe heat recovery system. In many commercial buildings, different zones have completely opposite thermal needs at the exact same time. For example, an interior server room or a crowded conference room in a Dartmouth office may require cooling, even in the middle of November. Meanwhile, perimeter offices with large windows facing the cold outdoor air require heating.
In a traditional setup, you would have to run a chiller to cool the server room and a boiler to heat the offices—consuming energy on both fronts.
A VRV heat recovery system solves this by using branch selector boxes to redirect waste heat. The system captures the heat rejected from the server room during the cooling process and, instead of dumping it outside, routes it through the refrigerant piping to warm the perimeter offices. This process of energy recycling can result in a heat recovery coefficient of performance (COP) of 6.0 or higher, dramatically reducing the building's overall energy draw.
Designing a mechanical system for a commercial property in Nova Scotia requires a deep understanding of our local climate. Unlike dry, inland regions, our coastal environment brings high humidity, heavy salt air, and rapid temperature swings. These factors can accelerate wear on outdoor equipment and complicate indoor humidity control if not properly addressed during the design phase.
When planning a VRV layout for a property in Truro, East Dover, or Cole Harbour, mechanical engineers must carefully calculate both peak loads (the maximum heating or cooling required on the coldest or hottest days of the year) and block loads (the actual combined load of the building at any given moment). Because a VRV system can share capacity across zones, the outdoor unit does not need to be sized to the sum of all indoor units' peak loads. This "diversity factor" allows for a more compact and cost-effective outdoor installation.
Additionally, because these systems involve complex electrical controls and dedicated circuits, ensuring your facility's electrical system is up to code is a vital step. If you are retrofitting an older commercial property, consult our guide on Commercial Electrical Repairs to ensure your electrical infrastructure is ready to support a modern mechanical system.
A common question among business owners in areas like Sackville and Waverley is how refrigerant-based systems perform during our harsh winters, where design temperatures can drop to -18°C or lower.
Modern VRV systems designed for cold climates utilize Enhanced Vapor Injection (EVI) compressors. This technology allows the system to maintain high heating capacities and excellent efficiency (COPs of 2.0 to 2.5) even when outdoor temperatures drop as low as -35°C. For extreme maritime winter conditions, some designs even involve placing the outdoor condensing units inside a dedicated mechanical room equipped with automated, damper-controlled louvers. These dampers can mix cold outdoor air with tempered air from adjacent warehouse spaces to optimize performance and protect the equipment from freezing winds and salt spray.
It is important to note that because a VRV system only circulates refrigerant to condition the indoor air, it does not inherently bring fresh outdoor air into the building. To meet local building codes and ASHRAE ventilation standards, a VRV system must be paired with a Dedicated Outdoor Air System (DOAS) or an Energy Recovery Ventilator (ERV).
To ensure optimal indoor air quality and prevent drafts, the fresh air ventilation system must be meticulously designed and balanced. At Presidential Ventilation Systems, we specialize in custom sheet-metal fabrication and duct design to ensure that fresh, pre-conditioned outdoor air is distributed evenly throughout your commercial space.
Proper air balancing prevents positive or negative pressure issues within the building, which can otherwise cause drafty doors, moisture infiltration, and localized humidity problems. By pairing a high-efficiency VRV system with a custom-engineered ERV or HRV, you can recover heat from exhaust air before it leaves the building, ensuring your indoor air remains fresh, clean, and highly energy-efficient year-round.
VRV systems are highly versatile and deliver the best results in buildings with diverse, multi-zone thermal loads. Excellent candidates include:
A commercial VRV installation typically follows a structured timeline to minimize disruption to your business operations:
Because VRV systems are highly sophisticated, they require regular, proactive preventative maintenance to protect your investment and ensure a lifespan of 15 to 20 years:
Upgrading your commercial property's climate control system is a major decision, but the long-term benefits of Variable Refrigerant Volume technology are undeniable. By delivering precise, zone-by-zone comfort, reducing energy waste by up to 55%, and providing reliable heating even in the depths of a Nova Scotia winter, a VRV system is an investment that pays dividends in both tenant satisfaction and lower utility bills.
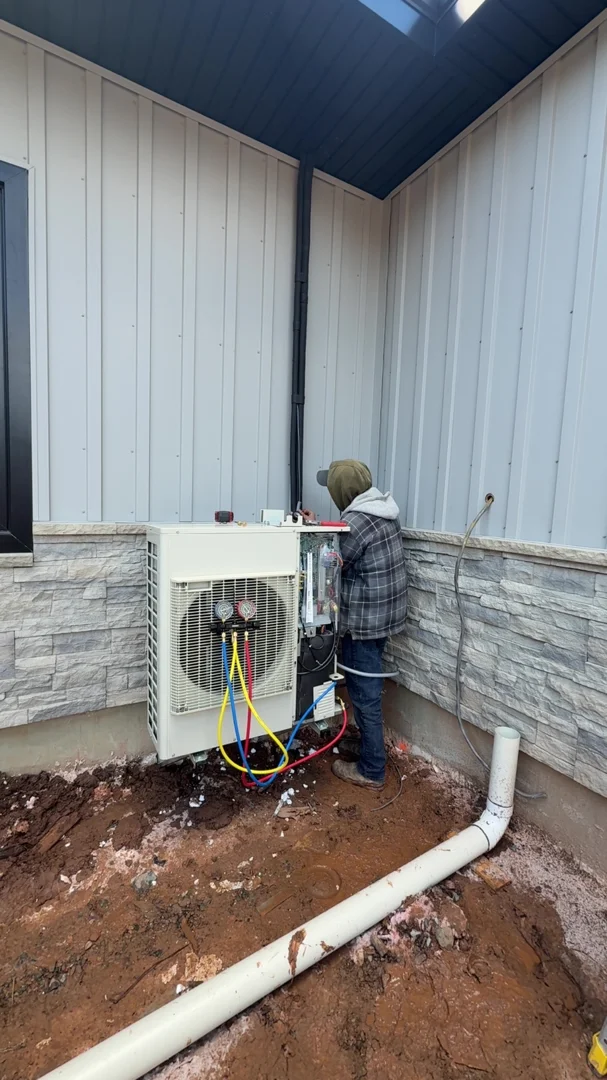
At Presidential Ventilation Systems Ltd., we bring over 30 years of experience serving businesses across Halifax, Dartmouth, Sackville, Bedford, and the surrounding areas. As a leading Daikin Comfort Pro Dealer, our team has the specialized expertise required to design, install, and maintain high-performance VRV and commercial ventilation systems tailored to our unique maritime climate.
If you are ready to explore how a modern VRV system can optimize your building's efficiency and comfort, contact our team today to discuss our Commercial Climate Control Solutions.
Knowing the signs your commercial HVAC system needs professional service early can be the difference between a quick fix and a full system failure that shuts down your building's heating and cooling for days.
Commercial HVAC systems work hard. They run year-round, handle large spaces, and are under constant demand from employees, customers, and tenants. When something starts going wrong, the warning signs are often subtle at first — a strange noise here, a slightly higher energy use there. By the time the problem becomes obvious, it has usually been affecting your system's efficiency for a while.
According to industry data, regular HVAC maintenance can reduce energy use by 5 to 20% annually, and commercial systems that receive preventive care experience up to 95% fewer breakdowns than those that don't. That's a significant gap — and it starts with knowing what to look for.
Here's a quick overview of the most common warning signs:
If you're noticing any of these in your facility, it's time to take action before a small issue becomes a major one.
Identifying issues with your commercial heating and cooling setup requires a mix of observation and proactive management. Because these systems are highly complex, a single failing part can trigger a chain reaction that compromises the entire unit.
When you notice changes in how your system sounds, smells, or performs, it is a clear message from your equipment that something is wrong. Let's break down the five most critical indicators that your commercial HVAC system requires professional diagnostic attention.
A primary job of any commercial climate control system is to maintain a uniform, comfortable environment throughout your facility. When you start noticing that the boardroom feels like a freezer while the corner offices are uncomfortably warm, your system is struggling.
Temperature fluctuations are rarely a simple thermostat issue. In commercial properties, these hot and cold spots often point to deeper system imbalances, such as:
If your building layout has changed or if you are dealing with Commercial HVAC Systems Not Working in Halifax NS, professional diagnostic tools are required to re-balance the airflow and ensure even comfort across all zones.
While commercial HVAC systems are powerful, they are designed to operate with a consistent, low-level hum. Sudden, loud, or unusual sounds are immediate red flags that mechanical components are wearing out or failing.
Ignoring these sensory warning signs can turn a minor belt replacement into a catastrophic motor failure. For a deeper look at identifying these sound and smell cues, check out our Commercial HVAC Repair Guide Stewiacke.
As a facility manager or business owner, you keep a close eye on operational efficiency. If your energy usage records show a sudden, unexplained increase — especially when compared to the same period in previous years — your HVAC system is likely losing its efficiency.
As of June 2026, energy efficiency benchmarks are tighter than ever, and an inefficient HVAC system is one of the fastest ways to reduce your operational efficiency. When internal components like the compressor, fan motors, or coils are dirty or failing, the system must work twice as hard and run much longer to achieve the same indoor temperatures.
Regular maintenance and timely interventions can prevent these energy spikes. Scheduling a professional Commercial HVAC Tune Up is the most effective way to restore your system's efficiency and optimize your system's performance.
Short cycling occurs when your commercial HVAC system turns on, runs for a brief period, and then abruptly shuts off before completing a standard heating or cooling cycle. This process repeats rapidly throughout the day.
This frequent on/off operation is incredibly damaging to your equipment. The startup phase of a compressor draws the most electrical current and subjects mechanical parts to the highest amount of physical stress. Constant starting and stopping accelerates component wear, shortens the overall system lifespan, and causes massive energy spikes.
Common causes of short cycling include:
If your system is short cycling, consulting a professional is urgent. For businesses in the corridor region, our Mount Uniacke Commercial HVAC Repair Guide offers excellent insights into how local climate factors can trigger these cycling issues.
Have you noticed that the air coming from your supply vents feels weak, or that it takes hours for your building to cool down on a warm afternoon? Weak airflow is a clear sign of system restriction.
When airflow is restricted, your HVAC system cannot distribute conditioned air effectively, causing some zones to remain uncomfortable while the system runs continuously. This lack of circulation also allows stale air and humidity to build up indoors, lowering employee productivity and tenant satisfaction.
Airflow blockages are typically caused by:
Keeping up with your Commercial Ventilation Maintenance Halifax NS ensures your ductwork, filters, and ventilation components remain clean, clear, and capable of delivering strong, healthy airflow to every corner of your property.
Deciding whether to continue repairing an aging commercial HVAC system or invest in a full system replacement is a major operational decision. Below is a quick comparison table to help guide your facilities team:
| Indicator | Choose Repair | Choose Replacement |
|---|---|---|
| Equipment Age | Under 10 years old | 10 to 15+ years old |
| Repair Frequency | Infrequent, minor component wear | Constant breakdowns, major part failures |
| Repair Scope | Minor component replacement | Major system overhaul required |
| Energy Efficiency | Stable energy usage close to baseline | Consistently climbing energy usage, outdated technology |
| Major Components | Failed capacitor, contactor, or fan belt | Failed compressor, cracked coils, or rusted chassis |
The most effective way to catch these warning signs before they escalate into a major business disruption is through structured, proactive care. Waiting for the system to break down before calling a technician — known as reactive or "run-to-fail" maintenance — is always the most disruptive path.
Implementing a preventive maintenance agreement delivers exceptional long-term reliability by catching minor issues, such as a worn belt or a small refrigerant leak, before they cause a complete system breakdown. To learn more about how structured care protects your facility's operations, read about How a Maintenance Agreement Extends Commercial HVAC Equipment Lifespan.
In Nova Scotia, our coastal climate brings unique environmental challenges that accelerate wear on outdoor HVAC equipment. High humidity, heavy seasonal storms, and salt-laden air can quickly corrode aluminum fins, rust structural brackets, and degrade electrical connections.
When minor warning signs are ignored in coastal environments, salt air corrosion accelerates the damage, leading to rapid refrigerant leaks, electrical shorts, and eventual complete system failure. Understanding How Salt Air and Coastal Conditions in Nova Scotia Affect Commercial HVAC Equipment highlights why prompt, professional service is so critical for businesses in our region.
Water leaks and high indoor humidity are usually caused by a clogged condensate drain line or frozen evaporator coils. Because cooling systems naturally dehumidify the air as they operate, they produce a significant amount of water. If the drain pan or drain lines are blocked by algae, dirt, or debris, this water will overflow, leading to stained ceiling tiles, mold growth, and potential water damage to your building's structure.
Regularly clearing these drains is a key part of our Commercial Central HVAC Maintenance Guide Dartmouth NS.
As a general rule, commercial air filters should be checked monthly and replaced at least every three months. However, in high-occupancy buildings or facilities prone to dust, more frequent changes may be required. Outdoor and indoor heat exchanger coils should be professionally inspected and cleaned at least once a year — typically in the spring before the heavy cooling season begins.
For reliable, scheduled upkeep, consider booking a Reliable Commercial HVAC Service in Cole Harbour NS.
When a commercial HVAC system is neglected, dirt and dust accumulate on the air filters and heat exchanger coils. This buildup restricts airflow and acts as an insulating barrier, making it much harder for the system to transfer heat. As a result, the compressor and fan motors must run longer and draw more electrical current to maintain the set temperature. This added strain can increase your annual energy consumption by 5% to 20%, leading to higher energy consumption and shortening the lifespan of your valuable equipment.
Your commercial HVAC system is a major investment that keeps your business running smoothly, comfortably, and productively. Paying close attention to the early warning signs of system failure — from minor temperature swings to unusual noises — is the key to avoiding unplanned downtime and premature equipment replacement.
At Presidential Ventilation Systems Ltd., we bring over 30 years of experience to commercial properties across Nova Scotia, including Halifax, Dartmouth, Bedford, Burnside, and surrounding areas. As a trusted Daikin Comfort Pro Dealer, our team is fully equipped to handle complex commercial diagnostics, routine maintenance, and system optimizations.
Don't wait for a complete system breakdown to address your heating and cooling needs. Contact us today to schedule a professional inspection and learn more about our high-efficiency Commercial HVAC services.