

When your air conditioner not working becomes a reality on a sweltering summer day, it can quickly turn your comfortable home into an unbearable oven. Over three-quarters of all homes in the US have air conditioners, and when they fail, the discomfort hits fast.
Quick troubleshooting checklist for a non-working AC:
Most AC problems fall into three categories: power issues (thermostat, breaker, disconnect switch), airflow problems (dirty filters, blocked vents, frozen coils), or mechanical failures (refrigerant leaks, compressor issues, electrical faults).
The good news? Many common AC problems have simple solutions you can try before calling a professional. Some issues like dirty filters or tripped breakers take just minutes to fix. However, problems involving refrigerant, electrical components, or water leaks require immediate professional attention to prevent costly damage or safety hazards.
Understanding how your AC works helps you troubleshoot smarter. Your air conditioner doesn't create cold air - it removes heat from indoor air and releases it outside through a continuous refrigeration cycle.

When your air conditioner not working leaves you sweating in the summer heat, take a deep breath before hitting the panic button. Many AC problems have surprisingly simple solutions that you can tackle yourself in just a few minutes.
Start with your thermostat – it's the command center of your cooling system, and sometimes it just needs a gentle nudge back to reality. Double-check that it's actually set to "Cool" mode rather than heat or fan-only. You'd be amazed how many service calls turn out to be nothing more than a seasonal setting mix-up!
Make sure your desired temperature is set lower than the current room temperature. If your thermostat display looks blank or is acting sluggish, try replacing the batteries. It's one of those "turn it off and on again" moments that actually works.
Check your electrical panel next, especially if your AC unit won't turn on at all. Look for the circuit breaker labeled for your air conditioner – it might say "AC," "HVAC," or "Furnace." If it's tripped (sitting halfway between on and off), flip it completely to "Off," wait a moment, then switch it back to "On."
Here's an important safety tip: if the breaker trips again immediately, don't keep resetting the breaker. This signals a serious electrical problem, and repeatedly flipping it could create a fire hazard.
While you're thinking about electrical issues, take a quick walk outside to your outdoor unit. Look for the outdoor disconnect switch – it's usually a small box mounted on your exterior wall near the unit. Make sure the switch inside is in the "On" position. Sometimes these get accidentally bumped or trip during power surges.
Now let's talk about airflow, which is often the real troublemaker. Your air filter is like the lungs of your AC system, and when it's clogged, everything suffers. A dirty filter makes your system work harder, reduces efficiency, and can even cause your coils to freeze up.

Check your filter monthly and replace it every three months – more often if you have pets or someone in your home deals with allergies. If you have a reusable filter, clean it according to the manufacturer's instructions. This simple step can save you both headaches and money.
Finally, take a tour of your home's vents and registers. Are they blocked by furniture or other obstructions? Blocked vents choke off airflow and prevent cool air from circulating properly. Make sure all supply and return vents are open and unobstructed.
Here's a common misconception: closing vents in unused rooms doesn't actually save energy. Instead, it increases pressure in your system and can damage your AC unit. Keep those vents open and make sure your dirty or blocked registers get a good cleaning.
If these basic checks don't solve your cooling crisis, it's time to dig deeper into what might be causing your AC troubles.
Now that you've checked the basics, let's dig deeper into the mystery of why your air conditioner not working properly. Sometimes the issue isn't as simple as a dirty filter or tripped breaker, and understanding these common culprits can help you decide whether it's a DIY fix or time to call in the professionals.
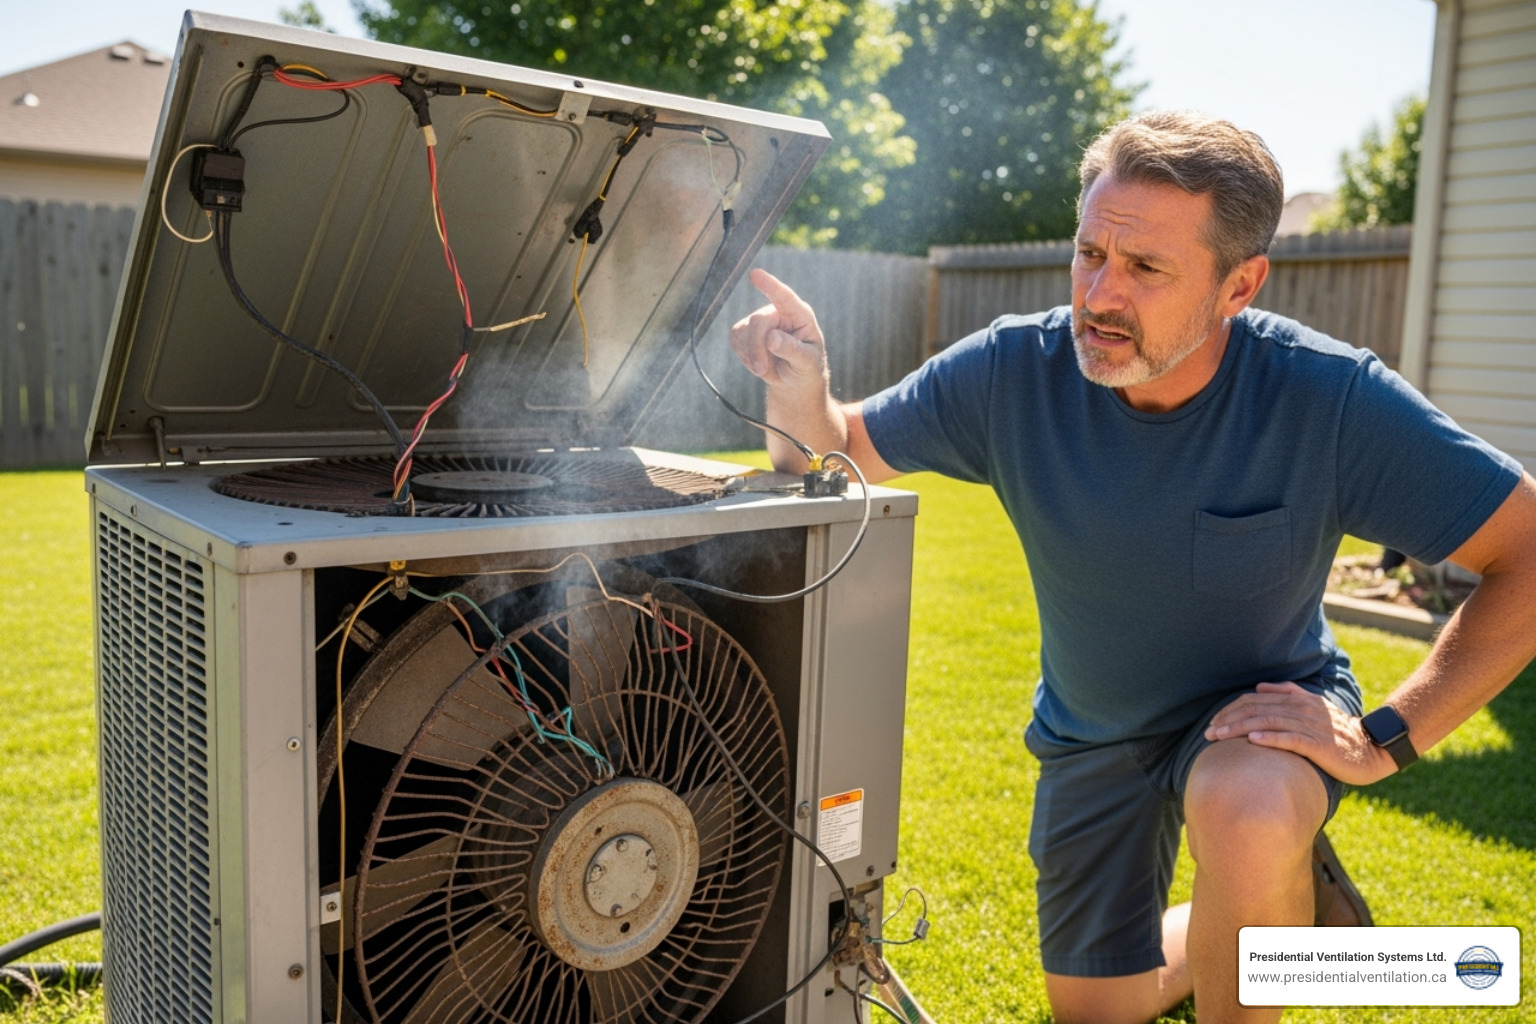
There's nothing more frustrating than hearing your AC humming away, working hard, but feeling only warm air coming from your vents. This scenario usually points to one of several specific problems that prevent your system from actually cooling your home.
Dirty condenser coils are often the sneaky culprit behind poor cooling performance. These coils live in your outdoor unit and work like a car radiator, releasing heat from your home to the outside air. When they're covered in dirt, grass clippings, leaves, or even cottonwood fluff, they can't do their job effectively. Think of it like trying to cool down while wearing a thick winter coat – not very efficient!
Your outdoor unit needs room to breathe, so make sure there's at least three feet of clearance around it. A gentle spray with your garden hose can work wonders for cleaning debris off the fins, but be careful not to bend them.
Frozen evaporator coils create another common cooling problem. These coils inside your home are supposed to be cold, but not frozen solid. When airflow gets restricted due to dirty filters, blocked vents, or a failing blower motor, these coils can turn into ice blocks. You might notice ice buildup on the indoor unit or hear a hissing sound as it melts.
If your system has frozen coils, turn it off immediately and let everything thaw completely before trying again. Running your AC with frozen coils is like trying to drink through a straw filled with ice – nothing good happens.
Refrigerant leaks represent a more serious issue that requires professional attention. Refrigerant is the magic fluid that actually absorbs heat from your indoor air and carries it outside. When there's a leak, your system loses its cooling power gradually. You might hear hissing sounds, notice the evaporator coils freezing more frequently, or see your energy bills creeping up as the system works harder to cool less effectively.
Electrical issues can also prevent proper cooling even when the system appears to be running. A faulty capacitor is particularly common – this small component provides the electrical boost needed to start your compressor and fan motors. When it fails, you might hear humming but see no actual cooling action. Blower motor failure is another electrical problem that stops air circulation entirely, leaving you with a system that's technically running but not moving any air through your home.
If you're experiencing persistent cooling problems or notice any of these warning signs, our blog on Signs Your Heat Pump Needs Immediate Attention covers additional symptoms that shouldn't be ignored.
When your air conditioner not working goes beyond a simple dirty filter fix, you're likely dealing with one of three more serious issues: water leaks, frozen components, or electrical problems. These situations can feel overwhelming, but understanding what's happening helps you know when to act quickly and when to call for professional help.
Water leaks are perhaps the most alarming AC problem you'll encounter. Picture this: you walk into your living room and find a puddle of water around your indoor unit, or worse, water dripping from your ceiling. Your first instinct might be panic, but most water leaks have a straightforward explanation.
The culprit is usually a clogged condensate drain line. Here's what happens: as your AC cools your home, it's also working as a giant dehumidifier, pulling moisture from the air. This water condenses on the cold evaporator coil and needs somewhere to go. Under normal conditions, it drips into a drain pan and flows out through a drain line to a floor drain or outside your home.
But life happens. Algae grows, dirt accumulates, and debris finds its way into that drain line. When it gets clogged, the water backs up like a sink with a blocked drain. The drain pan fills up and eventually overflows. Many newer AC systems have a clever safety feature called a float switch that automatically shuts off your unit when water levels get too high. If your AC suddenly stops working and you find a full drain pan, you've likely found your answer.
If you spot water leaking inside your home, turn it off immediately to avoid costly water damage to your floors, walls, or belongings. While you might be able to clear minor clogs with a wet/dry vacuum, persistent drainage issues need professional attention to prevent recurring problems.
Frozen coils might seem like an oxymoron during a sweltering summer day, but they're more common than you'd think. When your air conditioner not working involves ice buildup, it's usually your system crying out for help.

The most common cause is an airflow problem. Think of your evaporator coil as needing a steady diet of warm indoor air to function properly. When that airflow gets restricted by a dirty filter, blocked vents, or a struggling blower fan, the coil doesn't get enough warm air flowing over it. Without that heat transfer, the coil gets too cold, and moisture in the air freezes on its surface.
Low refrigerant is the other major freeze culprit. When your system develops a leak and loses refrigerant, the pressure inside drops dramatically. This causes the remaining refrigerant in the evaporator coil to expand too rapidly, creating an extreme temperature drop that can freeze any moisture present.
If you find frozen coils, resist the urge to chip away the ice with tools. Instead, turn off your AC and switch the fan to "On" if possible to help circulate air and speed thawing. Be patient – a thoroughly frozen coil can take several hours or even a full day to thaw completely. Once it's clear, check your air filter and ensure all vents are open. If freezing happens again, you're likely dealing with a refrigerant leak or another underlying issue that needs professional diagnosis. Understanding these patterns can help, especially since heat pumps share similar refrigeration cycles, as discussed in our guide on Common Summer Heat Pump Problems.
Electrical component failure represents the trickiest category of AC problems, and frankly, the most dangerous for DIY attempts. The most frequent electrical villain is capacitor failure. These small, cylindrical components act like powerful batteries, storing electrical energy and delivering the initial jolt needed to start your compressor and fan motors.
When a capacitor fails, you'll often hear a humming noise from your outdoor unit, but nothing actually starts moving. The compressor not starting is a telltale sign – it's like trying to start your car with a dead battery. The motor wants to run but simply doesn't have the electrical boost it needs to get going.
Capacitors typically last 10 to 15 years, but heat, electrical surges, and general wear can cause earlier failure. While replacing a capacitor is relatively inexpensive, it involves working with high-voltage electricity that can seriously injure or kill you. Unless you're trained in electrical work and have proper testing equipment, this repair should always be left to qualified technicians.
Other electrical gremlins include faulty wiring, malfunctioning contactors (the electrical relays that control your outdoor unit), and circuit board issues. Any of these can leave you with an air conditioner not working at the worst possible moment. The good news is that experienced HVAC professionals can quickly diagnose and resolve these electrical problems safely and effectively.
You know what they say: an ounce of prevention is worth a pound of cure. This couldn't be truer when it comes to keeping your air conditioner not working from becoming a summer nightmare. Think of AC maintenance like brushing your teeth – skip it, and you'll pay for it later with expensive problems that could have been easily avoided.

Let's start with the simplest yet most impactful thing you can do: regular filter changes. We've mentioned this throughout our troubleshooting guide, and there's a good reason why – it's that important! A clean filter is like giving your AC system room to breathe properly. Check your filter every month, and don't be surprised if it needs changing every one to three months. If you're a pet owner, you might find yourself changing filters even more frequently. Pet hair and dander can clog a filter faster than you'd expect, so keep an eye on it.
Your outdoor unit needs some love too. Walk outside and take a look at your condenser unit. Is it surrounded by leaves, grass clippings, or that overgrown bush that's been on your "honey-do" list all season? Your AC needs to breathe, and we recommend keeping at least 3 feet of clearance around the entire unit. It's amazing how much better your system runs when it's not fighting through a jungle of debris to do its job.
Here's a maintenance tip many homeowners forget about: cleaning your drain line. That little condensate drain can cause big problems if it gets clogged. A simple trick is to pour a cup of distilled white vinegar solution down the line once or twice a year. The vinegar naturally prevents algae and mold from building up, which are the usual suspects behind those annoying clogs that can flood your utility room.
The most important step you can take is scheduling an annual professional tune-up. Just like your car needs regular oil changes to keep running smoothly, your AC system thrives with professional attention. During these visits, our licensed technicians become detective, doctor, and mechanic all rolled into one. We'll clean those hard-to-reach coils, check refrigerant levels, inspect electrical connections, and catch small issues before they turn into wallet-draining repairs.
Professional maintenance isn't just about preventing breakdowns – though it can reduce equipment failures by up to 95%. It's also about efficiency. A well-maintained AC system uses less energy, which means lower utility bills and a smaller environmental footprint. For more insights on why this matters, check out our article on Why Heat Pump Maintenance is Essential.
We understand that remembering annual maintenance can be challenging with busy schedules. That's why we offer comprehensive Maintenance Plans that take the guesswork out of AC care. We'll remind you when it's time for service and ensure your system gets the attention it needs to keep you comfortable all season long.
The bottom line? A little preventive care goes a long way toward ensuring your AC keeps you cool when you need it most. Your future self will thank you when you're staying comfortable while your neighbors are scrambling to find emergency repair services on the hottest day of the year.
When your air conditioner not working becomes a summer nightmare, you're not alone in wondering what went wrong. We hear the same questions from homeowners across Nova Scotia almost daily, and honestly, they're great questions that deserve clear answers.
This has to be one of the most frustrating scenarios – you can hear your AC humming away, doing its thing, but the air coming out feels more like a gentle breeze than the arctic blast you're desperately craving.
The usual suspect? A dirty filter that's choking your system. Think of it like trying to breathe through a pillow – not exactly effective! When airflow gets restricted, your AC can't do the heat exchange dance it needs to cool your home properly.
Dirty coils are another common culprit. Your indoor evaporator coils and outdoor condenser coils need to be clean to transfer heat efficiently. When they're caked with dirt and debris, it's like wearing a winter coat in July – everything just works harder for worse results.
Low refrigerant is where things get more serious. Without enough of this cooling agent flowing through your system, there simply isn't enough "oomph" to absorb and release heat effectively. You'll get lukewarm air at best.
Sometimes the problem isn't your AC unit at all, but leaky ducts. All that beautiful cool air your system is producing might be escaping into your attic or crawl space through cracks and disconnections, never making it to where you actually need it.
Here's a handy trick to check if your system is cooling properly: measure the temperature difference between the air entering your return vent and the air coming out of your supply vents. A properly working system should show a 15-20 degree difference. If it's significantly less, something's definitely not right.
Refrigerant leaks are sneaky – they don't always announce themselves with dramatic fanfare. But your AC will give you some pretty clear hints if you know what to listen and look for.
Hissing or bubbling sounds are often your first clue. These noises happen when refrigerant escapes through tiny cracks or when air sneaks into the system where it doesn't belong. It's not always loud – sometimes it's just a subtle whisper you'll only notice when everything else is quiet.
Frozen coils are another telltale sign. When refrigerant levels drop, the pressure in your system goes haywire, causing your evaporator coil to get so cold that moisture freezes right onto it. Ironically, this ice formation means your AC can't cool your home at all.
You might also notice your AC running much longer than usual, working overtime to try to reach your thermostat setting but never quite getting there. Your energy bills will reflect this struggle too – an inefficient system guzzles electricity like a thirsty marathon runner.
While you can try a simple bubble test by applying soapy water to refrigerant connections and watching for bubbles, or look for traces from a UV dye test if your system has been previously treated, professional diagnosis is really the way to go. Refrigerant leaks need precise location and proper repair by licensed technicians. Just "topping off" the refrigerant without fixing the actual leak is like putting a band-aid on a broken pipe – it's temporary at best and wasteful at worst.
We love that homeowners want to tackle problems themselves – there's something satisfying about fixing things with your own hands. But some AC issues are definitely "call the pros" territory, and knowing the difference can save you money, frustration, and potentially keep you safe.
Refrigerant issues are absolutely not DIY projects. This stuff requires special handling, certification, and equipment. It's also hazardous if not managed properly, so leave it to the experts who know how to work with it safely.
Any electrical problems beyond flipping a tripped breaker should get professional attention. Capacitors, wiring, contactors – these components carry high voltage that can seriously hurt you. The humming sound from a failed capacitor might seem harmless, but the electricity involved definitely isn't.
Compressor failure is another "call immediately" situation. This is your AC's heart, and when it goes, the repair is complex and expensive. Trying to diagnose or fix it yourself could turn a repairable situation into a complete system replacement.
If you've worked through all our basic troubleshooting steps and your air conditioner not working persists, that's a clear sign there's something deeper going on that needs professional eyes and tools to diagnose properly.
Most importantly, trust your instincts about safety concerns. Burning smells, loud grinding noises, electrical sparks, or anything else that makes you think "that doesn't seem right" means it's time to shut everything down and call for help.
Our licensed technicians have seen it all and have the training to safely diagnose and repair whatever your AC throws at them. For more detailed guidance on heat pump troubleshooting and knowing when to call us, check out our comprehensive guide: Heat Pump Troubleshooting: Call Our Technicians.
When you're facing an air conditioner not working situation on a scorching summer day, it's natural to feel overwhelmed. But as we've explored together, many AC problems have surprisingly simple solutions that you can handle yourself. Sometimes it's just a matter of checking your thermostat settings, flipping a tripped circuit breaker back on, or swapping out a dirty air filter.
The key is knowing when to roll up your sleeves and when to step back. Basic troubleshooting like clearing blocked vents or resetting your system can save you time and money. But when you're dealing with refrigerant leaks, electrical component failures, or persistent cooling issues that don't respond to simple fixes, it's time to call in the experts.
Regular maintenance is your best defense against unexpected breakdowns. Those annual tune-ups and monthly filter changes might seem like small things, but they're what keep your system running smoothly when you need it most. Think of it as taking care of a good friend who's been keeping you cool all these years.
At Presidential Ventilation Systems Ltd., we've been helping Nova Scotia families stay comfortable for over 30 years. We know how frustrating it can be when your AC decides to take a vacation right when the temperature soars. That's why our licensed technicians are ready to help, whether you're in Halifax, Dartmouth, Bedford, Kentville, Truro, or anywhere else across our service areas.
As a leading Daikin Comfort Pro Dealer, we bring exceptional service and long warranties to every job. We believe everyone deserves to feel comfortable in their own home, and we're here to make that happen with energy-saving solutions that work for your family and your budget.
Don't spend another sweltering day wondering why your AC isn't cooperating. For expert HVAC services in Halifax and the surrounding areas, contact us today! Let us get your cool air flowing again so you can get back to enjoying your summer.

When your air conditioner not working becomes a reality on a sweltering summer day, it can quickly turn your comfortable home into an unbearable oven. Over three-quarters of all homes in the US have air conditioners, and when they fail, the discomfort hits fast.
Quick troubleshooting checklist for a non-working AC:
Most AC problems fall into three categories: power issues (thermostat, breaker, disconnect switch), airflow problems (dirty filters, blocked vents, frozen coils), or mechanical failures (refrigerant leaks, compressor issues, electrical faults).
The good news? Many common AC problems have simple solutions you can try before calling a professional. Some issues like dirty filters or tripped breakers take just minutes to fix. However, problems involving refrigerant, electrical components, or water leaks require immediate professional attention to prevent costly damage or safety hazards.
Understanding how your AC works helps you troubleshoot smarter. Your air conditioner doesn't create cold air - it removes heat from indoor air and releases it outside through a continuous refrigeration cycle.
When your air conditioner not working leaves you sweating in the summer heat, take a deep breath before hitting the panic button. Many AC problems have surprisingly simple solutions that you can tackle yourself in just a few minutes.
Start with your thermostat – it's the command center of your cooling system, and sometimes it just needs a gentle nudge back to reality. Double-check that it's actually set to "Cool" mode rather than heat or fan-only. You'd be amazed how many service calls turn out to be nothing more than a seasonal setting mix-up!
Make sure your desired temperature is set lower than the current room temperature. If your thermostat display looks blank or is acting sluggish, try replacing the batteries. It's one of those "turn it off and on again" moments that actually works.
Check your electrical panel next, especially if your AC unit won't turn on at all. Look for the circuit breaker labeled for your air conditioner – it might say "AC," "HVAC," or "Furnace." If it's tripped (sitting halfway between on and off), flip it completely to "Off," wait a moment, then switch it back to "On."
Here's an important safety tip: if the breaker trips again immediately, don't keep resetting the breaker. This signals a serious electrical problem, and repeatedly flipping it could create a fire hazard.
While you're thinking about electrical issues, take a quick walk outside to your outdoor unit. Look for the outdoor disconnect switch – it's usually a small box mounted on your exterior wall near the unit. Make sure the switch inside is in the "On" position. Sometimes these get accidentally bumped or trip during power surges.
Now let's talk about airflow, which is often the real troublemaker. Your air filter is like the lungs of your AC system, and when it's clogged, everything suffers. A dirty filter makes your system work harder, reduces efficiency, and can even cause your coils to freeze up.
Check your filter monthly and replace it every three months – more often if you have pets or someone in your home deals with allergies. If you have a reusable filter, clean it according to the manufacturer's instructions. This simple step can save you both headaches and money.
Finally, take a tour of your home's vents and registers. Are they blocked by furniture or other obstructions? Blocked vents choke off airflow and prevent cool air from circulating properly. Make sure all supply and return vents are open and unobstructed.
Here's a common misconception: closing vents in unused rooms doesn't actually save energy. Instead, it increases pressure in your system and can damage your AC unit. Keep those vents open and make sure your dirty or blocked registers get a good cleaning.
If these basic checks don't solve your cooling crisis, it's time to dig deeper into what might be causing your AC troubles.
Now that you've checked the basics, let's dig deeper into the mystery of why your air conditioner not working properly. Sometimes the issue isn't as simple as a dirty filter or tripped breaker, and understanding these common culprits can help you decide whether it's a DIY fix or time to call in the professionals.
There's nothing more frustrating than hearing your AC humming away, working hard, but feeling only warm air coming from your vents. This scenario usually points to one of several specific problems that prevent your system from actually cooling your home.
Dirty condenser coils are often the sneaky culprit behind poor cooling performance. These coils live in your outdoor unit and work like a car radiator, releasing heat from your home to the outside air. When they're covered in dirt, grass clippings, leaves, or even cottonwood fluff, they can't do their job effectively. Think of it like trying to cool down while wearing a thick winter coat – not very efficient!
Your outdoor unit needs room to breathe, so make sure there's at least three feet of clearance around it. A gentle spray with your garden hose can work wonders for cleaning debris off the fins, but be careful not to bend them.
Frozen evaporator coils create another common cooling problem. These coils inside your home are supposed to be cold, but not frozen solid. When airflow gets restricted due to dirty filters, blocked vents, or a failing blower motor, these coils can turn into ice blocks. You might notice ice buildup on the indoor unit or hear a hissing sound as it melts.
If your system has frozen coils, turn it off immediately and let everything thaw completely before trying again. Running your AC with frozen coils is like trying to drink through a straw filled with ice – nothing good happens.
Refrigerant leaks represent a more serious issue that requires professional attention. Refrigerant is the magic fluid that actually absorbs heat from your indoor air and carries it outside. When there's a leak, your system loses its cooling power gradually. You might hear hissing sounds, notice the evaporator coils freezing more frequently, or see your energy bills creeping up as the system works harder to cool less effectively.
Electrical issues can also prevent proper cooling even when the system appears to be running. A faulty capacitor is particularly common – this small component provides the electrical boost needed to start your compressor and fan motors. When it fails, you might hear humming but see no actual cooling action. Blower motor failure is another electrical problem that stops air circulation entirely, leaving you with a system that's technically running but not moving any air through your home.
If you're experiencing persistent cooling problems or notice any of these warning signs, our blog on Signs Your Heat Pump Needs Immediate Attention covers additional symptoms that shouldn't be ignored.
When your air conditioner not working goes beyond a simple dirty filter fix, you're likely dealing with one of three more serious issues: water leaks, frozen components, or electrical problems. These situations can feel overwhelming, but understanding what's happening helps you know when to act quickly and when to call for professional help.
Water leaks are perhaps the most alarming AC problem you'll encounter. Picture this: you walk into your living room and find a puddle of water around your indoor unit, or worse, water dripping from your ceiling. Your first instinct might be panic, but most water leaks have a straightforward explanation.
The culprit is usually a clogged condensate drain line. Here's what happens: as your AC cools your home, it's also working as a giant dehumidifier, pulling moisture from the air. This water condenses on the cold evaporator coil and needs somewhere to go. Under normal conditions, it drips into a drain pan and flows out through a drain line to a floor drain or outside your home.
But life happens. Algae grows, dirt accumulates, and debris finds its way into that drain line. When it gets clogged, the water backs up like a sink with a blocked drain. The drain pan fills up and eventually overflows. Many newer AC systems have a clever safety feature called a float switch that automatically shuts off your unit when water levels get too high. If your AC suddenly stops working and you find a full drain pan, you've likely found your answer.
If you spot water leaking inside your home, turn it off immediately to avoid costly water damage to your floors, walls, or belongings. While you might be able to clear minor clogs with a wet/dry vacuum, persistent drainage issues need professional attention to prevent recurring problems.
Frozen coils might seem like an oxymoron during a sweltering summer day, but they're more common than you'd think. When your air conditioner not working involves ice buildup, it's usually your system crying out for help.
The most common cause is an airflow problem. Think of your evaporator coil as needing a steady diet of warm indoor air to function properly. When that airflow gets restricted by a dirty filter, blocked vents, or a struggling blower fan, the coil doesn't get enough warm air flowing over it. Without that heat transfer, the coil gets too cold, and moisture in the air freezes on its surface.
Low refrigerant is the other major freeze culprit. When your system develops a leak and loses refrigerant, the pressure inside drops dramatically. This causes the remaining refrigerant in the evaporator coil to expand too rapidly, creating an extreme temperature drop that can freeze any moisture present.
If you find frozen coils, resist the urge to chip away the ice with tools. Instead, turn off your AC and switch the fan to "On" if possible to help circulate air and speed thawing. Be patient – a thoroughly frozen coil can take several hours or even a full day to thaw completely. Once it's clear, check your air filter and ensure all vents are open. If freezing happens again, you're likely dealing with a refrigerant leak or another underlying issue that needs professional diagnosis. Understanding these patterns can help, especially since heat pumps share similar refrigeration cycles, as discussed in our guide on Common Summer Heat Pump Problems.
Electrical component failure represents the trickiest category of AC problems, and frankly, the most dangerous for DIY attempts. The most frequent electrical villain is capacitor failure. These small, cylindrical components act like powerful batteries, storing electrical energy and delivering the initial jolt needed to start your compressor and fan motors.
When a capacitor fails, you'll often hear a humming noise from your outdoor unit, but nothing actually starts moving. The compressor not starting is a telltale sign – it's like trying to start your car with a dead battery. The motor wants to run but simply doesn't have the electrical boost it needs to get going.
Capacitors typically last 10 to 15 years, but heat, electrical surges, and general wear can cause earlier failure. While replacing a capacitor is relatively inexpensive, it involves working with high-voltage electricity that can seriously injure or kill you. Unless you're trained in electrical work and have proper testing equipment, this repair should always be left to qualified technicians.
Other electrical gremlins include faulty wiring, malfunctioning contactors (the electrical relays that control your outdoor unit), and circuit board issues. Any of these can leave you with an air conditioner not working at the worst possible moment. The good news is that experienced HVAC professionals can quickly diagnose and resolve these electrical problems safely and effectively.
You know what they say: an ounce of prevention is worth a pound of cure. This couldn't be truer when it comes to keeping your air conditioner not working from becoming a summer nightmare. Think of AC maintenance like brushing your teeth – skip it, and you'll pay for it later with expensive problems that could have been easily avoided.
Let's start with the simplest yet most impactful thing you can do: regular filter changes. We've mentioned this throughout our troubleshooting guide, and there's a good reason why – it's that important! A clean filter is like giving your AC system room to breathe properly. Check your filter every month, and don't be surprised if it needs changing every one to three months. If you're a pet owner, you might find yourself changing filters even more frequently. Pet hair and dander can clog a filter faster than you'd expect, so keep an eye on it.
Your outdoor unit needs some love too. Walk outside and take a look at your condenser unit. Is it surrounded by leaves, grass clippings, or that overgrown bush that's been on your "honey-do" list all season? Your AC needs to breathe, and we recommend keeping at least 3 feet of clearance around the entire unit. It's amazing how much better your system runs when it's not fighting through a jungle of debris to do its job.
Here's a maintenance tip many homeowners forget about: cleaning your drain line. That little condensate drain can cause big problems if it gets clogged. A simple trick is to pour a cup of distilled white vinegar solution down the line once or twice a year. The vinegar naturally prevents algae and mold from building up, which are the usual suspects behind those annoying clogs that can flood your utility room.
The most important step you can take is scheduling an annual professional tune-up. Just like your car needs regular oil changes to keep running smoothly, your AC system thrives with professional attention. During these visits, our licensed technicians become detective, doctor, and mechanic all rolled into one. We'll clean those hard-to-reach coils, check refrigerant levels, inspect electrical connections, and catch small issues before they turn into wallet-draining repairs.
Professional maintenance isn't just about preventing breakdowns – though it can reduce equipment failures by up to 95%. It's also about efficiency. A well-maintained AC system uses less energy, which means lower utility bills and a smaller environmental footprint. For more insights on why this matters, check out our article on Why Heat Pump Maintenance is Essential.
We understand that remembering annual maintenance can be challenging with busy schedules. That's why we offer comprehensive Maintenance Plans that take the guesswork out of AC care. We'll remind you when it's time for service and ensure your system gets the attention it needs to keep you comfortable all season long.
The bottom line? A little preventive care goes a long way toward ensuring your AC keeps you cool when you need it most. Your future self will thank you when you're staying comfortable while your neighbors are scrambling to find emergency repair services on the hottest day of the year.
When your air conditioner not working becomes a summer nightmare, you're not alone in wondering what went wrong. We hear the same questions from homeowners across Nova Scotia almost daily, and honestly, they're great questions that deserve clear answers.
This has to be one of the most frustrating scenarios – you can hear your AC humming away, doing its thing, but the air coming out feels more like a gentle breeze than the arctic blast you're desperately craving.
The usual suspect? A dirty filter that's choking your system. Think of it like trying to breathe through a pillow – not exactly effective! When airflow gets restricted, your AC can't do the heat exchange dance it needs to cool your home properly.
Dirty coils are another common culprit. Your indoor evaporator coils and outdoor condenser coils need to be clean to transfer heat efficiently. When they're caked with dirt and debris, it's like wearing a winter coat in July – everything just works harder for worse results.
Low refrigerant is where things get more serious. Without enough of this cooling agent flowing through your system, there simply isn't enough "oomph" to absorb and release heat effectively. You'll get lukewarm air at best.
Sometimes the problem isn't your AC unit at all, but leaky ducts. All that beautiful cool air your system is producing might be escaping into your attic or crawl space through cracks and disconnections, never making it to where you actually need it.
Here's a handy trick to check if your system is cooling properly: measure the temperature difference between the air entering your return vent and the air coming out of your supply vents. A properly working system should show a 15-20 degree difference. If it's significantly less, something's definitely not right.
Refrigerant leaks are sneaky – they don't always announce themselves with dramatic fanfare. But your AC will give you some pretty clear hints if you know what to listen and look for.
Hissing or bubbling sounds are often your first clue. These noises happen when refrigerant escapes through tiny cracks or when air sneaks into the system where it doesn't belong. It's not always loud – sometimes it's just a subtle whisper you'll only notice when everything else is quiet.
Frozen coils are another telltale sign. When refrigerant levels drop, the pressure in your system goes haywire, causing your evaporator coil to get so cold that moisture freezes right onto it. Ironically, this ice formation means your AC can't cool your home at all.
You might also notice your AC running much longer than usual, working overtime to try to reach your thermostat setting but never quite getting there. Your energy bills will reflect this struggle too – an inefficient system guzzles electricity like a thirsty marathon runner.
While you can try a simple bubble test by applying soapy water to refrigerant connections and watching for bubbles, or look for traces from a UV dye test if your system has been previously treated, professional diagnosis is really the way to go. Refrigerant leaks need precise location and proper repair by licensed technicians. Just "topping off" the refrigerant without fixing the actual leak is like putting a band-aid on a broken pipe – it's temporary at best and wasteful at worst.
We love that homeowners want to tackle problems themselves – there's something satisfying about fixing things with your own hands. But some AC issues are definitely "call the pros" territory, and knowing the difference can save you money, frustration, and potentially keep you safe.
Refrigerant issues are absolutely not DIY projects. This stuff requires special handling, certification, and equipment. It's also hazardous if not managed properly, so leave it to the experts who know how to work with it safely.
Any electrical problems beyond flipping a tripped breaker should get professional attention. Capacitors, wiring, contactors – these components carry high voltage that can seriously hurt you. The humming sound from a failed capacitor might seem harmless, but the electricity involved definitely isn't.
Compressor failure is another "call immediately" situation. This is your AC's heart, and when it goes, the repair is complex and expensive. Trying to diagnose or fix it yourself could turn a repairable situation into a complete system replacement.
If you've worked through all our basic troubleshooting steps and your air conditioner not working persists, that's a clear sign there's something deeper going on that needs professional eyes and tools to diagnose properly.
Most importantly, trust your instincts about safety concerns. Burning smells, loud grinding noises, electrical sparks, or anything else that makes you think "that doesn't seem right" means it's time to shut everything down and call for help.
Our licensed technicians have seen it all and have the training to safely diagnose and repair whatever your AC throws at them. For more detailed guidance on heat pump troubleshooting and knowing when to call us, check out our comprehensive guide: Heat Pump Troubleshooting: Call Our Technicians.
When you're facing an air conditioner not working situation on a scorching summer day, it's natural to feel overwhelmed. But as we've explored together, many AC problems have surprisingly simple solutions that you can handle yourself. Sometimes it's just a matter of checking your thermostat settings, flipping a tripped circuit breaker back on, or swapping out a dirty air filter.
The key is knowing when to roll up your sleeves and when to step back. Basic troubleshooting like clearing blocked vents or resetting your system can save you time and money. But when you're dealing with refrigerant leaks, electrical component failures, or persistent cooling issues that don't respond to simple fixes, it's time to call in the experts.
Regular maintenance is your best defense against unexpected breakdowns. Those annual tune-ups and monthly filter changes might seem like small things, but they're what keep your system running smoothly when you need it most. Think of it as taking care of a good friend who's been keeping you cool all these years.
At Presidential Ventilation Systems Ltd., we've been helping Nova Scotia families stay comfortable for over 30 years. We know how frustrating it can be when your AC decides to take a vacation right when the temperature soars. That's why our licensed technicians are ready to help, whether you're in Halifax, Dartmouth, Bedford, Kentville, Truro, or anywhere else across our service areas.
As a leading Daikin Comfort Pro Dealer, we bring exceptional service and long warranties to every job. We believe everyone deserves to feel comfortable in their own home, and we're here to make that happen with energy-saving solutions that work for your family and your budget.
Don't spend another sweltering day wondering why your AC isn't cooperating. For expert HVAC services in Halifax and the surrounding areas, contact us today! Let us get your cool air flowing again so you can get back to enjoying your summer.
What is included in a commercial HVAC preventive maintenance plan in nova scotia covers a range of scheduled tasks designed to keep your building's heating, ventilation, and air conditioning systems running safely and efficiently year-round. Here is a quick overview:
A standard commercial HVAC preventive maintenance plan in Nova Scotia typically includes:
For most commercial properties in Nova Scotia, a bi-annual schedule — once in spring before cooling season and once in fall before heating season — is the standard recommendation. High-usage facilities may benefit from quarterly visits.
Running a business in Nova Scotia means dealing with one of the most demanding climates on the East Coast. Harsh winters, high humidity, and salt-laden coastal air put commercial HVAC systems under constant stress. When a system fails in the middle of January or during a summer heat spike, it is never just a comfort issue — it disrupts operations, drives away customers, and can cost far more than any planned maintenance visit ever would.
Research consistently shows that organizations with a structured preventive maintenance program see a 25–30% reduction in emergency work orders, and that emergency repairs typically cost three to five times more than planned service. Regular maintenance can also trim energy bills by 5–20% — savings that add up quickly across a full commercial building.
Yet many Nova Scotia businesses still run their HVAC systems reactively, only calling for service when something breaks. This guide breaks down exactly what a commercial HVAC preventive maintenance plan includes, how often service should happen in a maritime climate, and what to look for in a qualified local provider.

When you partner with a professional team for your commercial facility, a maintenance plan is not just a quick visual check. It is a highly structured, comprehensive service protocol designed to optimize every component of your climate control and air handling infrastructure. For businesses operating in areas like Halifax, Dartmouth, and Bedford, our unique coastal environment requires specialized attention to protect heavy machinery from premature wear.
A professional plan begins with a complete system inspection. Our technicians look at the physical integrity of your outdoor rooftop units (RTUs), indoor air handlers, and ventilation pathways. Because Nova Scotia weather can swing from freezing rain to dense marine fog in a matter of hours, these outdoor cabinets face extreme wind loads and moisture penetration.
Another critical element of a professional service plan is air balancing. Over time, building usage changes, partitions are built, and dampers drift. This causes some zones in your office or retail space to become freezing cold while others remain sweltering. During a scheduled maintenance visit, technicians check the airflow across your entire system, ensuring that air is distributed evenly to maintain consistent comfort and prevent your system from working twice as hard to condition poorly balanced spaces.
Furthermore, we pay close attention to salt air corrosion. If your business is located near the water in Eastern Passage, coastal Dartmouth, or downtown Halifax, salt spray can rapidly degrade the delicate aluminum fins on your condenser coils. This pitting and corrosion acts as an insulating barrier, reducing heat transfer and forcing your compressors to run longer and hotter. Regular washing and the application of protective coatings during maintenance visits are essential to prevent this environmental degradation.
For a deeper dive into how localized maritime conditions impact your building's climate systems, check out our Commercial HVAC Halifax guide. You can also explore our comprehensive Commercial HVAC Maintenance Guide to understand how routine care protects your facility's infrastructure.
The "V" in HVAC is often the most overlooked component of commercial building systems, yet it is arguably the most crucial for the health and productivity of your employees. A professional preventive maintenance plan places a heavy emphasis on your building's breathing apparatus.
To learn more about how proper air balancing and fresh air exchange can transform your business environment, read about our Commercial Ventilation Solutions.
An HVAC system is only as good as the controls that run it. The electrical and mechanical checks performed during a preventive maintenance visit ensure that your system responds accurately to temperature changes and operates safely.
If your system is experiencing electrical issues or requires immediate professional wiring upgrades, our team can help through our Commercial Electrical Repairs services.
How often should your business schedule preventive maintenance? While residential systems can often get away with a single annual visit, commercial systems operate under much heavier loads and must handle the rapid weather shifts characteristic of Nova Scotia.
For most businesses in the Halifax Regional Municipality (HRM), a bi-annual maintenance schedule is the bare minimum. This involves a comprehensive spring visit to prepare your cooling and ventilation systems for summer humidity, and a thorough fall visit to ensure your heating systems are fully prepared to handle freezing winter winds.
However, high-demand facilities — such as restaurants in downtown Dartmouth, manufacturing plants in Sackville, or multi-tenant office buildings in Clayton Park — often require quarterly maintenance checks. These frequent visits focus on high-wear components like air filters, belts, and condensate drains, which can clog or wear out quickly under continuous, 24/7 operation.
To ensure your system is perfectly tuned before the peak seasons hit, scheduling a professional Commercial HVAC Tune-Up is the most proactive step you can take.
Below is a breakdown of how we structure our seasonal maintenance visits to keep your commercial property comfortable and efficient year-round:
| Maintenance Category | Spring Service (Focus on Cooling & Ventilation) | Fall Service (Focus on Heating & Air Quality) |
|---|---|---|
| Coil Care | Deep clean condenser coils to remove salt crust and winter dirt. | Inspect evaporator coils; check for blockages. |
| Refrigerant & Lines | Check refrigerant charge; test for leaks along lines. | Inspect insulation on outdoor lines to prevent freezing. |
| Electrical Systems | Tighten connections; measure amp draw on cooling fans. | Inspect heating elements; test ignition and safety controls. |
| Ventilation & Airflow | Inspect makeup air units; clean exhaust fan assemblies. | Replace all air filters; inspect ductwork for winter drafts. |
| Mechanical Components | Replace worn fan belts; lubricate blower bearings. | Check belt tension; inspect burner assemblies and heat exchangers. |
| Drainage | Flush condensate drain pans and lines to prevent summer leaks. | Inspect trap assemblies; verify drainage pathways are clear of ice. |
Investing in a commercial service agreement with a trusted local partner like Presidential Ventilation Systems Ltd. is one of the smartest operational decisions a facility manager can make. It shifts your facility's maintenance strategy from a chaotic "firefighting" model to a predictable, planned process.
When you establish an ongoing maintenance agreement, you unlock several key business advantages:
To understand the full financial and operational impact of securing an ongoing partnership for your facility, read our detailed guide on How a Maintenance Agreement Extends Commercial HVAC Equipment Lifespan.
Salt air is highly corrosive to the metals used in commercial HVAC systems, particularly the copper and aluminum found in condenser coils. When salt-laden moisture from the Atlantic settles on these coils, it triggers a chemical reaction called galvanic corrosion. This causes the aluminum fins to turn to dust, which reduces the surface area available for heat transfer.
Over time, this corrosion forces your system to run longer to cool your building, driving up energy bills and putting extreme stress on the compressor. During our preventive maintenance visits, we use specialized coil cleaners to wash away salt deposits and can apply protective coatings to slow down this corrosion process, extending the life of your outdoor units in coastal areas like Halifax, Dartmouth, and Eastern Passage.
While scheduled maintenance is designed to prevent breakdowns, you should contact us immediately if you notice any of the following warning signs in your building:
Yes, absolutely. HVAC systems can easily account for up to 60% of a commercial building's total energy consumption. When coils are caked with dirt, filters are clogged, and fan belts are slipping, the system must run longer and draw more power to keep your building comfortable.
Regular maintenance resolves these inefficiencies by restoring your equipment to its optimal operating state. Clean coils and properly calibrated controls can reduce your building's energy consumption by 5% to 20%, resulting in substantial savings over the course of the fiscal year.
A well-structured commercial HVAC preventive maintenance plan is not an administrative luxury — it is a foundational business continuity strategy. For businesses operating throughout Nova Scotia, from the bustling industrial parks of Burnside to the coastal storefronts of Dartmouth and Halifax, keeping your ventilation and indoor climate systems running smoothly is essential for protecting your inventory, your staff, and your bottom line.
With over 30 years of local experience, Presidential Ventilation Systems Ltd. is your trusted partner for commercial HVAC and ventilation care. As a leading Daikin Comfort Pro Dealer, our highly trained technicians understand the unique challenges posed by the Maritime climate and are equipped to design custom maintenance programs tailored to your facility's exact needs.
Don't wait for a costly system failure to disrupt your business. Contact us today to establish a proactive maintenance-plan and enjoy the peace of mind that comes with professional, reliable HVAC care.
Knowing what to look for when choosing a commercial HVAC contractor in Nova Scotia is one of the most important decisions you can make for your building's long-term comfort, air quality, and operating efficiency. The wrong contractor can lead to poorly sized systems, code violations, premature equipment failure, and costly downtime — problems no business owner wants to face.
Here is a quick overview of the key things to evaluate:
Commercial HVAC is fundamentally different from residential work. Systems are larger, more complex, and subject to stricter building codes. In Nova Scotia specifically, the coastal climate adds another layer of challenge — salt air accelerates equipment wear, humid summers stress ventilation systems, and cold winters demand reliable, well-designed air handling. A contractor without genuine regional experience may underestimate these factors entirely.
Most commercial HVAC systems are designed to last 15 to 20 years with proper care. Choosing the right contractor from the start is what makes that lifespan achievable — and protects the investment you are making in your building.

Vetting a commercial HVAC partner requires looking past the surface. While a flashy website or an appealing initial proposal might catch your eye, a business needs a partner capable of handling heavy-duty commercial demands. Commercial properties, from retail shops in Bedford to light industrial spaces in Burnside, require high-performing air distribution systems that function seamlessly day in and day out.
When searching for the right partner, you must look closely at their technical qualifications, their understanding of commercial air distribution, and their regional history. Our team at Presidential Ventilation Systems Ltd. has been serving commercial properties across the Halifax Regional Municipality for over 30 years, and we know exactly what makes a commercial partnership successful.
Whether you operate a bustling office complex or a multi-unit residential building, the right contractor will prioritize system reliability and indoor air quality. If you are operating a business in the capital region, starting your search with a specialized provider of Commercial HVAC Halifax ensures your building remains compliant, comfortable, and energy-efficient.
The absolute first step in evaluating any commercial contractor is verifying their legal and professional credentials. Commercial air handling systems are incredibly complex, often involving high-voltage electrical connections, intricate duct networks, and heavy commercial refrigeration cycles.
A qualified commercial contractor must possess:
Safety compliance and adherence to the National Building Code of Canada (specifically Part 6, which governs HVAC design) are non-negotiable. For businesses operating in growing commercial hubs, choosing a qualified specialist in Commercial HVAC Bedford guarantees that all local zoning, electrical, and structural codes are meticulously followed.
A contractor can have all the certifications in the world, but if they do not understand how Atlantic Canada’s unique climate impacts commercial equipment, your system will suffer. Nova Scotia's weather is notoriously unpredictable, swinging from damp, salty coastal summers to freezing, wind-swept winters.
When evaluating a contractor's local experience, ask these questions:
Working with an established local partner means they will design and install systems engineered to withstand our coastal environment. To learn more about designing commercial air systems specifically tailored to our region, consult the Commercial Ventilation Halifax Ultimate Guide.
A commercial HVAC system is only as good as the ductwork and ventilation systems supporting it. Without proper duct design and precise air balancing, even the most advanced rooftop air handler will struggle to distribute air evenly, leading to stagnant pockets, high humidity levels, and excessive energy consumption.
When choosing a contractor, ensure they have in-house capabilities for custom fabrication and air balancing. Cookie-cutter duct runs rarely fit the unique layouts of commercial spaces. For example, if you are setting up a facility in Mount Uniacke, you will need a team capable of handling specialized Commercial Ductwork Installation in Mount Uniacke NS to ensure optimal airflow from day one.
Custom-engineered air distribution ensures that every room in your building receives the correct volume of fresh, conditioned air. This is the foundation of high-performing Commercial Ventilation Solutions.
One of the biggest mistakes a contractor can make is sizing a commercial system based on guesswork or simple square-footage estimates. A commercial building’s heating and cooling load is highly dynamic.
An experienced commercial contractor will perform a comprehensive load calculation based on:
An oversized system will cycle on and off constantly, wearing out the compressor prematurely and failing to control humidity. An undersized system will run continuously, driving up your energy consumption and failing to keep your staff comfortable. Accurate load calculations prevent these headaches.
In our coastal climate, managing indoor air quality while maintaining energy efficiency is a constant balancing act. This is where Energy Recovery Ventilators (ERVs) and Heat Recovery Ventilators (HRVs) become essential. These systems capture heat and moisture from outgoing exhaust air and transfer it to the incoming fresh outdoor air, significantly reducing the load on your primary air conditioning and heating units.
A dirty air filter alone can increase your energy consumption by up to 15%, but integrating a highly efficient HRV or ERV can keep your air clean while keeping energy consumption low. In fact, residential and light commercial HRVs are incredibly efficient, typically using about the same amount of electricity as a single 60-watt light bulb.
When upgrading your building's fresh air systems, it is vital to work with a partner who understands proper zoning and integration. Business owners can review our detailed Commercial HRV Installation Bedford NS Guide to understand how balanced ventilation protects structural integrity and occupant health.
A commercial HVAC system represents a significant capital investment. To maximize its 15-to-20-year lifespan, proactive maintenance is absolutely essential. Nova Scotia’s coastal conditions present a unique threat: salt air. Salt-laden moisture from the Atlantic Ocean can quickly corrode aluminum coils, rust outdoor cabinets, and degrade electrical connections if left unchecked.
Understanding How Salt Air and Coastal Conditions in Nova Scotia Affect Commercial HVAC Equipment highlights the need for specialized, anti-corrosive coatings and regular wash-downs. A structured preventive maintenance agreement is essentially insurance for your building's mechanical systems. To learn more about protecting your investment, explore How a Maintenance Agreement Extends Commercial HVAC Equipment Lifespan.
A generic, once-a-year check-up is not enough for a commercial facility. High-use environments like offices, restaurants, and retail spaces require structured, quarterly maintenance schedules to prevent unexpected breakdowns and maintain peak efficiency.
At a minimum, your commercial maintenance plan should include:
For businesses located in the capital district, setting up a routine schedule with a local expert for Commercial Ventilation Maintenance Halifax NS keeps your system running at maximum efficiency, lowering energy consumption and ensuring clean indoor air.
Never rely on verbal agreements when it comes to your commercial property. A reputable contractor will always provide a detailed, written contract that clearly outlines:
A written contract provides peace of mind, ensuring there are no surprise expenses or misunderstandings during a major installation or service visit.
For the vast majority of commercial buildings in Nova Scotia, we recommend scheduling maintenance at least four times a year (quarterly). High-occupancy or high-use environments — such as medical facilities, restaurants, or schools — may require monthly inspections. Regular servicing ensures that filters are clean, belts are intact, and salt-air corrosion is caught and treated before it causes system failure.
In coastal regions like Halifax and Dartmouth, outdoor humidity levels can fluctuate wildly. An ERV is incredibly beneficial because it transfers both heat and moisture between the incoming and outgoing air streams. During humid summer days, it helps dehumidify the incoming fresh air before it reaches your space, reducing the workload on your air conditioning system and preventing mold growth within your ductwork.
As a general rule, commercial air handling units are built to last 15 to 20 years. However, when a single repair expense approaches 30% to 50% of the investment of a brand-new unit, replacement is almost always the smarter long-term investment. Additionally, if your system requires frequent repairs, struggles to maintain consistent indoor temperatures, or uses outdated, inefficient technology, upgrading to a modern system will significantly lower your ongoing energy consumption.
Choosing the right commercial HVAC contractor in Nova Scotia is a decision that directly impacts your business’s bottom line, your employees' comfort, and your building’s overall health. By focusing on Red Seal certified technicians, local coastal experience, custom duct design capabilities, and robust preventive maintenance plans, you can protect your investment for decades to come.
At Presidential Ventilation Systems Ltd., we bring over 30 years of local expertise, Daikin Comfort Pro standards, and a deep commitment to the communities of Halifax, Bedford, Dartmouth, Sackville, and beyond. We design custom, highly efficient commercial ventilation systems built to withstand the realities of our Nova Scotia climate.
When you are ready to partner with a team that prioritizes quality craftsmanship and long-term reliability, contact us to discuss your next Commercial HVAC Installation project. Let's work together to keep your business running smoothly and efficiently.