


Electrical wiring upgrades are essential home improvements that replace outdated wiring with modern, code-compliant infrastructure. These upgrades address safety hazards, increase power capacity, and prepare homes for today's high-tech demands.
Key reasons for electrical wiring upgrades:
• Safety - Eliminate fire risks from faulty, outdated wiring
• Power capacity - Support modern appliances and technology
• Code compliance - Meet current electrical safety standards
• Home value - Increase property value and insurability
• Energy efficiency - Reduce electrical waste and utility costs
Just because your lights turn on doesn't mean your wiring is safe. Many homes built before 1980 have systems that appear functional but pose serious risks. Faulty wiring is a leading cause of residential fires, as outdated systems can't handle the electrical load of modern life.
Homes built decades ago were designed for 60 amps of power, but today's homes often need 200 amps to safely run air conditioners, computers, and smart devices.
Beyond safety, an upgraded electrical system can lower insurance premiums, increase your home's resale value, and provide peace of mind knowing your family is protected from electrical hazards.
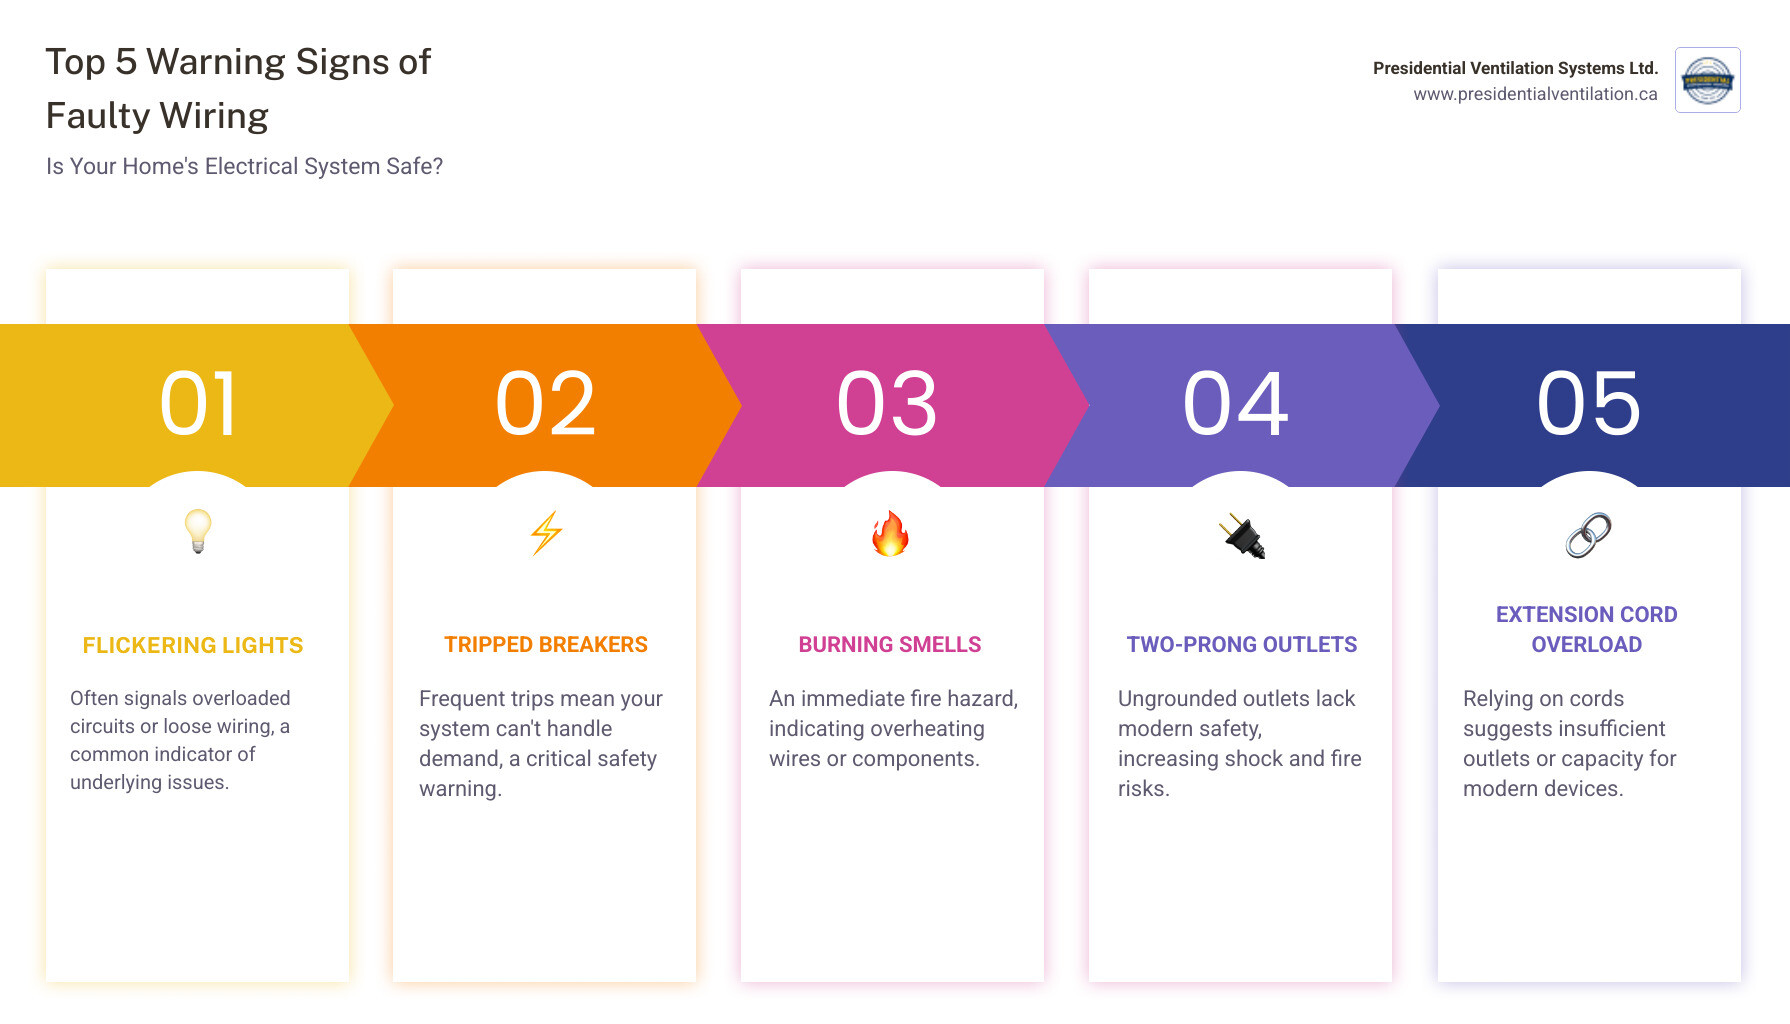
Your home's electrical system provides clear warning signs when it needs attention. Recognizing them can prevent dangerous situations and costly repairs.
Flickering lights that dim when you use an appliance are a classic sign of an overloaded circuit. Your wiring is struggling to keep up with demand.
Frequently tripped breakers and blown fuses are your panel's safety features working overtime. They indicate the system cannot handle the electrical load.
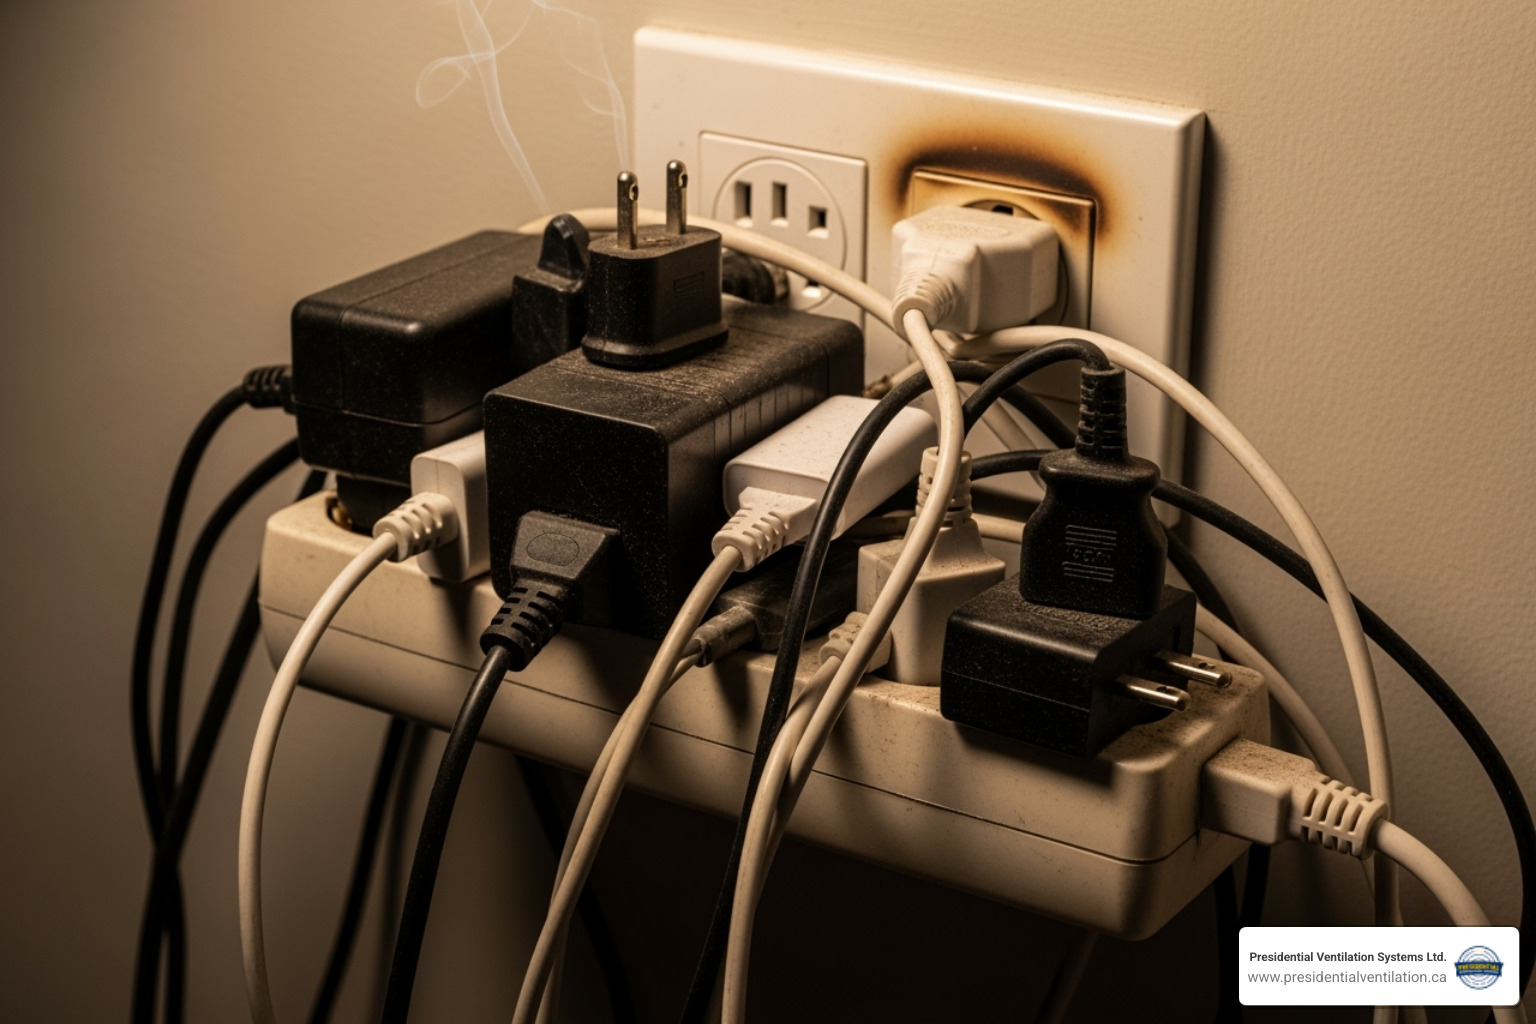
A burning smell from outlets or walls signals dangerous overheating and requires immediate attention. Similarly, discolored outlets or those warm to the touch are signs of heat damage and excessive strain.
If you feel a tingling sensation from appliances, you have a serious grounding problem that poses a shock risk. Call an electrician immediately.
Many older homes still have two-prong ungrounded outlets, which lack modern safety features that protect you and your electronics from electrical faults.
An over-reliance on extension cords and power strips suggests your home lacks sufficient outlets and that your system may not have the capacity for today's power-hungry devices.
Insufficient power for modern appliances is obvious when you can't run multiple devices without tripping a breaker. Today's homes need far more capacity than those built decades ago.
If you notice these signs, it's time to consider electrical wiring upgrades. For a helpful checklist, see When It's Time for an Electrical Wiring Upgrade.
Some wiring types that were once standard are now considered hazardous. Identifying your home's wiring can help determine if an upgrade is necessary.
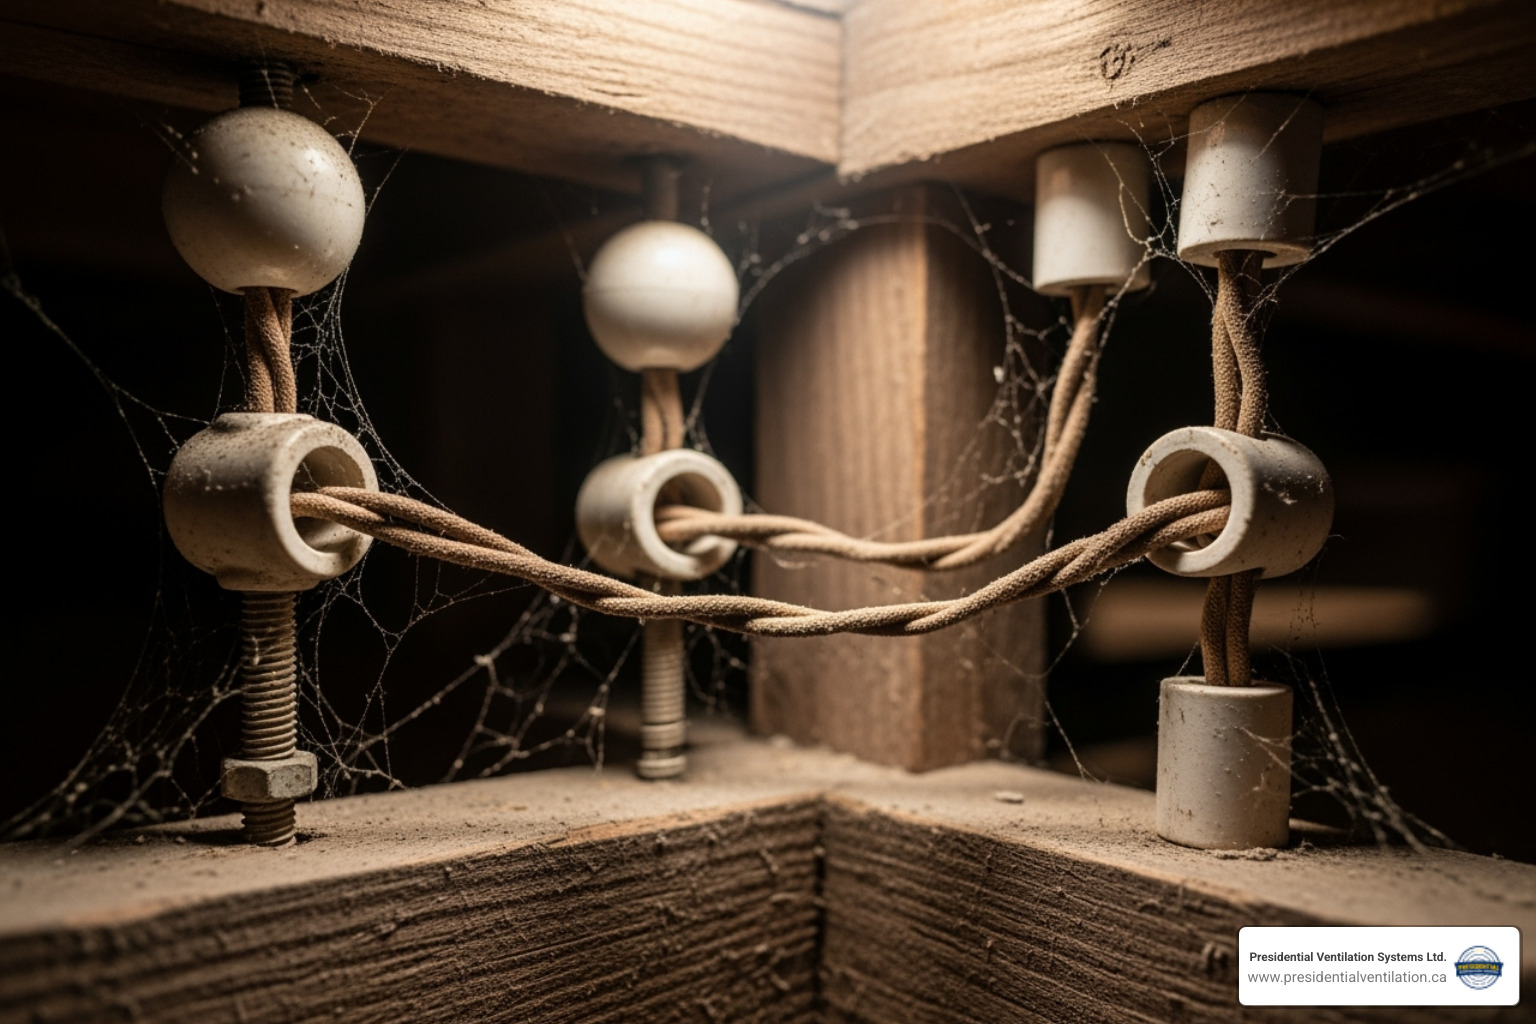
Knob-and-tube wiring, found in pre-1930s homes, uses porcelain knobs and tubes. Its rubber/cloth insulation becomes brittle with age, and it lacks a ground wire.
Aluminum wiring was a cheaper copper alternative in the 1960s and 70s. While not inherently dangerous, its properties can create serious safety issues over time.
Non-metallic sheathed cable from before the 1960s may have insulation that degrades and often lacks proper grounding.
Any ungrounded wiring system poses a risk, as electrical faults have no safe path to dissipate, increasing the danger of shock, fire, and damage to electronics.
• Material — Knob & Tube Wiring (Pre-1930s): Copper (single insulated strands) — Aluminum Wiring (1960s-1970s): Aluminum — Modern Copper Wiring (Post-1970s): Copper
• Ground Wire — Knob & Tube Wiring (Pre-1930s): No — Aluminum Wiring (1960s-1970s): Often No (especially older installations) — Modern Copper Wiring (Post-1970s): Yes
• Insulation — Knob & Tube Wiring (Pre-1930s): Rubber/cloth (prone to degradation) — Aluminum Wiring (1960s-1970s): PVC/rubber (can degrade) — Modern Copper Wiring (Post-1970s): Thermoplastic (durable, heat-resistant)
• Safety Concerns — Knob & Tube Wiring (Pre-1930s): Fire, shock, degradation, no ground — Aluminum Wiring (1960s-1970s): Overheating, fire, loose connections — Modern Copper Wiring (Post-1970s): High safety, reliability, code-compliant
• Heat Resistance — Knob & Tube Wiring (Pre-1930s): Low — Aluminum Wiring (1960s-1970s): Low — Modern Copper Wiring (Post-1970s): High
• Modern Load — Knob & Tube Wiring (Pre-1930s): Cannot handle — Aluminum Wiring (1960s-1970s): Limited capacity — Modern Copper Wiring (Post-1970s): Designed for modern loads
If your home was built in the 1960s-1970s, you may have aluminum wiring. Aluminum expands and contracts more than copper as it heats and cools. Over years, this cycle causes connection loosening.

Loose connections increase electrical resistance, generating more heat and creating a significant overheating risk and fire hazard. Aluminum also oxidizes, which further contributes to overheating at connection points.
These documented risks can create insurance difficulties. Many insurers refuse to cover homes with aluminum wiring or charge higher premiums. Some require professional remediation or replacement before providing coverage.
If you have aluminum wiring, take action. Professional electrical wiring upgrades can address these safety concerns, give you peace of mind, and potentially lower your insurance costs.
An electrical wiring upgrade is a manageable project with the right professionals. At Presidential Ventilation Systems Ltd., we guide you through each step transparently.
The first step is hiring a licensed electrician. This is not a DIY project. A licensed professional ensures all work is code-compliant, handles permits and inspections, and mitigates risks like fire and electrical shock.
The process begins with a thorough system assessment. Our electricians evaluate your existing wiring, assess your power needs, and determine the project's scope. This helps decide between a partial vs. whole-house rewiring. While some homes only need specific circuits upgraded, older systems like knob-and-tube or aluminum wiring often require a complete overhaul.
Permits and inspections are integral to any major electrical upgrade. We handle the paperwork to ensure all work is performed to code and approved by municipal inspectors, which protects your home's value and insurability.
During the rewiring, expect some disruption. We work to minimize this, but homeowners should prepare for temporary power outages and minor drywall removal to access wiring. We will help you plan for this to make the process as smooth as possible.
After installation and inspection, we move to post-rewire cleanup and repairs. We ensure the workspace is tidy and that any necessary wall or ceiling repairs are managed, leaving your home safe and ready for modern electrical demands. For more on enhancing your home's capacity, see our Panel Upgrade services page.
Understanding the factors that influence the cost of electrical wiring upgrades helps with budgeting. While every project is unique, the main cost components are consistent.
Home size and age are significant factors. Larger homes require more materials and labor. Older homes with outdated systems can present challenges that increase complexity and cost.
The accessibility of wiring also plays a major role. Labor costs are lower if wiring is easily accessed through unfinished basements or attics. Opening and repairing walls adds to the expense.
The scope of work is another critical factor. A whole-house rewiring is more extensive and costly than a partial upgrade or a simple panel replacement.
The materials used, such as the grade of outlets, switches, and fixtures, will affect the cost. Higher-quality components improve safety and functionality but add to the material cost.
Finally, labor costs are the largest portion of the expense, reflecting the specialized skills and safety protocols required for professional electrical work. Upgrading your electrical panel is often part of a comprehensive wiring upgrade. For insights into this investment, explore our information on Breaker Panel Upgrade Cost.
A whole-house rewiring project typically takes from five days to two weeks, depending on your home's size and complexity.
The best time to rewire is during a larger remodeling project. With walls already open for contractors, it's easier and more cost-effective to install new wiring, saving time and money on labor and repairs.

If a major renovation isn't planned, scheduling the project during a vacation can minimize disruption. While we strive to be as non-invasive as possible, some disruption is unavoidable. However, the long-term benefits of a safe, efficient, and future-ready electrical system far outweigh the temporary inconvenience.
While safety is the primary reason for electrical wiring upgrades, modern systems offer many other benefits that improve your daily life and home value.
A home with an upgraded electrical system signals to potential buyers that it has been well-maintained, which can significantly increase home resale value.
Outdated wiring can be inefficient, leading to voltage drops and heat loss that waste energy. Modern wiring works seamlessly with energy-efficient appliances and LED lighting, offering improved energy efficiency and lower utility bills.
Insurance companies see modern wiring as a lower risk and often reward homeowners with lower homeowners insurance premiums.
Perhaps the most noticeable daily benefit is supporting modern technology. An upgraded system provides the robust power supply today's tech-heavy homes demand, eliminating flickering lights and tripped breakers.
This all adds up to invaluable peace of mind. For more on the advantages of modernizing your home's electrical infrastructure, explore our guide on Electrical Service Upgrade.
Electrical wiring upgrades involve more than just new wires; they integrate modern safety technologies like GFCI, AFCI, and TRR to protect your family.
GFCI outlets (Ground Fault Circuit Interrupters) protect against electrical shock, especially in wet areas like kitchens and bathrooms. They detect tiny imbalances in the current and shut off power in milliseconds to prevent shock.
AFCI breakers (Arc Fault Circuit Interrupters) prevent electrical fires. Located in your electrical panel, they detect dangerous arcing in damaged wiring and shut down the circuit before a fire can start.
Tamper-Resistant Receptacles (TRR) are a must for child safety. They have spring-loaded shutters that prevent objects other than a proper plug from being inserted into the outlet.
These safety features are now standard code requirements in new construction and major renovations, ensuring your home meets the highest safety standards.
Electrical wiring upgrades are a smart investment that future-proofs your home, preparing it for tomorrow's technological possibilities.
Structured wiring for data, such as Category 6 or 7 Ethernet cables, creates a robust, hardwired network for reliable high-speed internet, streaming, and gaming.
Dedicated circuits for high-power appliances like refrigerators and microwaves prevent overloads and protect sensitive electronics from voltage drops.
USB outlets are a simple convenience that eliminates bulky charging adapters and frees up traditional outlets.
An upgraded electrical system provides a stable foundation for smart home integration, ensuring devices like thermostats, cameras, and lighting work seamlessly.
EV charger readiness is increasingly important. Installing the necessary dedicated circuit during an upgrade prepares your home for an electric vehicle, saving you from another major project later.
For more information on preparing your home for these needs, check out our Electrical Hookup Services. The future is electric, and with the right upgrades, your home will be ready.
Homeowners often have questions about electrical wiring upgrades. With three decades of experience in Nova Scotia, we've answered the most common ones.
There's no single answer for every home, but a good guideline is to have your wiring professionally evaluated every 25 years. This doesn't always mean a full rewire, but a licensed electrician should perform a thorough inspection.
If your home was built before 1980, an inspection is more urgent. Many pre-1980 wiring types are now considered unsafe, including knob-and-tube and aluminum wiring, as they cannot handle modern electrical loads. A professional inspection is key to making an informed decision about your family's safety.
While tempting, DIY electrical work is extremely risky. The consequences include:
• Significant safety risks: Fire and electric shock hazards can cause serious injury or death.
• Voiding homeowners insurance: If a fire is traced to unlicensed electrical work, your insurance company may refuse to pay the claim.
• Code violations: Electrical codes are complex and change often, making failed inspections likely when you sell your home.
• Potential damage to electronics: Improper wiring can cause power fluctuations that damage expensive appliances and electronics.
Electrical wiring upgrades can lead to lower premiums for updated systems. Insurance companies view modern wiring as a significantly lower fire risk.
Conversely, some insurers may refuse coverage for outdated wiring, particularly for homes with knob-and-tube or aluminum systems.
To receive insurance benefits, proof of professional installation required. Your insurer will want to see permits and inspection reports from a licensed electrician, proving the work was done safely and to code. We recommend contacting your insurance provider before an upgrade to see what discounts you may qualify for.
Electrical wiring upgrades are one of the smartest investments for your property. They are more than just keeping the lights on; they are crucial for safety, supporting a modern lifestyle, and protecting your family from electrical fires.
Upgrading from outdated systems like knob-and-tube or aluminum wiring provides a safe foundation for your home. It eliminates the daily frustrations of tripped breakers and overloaded circuits, allowing your home to handle everything from smart devices to EV chargers.
The importance of professional work cannot be overstated. DIY electrical work risks your family's safety, can void your insurance, and often leads to more costly repairs. A licensed electrician ensures the job is done correctly, safely, and to code.
With over 30 years of experience in Nova Scotia, we've seen the hidden dangers of outdated wiring. We are dedicated to helping families from Halifax to the Annapolis Valley ensure their homes are powered safely and efficiently.
Your home's electrical system works hard every day. Ensure it's equipped to work safely for years to come. Whether you're seeing warning signs or want the peace of mind of a modern system, now is the time to act.
For a comprehensive assessment of your home's electrical system in the Halifax area, trust the certified experts at Presidential Ventilation Systems Ltd. Contact us for Electrical Services in Halifax NS and take the first step toward a safer, smarter home.

Electrical wiring upgrades are essential home improvements that replace outdated wiring with modern, code-compliant infrastructure. These upgrades address safety hazards, increase power capacity, and prepare homes for today's high-tech demands.
Key reasons for electrical wiring upgrades:
• Safety - Eliminate fire risks from faulty, outdated wiring
• Power capacity - Support modern appliances and technology
• Code compliance - Meet current electrical safety standards
• Home value - Increase property value and insurability
• Energy efficiency - Reduce electrical waste and utility costs
Just because your lights turn on doesn't mean your wiring is safe. Many homes built before 1980 have systems that appear functional but pose serious risks. Faulty wiring is a leading cause of residential fires, as outdated systems can't handle the electrical load of modern life.
Homes built decades ago were designed for 60 amps of power, but today's homes often need 200 amps to safely run air conditioners, computers, and smart devices.
Beyond safety, an upgraded electrical system can lower insurance premiums, increase your home's resale value, and provide peace of mind knowing your family is protected from electrical hazards.
Your home's electrical system provides clear warning signs when it needs attention. Recognizing them can prevent dangerous situations and costly repairs.
Flickering lights that dim when you use an appliance are a classic sign of an overloaded circuit. Your wiring is struggling to keep up with demand.
Frequently tripped breakers and blown fuses are your panel's safety features working overtime. They indicate the system cannot handle the electrical load.
A burning smell from outlets or walls signals dangerous overheating and requires immediate attention. Similarly, discolored outlets or those warm to the touch are signs of heat damage and excessive strain.
If you feel a tingling sensation from appliances, you have a serious grounding problem that poses a shock risk. Call an electrician immediately.
Many older homes still have two-prong ungrounded outlets, which lack modern safety features that protect you and your electronics from electrical faults.
An over-reliance on extension cords and power strips suggests your home lacks sufficient outlets and that your system may not have the capacity for today's power-hungry devices.
Insufficient power for modern appliances is obvious when you can't run multiple devices without tripping a breaker. Today's homes need far more capacity than those built decades ago.
If you notice these signs, it's time to consider electrical wiring upgrades. For a helpful checklist, see When It's Time for an Electrical Wiring Upgrade.
Some wiring types that were once standard are now considered hazardous. Identifying your home's wiring can help determine if an upgrade is necessary.
Knob-and-tube wiring, found in pre-1930s homes, uses porcelain knobs and tubes. Its rubber/cloth insulation becomes brittle with age, and it lacks a ground wire.
Aluminum wiring was a cheaper copper alternative in the 1960s and 70s. While not inherently dangerous, its properties can create serious safety issues over time.
Non-metallic sheathed cable from before the 1960s may have insulation that degrades and often lacks proper grounding.
Any ungrounded wiring system poses a risk, as electrical faults have no safe path to dissipate, increasing the danger of shock, fire, and damage to electronics.
• Material — Knob & Tube Wiring (Pre-1930s): Copper (single insulated strands) — Aluminum Wiring (1960s-1970s): Aluminum — Modern Copper Wiring (Post-1970s): Copper
• Ground Wire — Knob & Tube Wiring (Pre-1930s): No — Aluminum Wiring (1960s-1970s): Often No (especially older installations) — Modern Copper Wiring (Post-1970s): Yes
• Insulation — Knob & Tube Wiring (Pre-1930s): Rubber/cloth (prone to degradation) — Aluminum Wiring (1960s-1970s): PVC/rubber (can degrade) — Modern Copper Wiring (Post-1970s): Thermoplastic (durable, heat-resistant)
• Safety Concerns — Knob & Tube Wiring (Pre-1930s): Fire, shock, degradation, no ground — Aluminum Wiring (1960s-1970s): Overheating, fire, loose connections — Modern Copper Wiring (Post-1970s): High safety, reliability, code-compliant
• Heat Resistance — Knob & Tube Wiring (Pre-1930s): Low — Aluminum Wiring (1960s-1970s): Low — Modern Copper Wiring (Post-1970s): High
• Modern Load — Knob & Tube Wiring (Pre-1930s): Cannot handle — Aluminum Wiring (1960s-1970s): Limited capacity — Modern Copper Wiring (Post-1970s): Designed for modern loads
If your home was built in the 1960s-1970s, you may have aluminum wiring. Aluminum expands and contracts more than copper as it heats and cools. Over years, this cycle causes connection loosening.
Loose connections increase electrical resistance, generating more heat and creating a significant overheating risk and fire hazard. Aluminum also oxidizes, which further contributes to overheating at connection points.
These documented risks can create insurance difficulties. Many insurers refuse to cover homes with aluminum wiring or charge higher premiums. Some require professional remediation or replacement before providing coverage.
If you have aluminum wiring, take action. Professional electrical wiring upgrades can address these safety concerns, give you peace of mind, and potentially lower your insurance costs.
An electrical wiring upgrade is a manageable project with the right professionals. At Presidential Ventilation Systems Ltd., we guide you through each step transparently.
The first step is hiring a licensed electrician. This is not a DIY project. A licensed professional ensures all work is code-compliant, handles permits and inspections, and mitigates risks like fire and electrical shock.
The process begins with a thorough system assessment. Our electricians evaluate your existing wiring, assess your power needs, and determine the project's scope. This helps decide between a partial vs. whole-house rewiring. While some homes only need specific circuits upgraded, older systems like knob-and-tube or aluminum wiring often require a complete overhaul.
Permits and inspections are integral to any major electrical upgrade. We handle the paperwork to ensure all work is performed to code and approved by municipal inspectors, which protects your home's value and insurability.
During the rewiring, expect some disruption. We work to minimize this, but homeowners should prepare for temporary power outages and minor drywall removal to access wiring. We will help you plan for this to make the process as smooth as possible.
After installation and inspection, we move to post-rewire cleanup and repairs. We ensure the workspace is tidy and that any necessary wall or ceiling repairs are managed, leaving your home safe and ready for modern electrical demands. For more on enhancing your home's capacity, see our Panel Upgrade services page.
Understanding the factors that influence the cost of electrical wiring upgrades helps with budgeting. While every project is unique, the main cost components are consistent.
Home size and age are significant factors. Larger homes require more materials and labor. Older homes with outdated systems can present challenges that increase complexity and cost.
The accessibility of wiring also plays a major role. Labor costs are lower if wiring is easily accessed through unfinished basements or attics. Opening and repairing walls adds to the expense.
The scope of work is another critical factor. A whole-house rewiring is more extensive and costly than a partial upgrade or a simple panel replacement.
The materials used, such as the grade of outlets, switches, and fixtures, will affect the cost. Higher-quality components improve safety and functionality but add to the material cost.
Finally, labor costs are the largest portion of the expense, reflecting the specialized skills and safety protocols required for professional electrical work. Upgrading your electrical panel is often part of a comprehensive wiring upgrade. For insights into this investment, explore our information on Breaker Panel Upgrade Cost.
A whole-house rewiring project typically takes from five days to two weeks, depending on your home's size and complexity.
The best time to rewire is during a larger remodeling project. With walls already open for contractors, it's easier and more cost-effective to install new wiring, saving time and money on labor and repairs.
If a major renovation isn't planned, scheduling the project during a vacation can minimize disruption. While we strive to be as non-invasive as possible, some disruption is unavoidable. However, the long-term benefits of a safe, efficient, and future-ready electrical system far outweigh the temporary inconvenience.
While safety is the primary reason for electrical wiring upgrades, modern systems offer many other benefits that improve your daily life and home value.
A home with an upgraded electrical system signals to potential buyers that it has been well-maintained, which can significantly increase home resale value.
Outdated wiring can be inefficient, leading to voltage drops and heat loss that waste energy. Modern wiring works seamlessly with energy-efficient appliances and LED lighting, offering improved energy efficiency and lower utility bills.
Insurance companies see modern wiring as a lower risk and often reward homeowners with lower homeowners insurance premiums.
Perhaps the most noticeable daily benefit is supporting modern technology. An upgraded system provides the robust power supply today's tech-heavy homes demand, eliminating flickering lights and tripped breakers.
This all adds up to invaluable peace of mind. For more on the advantages of modernizing your home's electrical infrastructure, explore our guide on Electrical Service Upgrade.
Electrical wiring upgrades involve more than just new wires; they integrate modern safety technologies like GFCI, AFCI, and TRR to protect your family.
GFCI outlets (Ground Fault Circuit Interrupters) protect against electrical shock, especially in wet areas like kitchens and bathrooms. They detect tiny imbalances in the current and shut off power in milliseconds to prevent shock.
AFCI breakers (Arc Fault Circuit Interrupters) prevent electrical fires. Located in your electrical panel, they detect dangerous arcing in damaged wiring and shut down the circuit before a fire can start.
Tamper-Resistant Receptacles (TRR) are a must for child safety. They have spring-loaded shutters that prevent objects other than a proper plug from being inserted into the outlet.
These safety features are now standard code requirements in new construction and major renovations, ensuring your home meets the highest safety standards.
Electrical wiring upgrades are a smart investment that future-proofs your home, preparing it for tomorrow's technological possibilities.
Structured wiring for data, such as Category 6 or 7 Ethernet cables, creates a robust, hardwired network for reliable high-speed internet, streaming, and gaming.
Dedicated circuits for high-power appliances like refrigerators and microwaves prevent overloads and protect sensitive electronics from voltage drops.
USB outlets are a simple convenience that eliminates bulky charging adapters and frees up traditional outlets.
An upgraded electrical system provides a stable foundation for smart home integration, ensuring devices like thermostats, cameras, and lighting work seamlessly.
EV charger readiness is increasingly important. Installing the necessary dedicated circuit during an upgrade prepares your home for an electric vehicle, saving you from another major project later.
For more information on preparing your home for these needs, check out our Electrical Hookup Services. The future is electric, and with the right upgrades, your home will be ready.
Homeowners often have questions about electrical wiring upgrades. With three decades of experience in Nova Scotia, we've answered the most common ones.
There's no single answer for every home, but a good guideline is to have your wiring professionally evaluated every 25 years. This doesn't always mean a full rewire, but a licensed electrician should perform a thorough inspection.
If your home was built before 1980, an inspection is more urgent. Many pre-1980 wiring types are now considered unsafe, including knob-and-tube and aluminum wiring, as they cannot handle modern electrical loads. A professional inspection is key to making an informed decision about your family's safety.
While tempting, DIY electrical work is extremely risky. The consequences include:
• Significant safety risks: Fire and electric shock hazards can cause serious injury or death.
• Voiding homeowners insurance: If a fire is traced to unlicensed electrical work, your insurance company may refuse to pay the claim.
• Code violations: Electrical codes are complex and change often, making failed inspections likely when you sell your home.
• Potential damage to electronics: Improper wiring can cause power fluctuations that damage expensive appliances and electronics.
Electrical wiring upgrades can lead to lower premiums for updated systems. Insurance companies view modern wiring as a significantly lower fire risk.
Conversely, some insurers may refuse coverage for outdated wiring, particularly for homes with knob-and-tube or aluminum systems.
To receive insurance benefits, proof of professional installation required. Your insurer will want to see permits and inspection reports from a licensed electrician, proving the work was done safely and to code. We recommend contacting your insurance provider before an upgrade to see what discounts you may qualify for.
Electrical wiring upgrades are one of the smartest investments for your property. They are more than just keeping the lights on; they are crucial for safety, supporting a modern lifestyle, and protecting your family from electrical fires.
Upgrading from outdated systems like knob-and-tube or aluminum wiring provides a safe foundation for your home. It eliminates the daily frustrations of tripped breakers and overloaded circuits, allowing your home to handle everything from smart devices to EV chargers.
The importance of professional work cannot be overstated. DIY electrical work risks your family's safety, can void your insurance, and often leads to more costly repairs. A licensed electrician ensures the job is done correctly, safely, and to code.
With over 30 years of experience in Nova Scotia, we've seen the hidden dangers of outdated wiring. We are dedicated to helping families from Halifax to the Annapolis Valley ensure their homes are powered safely and efficiently.
Your home's electrical system works hard every day. Ensure it's equipped to work safely for years to come. Whether you're seeing warning signs or want the peace of mind of a modern system, now is the time to act.
For a comprehensive assessment of your home's electrical system in the Halifax area, trust the certified experts at Presidential Ventilation Systems Ltd. Contact us for Electrical Services in Halifax NS and take the first step toward a safer, smarter home.

The fall shoulder season in maritime Nova Scotia is fast approaching, and your retail store's climate control is about to face its toughest test of the year. Preparing your Dartmouth retail store's HVAC for the fall shoulder season means navigating freezing mornings that demand heat, followed by busy, sunlit afternoons that require active cooling. This extreme daily temperature swing creates a unique concrete problem for commercial spaces: the building requires robust heating at dawn, but rapid cooling just a few hours later when the store fills with customers.
If your commercial thermostat controls are not configured correctly, this dramatic shift causes your heating and cooling systems to fight each other. The core decision point for facility managers is how to properly configure commercial thermostat deadband settings to handle these rapid daily temperature shifts without causing excessive mechanical strain. Ensure you have reliable commercial heating services on standby before the unpredictable coastal weather takes a toll on your equipment.
Managing a commercial retail space is vastly different from controlling a residential home. In a residential setting, you might simply switch the thermostat from "Cool" to "Heat" once October arrives. In a Dartmouth retail environment, doing so will almost certainly result in an uncomfortably hot store by 2:00 PM. The challenge lies in balancing the natural climate fluctuations of maritime fall weather with the heavy internal heat loads generated by retail operations. When commercial systems are left on standard factory settings during this transition, the resulting inefficiency leads to massive energy waste and significant wear on expensive commercial electrical components.
Retail stores struggle with temperature regulation during the fall significantly more than standard office buildings or warehouses. This difficulty stems from the concept of latent and sensible heat loads. Even when the outside air is crisp and cool, the inside of a retail store generates a massive amount of its own heat.
Consider the typical heat sources present in a busy retail environment:
• High-intensity lighting: Large arrays of display lights, track lighting, and illuminated signage generate continuous radiant heat throughout business hours.
• Electronic displays: Point-of-sale systems, digital advertising screens, and massive refrigeration units (which exhaust heat into the aisles) constantly raise the ambient temperature.
• Foot traffic: Every customer walking through the door introduces body heat and moisture into the space, rapidly changing the indoor climate during peak shopping hours.
Dartmouth's coastal proximity exacerbates rapid temperature and humidity shifts during the fall transition period, stressing improperly configured commercial HVAC systems. The frequent opening and closing of main entry doors allows cold, damp maritime air to rush in, confusing the thermostat sensors located deeper inside the store. The system detects a sudden drop in temperature and triggers the furnace or heating mode.
However, within minutes, the massive internal heat loads from lights and bodies warm that air back up, pushing the indoor temperature past the comfort zone. This dynamic triggers the need for active cooling even when outdoor temperatures begin to drop into the single digits. Standard residential thermostat practices simply do not apply to commercial retail environments because residential homes do not experience this rapid, intense fluctuation of internal heat generation. Commercial spaces require specialized control strategies to manage this chaotic thermal environment.
To resolve the issue of systems fighting each other, commercial HVAC relies on a specific control setting known as a thermostat deadband. A thermostat deadband is defined as the specific temperature range where neither heating nor cooling is activated. It is a neutral zone, or a buffer, programmed into the commercial control system to give the mechanical equipment a rest.
Without a proper deadband, a commercial HVAC system can experience "overlap." This happens when the heating setpoint and the cooling setpoint are too close together. For example, if the heat is set to turn on at 20°C and the AC is set to turn on at 21°C, the system will constantly bounce back and forth. The furnace runs, overshoots the target slightly to 21.5°C, which immediately triggers the air conditioning to turn on. The AC then cools the space down to 19.5°C, which immediately triggers the heat again. The systems are literally fighting each other, wasting massive amounts of energy.
According to ASHRAE (American Society of Heating, Refrigerating and Air-Conditioning Engineers) commercial building temperature guidelines, establishing a proper deadband is critical for energy efficiency and occupant comfort. A typical thermostat deadband variance of 3-5 degrees is recommended to prevent this overlap.
• Zero Deadband (Incorrect) — Heating Setpoint: 21°C — Cooling Setpoint: 21°C — System Behavior: Constant switching between heat and AC; rapid component failure.
• Narrow Deadband (Risky) — Heating Setpoint: 20°C — Cooling Setpoint: 21°C — System Behavior: Frequent cycling during fall shoulder season temperature swings.
• Optimized Deadband (Correct) — Heating Setpoint: 19°C — Cooling Setpoint: 23°C — System Behavior: System rests in the 4-degree neutral zone; saves energy and wear.
Configuring these advanced deadband controls requires a professional understanding of commercial electrical and mechanical systems. Facility managers should never attempt to rewire internal commercial thermostats, adjust electrical contactors, or bypass safety limits, as commercial voltage can be highly dangerous and improper settings can instantly damage heavy rooftop units (RTUs).
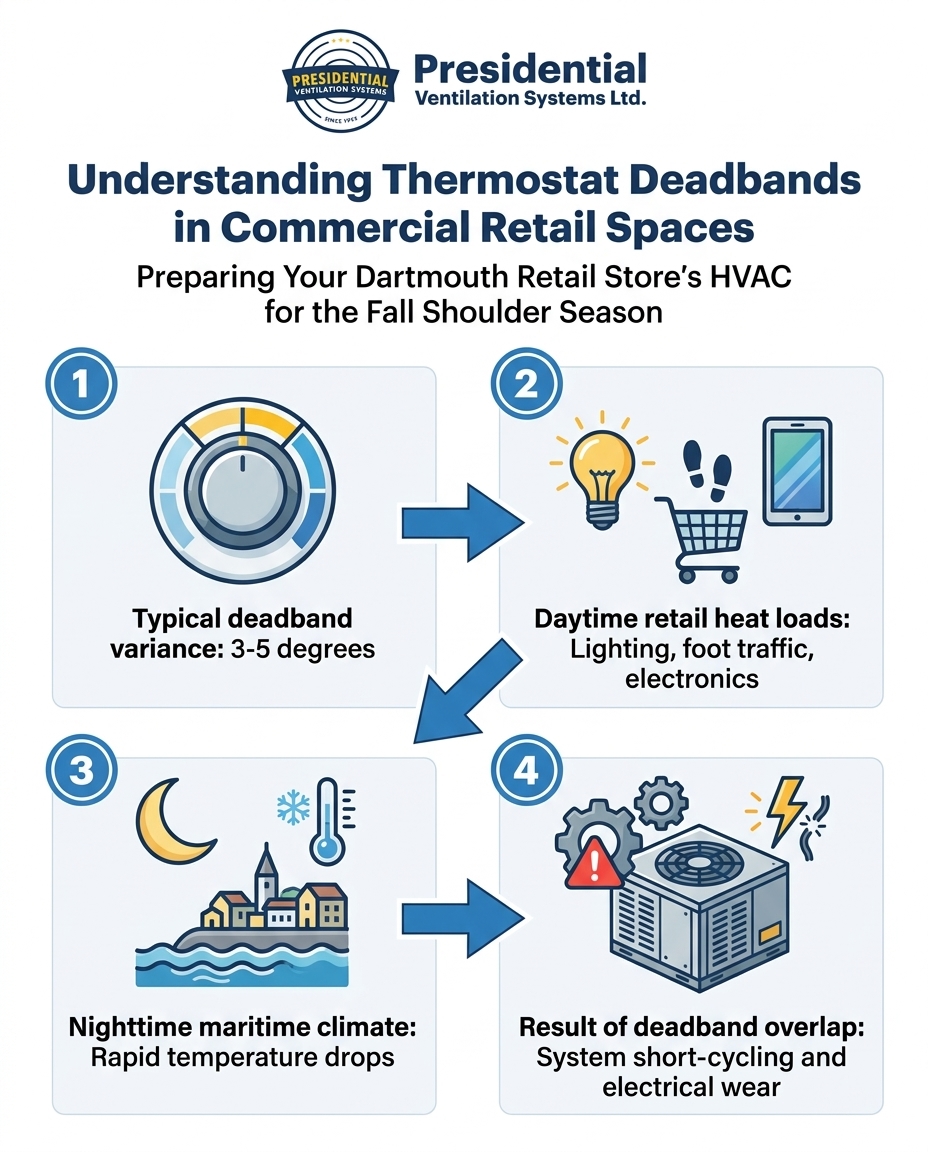
When a deadband is improperly configured during the fall shoulder season, the most immediate consequence is short-cycling. In a commercial context, short-cycling occurs when a massive piece of HVAC equipment turns on, runs for only a few minutes, and then abruptly shuts off, only to restart moments later. Fall weather frequently causes this because the ambient temperature hovers right on the edge of the thermostat's setpoints.
Rapid daily temperature shifts lead to excessive mechanical wear and tear on commercial compressors. A compressor is designed to run in long, steady cycles to efficiently move refrigerant and allow lubricating oils to circulate properly. When the system short-cycles, the oil never fully returns to the compressor, leading to increased friction, overheating, and eventual catastrophic mechanical failure. The constant starting and stopping grinds down bearings and stresses the blower motor belts.
Beyond the mechanical parts, short-cycling places immense strain on commercial electrical components. Every time a heavy commercial rooftop unit starts up, it draws a massive surge of power known as inrush current. This current is often several times higher than the running current. When heavy machinery cycles on and off too frequently, this repeated surge overheats electrical contactors, degrades capacitors, and can even cause phase imbalances in the building's electrical panel.
Establishing a proper thermostat deadband variance (typically 3-5 degrees) allows the system to rest. By widening the gap between the heating and cooling triggers, the indoor temperature is allowed to drift naturally within a comfortable range. This simple optimization drastically reduces the number of startup cycles, extending the equipment lifespan and protecting the building's electrical infrastructure.
Facility managers and store owners need to know how to identify if their current deadband settings are incorrect before the equipment suffers permanent damage. Because the fall shoulder season in maritime Nova Scotia forces systems to work in both modes daily, symptoms of deadband overlap become highly visible.
Watch for these common warning signs that your retail HVAC system is fighting itself:
• Noticeable temperature swings: Customers or staff complain that the store feels freezing near the entrance but boiling hot near the back displays, changing rapidly by the hour.
• Constant blower fan operation: The air never stops rushing through the vents, yet the temperature never seems to stabilize.
• Unusually high energy bills: A sudden, unexplained spike in commercial electrical costs during September or October often indicates the heat and AC are running simultaneously.
• Rapid clicking noises: Hearing the thermostat or the rooftop unit constantly clicking on and off every ten minutes.
One of the most frustrating scenarios for a retail manager is when the air conditioner not working during warm afternoons becomes a daily disruption, despite the system functioning perfectly to heat the store that very same morning. This usually means the safety sensors have locked the cooling system out due to short-cycling or frozen coils caused by improper fall settings.
Always observe the operational cycles by listening to the vents and monitoring the thermostat readouts, but never attempt internal electrical diagnostics. Instead, document these specific issues—noting the time of day the temperature swings occur and how often the system cycles—to share with a commercial HVAC technician upon arrival.
Optimizing your commercial controls is not just about preventing breakdowns; it is directly tied to your retail store's bottom line. The relationship between reduced short-cycling and overall energy consumption in retail spaces is profound. Every unnecessary startup surge avoided is electricity saved.
When you optimize commercial HVAC controls, you reduce unnecessary mechanical wear, which lowers your long-term maintenance costs. However, the immediate financial benefit comes from reduced monthly utility bills. By allowing the store's temperature to drift naturally within that 3-5 degree deadband, the system relies on the building's thermal mass rather than active mechanical heating or cooling.
Furthermore, upgrading to advanced commercial thermostats or building automation controls can help businesses qualify for provincial energy efficiency rebates. Programs designed to reduce grid strain often reward commercial properties that upgrade from outdated, manual thermostats to smart, deadband-capable control systems. Reviewing Efficiency Nova Scotia commercial rebate literature is a smart first step, as many of these incentives require professional installation and verification. Seeking a professional system assessment not only ensures your deadbands are set perfectly for the maritime fall, but it also provides the documentation needed to pursue construction, electrical, and energy efficiency rebates.
Transitioning from a technical understanding of deadbands to actual implementation requires professional support. A professional fall inspection for a commercial system entails much more than changing a filter. Technicians must test the advanced controls, verify the deadband variance, inspect the electrical contactors for pitting caused by summer short-cycling, and perform a deep cleaning of the coils to ensure proper airflow.
Preventative maintenance avoids costly downtime during peak retail shopping seasons. If a rooftop unit fails on Black Friday because the compressor finally gave out after weeks of fall short-cycling, the loss of foot traffic and inventory damage far outweighs the cost of a routine inspection. This highlights the absolute necessity of having a structured maintenance plan for complex commercial equipment.
One local commercial customer reached out during the spring when their heat pump system failed entirely, and previous technicians from other companies could not resolve the issue. A skilled technician properly diagnosed the complex control problem, explained the underlying cause to the facility manager, and successfully fixed the heat pump after previous failed attempts. This level of insight is crucial when dealing with commercial ducted heat pump systems that require precise calibration.
Presidential Ventilation's expertise in commercial HVAC systems ensures retail businesses avoid costly downtime and maintain perfect customer comfort through advanced thermostat deadband optimization. Working with technicians who deeply understand local maritime climate challenges across various local HVAC service areas means your system will be tailored to handle the exact humidity and temperature swings unique to the coast.
The fall shoulder season in maritime Nova Scotia is the optimal time to configure your controls, well before the deep winter freeze sets in. Stabilizing your indoor temperatures now protects sensitive retail inventory, keeps your staff productive, and ensures every customer experiences a comfortable shopping environment the moment they walk through the doors.
Don't wait until the system locks itself out from excessive short-cycling. Schedule a professional assessment of your store's HVAC controls today and secure an HVAC maintenance plan to keep your commercial electrical and mechanical systems running safely and efficiently all year long.
What is a thermostat deadband?
A thermostat deadband is a specific temperature range programmed into an HVAC control system where neither heating nor cooling is activated. This neutral zone, typically 3-5 degrees, gives the mechanical equipment time to rest and prevents the heating and cooling systems from fighting each other.
How do I stop my commercial HVAC from short-cycling during the fall?
The most effective way to stop short-cycling during the fall shoulder season is to have a professional widen the thermostat deadband variance. This prevents the system from rapidly turning on and off in response to minor temperature fluctuations, reducing strain on the electrical components and compressor.
What temperature should a retail store be kept at?
While exact temperatures depend on the inventory, ASHRAE guidelines generally suggest a heating setpoint around 19°C to 20°C and a cooling setpoint around 23°C to 24°C. Maintaining this gap ensures energy efficiency and keeps the environment comfortable for shoppers moving through the store.
Why is my commercial AC running in the fall?
Your commercial AC runs in the fall because retail spaces generate massive latent heat loads from high-intensity lighting, electronic displays, and heavy foot traffic. Even when it is cold outside, this internal heat can quickly push the indoor temperature past the cooling setpoint, requiring the AC to engage.
Can improper deadband settings damage commercial electrical components?
Yes, improper deadband settings cause the system to short-cycle, which forces heavy commercial equipment to restart constantly. Each startup draws a massive surge of inrush current that can overheat electrical contactors, degrade capacitors, and eventually lead to catastrophic mechanical failure.
How do commercial HVAC rebates work in Nova Scotia?
Commercial HVAC rebates, such as those offered by Efficiency Nova Scotia, provide financial incentives for businesses that upgrade to high-efficiency equipment and advanced control systems. Qualifying for these rebates typically requires a professional assessment and installation to verify that the new systems significantly reduce electrical grid strain.
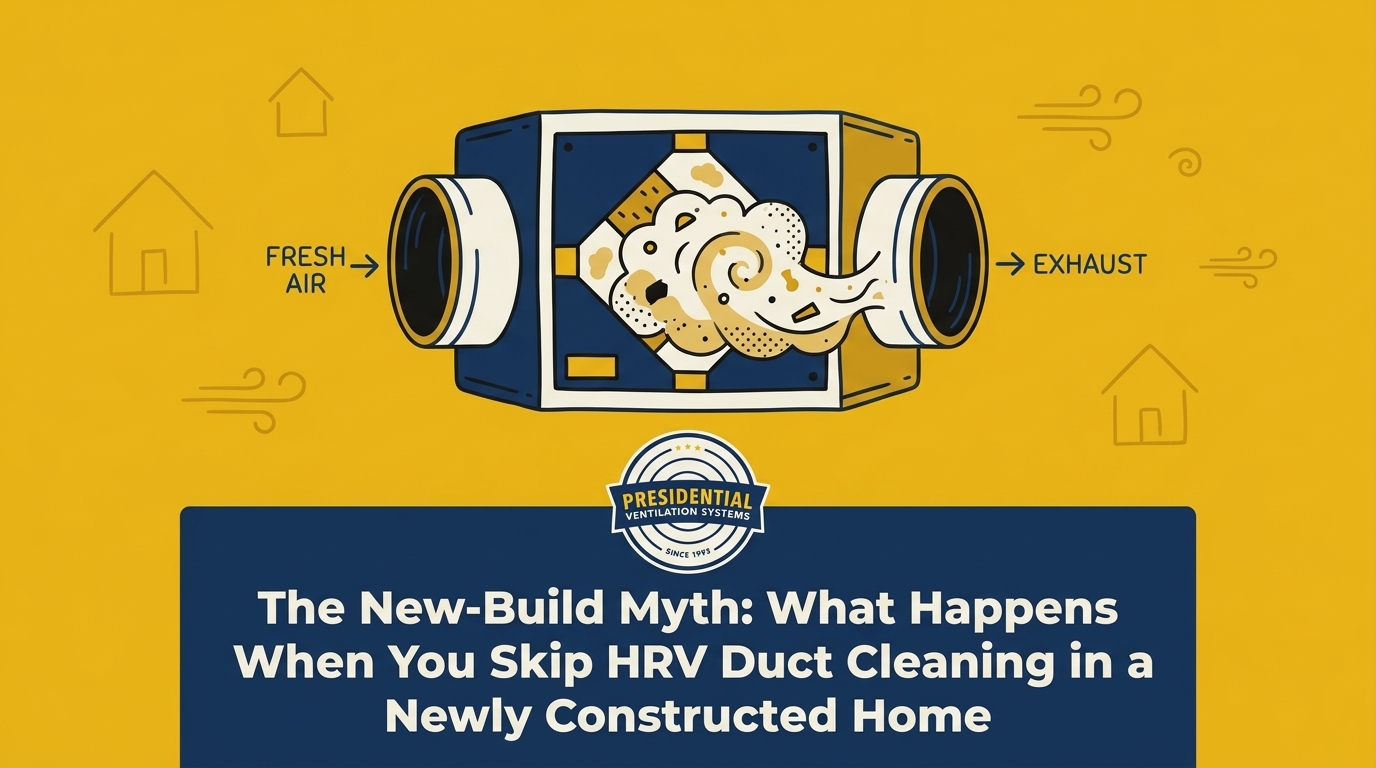
You finally have the keys to your brand-new build, but despite the pristine floors and fresh paint, a fine layer of white dust keeps settling on your countertops. At Presidential Ventilation Systems Ltd., our team often encounters a frustrating reality for many property owners: What happens when you skip HRV duct cleaning in a newly constructed home means your state-of-the-art ventilation network is already compromised before you even move your furniture inside. For example, in homes completed during the recent 2022-2024 residential and commercial construction boom, we routinely find significant amounts of drywall dust, heavy sawdust, and fiberglass particles accumulated heavily during the final stages of home construction, settling deep inside the ductwork.
To ensure your new property operates as efficiently as it was designed to, exploring professional ventilation and HVAC services is the best first step you can take.
The most common decision point for new homeowners is whether to schedule a post-build cleaning or simply assume the system is spotless because the house has never been lived in. Modern construction practices generate massive amounts of ultrafine particulate matter. Even with diligent contractors sweeping up daily, microscopic debris becomes airborne and inevitably finds its way into the ventilation returns. As we remind our Mount Uniacke NS clients, a "new" home does not automatically equal a "clean" ventilation system.
The unseen accumulation process:
• Drywall sanding: Produces a flour-like dust that stays suspended in the air for hours, easily drifting into open vent boots.
• Hardwood cutting: Heavy sawdust falls into floor registers before grilles are officially installed.
• Insulation installation: Airborne fiberglass particles get pulled into the return ducting if the system is tested prematurely.
If left unaddressed, this debris travels straight to the HRV heat recovery core, turning a brand-new mechanical system into a strained, inefficient unit from day one.
The timeline of a new build is complex, with multiple trades overlapping to meet deadlines. During the busy spring and summer building seasons, heavy particulate matter is introduced into the environment daily. One local homeowner recently noted how crucial a tidy, efficient installation is during a summer project; when contractors prioritize a clean work environment, it helps, but even the best crews cannot stop airborne dust from entering an active air exchange network.
When you run the heating or cooling during the construction or major renovation phase—often done to dry drywall mud faster or keep workers comfortable—the system pulls this debris directly into the return vents. This creates an immediate burden on your HRV systems right out of the gate.
Sanding drywall and cutting wood generate suspended particles—often measuring as small as 2.5 microns (PM2.5)—that behave very differently than normal household dust. Standard household dust is primarily made of fabric fibers, pet dander, and skin cells. Construction dust is heavy, abrasive, and highly concentrated.
• Standard Household Dust — Particle Characteristics: Light, easily trapped by basic filters, organic material. — Impact on Ventilation Systems: Gradual buildup over months; easily managed with standard maintenance.
• Construction Debris — Particle Characteristics: Ultrafine, abrasive, inorganic (silica, gypsum, wood). — Impact on Ventilation Systems: Rapid clogging; coats internal components and bypasses basic filters.
Because systems are often tested or run temporarily before the final cleanup is complete, the ductwork acts as a vacuum for the entire job site.
You might assume the disposable filter installed by the builder will catch the mess. Unfortunately, standard construction-grade fiberglass filters are designed to stop large debris like hair and large dust bunnies, not ultrafine drywall powder. These microscopic particles bypass basic filters entirely. The dust settles deep within the ductwork, waiting to be circulated, ultimately leading to restricted airflow and reduced heat exchange efficiency the moment you take occupancy.
To understand why this specific type of dust is so damaging, you have to look at the mechanical heart of your ventilation setup: the HRV heat recovery core. This component is an intricate, honeycomb-like structure made of thin aluminum or specialized plastic plates. Its job is to cross outgoing stale indoor air with incoming fresh outdoor air, transferring the heat without mixing the air streams.
When our technicians open these units in Mount Uniacke NS, we see firsthand how skipping a post-construction cleaning sends a continuous stream of ultrafine dust straight into this delicate honeycomb structure. If you are wondering what happens if you don't maintain your HRV, the core is the first place to look for failure, often causing standard 75% to 80% Sensible Recovery Efficiency (SRE) ratings to plummet.
Ultrafine dust easily navigates through the ducts to the central unit. Once it reaches the core, a damaging chemical reaction occurs. Drywall dust is highly absorbent. When it combines with normal indoor humidity—or the moisture from fresh paint and curing concrete—it acts exactly like a paste. This paste coats the core's delicate transfer surfaces.
The mechanical breakdown:
• Insulating barrier: The drywall paste hardens into an insulating layer over the heat exchange plates.
• Blocked transfer: Heat can no longer pass efficiently from the warm exhaust air to the cold incoming air.
• Physical blockage: The narrow channels of the honeycomb structure physically plug up, stopping air from moving through the unit.
This buildup happens rapidly in new builds. Without intervention, a high-end, brand-new piece of equipment is quickly reduced to the efficiency of a heavily aged, neglected unit.
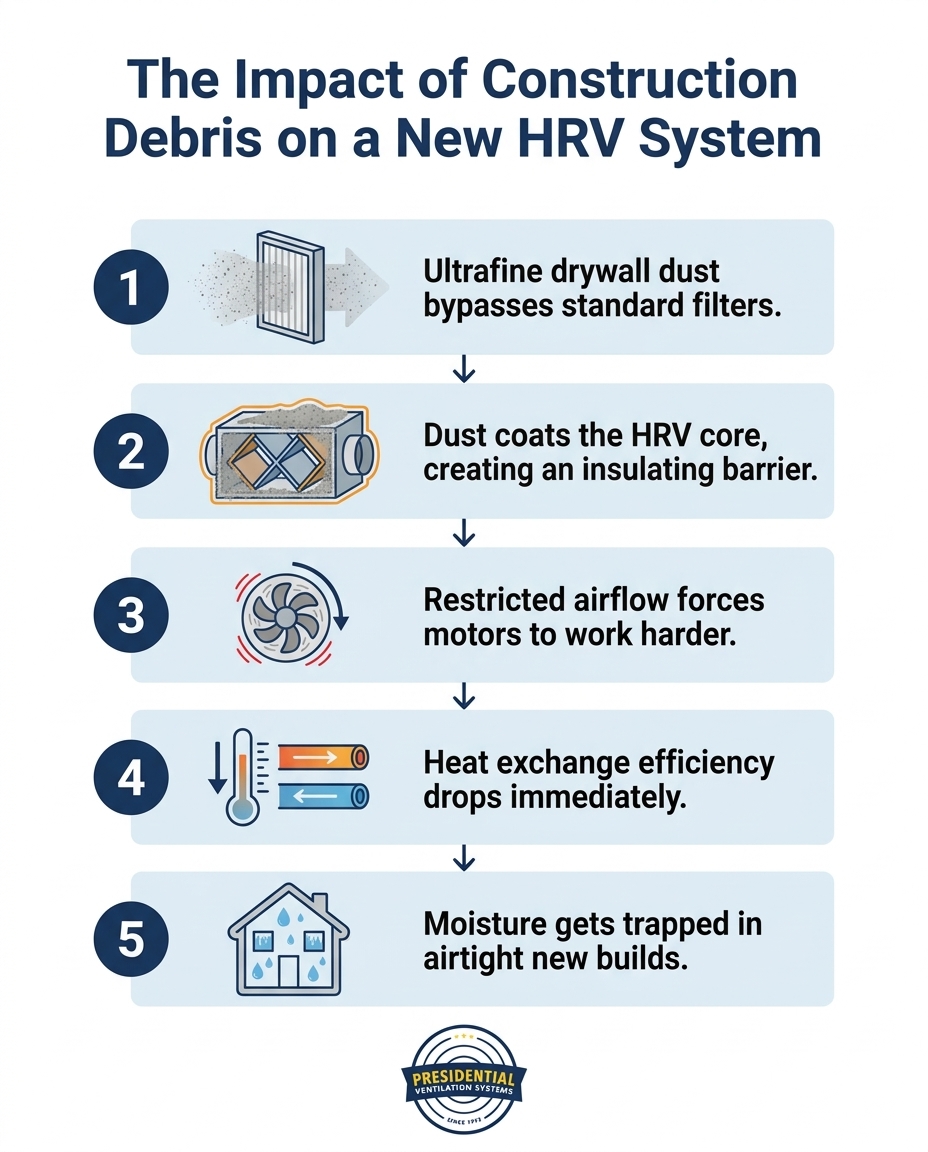
The secondary mechanical failures caused by a clogged core are often what homeowners notice first. The primary symptom is a sudden spike in energy usage or a home that feels stuffy despite the system running constantly. This is the direct result of restricted airflow and reduced heat exchange efficiency.
In a brand-new, airtight home, airflow must be perfectly balanced. When the channels of the HRV core become clogged with drywall dust, the volume of fresh air entering the home is drastically reduced. This creates a bottleneck. The static pressure inside the ductwork increases, forcing the system out of its optimal operating range. The blower motors, which are designed to push air with minimal resistance, suddenly have to push past 2,000 RPMs just to force air through the physical blockage.
Energy is wasted trying to overcome this resistance. The motors draw more electricity to maintain the required RPMs, negating the financial benefits of installing high-efficiency equipment in your new build. Furthermore, because the heat transfer surfaces are insulated by a layer of dust, the heat recovery rates plummet. Instead of capturing the heat from your outgoing air to warm the incoming winter air, that energy is lost to the outside, forcing your primary heating system to run longer and harder to make up the difference. This constant electrical strain leads directly to premature wear on blower motors and electrical components.
Modern new construction homes are built to rigorous energy codes, meaning they are highly airtight to prevent drafts and heat loss. While this is fantastic for your heating bill, it creates a unique challenge: airtight homes rely entirely on mechanical ventilation to expel indoor moisture. In Nova Scotia's damp maritime climate, managing high indoor humidity—especially keeping it below the critical 50% threshold during winter—is critical. The regional moisture levels make an efficiently running HRV heat recovery core essential to protect a brand-new airtight home from severe moisture damage.
Airtight construction traps moisture inside. Everyday activities like cooking, bathing, and even breathing generate significant humidity. More importantly, new building materials—such as fresh lumber, poured concrete, and interior paint—release gallons of moisture into the air during the first year of occupancy as they dry and cure.
The risks of trapped moisture:
• Window condensation: Water pools on sills, damaging brand-new trim and drywall.
• Poor indoor air quality: High humidity breeds mold and mildew in dark corners and closets.
• Material warping: Hardwood floors and cabinetry can swell or warp when indoor humidity remains unchecked.
In our years of servicing Mount Uniacke NS, we have seen how a dust-clogged HRV fails to expel this moisture effectively. When the airflow is restricted by construction debris, the damp, stale air stays trapped inside, putting your brand-new investment at immediate risk.
The transition from the installation phase to the occupancy phase is a critical window for your HVAC system's health. The final steps of an air exchanger installation involve balancing the airflow and testing the controls, but the job isn't truly finished until the post-build environment is completely clean. Because commercial and residential construction timelines often overlap, dust continues to enter newly installed systems right up until move-in day.
Our team at Presidential Ventilation Systems Ltd. brings deep local expertise in new construction HVAC, understanding exactly how Maritime building practices and timelines impact brand-new ventilation systems. Professional HVAC installers view the transition from a messy construction site to an occupied home as the most vulnerable time for mechanical equipment. If you have complementary systems, such as ducted heat pump systems, coordinating a professional cleaning immediately after construction protects the entire HVAC ecosystem. It ensures that restricted airflow and reduced heat exchange efficiency don't compromise the lifespan of your interconnected climate control units, while also maintaining system efficiency to ensure you qualify for regional energy rebates.
Assuming your system is clean simply because it is new is a costly mistake. One local homeowner scheduled a routine fall inspection and deep cleaning within the first 6 months of occupancy, only to realize the immense value of thorough testing and product care information after seeing the heavy particulate buildup removed from their seemingly "clean" new system. The evidence is clear: the HRV heat recovery core cannot process construction debris.
The immediate consequences of skipping a post-build cleaning include:
• Immediate reduction in heat exchange efficiency: Dust insulates the core, preventing heat transfer.
• Increased strain on blower motors: Motors overwork to push air through clogged channels, leading to higher electrical energy consumption.
• Poor indoor air quality: Ultrafine drywall dust recirculates continuously into your living spaces.
• Inability to manage indoor humidity: Airtight homes suffer from condensation and potential mold growth when ventilation fails.
• Premature component failure: Overworked motors and sensors burn out faster than their expected lifespan.
Highlighting the value of a thorough, professional inspection and deep clean to verify system health before move-in is essential. For property owners across our local service areas, scheduling this service is the ultimate peace-of-mind check.
A clear, technical understanding of how construction debris interacts with modern ventilation validates the absolute necessity of a post-build cleaning. Protecting the core from the abrasive, paste-like buildup of drywall dust ensures the system operates at peak efficiency from the moment you move in. By clearing out the hidden threats, our team ensures you eliminate the risks of restricted airflow and reduced heat exchange efficiency, allowing your equipment to properly manage the unique moisture loads of a new, airtight build.
Don't let the "new build myth" compromise your comfort. Consult with our local experts at Presidential Ventilation Systems Ltd. to clear out construction dust thoroughly, ensuring you start your new home journey with truly clean, healthy air.
Your new home is likely dusty because ultrafine construction debris, such as drywall dust and sawdust, has settled inside your ductwork. When the HVAC system kicks on, it continuously blows these hidden particles back into your living spaces. A professional duct cleaning removes this trapped debris at the source.
Yes, new builds almost always require duct cleaning before or immediately after move-in. During commercial and residential construction, the open ductwork acts as a collection point for sawdust, fiberglass, and drywall powder. Cleaning the system ensures this abrasive debris doesn't damage your brand-new HVAC equipment.
If an HRV core is clogged, the system cannot efficiently transfer heat between the incoming and outgoing air streams. This blockage restricts fresh airflow, forces the blower motors to overwork, and traps stale, humid air inside your home. In new airtight builds, this often leads to rapid window condensation.
Drywall dust affects an air exchanger installation by bypassing standard filters and coating the internal heat recovery core. Because drywall dust absorbs moisture, it forms a thick paste that blocks the narrow air channels. This immediately reduces the newly installed unit's efficiency and lifespan.
Yes, construction dust can permanently damage a new HRV system if left unaddressed. The constant electrical strain of pushing air through a clogged core can burn out the blower motors prematurely. Additionally, the abrasive nature of the dust can wear down delicate internal sensors and moving parts.