


Aluminum wiring remediation is the process of addressing the serious fire hazards posed by single-strand aluminum wiring installed in many homes between 1965 and 1973. The U.S. Consumer Product Safety Commission (CPSC) has found that these homes are 55 times more likely to have connections reach dangerous conditions than homes wired with copper.
The danger isn't the wire itself, but what happens at connection points. Aluminum expands, contracts, and oxidizes differently than copper, causing connections at outlets and switches to loosen over time. This can lead to overheating, arcing, and devastating fires, like one in 1974 that was traced to a faulty aluminum wire connection.
Fortunately, these hazards can be permanently eliminated. The CPSC approves three main methods for remediation:
• Complete Rewire: Replacing all aluminum wire with copper.
• COPALUM Connectors: A specialized crimp creating a permanent "cold weld" between aluminum and copper wires.
• AlumiConn Connectors: A setscrew connector that safely joins aluminum and copper wires.
Each method, when performed by a qualified electrician, can make your home safe.
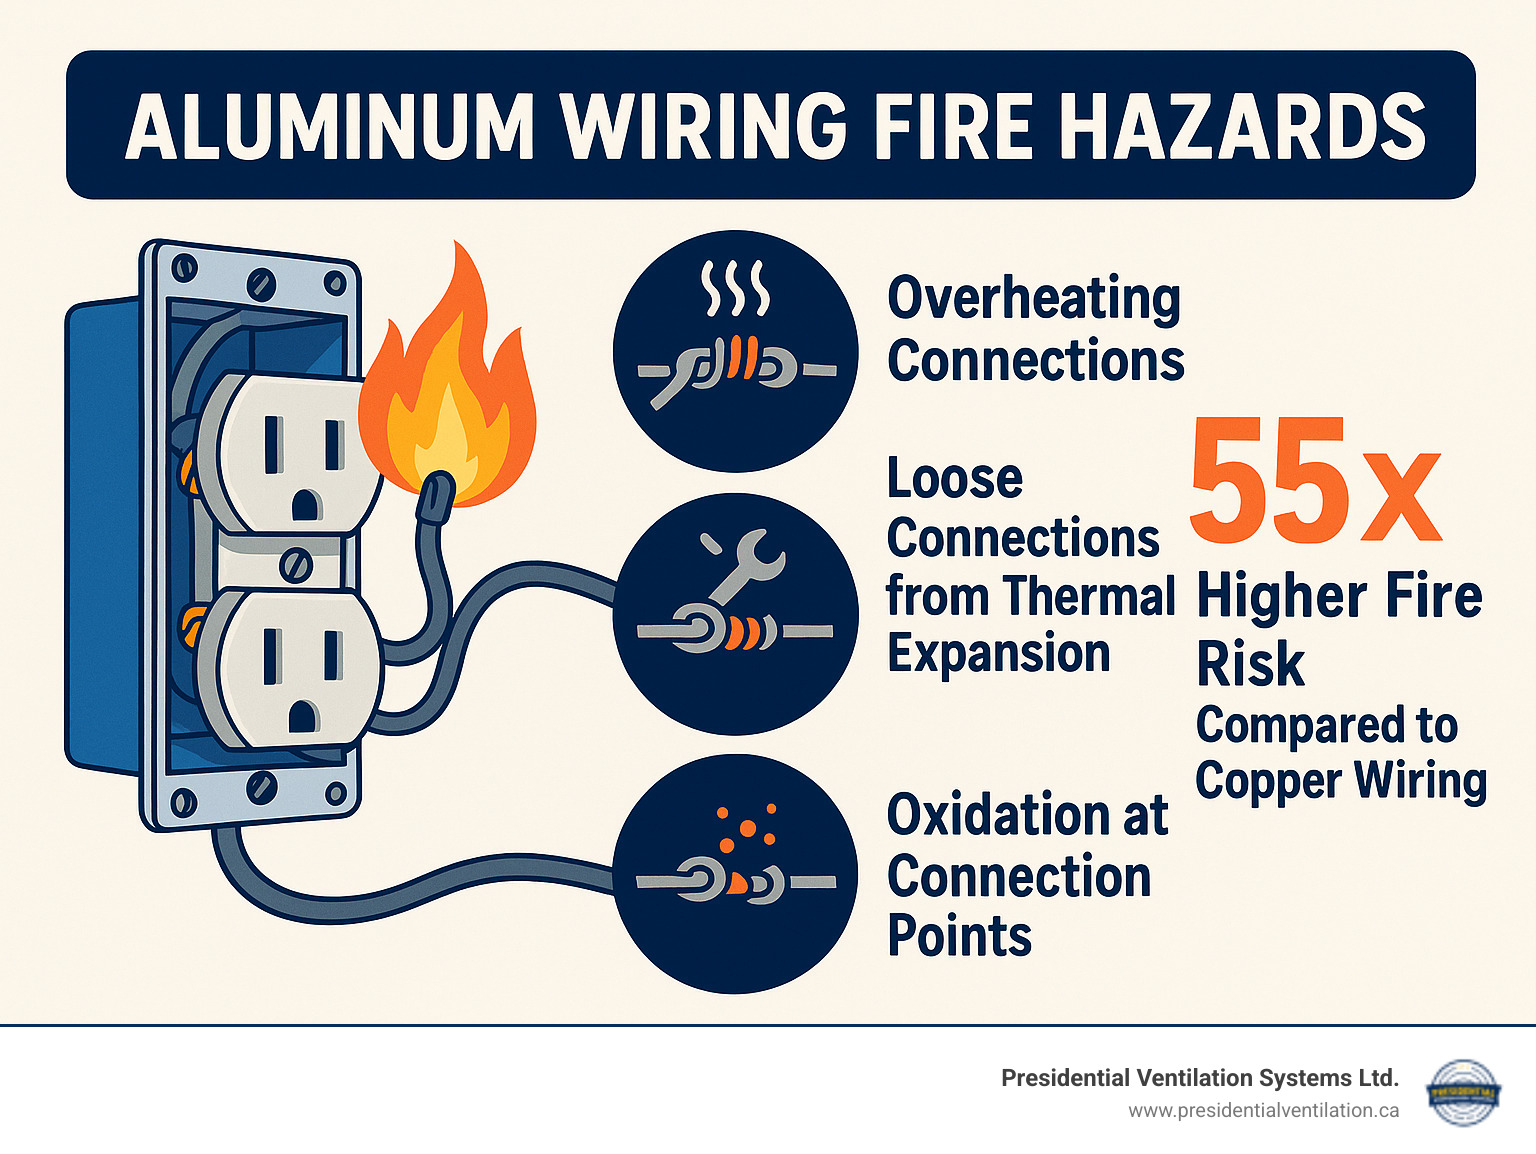
If your Nova Scotia home was built between 1965 and 1973, a hidden danger could be lurking in your walls. Homes with aluminum wire from this era are 55 times more likely to develop fire hazard conditions than copper-wired homes. This isn't a minor issue; it can lead to scorching hot outlets, sparks, and charring around electrical connections.
A tragic 1974 house fire in Hampton Bays, New York, which claimed two lives, was directly linked to a faulty aluminum wire connection. This event spurred investigations by the U.S. Consumer Product Safety Commission into the widespread risks of aluminum branch circuit wiring.
So what makes aluminum so much more dangerous than copper? The problem lies in its inherent properties:
• Oxidation: When exposed to air, aluminum forms a resistive oxide layer that impedes electrical flow and generates excess heat.
• Higher Resistance & Thermal Expansion: Aluminum has higher electrical resistance than copper and expands and contracts more with temperature changes. These heating and cooling cycles cause connections to loosen over time.
• Malleability: Aluminum is a soft metal that can "flow" or deform under the pressure of a screw terminal, leading to a loose connection over months or years.
• Galvanic Corrosion: When aluminum touches other metals like copper in the presence of moisture, an electrochemical reaction can degrade the connection, increasing resistance and heat.
These problems develop gradually and silently. A connection can deteriorate for decades, reaching dangerous temperatures long before any obvious warning signs appear.
The use of aluminum wiring was an economic decision made during the post-WWII building boom. As construction surged across North America, the demand for copper caused its price to skyrocket between 1965 and 1973. Builders sought a cheaper alternative, and single-strand solid aluminum conductors seemed like a viable solution. At the time, the long-term risks were unknown, and many homes in Nova Scotia were built using this material.
The primary danger is overheating at connection points like outlets, switches, and junction boxes. As connections loosen due to aluminum's properties, electrical resistance increases, generating extreme heat. This heat can melt the wire's plastic insulation, exposing live conductors that can ignite nearby materials like wood framing or insulation.
Another risk is arcing, where electricity jumps across small gaps in a loose connection, creating high-temperature sparks that can instantly start a fire. The CPSC defines "Fire Hazard Conditions" as situations with dangerously hot outlet covers, visible sparks, or charring—all direct results of failing aluminum connections. Because this deterioration is slow and often invisible, aluminum wiring remediation is a critical safety measure, not just an optional upgrade.
Determining if your home has aluminum wiring is a crucial first step. While a professional inspection is always recommended, you can look for some key clues yourself.
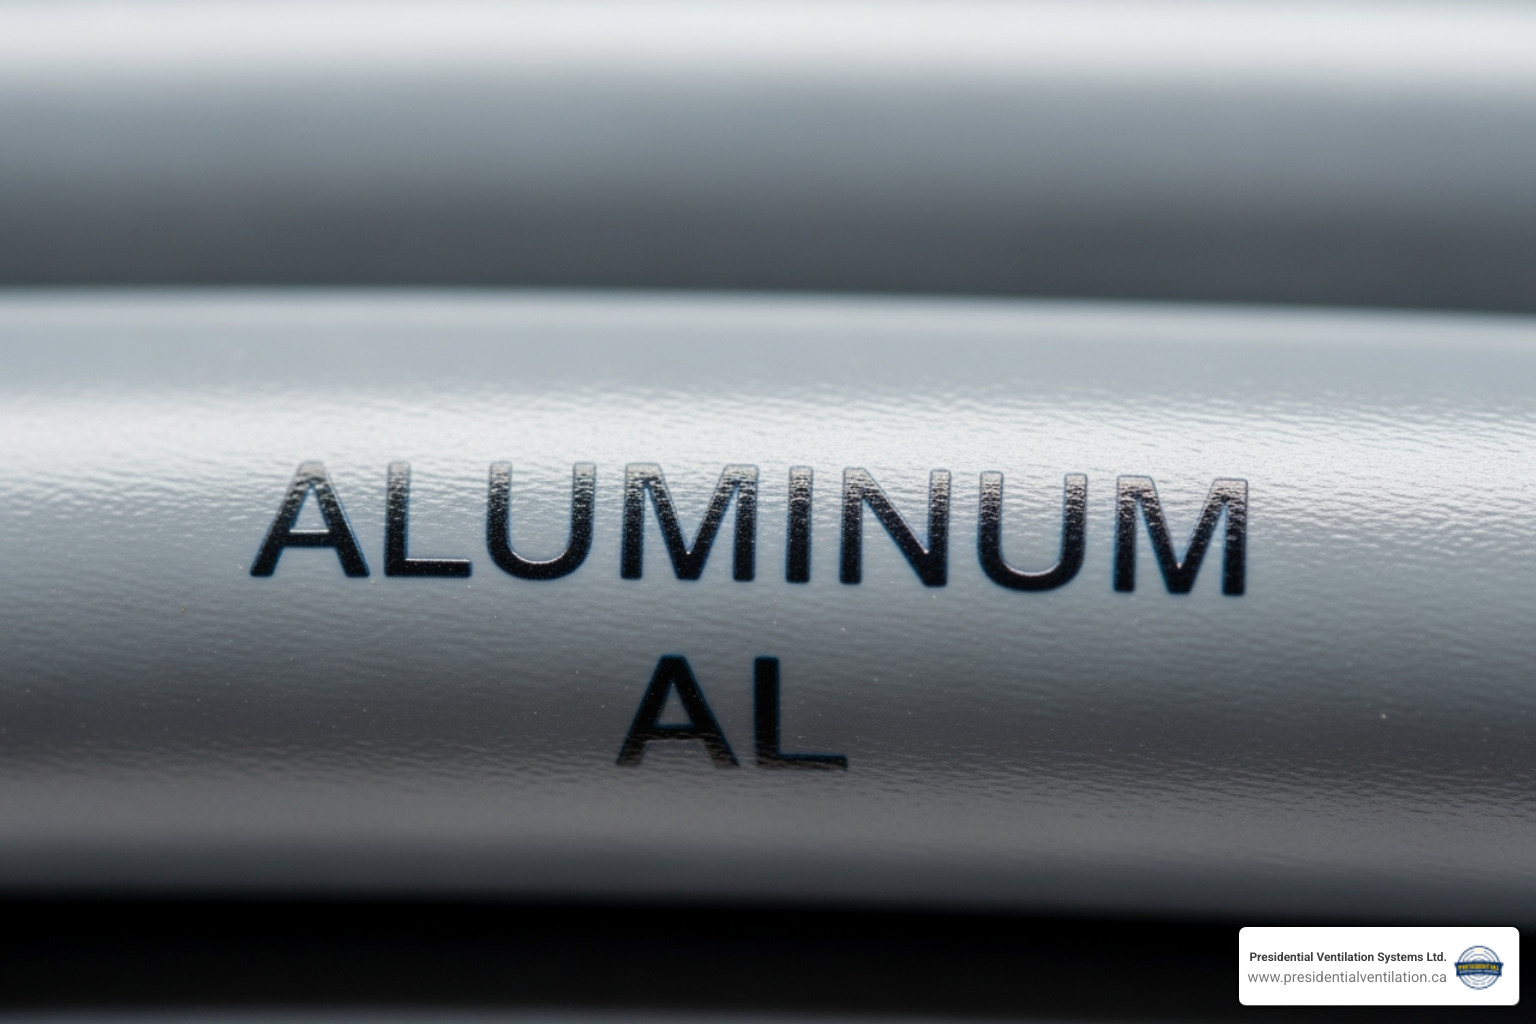
The most definitive way to identify aluminum wiring is by checking the cable markings in your basement, attic, or garage—anywhere cables are exposed. Look for the word "ALUMINUM" or the abbreviation "AL" printed on the plastic wire jacket. The wire itself will have a distinctive dull silver color, unlike copper's reddish-brown hue. Cables marked "CU-clad" or "Copper-clad" are different and not the primary concern.
Your home's age is another strong indicator. If it was built or had significant electrical work done between 1965 and 1973, there's a high probability it has aluminum wiring.
For a definitive answer, especially when wires are hidden, it's best to call a professional. Our team at Presidential Ventilation Systems Ltd. offers comprehensive Electrical Services that include thorough wiring inspections.
Your home may provide warning signs of failing aluminum connections. Be alert for these red flags:
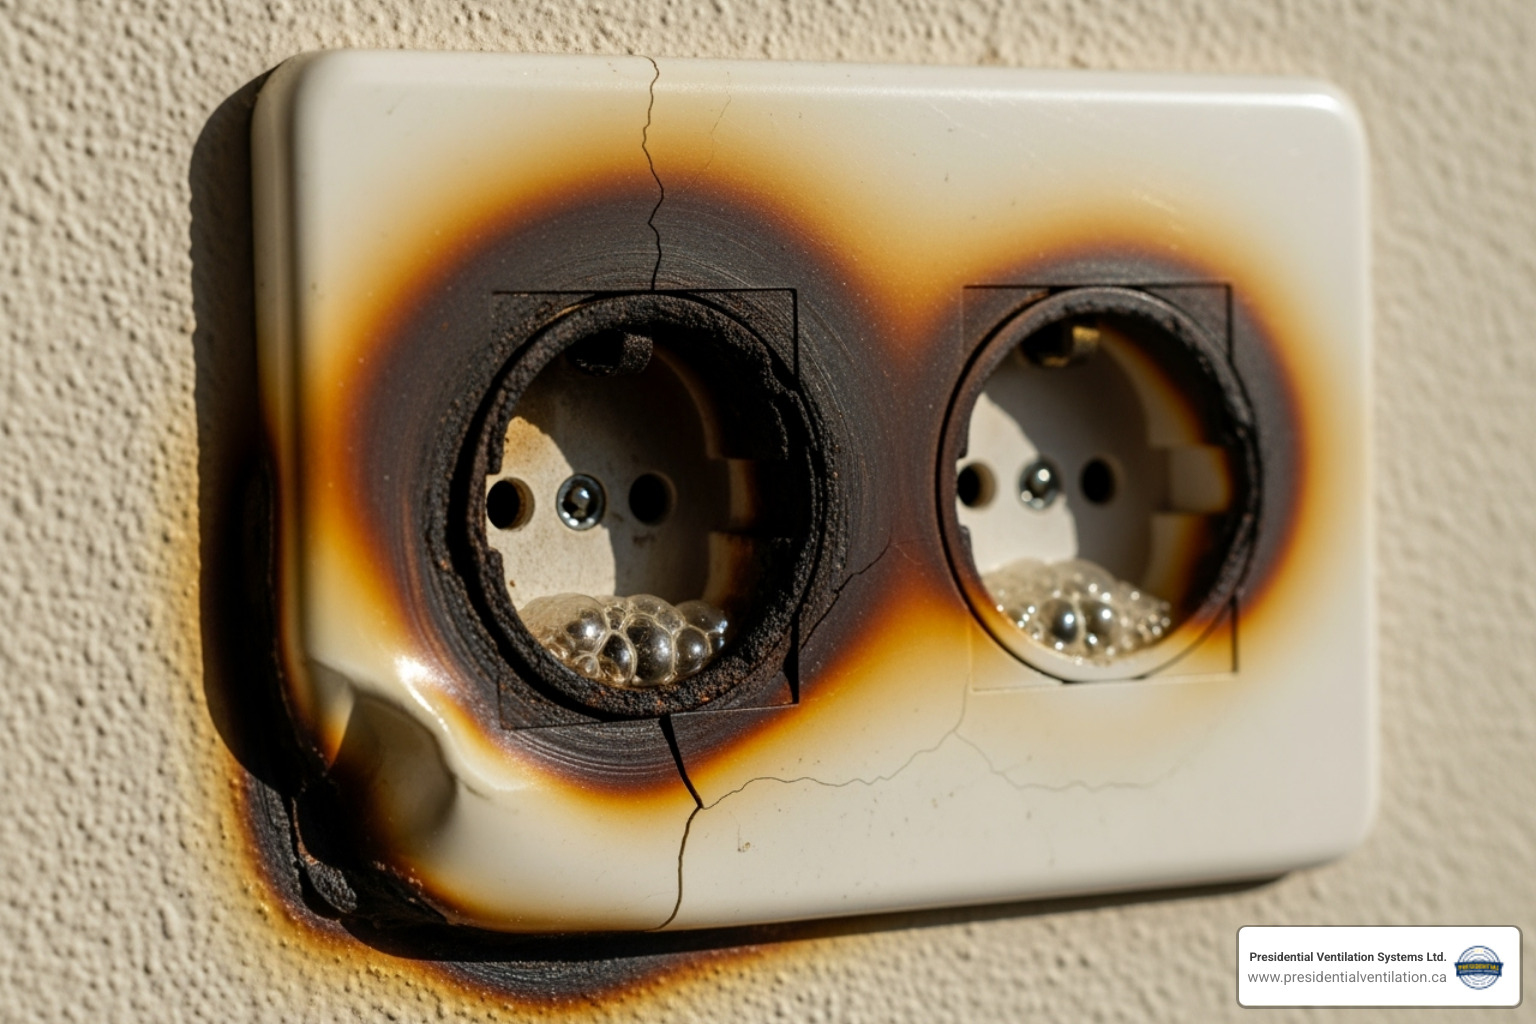
• Flickering Lights: Lights that dim or flicker, especially when a large appliance turns on, can indicate loose connections.
• Warm Faceplates: Outlet and switch covers should be cool to the touch. Warmth is a serious sign of overheating.
• Smell of Burning Plastic: An acrid, chemical smell near outlets or switches suggests that wire insulation is melting.
• Malfunctioning Outlets: Circuits that trip frequently or outlets that stop working can signal a failing connection.
• Discoloration: Any browning, black marks, or charring around outlets and switches means dangerous overheating has already occurred.
Because some connections can fail without any warning, proactive aluminum wiring remediation is essential. If you notice any of these signs, call a qualified electrician immediately and avoid DIY investigations.
When addressing aluminum wiring, we strictly follow the guidance of the U.S. Consumer Product Safety Commission (CPSC). After extensive research, the CPSC has approved three specific methods for permanent aluminum wiring remediation. These are not temporary fixes; they are engineered solutions designed to eliminate fire hazards by addressing every single connection point in the home. You can find the full details in the CPSC guidelines on repairing aluminum wiring, which our team follows precisely.
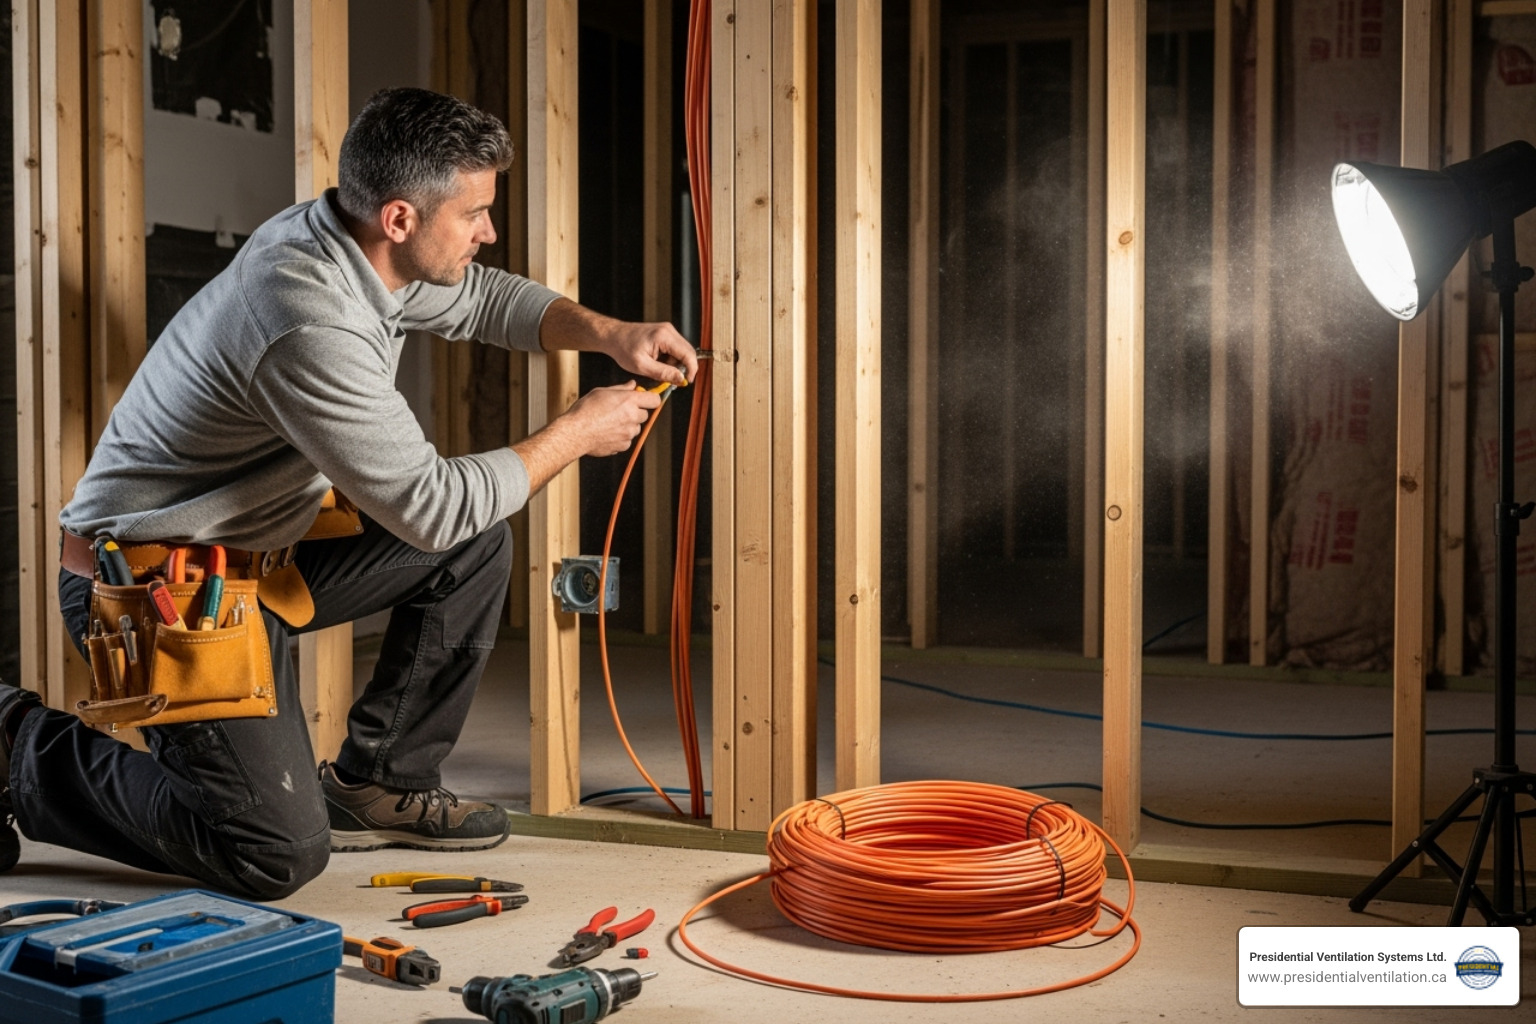
A complete copper rewire is the most comprehensive solution. It involves removing all old aluminum branch circuit wiring and replacing it with modern, reliable copper. This method offers the highest level of safety and peace of mind, bringing your entire electrical system up to current standards.
While it is the most expensive and invasive option—requiring access to walls and ceilings—it permanently eliminates the risk. Insurance companies favor this approach, and it can be a wise investment if you're already planning major renovations or require an Electrical Service Upgrade to handle modern power demands.
The COPALUM crimp method is a specialized technique that creates a permanent, gas-tight "cold weld" between aluminum and copper wires. A short copper "pigtail" is inserted alongside the aluminum wire into a special metal sleeve. A proprietary tool then applies over 10,000 pounds of pressure, fusing the metals together.
This process eliminates the problematic aluminum-to-device connection, as the new copper pigtail connects directly to the outlet or switch. This method has an outstanding track record of over 25 years of safe use. However, it must be performed by an electrician certified to use the specialized, manufacturer-controlled equipment.
AlumiConn connectors are another CPSC-approved solution. These devices use a setscrew design to secure aluminum and copper wires in separate ports. The key to a safe installation is using a calibrated torque screwdriver to tighten each screw to the manufacturer's exact specifications, preventing a connection that is too loose or too tight.
AlumiConn connectors are more accessible than COPALUM as they don't require the same specialized crimping tool. Their main drawback is their size; they are bulkier and can be challenging to fit into smaller, older electrical boxes. Despite having less field history than COPALUM, AlumiConn is rigorously tested and fully approved by the CPSC as a permanent repair.
FeatureComplete Home Rewire (Copper)COPALUM CrimpAlumiConn ConnectorEffectivenessMost effective; eliminates all aluminum wiringHighly effective; permanent, gas-tight connectionEffective; CPSC-acceptable permanent connectionCost ImplicationsHighest initial costMid-range cost (per connection)Mid-range cost (per connection)InvasivenessMost invasive; requires opening walls/ceilingsLeast invasive; confined to device boxesLeast invasive; confined to device boxesTime to CompleteLongest (days to weeks)Moderate (hours to days)Moderate (hours to days)Long-Term ReliabilityExcellent; new copper systemExcellent; 25+ year track recordGood; CPSC-approvedInsurance AcceptanceBest acceptanceWidely acceptedGenerally acceptedSpecial RequirementsPotential for cosmetic repairsRequires certified electrician & specialized toolRequires qualified electrician & torque screwdriverSpace in BoxN/AMinimalModerate (can be bulky)
It's critical to avoid dangerous shortcuts that can worsen the problem. The CPSC has found the following methods to be unsafe:
• Pigtailing with standard twist-on wire nuts: Using regular hardware store wire nuts to connect aluminum and copper wires is extremely dangerous. CPSC testing shows these connections can overheat even more than the original faulty ones.
• CO/ALR devices: While these special outlets and switches are better than standard ones, the CPSC considers them an incomplete repair. They don't address all connection types and still rely on a direct aluminum connection.
• Ignoring the problem: Aluminum wire connections degrade over time; they do not get better. Waiting only increases the risk.
• DIY repairs: The CPSC explicitly warns homeowners, "DO NOT TRY TO DO IT YOURSELF." Working with aluminum wiring requires specialized knowledge and tools to be done safely.
For your family's safety, aluminum wiring remediation must be performed by a qualified professional using one of the three CPSC-approved methods.
Addressing aluminum wiring remediation involves more than just the physical repairs; it has significant implications for your homeowner's insurance, budget, and peace of mind.
Insurance companies are well aware of the fire risks associated with aluminum wiring, which directly impacts your ability to get and keep coverage. Many insurers will refuse to write new policies for homes with un-remediated aluminum wiring. Others may offer coverage but require that CPSC-approved remediation be completed within a short timeframe as a condition of the policy.
If you can find coverage, expect increased premiums. There is also a policy cancellation risk if the wiring is finded after your policy is in effect. The best approach is transparency. Discuss the situation with your insurance provider upfront. Most will work with you if you commit to professional remediation, but they will require documentation from a licensed electrician proving the work was done correctly using an approved method like COPALUM or AlumiConn.
The cost of aluminum wiring remediation is an investment in your home's safety. The final price depends on several factors:
• Home size and complexity: The total number of outlets, switches, and junction boxes that need remediation is the primary cost driver for per-connection methods like COPALUM and AlumiConn.
• Accessibility: Wiring in unfinished basements or attics is easier and less costly to access than wiring hidden behind finished walls.
• Chosen Method: A complete home rewire is the most expensive option, while per-connection methods have a lower upfront cost but can add up in larger homes.
Older homes may also need other updates, such as a new panel. The Breaker Panel Upgrade Cost could be part of a larger modernization project. We provide detailed quotes only after a thorough on-site inspection, as every home is unique.
Aluminum wiring remediation is not a DIY project. The risks are too high, and the work requires specialized training, tools, and experience.
A qualified electrician brings several non-negotiable benefits:
• Specialized Training: Professionals are trained in the specific hazards of aluminum and certified in CPSC-approved methods like COPALUM.
• Safety and Code Compliance: They follow strict safety protocols and ensure all work meets current electrical codes, which is essential for passing inspections and satisfying insurance requirements.
• Proper Tools: Remediation requires specialized equipment, from the high-pressure COPALUM crimper to calibrated torque screwdrivers for AlumiConn, to ensure a safe and lasting repair.
• Liability and Peace of Mind: Hiring a licensed professional provides documentation for your insurer and the confidence that the job was done right, protecting your family and your investment. Our team's experience with complex jobs, including Commercial Electrical Repairs, ensures we can handle any residential challenge.
Homeowners in Nova Scotia often have questions and concerns when they find their home may have aluminum wiring. Here are answers to the most common ones.
No, aluminum wiring is not illegal in Nova Scotia or anywhere else in Canada. Homes wired with aluminum in the 1960s and 1970s were built to the electrical codes of that era and are "grandfathered in."
However, "legal" does not mean "safe" by today's standards. The material is universally recognized by safety organizations as a significant fire hazard due to its properties that lead to connection degradation. While you are not legally required to replace it, aluminum wiring remediation is strongly recommended for safety. Any new electrical work or renovations in your home must use copper wiring to meet current codes.
This is a critical question, as the insurance landscape for homes with aluminum wiring is challenging. Policies vary greatly between providers, but the trend is toward caution. Many insurers will refuse to issue new policies for homes with un-remediated aluminum wiring. Others may provide coverage contingent on you completing CPSC-approved remediation within a short period (e.g., 30-60 days), requiring proof from a qualified electrician.
Even with an existing policy, you are not necessarily safe, as some companies may cancel coverage if they find the wiring later. The best course of action is to be transparent with your insurer. Discuss your findy and your plans for remediation to understand their specific requirements and avoid future coverage issues.
Cost is a major factor, but it's best viewed as an investment in safety. The final price varies significantly based on your home's specific situation. For methods like COPALUM or AlumiConn, the cost is typically calculated per connection point (every outlet, switch, light fixture, etc.). The total depends on the number of these points in your home.
A complete home rewire is the most expensive option but provides the ultimate peace of mind by eliminating the problem entirely. Factors influencing the cost include your home's size, the accessibility of the wiring, and your location in Nova Scotia.
The only way to get an accurate price is to schedule a professional inspection. Our team can assess your home, count the connections, and provide a detailed quote for the most suitable remediation method. This same commitment to quality assessment applies to our Commercial Electrical Repairs.
After learning about the serious risks of aluminum wiring, it's clear that aluminum wiring remediation is a critical safety priority. With homes being 55 times more likely to experience dangerous fire conditions, and the memory of tragedies like the Hampton Bays fire, the statistics are too significant to ignore.
Fortunately, proven solutions exist. Whether you opt for a complete copper rewire, the time-tested COPALUM crimp method, or the reliable AlumiConn connector approach, you can permanently eliminate the hazard. It is vital to avoid ineffective "quick fixes" like standard wire nuts, which can make the situation even more dangerous.
Taking action provides more than just fire safety. It improves your ability to get and keep homeowner's insurance, can increase your property value, and delivers invaluable peace of mind.
At Presidential Ventilation Systems Ltd., we have been ensuring the safety of Nova Scotia homes for over 30 years. Our electricians are specifically trained in CPSC-approved remediation methods. We serve communities including Halifax, Dartmouth, Bedford, Kentville, and Truro, and we believe every family deserves to feel secure in their home.
Don't wait for a warning sign. Contact us for electrical services in Halifax, NS today to schedule an inspection and discuss how we can make your home safer. When it comes to your family's safety, the time to act is now.


Aluminum wiring remediation is the process of addressing the serious fire hazards posed by single-strand aluminum wiring installed in many homes between 1965 and 1973. The U.S. Consumer Product Safety Commission (CPSC) has found that these homes are 55 times more likely to have connections reach dangerous conditions than homes wired with copper.
The danger isn't the wire itself, but what happens at connection points. Aluminum expands, contracts, and oxidizes differently than copper, causing connections at outlets and switches to loosen over time. This can lead to overheating, arcing, and devastating fires, like one in 1974 that was traced to a faulty aluminum wire connection.
Fortunately, these hazards can be permanently eliminated. The CPSC approves three main methods for remediation:
• Complete Rewire: Replacing all aluminum wire with copper.
• COPALUM Connectors: A specialized crimp creating a permanent "cold weld" between aluminum and copper wires.
• AlumiConn Connectors: A setscrew connector that safely joins aluminum and copper wires.
Each method, when performed by a qualified electrician, can make your home safe.
If your Nova Scotia home was built between 1965 and 1973, a hidden danger could be lurking in your walls. Homes with aluminum wire from this era are 55 times more likely to develop fire hazard conditions than copper-wired homes. This isn't a minor issue; it can lead to scorching hot outlets, sparks, and charring around electrical connections.
A tragic 1974 house fire in Hampton Bays, New York, which claimed two lives, was directly linked to a faulty aluminum wire connection. This event spurred investigations by the U.S. Consumer Product Safety Commission into the widespread risks of aluminum branch circuit wiring.
So what makes aluminum so much more dangerous than copper? The problem lies in its inherent properties:
• Oxidation: When exposed to air, aluminum forms a resistive oxide layer that impedes electrical flow and generates excess heat.
• Higher Resistance & Thermal Expansion: Aluminum has higher electrical resistance than copper and expands and contracts more with temperature changes. These heating and cooling cycles cause connections to loosen over time.
• Malleability: Aluminum is a soft metal that can "flow" or deform under the pressure of a screw terminal, leading to a loose connection over months or years.
• Galvanic Corrosion: When aluminum touches other metals like copper in the presence of moisture, an electrochemical reaction can degrade the connection, increasing resistance and heat.
These problems develop gradually and silently. A connection can deteriorate for decades, reaching dangerous temperatures long before any obvious warning signs appear.
The use of aluminum wiring was an economic decision made during the post-WWII building boom. As construction surged across North America, the demand for copper caused its price to skyrocket between 1965 and 1973. Builders sought a cheaper alternative, and single-strand solid aluminum conductors seemed like a viable solution. At the time, the long-term risks were unknown, and many homes in Nova Scotia were built using this material.
The primary danger is overheating at connection points like outlets, switches, and junction boxes. As connections loosen due to aluminum's properties, electrical resistance increases, generating extreme heat. This heat can melt the wire's plastic insulation, exposing live conductors that can ignite nearby materials like wood framing or insulation.
Another risk is arcing, where electricity jumps across small gaps in a loose connection, creating high-temperature sparks that can instantly start a fire. The CPSC defines "Fire Hazard Conditions" as situations with dangerously hot outlet covers, visible sparks, or charring—all direct results of failing aluminum connections. Because this deterioration is slow and often invisible, aluminum wiring remediation is a critical safety measure, not just an optional upgrade.
Determining if your home has aluminum wiring is a crucial first step. While a professional inspection is always recommended, you can look for some key clues yourself.
The most definitive way to identify aluminum wiring is by checking the cable markings in your basement, attic, or garage—anywhere cables are exposed. Look for the word "ALUMINUM" or the abbreviation "AL" printed on the plastic wire jacket. The wire itself will have a distinctive dull silver color, unlike copper's reddish-brown hue. Cables marked "CU-clad" or "Copper-clad" are different and not the primary concern.
Your home's age is another strong indicator. If it was built or had significant electrical work done between 1965 and 1973, there's a high probability it has aluminum wiring.
For a definitive answer, especially when wires are hidden, it's best to call a professional. Our team at Presidential Ventilation Systems Ltd. offers comprehensive Electrical Services that include thorough wiring inspections.
Your home may provide warning signs of failing aluminum connections. Be alert for these red flags:
• Flickering Lights: Lights that dim or flicker, especially when a large appliance turns on, can indicate loose connections.
• Warm Faceplates: Outlet and switch covers should be cool to the touch. Warmth is a serious sign of overheating.
• Smell of Burning Plastic: An acrid, chemical smell near outlets or switches suggests that wire insulation is melting.
• Malfunctioning Outlets: Circuits that trip frequently or outlets that stop working can signal a failing connection.
• Discoloration: Any browning, black marks, or charring around outlets and switches means dangerous overheating has already occurred.
Because some connections can fail without any warning, proactive aluminum wiring remediation is essential. If you notice any of these signs, call a qualified electrician immediately and avoid DIY investigations.
When addressing aluminum wiring, we strictly follow the guidance of the U.S. Consumer Product Safety Commission (CPSC). After extensive research, the CPSC has approved three specific methods for permanent aluminum wiring remediation. These are not temporary fixes; they are engineered solutions designed to eliminate fire hazards by addressing every single connection point in the home. You can find the full details in the CPSC guidelines on repairing aluminum wiring, which our team follows precisely.
A complete copper rewire is the most comprehensive solution. It involves removing all old aluminum branch circuit wiring and replacing it with modern, reliable copper. This method offers the highest level of safety and peace of mind, bringing your entire electrical system up to current standards.
While it is the most expensive and invasive option—requiring access to walls and ceilings—it permanently eliminates the risk. Insurance companies favor this approach, and it can be a wise investment if you're already planning major renovations or require an Electrical Service Upgrade to handle modern power demands.
The COPALUM crimp method is a specialized technique that creates a permanent, gas-tight "cold weld" between aluminum and copper wires. A short copper "pigtail" is inserted alongside the aluminum wire into a special metal sleeve. A proprietary tool then applies over 10,000 pounds of pressure, fusing the metals together.
This process eliminates the problematic aluminum-to-device connection, as the new copper pigtail connects directly to the outlet or switch. This method has an outstanding track record of over 25 years of safe use. However, it must be performed by an electrician certified to use the specialized, manufacturer-controlled equipment.
AlumiConn connectors are another CPSC-approved solution. These devices use a setscrew design to secure aluminum and copper wires in separate ports. The key to a safe installation is using a calibrated torque screwdriver to tighten each screw to the manufacturer's exact specifications, preventing a connection that is too loose or too tight.
AlumiConn connectors are more accessible than COPALUM as they don't require the same specialized crimping tool. Their main drawback is their size; they are bulkier and can be challenging to fit into smaller, older electrical boxes. Despite having less field history than COPALUM, AlumiConn is rigorously tested and fully approved by the CPSC as a permanent repair.
FeatureComplete Home Rewire (Copper)COPALUM CrimpAlumiConn ConnectorEffectivenessMost effective; eliminates all aluminum wiringHighly effective; permanent, gas-tight connectionEffective; CPSC-acceptable permanent connectionCost ImplicationsHighest initial costMid-range cost (per connection)Mid-range cost (per connection)InvasivenessMost invasive; requires opening walls/ceilingsLeast invasive; confined to device boxesLeast invasive; confined to device boxesTime to CompleteLongest (days to weeks)Moderate (hours to days)Moderate (hours to days)Long-Term ReliabilityExcellent; new copper systemExcellent; 25+ year track recordGood; CPSC-approvedInsurance AcceptanceBest acceptanceWidely acceptedGenerally acceptedSpecial RequirementsPotential for cosmetic repairsRequires certified electrician & specialized toolRequires qualified electrician & torque screwdriverSpace in BoxN/AMinimalModerate (can be bulky)
It's critical to avoid dangerous shortcuts that can worsen the problem. The CPSC has found the following methods to be unsafe:
• Pigtailing with standard twist-on wire nuts: Using regular hardware store wire nuts to connect aluminum and copper wires is extremely dangerous. CPSC testing shows these connections can overheat even more than the original faulty ones.
• CO/ALR devices: While these special outlets and switches are better than standard ones, the CPSC considers them an incomplete repair. They don't address all connection types and still rely on a direct aluminum connection.
• Ignoring the problem: Aluminum wire connections degrade over time; they do not get better. Waiting only increases the risk.
• DIY repairs: The CPSC explicitly warns homeowners, "DO NOT TRY TO DO IT YOURSELF." Working with aluminum wiring requires specialized knowledge and tools to be done safely.
For your family's safety, aluminum wiring remediation must be performed by a qualified professional using one of the three CPSC-approved methods.
Addressing aluminum wiring remediation involves more than just the physical repairs; it has significant implications for your homeowner's insurance, budget, and peace of mind.
Insurance companies are well aware of the fire risks associated with aluminum wiring, which directly impacts your ability to get and keep coverage. Many insurers will refuse to write new policies for homes with un-remediated aluminum wiring. Others may offer coverage but require that CPSC-approved remediation be completed within a short timeframe as a condition of the policy.
If you can find coverage, expect increased premiums. There is also a policy cancellation risk if the wiring is finded after your policy is in effect. The best approach is transparency. Discuss the situation with your insurance provider upfront. Most will work with you if you commit to professional remediation, but they will require documentation from a licensed electrician proving the work was done correctly using an approved method like COPALUM or AlumiConn.
The cost of aluminum wiring remediation is an investment in your home's safety. The final price depends on several factors:
• Home size and complexity: The total number of outlets, switches, and junction boxes that need remediation is the primary cost driver for per-connection methods like COPALUM and AlumiConn.
• Accessibility: Wiring in unfinished basements or attics is easier and less costly to access than wiring hidden behind finished walls.
• Chosen Method: A complete home rewire is the most expensive option, while per-connection methods have a lower upfront cost but can add up in larger homes.
Older homes may also need other updates, such as a new panel. The Breaker Panel Upgrade Cost could be part of a larger modernization project. We provide detailed quotes only after a thorough on-site inspection, as every home is unique.
Aluminum wiring remediation is not a DIY project. The risks are too high, and the work requires specialized training, tools, and experience.
A qualified electrician brings several non-negotiable benefits:
• Specialized Training: Professionals are trained in the specific hazards of aluminum and certified in CPSC-approved methods like COPALUM.
• Safety and Code Compliance: They follow strict safety protocols and ensure all work meets current electrical codes, which is essential for passing inspections and satisfying insurance requirements.
• Proper Tools: Remediation requires specialized equipment, from the high-pressure COPALUM crimper to calibrated torque screwdrivers for AlumiConn, to ensure a safe and lasting repair.
• Liability and Peace of Mind: Hiring a licensed professional provides documentation for your insurer and the confidence that the job was done right, protecting your family and your investment. Our team's experience with complex jobs, including Commercial Electrical Repairs, ensures we can handle any residential challenge.
Homeowners in Nova Scotia often have questions and concerns when they find their home may have aluminum wiring. Here are answers to the most common ones.
No, aluminum wiring is not illegal in Nova Scotia or anywhere else in Canada. Homes wired with aluminum in the 1960s and 1970s were built to the electrical codes of that era and are "grandfathered in."
However, "legal" does not mean "safe" by today's standards. The material is universally recognized by safety organizations as a significant fire hazard due to its properties that lead to connection degradation. While you are not legally required to replace it, aluminum wiring remediation is strongly recommended for safety. Any new electrical work or renovations in your home must use copper wiring to meet current codes.
This is a critical question, as the insurance landscape for homes with aluminum wiring is challenging. Policies vary greatly between providers, but the trend is toward caution. Many insurers will refuse to issue new policies for homes with un-remediated aluminum wiring. Others may provide coverage contingent on you completing CPSC-approved remediation within a short period (e.g., 30-60 days), requiring proof from a qualified electrician.
Even with an existing policy, you are not necessarily safe, as some companies may cancel coverage if they find the wiring later. The best course of action is to be transparent with your insurer. Discuss your findy and your plans for remediation to understand their specific requirements and avoid future coverage issues.
Cost is a major factor, but it's best viewed as an investment in safety. The final price varies significantly based on your home's specific situation. For methods like COPALUM or AlumiConn, the cost is typically calculated per connection point (every outlet, switch, light fixture, etc.). The total depends on the number of these points in your home.
A complete home rewire is the most expensive option but provides the ultimate peace of mind by eliminating the problem entirely. Factors influencing the cost include your home's size, the accessibility of the wiring, and your location in Nova Scotia.
The only way to get an accurate price is to schedule a professional inspection. Our team can assess your home, count the connections, and provide a detailed quote for the most suitable remediation method. This same commitment to quality assessment applies to our Commercial Electrical Repairs.
After learning about the serious risks of aluminum wiring, it's clear that aluminum wiring remediation is a critical safety priority. With homes being 55 times more likely to experience dangerous fire conditions, and the memory of tragedies like the Hampton Bays fire, the statistics are too significant to ignore.
Fortunately, proven solutions exist. Whether you opt for a complete copper rewire, the time-tested COPALUM crimp method, or the reliable AlumiConn connector approach, you can permanently eliminate the hazard. It is vital to avoid ineffective "quick fixes" like standard wire nuts, which can make the situation even more dangerous.
Taking action provides more than just fire safety. It improves your ability to get and keep homeowner's insurance, can increase your property value, and delivers invaluable peace of mind.
At Presidential Ventilation Systems Ltd., we have been ensuring the safety of Nova Scotia homes for over 30 years. Our electricians are specifically trained in CPSC-approved remediation methods. We serve communities including Halifax, Dartmouth, Bedford, Kentville, and Truro, and we believe every family deserves to feel secure in their home.
Don't wait for a warning sign. Contact us for electrical services in Halifax, NS today to schedule an inspection and discuss how we can make your home safer. When it comes to your family's safety, the time to act is now.

In our 30+ years serving Nova Scotia homeowners, we find that believing a modern electric system will deliver the exact same physical sensation as a combustion furnace is a common misconception. In fact, if you are transitioning from oil forced air to a central ducted heat pump: airflow considerations are just as important as the anticipated energy savings. Many homeowners expect the new system to blast intensely hot air just like their old furnace did. When they place a hand over the vent and feel a milder breeze, they immediately worry that the new equipment is failing to heat the house.
This dramatic sensory difference requires a slight adjustment in how you perceive indoor comfort. The reality is that your new system is working perfectly, but it uses an entirely different method of heat transfer. Understanding how airflow volume and supply register temperatures change before you commit to a conversion is the single most important step in setting the right expectations for your home.
Explore our heat pumps and discover how our experienced team guides you through every step of this mechanical and sensory transition.
To fully appreciate the upgrade, you have to look at the mechanics behind the air coming out of your vents. Traditional combustion systems rely on extreme heat and short bursts, whereas modern electric heat transfer relies on consistent, steady airflow. This fundamental shift explains why custom ductwork adaptation becomes such a critical part of the installation process. If you force a high-volume system to breathe through ductwork designed for low-volume combustion, you will never achieve the comfort you expect.
The primary reason heat pump air feels different than oil heat comes down to the fundamental difference between creating heat through combustion and moving heat through refrigeration. An oil furnace burns fossil fuels at extremely high temperatures. As a result, the air it forces through your ductwork typically reaches supply register temperatures between 120F and 140F. This is a high-heat, low-volume approach. The air is so hot that it quickly raises the room temperature, allowing the furnace to shut off after a relatively short cycle.
Modern ducted heat pump systems operate on a completely different principle. Instead of burning fuel, they extract ambient heat from the outside air and transfer it indoors. Because of this highly efficient process, the air delivered to your supply registers generally sits between 90F and 105F. This is a lower-heat, high-volume approach.
Here is where human biology plays tricks on you. Your normal body temperature is 98.6F. When 90F air blows directly onto your skin, it is literally cooler than your body temperature, so it feels "cool" to the touch. However, that 90F air is still significantly warmer than your 70F thermostat set point. It is actively and efficiently heating the room, even if it does not feel hot against your hand.
• Supply Air Temperature — Traditional Oil Furnace: 120F - 140F — Modern Ducted Heat Pump: 90F - 105F
• Airflow Volume (CFM) — Traditional Oil Furnace: Lower volume, higher static pressure — Modern Ducted Heat Pump: Higher volume, requires larger ducts
• Operational Cycle — Traditional Oil Furnace: Short, intense bursts of heat — Modern Ducted Heat Pump: Long, continuous, steady operation
• Sensory Experience — Traditional Oil Furnace: Hot to the touch, noticeable temperature swings — Modern Ducted Heat Pump: Mild breeze, highly consistent room temperature
BTU (British Thermal Unit) delivery methods dictate how your home stays warm. Because an oil furnace delivers fewer cubic feet per minute (CFM) of very hot air, it achieves the required BTUs quickly. Because a heat pump delivers lower register temperatures, it must move a higher volume of air continuously to deliver those same BTUs and achieve the same ambient room temperature. This higher CFM requirement fundamentally changes the physical sensation of air moving through your vents, replacing the harsh blast of a furnace with a gentle, continuous circulation.

The problem: If you have lived with an oil furnace for years, you are intimately familiar with the "blast and chill" cycle. The thermostat calls for heat, the furnace ignites, and a rapid blast of intense heat floods the room. Within fifteen minutes, the house reaches the target temperature and the system shuts down abruptly. Over the next hour, the house slowly cools down. During the Nova Scotia winter heating season, this on/off cycling allows cold drafts and the damp, coastal chill to settle deep into the home's envelope before the next heating cycle kicks in.
The cause: Combustion systems are essentially oversized by design. They are built to overwhelm the cold quickly, rather than manage it steadily. This creates a rollercoaster effect in your indoor climate. You are often slightly too hot while the furnace is running, and slightly too cold right before it turns back on.
The solution: Our team at Presidential Ventilation Systems frequently hears from homeowners who are tired of this rollercoaster effect. Continuous, steady-state heat pump operation actively prevents this damp chill from settling into the home. Modern inverter-driven compressors do not just turn on and off; they ramp up and down like the accelerator pedal in a car. They supply a constant, gentle flow of warm air that matches the exact heat loss of your home in real-time. This maintains a perfectly even ambient temperature from floor to ceiling. The psychological adjustment for homeowners is realizing that a system running constantly is actually operating at peak efficiency, not struggling to keep up. It is working smarter, not harder, to keep the dampness at bay.
One of the most frequent questions we encounter involves ductwork compatibility. Many older homes were built with ductwork sized specifically for the low-volume, high-heat characteristics of an oil furnace. If you simply attach a high-efficiency heat pump to a restrictive, undersized duct system, you are going to encounter immediate problems.
Forcing high-volume heat pump air through undersized ducts is like trying to breathe through a drinking straw while running a marathon. It causes excessive static pressure, which leads to loud rushing noises at the vents, significantly reduced energy efficiency, and premature wear on the new blower motor. The equipment will struggle to deliver the correct volume of air, meaning some rooms will remain cold while the central unit works itself to death.
This is why custom duct transitions and modifications are almost always required to ensure proper static pressure and airflow. Never assume your existing ducts are instantly compatible. A professional assessment is strictly required to measure the existing ductwork's capacity against the new system's CFM requirements.
Our skilled Red Seal tradespeople see this exact scenario frequently across Mount Uniacke and the surrounding areas. During a major house renovation that was gutted to the studs, one local homeowner needed their old heat pump and oil furnace ducting completely replaced. Because our team handles sheet metal fabrication in-house, we designed and replaced all the ductwork to perfectly match the airflow requirements of their new top-of-the-line system. The new unit has been working flawlessly since the installation, proving the value of proper airflow design.
Off-the-shelf duct fittings often fail in retrofit scenarios because every older home has unique structural constraints. Relying on generic parts usually creates sharp angles and airflow bottlenecks. With over 30+ years of local HVAC and custom sheet-metal experience, our in-house fabrication ensures that old oil ducts are seamlessly and precisely adapted. We build the exact transition pieces required to smooth out the airflow, reducing static pressure and ensuring the system operates quietly and efficiently without relying on third-party subcontractors.
Moving from a fossil-fuel combustion appliance to a fully electric heating system fundamentally changes your home's electrical load. While you are focused on ductwork and airflow, it is crucial not to overlook the electrical panel upgrades that are often required during an oil-to-heat-pump conversion.
Older homes built during the peak of oil heating often have 100-amp electrical services. While 100 amps was plenty for running lights, appliances, and a small furnace fan, it is rarely enough to safely support a central heat pump system alongside backup electric heating elements.
Key electrical considerations during a conversion:
• Total load calculations: A fully electric home requires a comprehensive load calculation to ensure the main breaker will not trip during peak winter usage.
• Backup heating elements: Central ducted systems often include auxiliary electric heat strips for extreme cold snaps, which draw significant amperage and require dedicated high-capacity circuits.
• Panel capacity upgrades: Upgrading to a 200-amp service is frequently necessary to provide the safe, reliable power required for modern electric heating.
• Code compliance: All new electrical connections must meet current provincial safety codes, requiring licensed professionals to pull permits and complete the wiring.
With approximately 70 employees spanning multiple skilled trades, our team knows firsthand that upgrading from a forced air oil burner system often brings these unexpected electrical challenges to light. One recent customer experienced concerns regarding their electrical panel capacity during their central heat pump transition. Because we maintain multi-trade capabilities, our electrical staff stepped in immediately to resolve the panel concerns without delaying the project. The system works great, and the seamless coordination meant the homeowner did not have to juggle multiple contractors.
Proper equipment sizing is the linchpin of a successful conversion. You should never size a new electric system based solely on the square footage of your home, nor should you simply match the BTU output of your old oil furnace. Oil furnaces were historically oversized by default. If you install an oversized heat pump, it will short-cycle—turning on and off rapidly—which destroys its ability to dehumidify the air and ruins the continuous airflow comfort it was designed to provide.
A proper Manual J load calculation ensures the new system can deliver the correct volume of air without short-cycling. This calculation takes into account your home's insulation levels, window quality, layout, and regional climate data. Only a rigorous assessment guarantees that the equipment matches your actual heat loss.
High-quality equipment, such as Lennox ducted heat pumps, manages variable speeds to optimize continuous airflow. As a Daikin Comfort Pro and trusted Lennox installer, we know these advanced systems precisely modulate their output, delivering exactly the right amount of warm air to maintain your thermostat setting without wasting power.
It is also worth noting that various provincial and federal rebate programs may be available to help offset the costs of upgrading to high-efficiency equipment. However, program requirements and eligibility criteria change frequently. You should always confirm current rebate programs and your specific eligibility with Presidential Ventilation Systems during the assessment phase.
Your first winter without an oil furnace will be a distinctly different experience, but one that ultimately provides superior comfort. The most important thing to remember is that your home will feel different. You will notice fewer dramatic temperature swings and a much steadier, even warmth throughout the house.
During the peak of the Nova Scotia winter heating season, do not panic if the system runs for long periods—or even continuously. This is by design. Constant operation is how the system achieves its incredible energy efficiency, gently replacing the heat your home loses to the cold outside air. The air coming from the vents will feel milder, but the room itself will remain perfectly comfortable.
To keep this airflow optimal, regular maintenance is essential. Because the system moves a higher volume of air continuously, your air filters will capture more dust and debris than they did with your old furnace. Checking and replacing your filters regularly will protect the blower motor and ensure the static pressure remains balanced.
The initial sensory adjustment is entirely worth the long-term efficiency and comfort gains. If you are still exploring your options, reading up on the best ducted heat pumps for Halifax homes can provide additional insights into which systems perform best in our unique coastal climate.
A heat pump provides a milder, more consistent warmth compared to the intense, hot blast of an oil furnace. While an oil furnace delivers air at 120F to 140F, a heat pump delivers air between 90F and 105F. Because this supply temperature is slightly lower than your normal body temperature, the air may feel cool if it blows directly on your skin. However, this steady stream of milder air is highly efficient and perfectly capable of keeping your entire home at a comfortable 70F ambient temperature.
As our in-house sheet-metal fabricators will tell you, in most cases, existing oil ductwork must be modified or partially replaced to accommodate a heat pump. Oil furnaces operate with low-volume, high-heat airflow, meaning their ducts are often too small for modern electric systems. Heat pumps require a higher volume of continuous airflow (higher CFM) to heat the home effectively. Forcing this higher volume through undersized ducts causes loud rushing noises, poor efficiency, and excess static pressure, which is why custom sheet-metal transitions are usually required.
Your heat pump is designed to run continuously to maintain a steady, efficient temperature in your home. Unlike older combustion furnaces that blast heat and then shut off, modern variable-speed compressors ramp up and down to match your home's exact heat loss in real-time. Running constantly at a low speed uses significantly less electricity than constantly turning on and off, and it prevents cold drafts from settling into the house between cycles.
If your system is in heating mode, it may feel like it is blowing cool air because the 90F supply air is cooler than your 98.6F body temperature. This is a normal sensory difference when switching from oil heat. However, if the air is genuinely cold and the room temperature is dropping below your thermostat setting, the system may be in a temporary defrost cycle to remove ice from the outdoor unit, or it may require professional maintenance to check the refrigerant charge.
Many older homes require an electrical panel upgrade when transitioning from an oil furnace to a fully electric heating system. Oil furnaces use very little electricity, so a 100-amp service was historically sufficient. Central heat pumps, especially those equipped with auxiliary electric backup heating elements for extreme cold, draw significant amperage. Upgrading to a 200-amp service ensures your home can safely handle the increased electrical load without tripping the main breaker.
Understanding the sensory shift and the necessary mechanical requirements is the very first step toward a successful heating upgrade. Transitioning away from oil requires careful planning, from load calculations to ductwork adaptation and electrical panel upgrades. With 30+ years of local Nova Scotia HVAC, electrical, and custom sheet-metal experience, our multi-trade team of approximately 70 employees handles every aspect of the conversion seamlessly in-house.
You do not have to manage multiple contractors to achieve perfect indoor comfort. Contact Presidential Ventilation Systems today to request a free professional assessment and estimate, and let us design a customized heating solution that perfectly fits your home.

Your new commercial rooftop unit (RTU) has finally arrived, the 50-ton heavy-duty crane is positioned in the parking lot, and the mechanical installation crew is ready to work. Then, progress grinds to a complete halt. The electrical capacity on the roof does not match the new equipment requirements. Our commercial installation teams at Presidential Ventilation Systems frequently see this scenario play out during the busy fall changeover season. Coordinating Three-Phase Power Hookups for Commercial Rooftop Units in Dartmouth, NS, is frequently the most overlooked step in facility upgrades. This single oversight leads to severe logistical delays, wasted crane rental fees, and massive scheduling conflicts across different trades. As a facility manager, you face a critical decision: do you try to juggle multiple separate subcontractors, or do you hire a single multi-trade contractor to handle the entire project seamlessly? When you need comprehensive commercial HVAC and ventilation services, getting the electrical and mechanical sequence right the first time is exactly what keeps your project on schedule.
The primary frustration for property managers during a commercial HVAC installation is the siloed nature of the traditional construction industry. Usually, an HVAC technician installs the physical unit, while a completely separate electrical contractor handles the high-voltage wiring. If these two entities do not communicate perfectly during the planning phase, you end up with a severe capacity mismatch on installation day. The mechanical team assumes the electrician pulled the right permits and installed the correct disconnects, while the electrician assumes the HVAC team ordered equipment that matches the existing building load.
This disconnect creates a logistical nightmare. When a crane is sitting idle in Dartmouth commercial districts like Burnside or Dartmouth Crossing, you are paying hefty hourly equipment fees for machinery that isn't moving. If the electrical hookup is wrong, the mechanical team cannot commission the unit. They have to leave the site, wait for the electrician to return, upgrade the wiring, and then schedule a second mechanical visit to finalize the startup. These trade silos cause massive scheduling overruns and leave your building without proper climate control for days or even weeks longer than anticipated.
Common Crane Day Bottlenecks Include:
• Mismatched voltage requirements: The new unit requires 460V, but the existing rooftop disconnect only supplies 208V.
• Missing electrical permits: The mechanical permit was pulled, but the electrical service upgrade request was forgotten.
• Physical interference: The new sheet metal curb blocks the existing electrical conduit pathways, requiring immediate on-site rerouting.
• Communication breakdowns: The electrician is scheduled for Tuesday, but the crane and HVAC team arrive on Monday due to weather shifts.
Establishing a unified, multi-trade approach eliminates these blind spots. When the people designing the ductwork, installing the mechanical components, and wiring the high-voltage connections all work for the same company, the hidden bottlenecks disappear.
To understand why electrical coordination is so critical, you have to understand the fundamental difference between standard residential power and commercial power delivery. Most homes and light commercial spaces operate on single-phase power. This system uses one primary alternating current to deliver electricity. While sufficient for smaller appliances, single-phase power experiences brief moments where the voltage drops to zero during its cycle. For heavy-duty commercial loads, like a 15-ton or 25-ton RTU, this fluctuation creates inefficiency and heat.
Three-phase power, on the other hand, uses three distinct alternating currents, each slightly offset in time. As one current drops, another is peaking. This provides a constant, smooth, and uninterrupted flow of electricity. For heavy-duty commercial rooftop units, this smooth power delivery is not just a preference; it is an engineering requirement. It reduces the mechanical strain on massive compressor motors and massive blower fans, allowing them to start up easier and run cooler.
• Power Delivery — Single-Phase Power: Fluctuating (drops to zero in cycles) — Three-Phase Power: Continuous and smooth
• Common Voltage — Single-Phase Power: 120V / 240V — Three-Phase Power: 208V / 460V / 575V
• Motor Efficiency — Single-Phase Power: Lower efficiency, requires start capacitors — Three-Phase Power: High efficiency, self-starting
• Equipment Wear — Single-Phase Power: Higher vibration and heat generation — Three-Phase Power: Lower vibration, longer lifespan
• Typical Application — Single-Phase Power: Residential and light commercial — Three-Phase Power: Heavy-duty commercial RTUs and industrial
Major commercial brands like Daikin and Lennox engineer their high-capacity RTUs specifically for three-phase power. Depending on the size of your facility, these units typically require 208-volt, 460-volt, or even 575-volt three-phase connections. If your building currently only has single-phase service, or if your existing three-phase service lacks the necessary amperage to support a modern, high-efficiency unit, you will need a substantial electrical upgrade before the new HVAC equipment can even be turned on. Our Red Seal electricians emphasize that proper electrical sizing is the foundation that ensures the longevity of your commercial heating services and cooling operations.
The operational lifespan of a commercial RTU is directly tied to the quality of the electricity feeding it. In our 30+ years serving Nova Scotia, our HVAC technicians consistently see that units running on properly balanced three-phase power outlast their single-phase counterparts. Here is why the electrical phase matters so much to the mechanical components:
• Reduced electrical phase imbalance: Three-phase motors do not require start capacitors or run capacitors, which are common failure points in single-phase systems. The power naturally rotates the motor.
• Lower operating temperatures for motor windings: Because the power delivery is continuous, the motor does not have to work as hard to maintain momentum, generating significantly less heat inside the compressor shell.
• Fewer premature mechanical failures: Smoother rotation means less vibration. Less vibration means less wear on bearings, belts, and mounting hardware over the unit's 15-to-20-year lifespan.
Upgrading the electrical capacity is only half the battle; protecting that high-voltage connection from the elements is equally important. In our experience servicing commercial rooftops across Dartmouth, we find that standard indoor electrical components fail rapidly when exposed to harsh rooftop environments. With Dartmouth's specific coastal maritime climate factors—high humidity, heavy salt air blowing in from the harbor, and aggressive winter temperatures that frequently dip below -15°C in February—improperly sealed rooftop electrical hookups will actively corrode in a matter of months.
Every commercial RTU requires a dedicated electrical disconnect switch mounted within sight of the unit. This allows technicians to safely cut power during maintenance or emergency repairs. However, you cannot use a standard metal electrical box on a Dartmouth rooftop. The local building codes and environmental realities necessitate NEMA 4X rated electrical enclosures. A NEMA 4X rating means the enclosure is completely watertight, dust-tight, and most importantly, highly resistant to corrosion. If a contractor installs a cheaper NEMA 3R box (which is only weather-resistant, not corrosion-resistant), the salt air will rapidly degrade the hinges, the internal contacts, and the copper wiring.
Furthermore, extreme winter weather cycling takes a massive toll on rooftop wiring conduits. When moisture penetrates a poorly sealed conduit fitting during a mild, rainy afternoon, it pools inside. When the temperature plummets overnight, that water freezes and expands, cracking the conduit and exposing the high-voltage wires to the elements. Heavy snow loads can also physically crush unsupported electrical runs across flat commercial roofs. Working with contractors who deeply understand Dartmouth commercial service areas ensures that your installation includes robust weatherproofing designed specifically for our coastal reality.
Protecting your investment requires meticulous attention to the exterior electrical details. A proper commercial installation addresses three main environmental threats:
• Combating salt-air corrosion on electrical contacts: Using specialized dielectric greases on connections and utilizing stainless steel or non-metallic polycarbonate enclosures to prevent rust.
• Preventing moisture ingress during freeze-thaw cycles: Utilizing liquid-tight flexible metal conduit (LFMC) with specialized compression fittings that will not loosen as the temperature swings from -15°C to +10°C during volatile spring thaw cycles.
• Securing conduits against high coastal winds: Using heavy-duty, UV-resistant rooftop conduit supports (often called block supports) that keep the wiring elevated above standing water and secure during intense Nor'easter storm systems that frequently hit Nova Scotia between November and March.
If your building lacks the required three-phase capacity for a new RTU, you cannot simply flip a switch. Our electrical division regularly coordinates with Nova Scotia Power (NSP), and we always advise clients that this administrative process must begin long before the HVAC equipment is ordered. Facility managers are often caught off guard by utility upgrade lead times, which can easily take 6 to 12 weeks depending on the neighborhood's grid infrastructure.
The process begins with a comprehensive load calculation. A licensed electrician must evaluate everything currently running in your building—lighting, computers, machinery, and existing HVAC—and add the specific electrical draw of the proposed new rooftop units. This calculation is submitted to NSP to prove that the grid infrastructure outside your building (the transformers and overhead lines) can handle the increased demand. If the local transformer is undersized, NSP will need to schedule a heavy infrastructure upgrade, which can add months to your project timeline.
This is why matching electrical hookup specs to commercial rooftop units early in the design phase is non-negotiable. If you order a 460V unit but NSP determines they can only supply 208V three-phase to your specific street without a massive infrastructure overhaul, you are stuck with incompatible equipment. Local electrical codes also dictate exactly where the new main service panels, meters, and rooftop disconnect switches must be placed, requiring careful architectural planning.
To prevent your HVAC project from stalling, the utility upgrade must run parallel to the equipment procurement. The standard sequence looks like this:
1. Verifying existing building load calculations: An in-house electrician assesses your current panels and compares them against the submittals for the new commercial RTU.
2. Submitting upgrade requests to the utility: The formal application is sent to Nova Scotia Power, detailing the required amperage and voltage for the new three-phase service.
3. Ordering the mechanical equipment: Once NSP approves the service upgrade and confirms the timeline, the heavy-duty RTU is officially ordered from the manufacturer.
4. Scheduling the power shutdown and transition: The final cut-over requires a coordinated building shutdown, typically scheduled over a weekend or overnight to minimize disruption to your commercial tenants.

The ultimate solution to the coordination problem is consolidating your project under a single contractor with in-house expertise across all required trades. The traditional multi-subcontractor model inherently breeds conflict. If the custom roof curb doesn't fit the existing ductwork, the sheet metal contractor blames the HVAC supplier. If the RTU won't turn on, the mechanical contractor blames the electrician's wiring. You, the facility manager, are stuck managing the delays while they argue.
A unified in-house team approach changes everything. At Presidential Ventilation Systems, our team of approximately 70 employees includes Red Seal electricians, HVAC technicians, and sheet metal fabricators all working under one roof. This eliminates communication silos and scheduling conflicts. The electrician reviewing the load calculation is sitting across the desk from the HVAC technician sizing the rooftop unit. Furthermore, custom sheet metal fabrication and installation for rooftop units can be seamlessly integrated with the electrical and mechanical phases. If a duct transition needs to be modified to avoid an electrical conduit run, it happens immediately in our own fabrication shop, not three weeks later through a third-party vendor.
This single point of accountability protects your project timeline and your budget. One longstanding issue our multi-trade team resolved last summer perfectly illustrates the danger of siloed knowledge. A commercial facility in a Dartmouth business park had a heat pump system that remained broken for months after previous companies failed to fix it. Because they lacked overlapping expertise, the mechanical and electrical components were never evaluated together. When our multi-trade technician arrived, they properly diagnosed the real issue—a complex electrical fault mimicking a mechanical failure—explained the process thoroughly, and successfully repaired the unit. That is the power of integrated trade knowledge.
When the crane finally arrives, a multi-trade team ensures a flawless execution. The advantages are immediate and measurable:
• Synchronized arrival of mechanical and electrical teams: No waiting for a third-party electrician to show up. The whole team arrives together, ready to execute their specific roles.
• Immediate resolution of on-site electrical panel issues: If a breaker trips or a wire needs extending during the physical placement of the unit, the licensed electrician is already on the roof to handle it instantly.
• Faster commissioning and handover: Because the electrical and mechanical systems were designed to work together from day one, the startup sequence is smooth, allowing your building to regain climate control hours faster.
Commercial HVAC units use 3-phase power because it provides a continuous, smooth flow of electricity without the voltage drops found in single-phase systems. This continuous power allows heavy-duty compressor motors—like those found in 10-ton to 25-ton units—and massive blower fans to operate with higher efficiency and significantly less heat generation. Ultimately, three-phase power reduces mechanical wear and tear, extending the lifespan of expensive commercial rooftop units.
Coordinating electrical and HVAC for an RTU installation requires finalizing the mechanical equipment specifications first, then performing a building load calculation to ensure the electrical panel can support it. The most effective way to manage this coordination is to hire a single multi-trade contractor who employs both Red Seal electricians and HVAC technicians. This eliminates scheduling conflicts and ensures that the electrical disconnects and mechanical curbs are installed in perfect synchronization.
The electrical requirements for a commercial HVAC unit vary heavily based on the system's tonnage and the manufacturer's specifications. Most heavy-duty commercial units require 208-volt, 460-volt, or 575-volt three-phase power connections. Additionally, local electrical codes require a dedicated, weather-rated disconnect switch mounted within sight of the rooftop unit to allow for safe maintenance and emergency shut-offs.
You strictly need a licensed electrician to handle the high-voltage connections for a commercial rooftop unit, as HVAC technicians are generally not licensed to upgrade main service panels or pull commercial electrical permits. However, you do not need to hire a separate electrical company if you choose a multi-trade HVAC contractor that employs in-house Red Seal electricians to handle the wiring legally and safely.
Wiring a 3-phase rooftop AC unit involves routing three separate hot wires and a ground wire from the main commercial breaker panel to a rooftop disconnect, and then to the unit's contactor. Because this involves highly dangerous commercial voltages (up to 575V) and strict adherence to the Canadian Electrical Code, this work must never be attempted as a DIY project; it requires a licensed commercial electrician to ensure proper phase balancing and safety.
The size of the electrical disconnect required for a commercial RTU is dictated by the unit's Maximum Overcurrent Protection (MOCP) and Minimum Circuit Ampacity (MCA) ratings, which are printed on the equipment's data plate. An electrician will use these numbers to size the disconnect box, the fuses or breakers, and the wire gauge. In coastal areas like Dartmouth, the disconnect must also be housed in a NEMA 4X corrosion-resistant enclosure.
Proper three-phase electrical planning is the foundation of any successful commercial RTU installation. Without it, you risk severe project delays, wasted crane rental fees, and premature equipment failure. Navigating utility upgrades, coastal weatherproofing requirements, and complex load calculations requires specialized knowledge that spans multiple construction disciplines.
In our 30+ years serving Nova Scotia, we have proven that the greatest peace of mind comes from using a single, unified multi-trade contractor. By keeping Red Seal electricians, HVAC technicians, and custom sheet metal fabricators under one roof, we eliminate the communication bottlenecks that plague commercial upgrades. We can also help you navigate any available commercial energy efficiency rebates to maximize your investment. If you are a facility manager planning a rooftop unit replacement, reach out to Presidential Ventilation Systems today to request a free estimate and book a comprehensive professional assessment of your building's HVAC and electrical infrastructure.