Education

What Is the Difference Between Ductless and Ducted Systems

By
John Doe
July 24, 2026
5 min read

What Is the Difference Between Ductless and Ducted Systems?

Are you considering a new HVAC system for your home or office but need to decide whether to choose a ductless system or a ducted system? At Presidential Ventilation Systems Ltd., we understand the confusion many homeowners face when making this decision. Each option has its unique advantages and disadvantages, and the choice often depends on your specific needs, budget, and space. As experts in providing high-quality HVAC services, we want to help you make the best decision for your comfort and efficiency.

Share this post
What Is the Difference Between Ductless and Ducted SystemsPresidential Ventilation Systems
Share this post

What Is the Difference Between Ductless and Ducted Systems?

Are you considering a new HVAC system for your home or office but need to decide whether to choose a ductless system or a ducted system? At Presidential Ventilation Systems Ltd., we understand the confusion many homeowners face when making this decision. Each option has its unique advantages and disadvantages, and the choice often depends on your specific needs, budget, and space. As experts in providing high-quality HVAC services, we want to help you make the best decision for your comfort and efficiency.

Understanding Ductless Systems

Ductless systems, often referred to as mini-splits, have gained popularity in recent years due to their flexibility and energy efficiency. These systems do not require ductwork to deliver air throughout your home. Instead, they consist of an outdoor unit connected to one or more indoor units via a small conduit, allowing for temperature control in specific areas or zones.

Advantages of Ductless Systems

  • Energy Efficiency: One of the standout features of a ductless system is its energy-saving potential. Since air isn't lost through ductwork, these systems are often more efficient, meaning lower utility bills.
  • Flexible Installation: Ductless systems are versatile and can be installed in a variety of spaces, including rooms without existing ductwork. They are perfect for older homes, home additions, and even garages or basements.
  • Zoned Comfort: A ductless system allows you to control the temperature of individual rooms or zones. This means you can cool or heat only the rooms you are using, leading to further energy savings.
  • Quiet Operation: Unlike traditional HVAC systems that can be noisy, ductless systems operate quietly, providing a peaceful environment in your home or office.

While ductless systems have plenty of benefits, there might be better choices for some situations. Understanding the key differences between ductless and ducted systems is important so you can make an informed decision. Keep reading to learn more about ducted systems and how they compare to their ductless counterparts.

The Benefits of a Ducted System

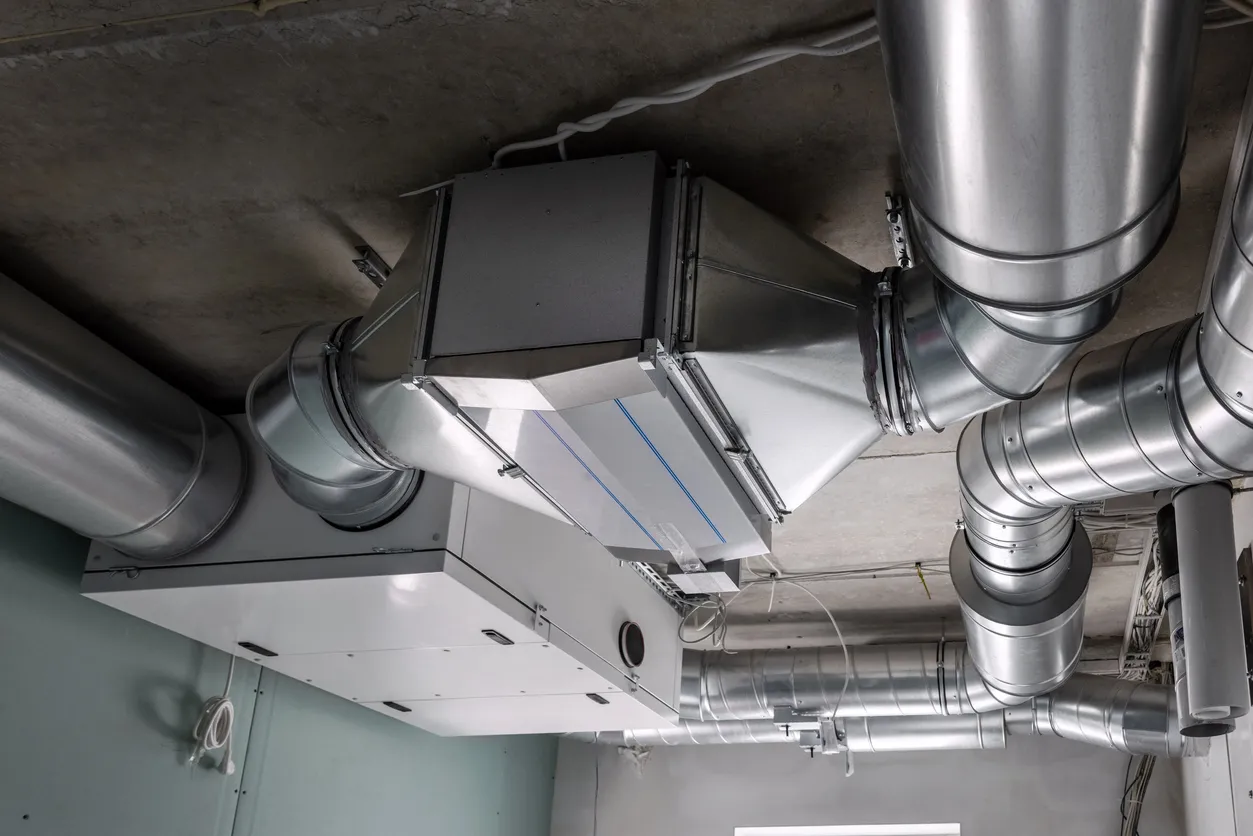
Ducted systems, also known as central heating and cooling systems, are the more traditional option. These systems use a network of ducts to distribute conditioned air throughout your home or building. If your home already has ductwork, a ducted system might be the more accessible and more cost-effective option to upgrade.

Advantages of Ducted Systems

  • Whole-Home Comfort: Ducted systems are designed to provide consistent temperatures throughout your entire home. Every room benefits from the same level of comfort, making this system ideal for larger homes or buildings.
  • Aesthetics: A ducted system's only visible components are the vents, which can blend seamlessly with your décor. Unlike ductless systems, which require visible wall-mounted units, ducted systems keep most of the hardware out of sight.
  • Cost-Effective for Larger Spaces: If you have a large home or office with many rooms, a ducted system may be the more economical choice. While ductless systems offer zoned control, installing multiple indoor units can become expensive for large properties.
  • Air Filtration: Ducted systems often come equipped with air filtration options that can improve indoor air quality by reducing dust, allergens, and pollutants. This feature is a big plus for anyone concerned about respiratory health or allergies.

While ducted systems are an excellent option for whole-home comfort, they are not without their downsides. Before making a decision, consider the maintenance and potential energy loss associated with ductwork, especially if your ducts are old or poorly insulated.

Key Differences Between Ductless and Ducted Systems

When choosing between a ductless system and a ducted system, it’s essential to understand the key differences that could impact your comfort, budget, and energy usage. Let’s take a closer look at how these systems compare in several critical areas:

Installation Requirements

  • Ductless: Installing a ductless system is relatively simple and less invasive since it doesn't require ductwork. The indoor units can be mounted on walls or ceilings and are connected to the outdoor unit via a small conduit. This makes ductless systems a great option for homes or offices without existing ductwork.
  • Ducted: Installing a ducted system can be more complex, especially if your home doesn’t already have ductwork in place. If you’re building a new home or undergoing major renovations, adding ducts may be an option. However, retrofitting ductwork into an existing home can be expensive and disruptive.

Energy Efficiency

  • Ductless: Ductless systems are generally more energy-efficient because there is no energy loss through ducts. If you're looking to lower your energy bills and reduce your environmental impact, a ductless system could be the ideal choice.
  • Ducted: While modern ducted systems can be pretty efficient, they are prone to energy losses, especially if the ducts need to be well-insulated. Over time, these losses can add up, making ducted systems slightly less efficient than their ductless counterparts.

Aesthetic Considerations

  • Ductless: Ductless systems require indoor units that are typically mounted on walls or ceilings, which may appeal to only some. However, newer models have sleek designs that blend better with modern décor.
  • Ducted: Once installed, ducted systems are almost invisible. Only the vents are visible in each room, which means the system doesn’t interfere with your home’s aesthetics.

Cost of Installation

  • Ductless: The initial cost of a ductless system can be higher than a ducted system, especially if you need multiple indoor units to cover a large area. However, this cost can be offset by lower energy bills over time.
  • Ducted: If your home already has ductwork, a ducted system may be more affordable to install. However, if ductwork needs to be added or repaired, the costs can quickly escalate.

Which System is Right for You?

Choosing between a ductless and ducted system depends on a variety of factors, including your home’s layout, your budget, and your personal preferences. Here’s a quick summary to help you decide:

Ductless systems are ideal for:

  • Homes or offices without existing ductwork
  • People looking to maximize energy efficiency
  • Zoned temperature control and energy savings
  • Smaller homes or individual room installations

Ducted systems are ideal for:

  • Homes or offices with existing ductwork
  • People who prefer whole-home temperature consistency
  • Large homes or offices with multiple rooms
  • Those looking for a more discreet HVAC solution

Trust Presidential Ventilation Systems Ltd.

When it comes to choosing between a ductless or ducted system, trust the experts at Presidential Ventilation Systems Ltd. to guide you in the right direction. Our team is committed to ensuring your HVAC system meets your needs for comfort, efficiency, and reliability. Whether you opt for a ductless system or a ducted system, we will provide professional installation and ongoing support to ensure your system performs at its best.

Ready to get started? Call us today or visit our website to schedule your consultation. With us, you’re not just getting a new HVAC system—you’re getting peace of mind with our professional HVAC services. Don’t hesitate to reach out, and let us take care of all your heating and cooling needs!

Contact Presidential Ventilation Systems Ltd. Today for Expert Guidance and The Perfect HVAC Solution Tailored to Your Needs!

The Latest HVAC News

Stay informed with our informative blog posts.
Upgrading Your Electrical Service During a Major Mount Uniacke Home RenovationPresidential Ventilation Systems
5 min read

Upgrading Your Electrical Service During a Major Mount Uniacke Home Renovation

Opening walls for a remodel is the perfect time to evaluate your aging 100-amp panel. Upgrading your electrical capacity now prevents costly drywall repairs when adding modern heat pumps later.
Read more

The Hidden Opportunity Behind Open Walls During a Remodel

Upgrading your electrical service during a major Mount Uniacke home renovation is the single most critical infrastructure decision you can make before the new drywall goes up. At Presidential Ventilation Systems Ltd., our team has seen firsthand how planning a major home remodel means exposing the foundational skeleton of your property. You tear down the walls to reconfigure a layout, and suddenly, you are face-to-face with an aging electrical system. For many older properties we service, this reveals a legacy 100-amp panel that was never designed for the demands of the twenty-first century.

A critical early decision in any residential or commercial construction project is determining if that existing panel can support future high-efficiency additions. Relying on an outdated electrical service severely limits your options for modern heating services. If you plan to add a high-efficiency heat pump installation in the future, we strongly recommend tackling the upgrade from 100 to 200 amps now to prevent the massive headache of tearing into fresh paint and finished drywall later.

The Reality of 100-Amp Limitations

Our licensed electricians frequently meet homeowners who assume their current electrical panel is fine simply because the lights turn on and the refrigerator runs. However, the baseline electrical load of a standard household has shifted dramatically over the past few decades. A 100-amp service provides enough power for basic lighting, standard appliances, and perhaps a traditional electric water heater. It leaves virtually no remaining capacity for heavy-draw appliances or modern climate control systems.

When you leave a 100-amp panel in place during a renovation, you are effectively putting a hard cap on your home's future capabilities. Proactive planning sets the stage for seamless future upgrades. By having professionals execute the transition from 100 to 200 amps while the structural framing is exposed, you eliminate the roadblocks that typically stop homeowners from adopting next-generation, energy-efficient technologies.

Upgrading While Walls Are Open — Structural Impact: Zero damage to finished surfaces; wiring routes easily through exposed studs. — Future HVAC Readiness: Fully prepared for 240V circuits and heavy-draw heat pumps.

Delaying Until HVAC Installation — Structural Impact: Requires cutting into fresh drywall, patching, mudding, and repainting. — Future HVAC Readiness: Often requires a delayed installation while waiting for electrical upgrades.

Why Modern HVAC Upgrades Demand Increased Electrical Capacity

In our experience handling complex electrical projects, the core problem with older infrastructure is a fundamental lack of capacity. Older 100-amp electrical panels simply lack the bandwidth to handle the electrical load of modern, high-efficiency HVAC systems. When you attempt to add new heating equipment to an undersized panel, the immediate cause of failure is circuit overload. The solution our team always implements is straightforward but non-negotiable: a heavy-up to a 200-amp service.

Amperage Draw and Winter Demands

As locals, we know that Mount Uniacke experiences harsh winter temperatures that demand robust, high-capacity heating systems. When the temperature drops below freezing, your heating equipment works harder to extract heat from the outside air. Advanced solutions like ducted heat pump systems require dedicated 240V circuits to operate efficiently and safely. During periods of extreme cold, backup resistance heating strips may also engage, drawing a massive amount of amperage all at once.

Failing to increase your home's electrical capacity before installing this new equipment can lead to constantly tripped breakers, overloaded circuits, and compromised heating performance right when you need it most. An undersized panel forces your new, expensive HVAC equipment to operate in a state of electrical starvation, which shortens the lifespan of the compressor and the blower motor.

One Mount Uniacke homeowner undergoing a major summer construction project took this exact proactive route with our team. While their home's framing was exposed, our technicians replaced their aging ductwork and upgraded their entire heat pump system simultaneously. By sequencing the HVAC and electrical work during the heavy construction phase, they secured excellent duct routing and a highly efficient new system without the friction of a post-remodel retrofit. Upgrading the panel from 100 to 200 amps ensures the home's infrastructure is fully prepared for the heavy electrical demands of this kind of next-generation heating.

The Practical Efficiency of Upgrading During a Renovation

Executing your electrical work concurrently with a remodel makes logical, structural, and financial sense. Upgrading electrical infrastructure while walls are open significantly reduces the labor hours required by our technicians. Fishing heavy-gauge wire through closed, finished walls is a tedious, time-consuming process that requires specialized tools and blind navigation. When the drywall is gone, our professionals can route new wiring directly through the studs in a fraction of the time.

The Open-Wall Advantage

This strategic timing represents the most cost-effective approach when calculating your breaker panel upgrade cost factors. The efficiency gained by working in an open environment translates directly to a smoother, faster project. Homeowners also avoid the secondary costs of patching, mudding, and repainting finished drywall that inevitably occur during post-renovation electrical work. Here is how our licensed professionals handle the project timeline during this phase of construction:

1. Demolition and Exposure: The renovation begins, removing old drywall and exposing the structural framing and existing wiring runs.

2. Panel Swap: Our licensed technicians safely disconnect the old 100-amp service and install the new 200-amp panel while access to the main service line is unobstructed.

3. Circuit Routing: New 240V circuits are run by our team from the panel to the future locations of the air handler and outdoor compressor.

4. Drywall Installation: The new walls go up, completely hiding the heavy-duty infrastructure safely behind the finished surfaces.

5. Equipment Connection: The new HVAC equipment is installed and connected to the pre-wired, dedicated circuits with zero structural disruption.

Routing new wiring for future HVAC zones is vastly simpler without structural barriers. If you plan to add multiple zones to your home, running the necessary electrical and control wires is effortless when the skeleton of the house is exposed.

The Timeline of an Electrical Upgrade During a Home Renovation

Identifying and Resolving Legacy Wiring Hazards

Beyond capacity limits, a pattern we see often during major renovations is the discovery of hidden safety hazards that have been lurking behind the drywall for decades. Homes built between the mid-1960s and late 1970s may contain aluminum wiring, which requires specialized remediation by a certified electrician. Unlike modern copper wiring, aluminum expands and contracts significantly with temperature changes. Over time, this movement causes connections at outlets, switches, and the breaker panel to loosen.

The Danger of Oxidation

Loose connections create electrical resistance, which generates heat. Furthermore, aluminum wiring oxidizes when exposed to the air, and this oxidation acts as an insulator rather than a conductor, compounding the heat generation. This is a well-documented fire hazard that must be addressed to meet modern safety standards.

Flickering lights: Often the first sign of a loose connection in a legacy wiring system.

Warm faceplates: Outlets or switches that feel warm to the touch indicate dangerous electrical resistance.

Scorched receptacles: Visible blackening around outlet slots requires immediate professional attention.

Tripping breakers: A system constantly protecting itself from overloads or shorts.

Major renovations provide the ideal opportunity to inspect and correct these legacy wiring issues. Upgrading the main electrical service often coincides with bringing the rest of the home's wiring up to current electrical codes. Our technicians can replace the problematic aluminum runs with modern copper wiring, or apply specialized, code-approved connectors to make the existing wiring safe. Addressing these hazards proactively protects the home and ensures your new, high-efficiency HVAC equipment operates safely without risking an electrical fire.

Maximizing Your Investment with Local Efficiency Rebates

One of the most compelling reasons we encourage upgrading your home's infrastructure is the availability of financial incentives. Transitioning a home to modern, energy-efficient climate control is a priority for local and provincial energy grids, and programs exist to help offset the initial investment. Efficiency Nova Scotia offers various rebates and incentives for home energy upgrades.

Aligning Your Renovation with Rebate Guidelines

These programs often apply specifically to high-efficiency heating systems, such as cold-climate heat pumps. However, installing these advanced systems necessitates an upgraded electrical panel. By planning the electrical upgrade as part of a larger, energy-efficient home strategy, you maximize the overall return on your investment.

The key is foresight. You cannot claim a rebate for a high-efficiency system if your home lacks the electrical capacity to support its installation. We always advise homeowners to explore these local rebate guidelines early in the renovation planning phase. By understanding the technical requirements of the rebate-eligible equipment—such as the specific amperage and dedicated circuit needs—you can direct your electrical upgrade to meet those exact specifications while the walls are open. This holistic approach ensures you do not leave available incentive money on the table simply because your home's infrastructure was not prepared in time.

Streamlining Your Project with a Unified Contractor

Coordinating multiple distinct trades during a major construction project often leads to scheduling delays, miscommunication, and frustration. When you hire one company to handle the electrical panel upgrade and an entirely different company to install the heat pump, you introduce a massive operational bottleneck. The HVAC installers cannot do their job until the electricians finish, and if the electricians install the wrong size breaker or route the circuits incorrectly, the HVAC team is stalled.

Eliminating the Multi-Trade Bottleneck

A unified contractor eliminates this friction. When our team handles both sides of the equation, we ensure the electrical panel is perfectly sized for the exact specifications of the future HVAC equipment. There is no guessing about circuit requirements or wire gauges.

During a summer project converting a home from an outdated oil burner to a modern central heat pump, one homeowner expressed concerns about the complexity of the necessary electrical panel upgrade. Because our team at Presidential Ventilation Systems handles the complete HVAC and electrical system coordination, our licensed technician was able to resolve those electrical concerns directly on-site. The resulting system operates flawlessly, and the homeowner avoided the stress of managing multiple contractors.

Single-source accountability also prevents warranty disputes between separate electrical and heating installers. If a system trips a breaker, two different companies might point fingers at each other, leaving you caught in the middle. Consolidating these services with our experienced team ensures a smoother renovation timeline, seamless communication, and total peace of mind regarding your equipment warranties.

Take the Next Step in Future-Proofing Your Home

Upgrading the electrical panel while walls are exposed is the most logical, efficient, and forward-thinking choice for any major home remodel. It transforms a disruptive, messy retrofit into a streamlined phase of your existing construction project. Moving from a restricted 100-amp service to a robust 200-amp panel safely enables future HVAC additions and provides the perfect opportunity to resolve legacy wiring issues.

Taking this step now prepares the home for decades of comfortable, efficient climate control, no matter how harsh the Mount Uniacke winters become. Proper HVAC and electrical system coordination guarantees that your home's infrastructure will never be the bottleneck preventing you from upgrading your comfort. Reach out to our expert team at Presidential Ventilation Systems Ltd. to explore your options and ensure your renovation infrastructure is built to last.

Frequently Asked Questions

Why is a home renovation the best time to upgrade to 200 amps?
Upgrading while walls are open gives our technicians direct access to your home's structural framing. This eliminates the need to cut into finished drywall to route new wiring, which saves significant labor time and prevents costly post-renovation patching and painting.

Do modern heat pumps require an electrical panel upgrade?
In most older homes, yes. Modern heat pumps typically require dedicated 240V circuits that draw significant power, and a legacy 100-amp panel usually lacks the remaining capacity to support this load safely without constantly tripping breakers.

How do you handle aluminum wiring in houses during a renovation?
When walls are open, licensed electricians can completely replace hazardous aluminum wiring with modern copper wire. If full replacement isn't feasible, they can use specialized, code-approved connectors to safely bridge the aluminum to copper connections at switches and outlets.

What happens if you don't upgrade your electrical panel before installing new HVAC?
Failing to upgrade an undersized panel will lead to overloaded circuits, frequently tripped breakers, and potential fire hazards. It forces your new HVAC equipment to run on insufficient power, which can severely damage the compressor and void the warranty.

Are there local rebates available for energy-efficient electrical and HVAC upgrades in Mount Uniacke?
Yes, Efficiency Nova Scotia offers various rebates for homeowners who upgrade to energy-efficient systems like cold-climate heat pumps. Because these high-efficiency systems often require a panel upgrade to operate, planning your electrical work early ensures you meet the infrastructure requirements to qualify for these incentives.

Balancing Humidity with an HRV System Before the Nova Scotia Fall Dampness Sets InPresidential Ventilation Systems
5 min read

Balancing Humidity with an HRV System Before the Nova Scotia Fall Dampness Sets In

September brings a rapid shift in Maritime weather, causing sudden indoor dampness and window condensation. Adjusting your HRV settings now intercepts moisture before the deep cold arrives.
Read more

The September Shift: Why Nova Scotia's Fall Dampness Demands Immediate HRV Adjustments

As summer fades, balancing humidity with an HRV system before the Nova Scotia fall dampness sets in becomes the most necessary task for homeowners across the Maritimes. September brings a rapid shift in the weather. The lingering warmth of late summer quickly gives way to crisp, cool evenings, and with that transition comes a sudden spike in outdoor moisture levels. At Presidential Ventilation Systems Ltd., our team typically sees a surge in service calls right around this time, as this seasonal change reveals itself as heavy indoor dampness and stubborn condensation forming on the inside of windows when nighttime temperatures drop. If you are tired of wiping down glass every morning, adjusting your ventilation strategy early is the only permanent solution.

Proactively calibrating your equipment now, during the September transition to wet autumn weather, intercepts that moisture before it can settle on cold surfaces. Proper airflow management constantly replaces stale, damp indoor air with fresh, filtered outdoor air, recovering the heat in the process. By making these adjustments before the deep cold arrives, you protect your window frames, drywall, and indoor air quality from the damaging effects of trapped moisture.

To ensure your home is protected, we highly recommend securing a professional HRV systems inspection before the seasonal rush begins.

The Mechanics of Coastal Dew Points and Window Condensation

In our years of serving Mount Uniacke and surrounding Nova Scotia areas, we've learned that standard ventilation advice often fails in coastal regions because it ignores the unique physics of maritime weather. The autumn transition brings a specific set of atmospheric challenges. Unlike drier inland regions, coastal air holds a massive amount of moisture. When nighttime temperatures drop rapidly below 10°C, the outdoor humidity often remains at 70% to 80% or higher. This creates a challenging environment for your home's mechanical systems.

Window condensation is simple physics in action. When warm, moist indoor air comes into contact with the cold surface of your window glass, the air rapidly cools. Because cold air cannot hold as much moisture as warm air, the excess water vapor instantly converts into liquid droplets. If your air exchange unit is not properly exhausting that moist indoor air, a pattern we see often is those droplets forming every single night.

An unbalanced ventilation unit can actually make this problem worse. If the system is pulling in heavy, damp coastal air without properly exhausting an equal volume of indoor air, it inadvertently traps moisture inside. Over time, ignoring these mechanics leads to compromised indoor air quality, peeling paint, and structural dampness inside your wall cavities. To understand the long-term risks to your home, you can read our detailed breakdown on what happens if you don't maintain your HRV.

Why Autumn Nights Create the Perfect Storm for Condensation

The clash between indoor heating and dropping outdoor temperatures creates an ideal environment for moisture accumulation. Thermal bridging—where heat transfers through the poorly insulated parts of window frames—accelerates this process.

Outdoor Humidity — Inland Canadian Autumn: Generally drops as the air cools — Coastal Nova Scotia Autumn: Remains extremely high (70-80%+)

Dew Point Risk — Inland Canadian Autumn: Moderate, usually manageable — Coastal Nova Scotia Autumn: Severe during rapid nighttime cooling

Ventilation Strategy — Inland Canadian Autumn: Standard winter mode settings — Coastal Nova Scotia Autumn: Proactive, continuous low-speed exchange

Understanding this stark difference is why local climate dictates specific mechanical responses. What works in Alberta or Ontario will leave a Nova Scotia home dripping with condensation.

Recognizing the Signs Your Ventilation Needs a Fall Calibration

Catching humidity issues early prevents expensive repairs later. During the September transition to wet autumn weather, we often tell our clients that their home will usually provide several warning signs before severe condensation occurs. Modern, tightly sealed homes are fantastic for energy efficiency, but they trap moisture from cooking, breathing, and showering. Without mechanical intervention, that moisture has nowhere to go.

Here are the early warning signs our technicians tell homeowners to look out for that indicate an immediate calibration is needed:

Persistent window fog: Look for moisture specifically pooling in the lower corners of your windows first thing in the morning.

A "heavy" indoor environment: The air inside your home may feel stale, thick, or unusually warm despite the thermostat setting.

Lingering household odors: If smells from cooking or pets hang in the air for hours, your system is not exchanging enough volume.

High hygrometer readings: Digital humidity monitors showing indoor levels consistently rising above 50%.

Health Canada officially recommends maintaining indoor humidity between 30% and 50% to prevent mold growth and maintain healthy air quality. Tracking these levels with an inexpensive digital hygrometer during the critical autumn transition weeks is a smart habit. If you notice the numbers creeping up toward 60%, your ventilation equipment is falling behind the moisture load.

Proactive Settings and Adjustments for the Autumn Transition

Preparing your air exchanger for the maritime fall involves a mix of basic homeowner maintenance and strategic dial adjustments. Our team constantly reminds homeowners that when you live in Mount Uniacke and surrounding Nova Scotia areas, you cannot just set the dial once and forget it. The changing weather demands a proactive approach.

1. Adjust the Dehumidistat Baseline: As outdoor temperatures drop, your indoor relative humidity target should also drop. If your dial was set to 50% or higher during the summer, begin dialing it back toward 40% to combat the cooler glass temperatures.

2. Switch to Continuous Low-Speed: Setting the unit to a continuous low-speed exchange is often far more effective in autumn than using intermittent high-speed bursts. Continuous operation ensures a steady, unbroken removal of moisture and prevents sudden spikes in humidity.

3. Clear Exterior Hoods: Walk around the outside of your home and inspect the intake and exhaust hoods. September winds often blow leaves, twigs, and debris into these vents, severely restricting airflow.

4. Wash Accessible Filters: Open the front panel of your unit and remove the core filters. Most standard filters are washable; rinse them under warm water, let them dry completely, and reinstall them to ensure maximum airflow.

Safe Homeowner Maintenance vs. Licensed Professional Work

There is a strict line between what a homeowner should handle and what requires a licensed technician. Clearing exterior vents and washing reusable filters are perfectly safe DIY tasks. However, attempting to adjust internal dampers, diagnosing electrical faults, or opening the sealed mechanical core of the unit crosses into dangerous territory. Internal electrical components and core balancing require a licensed professional with the right diagnostic tools.

Seasonal HRV Transition Checklist

The Critical Role of Professional HRV Balancing and Maintenance

While washing filters is helpful, it does not address the overall mechanical balance of your home. "Balancing" is a highly specific technical process. It ensures that the exact volume of exhausted stale air perfectly matches the volume of fresh air brought inside. If these two airstreams are not perfectly equalized, your home will experience negative or positive pressure.

An unbalanced system creating negative pressure will actively pull unconditioned, freezing air through the tiny drafts around your doors and windows. Conversely, positive pressure forces warm, damp indoor air into your wall cavities, where it meets cold exterior sheathing and causes hidden rot. A thorough seasonal inspection by our licensed technicians includes deep cleaning of the heat exchange core, testing of all operational modes, and precise damper adjustments using specialized airflow measurement tools.

Ventilation systems are deeply integrated with your home's overall HVAC and electrical infrastructure. Recently, our team helped a local homeowner navigate a major mechanical overhaul, transitioning from an aging oil burner to a modern central heat pump system. During the complex installation, our experts successfully resolved an unexpected issue with the home's electrical panel upgrade, ensuring the entire system could safely handle the new load. This level of comprehensive, hands-on expertise highlights why professional oversight is so valuable.

Presidential Ventilation Systems brings deep local expertise to Mount Uniacke and the Maritimes, understanding exactly how to calibrate systems for unique coastal humidity shifts. Securing a professional preventative maintenance plan provides the peace of mind that comes with knowing your system is fully optimized for the upcoming winter.

Beyond Residential: Commercial and Construction Ventilation Upgrades

The challenges of the September transition to wet autumn weather are not limited to single-family homes. Commercial properties and new construction projects face amplified humidity challenges during the fall transition due to larger square footage, varying occupancy loads, and complex ducting networks.

In new construction or major renovations, integrating proper ventilation early in the building phase is absolutely critical to manage curing moisture. Freshly poured concrete, new drywall mud, and fresh paint release hundreds of gallons of water vapor into the air as they dry. Without a robust, professionally balanced air exchange system operating continuously, this curing moisture will immediately condense on the brand-new windows and framing.

Property managers and builders should also note that Efficiency Nova Scotia frequently offers rebates for energy-efficient ventilation upgrades and installations in both residential and commercial properties. We often find that upgrading outdated electrical panels and ventilation systems simultaneously can streamline your overall energy efficiency and frequently helps qualify the project for these valuable local incentives.

Whether you are managing a large commercial space or building a custom home, professional balancing ensures the structure remains dry and healthy. We provide comprehensive mechanical solutions across our local service areas to meet these exact needs.

FAQ: Navigating Air Exchange Systems During the Maritime Fall

What should my HRV be set at in the fall?

During the fall transition, your dehumidistat should generally be set between 40% and 50%. As outdoor temperatures continue to drop toward freezing, you will need to lower this setting further to prevent condensation. Keeping the system running on a continuous low-speed setting is usually the best approach for maintaining a consistent baseline.

Why are my windows sweating when my HRV is running?

Sweating windows while the unit is running typically indicates that the indoor humidity is still too high for the current outdoor temperature, or the system is mechanically unbalanced. Even if the fans are spinning, clogged filters, a dirty core, or improper damper settings can severely restrict the actual volume of air being exchanged.

How do I stop condensation on my windows with an HRV?

To stop condensation, first lower the setting on your wall control to force the unit to exchange more air. Next, ensure all interior vents are fully open and unobstructed by furniture. Finally, verify that the exterior exhaust hood is clear of leaves and debris so the damp air can freely escape the house.

Does an HRV reduce indoor humidity?

Yes, it reduces indoor humidity during the cooler months by exhausting warm, damp indoor air and replacing it with cooler, drier outdoor air. The heat recovery core transfers the warmth to the incoming air, but the moisture is successfully vented outside, effectively drying out the home.

When is the best time of year to schedule professional ventilation balancing?

September is the ideal time to schedule professional balancing, right before the deep cold and heavy condensation season begins. Proactive scheduling ensures your equipment is clean, calibrated, and operating at peak efficiency before the harsh maritime winter puts it under maximum strain.

Can improper ventilation settings cause mold during the autumn transition?

Absolutely. If the system is turned off or set incorrectly, moisture from daily living becomes trapped inside the tightly sealed house. This trapped moisture settles on cold exterior walls and window frames, creating the perfect damp environment for mold spores to colonize rapidly.

Secure Your Indoor Air Quality Before the Deep Cold Arrives

Taking action in September is the single best way to prevent winter moisture damage in your home. By understanding the unique coastal climate of Mount Uniacke and surrounding Nova Scotia areas, you can make informed decisions about your indoor air quality. In our extensive experience, clear guidance and proper mechanical calibration provide a significantly healthier living environment for your family.

Do not wait until the frost is heavy on the glass and the window frames are already damp. Balancing humidity with an HRV system before the Nova Scotia fall dampness sets in protects your property investment. Schedule a professional assessment and system balancing with our team today to secure your home's air quality before the peak fall rush begins.