


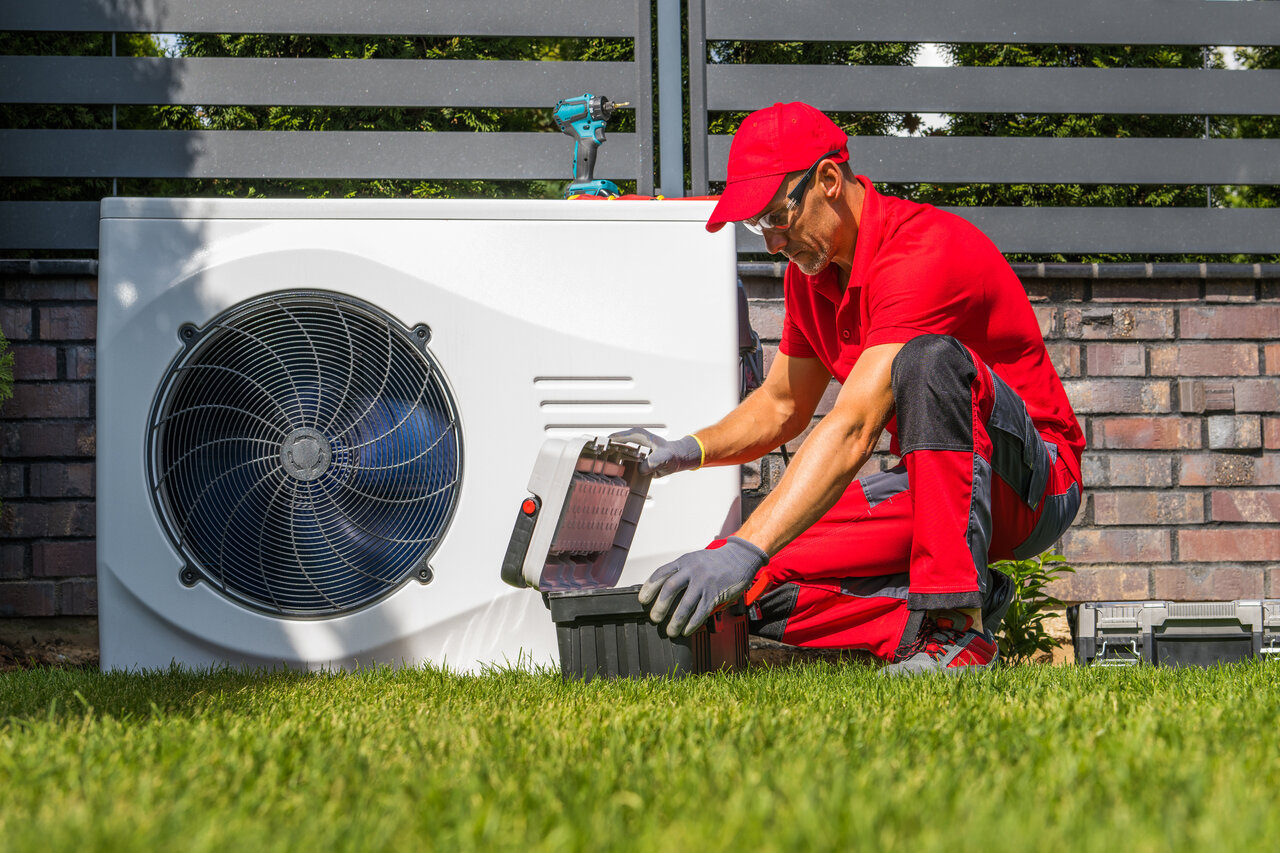

A residential heat pump is a vital component of any home's heating and cooling system, providing year-round comfort and efficiency. However, to ensure this reliability over time, proper care and maintenance are essential. Various strategies can be employed to extend the lifespan of your heat pump, maximizing its performance and ensuring it remains cost-effective.
Regular maintenance and professional inspections are key factors in preserving heat pump functionality. Routine upkeep not only enhances efficiency but also helps prevent wear and tear that could lead to costly repairs. Additionally, optimizing system efficiency and making seasonal adjustments can greatly contribute to longevity.
Implementing these measures can help prevent premature failure and keep your heat pump running smoothly. By paying attention to details such as airflow and component care, homeowners can make informed decisions to protect their investment.
Regular maintenance is essential for extending the lifespan of a residential heat pump. Routine upkeep ensures that the system operates smoothly and efficiently, preventing wear and tear that could lead to costly repairs. By maintaining your heat pump consistently, you can enjoy reliable comfort in your home while maximizing energy savings.
Key maintenance activities include checking refrigerant levels, inspecting ducts for leaks, and ensuring that electrical connections are tight and secure. Regularly lubricating moving parts can also reduce friction, which helps in sustaining efficiency. Cleaning or replacing air filters regularly is crucial, as it ensures proper airflow and maintains indoor air quality.
Scheduling professional inspections is equally important. Our professionals are equipped to provide thorough assessments of your system. They have the expertise to identify potential issues before they escalate, saving you from unexpected breakdowns and expensive fixes. With regular check-ups, our technicians can maintain your heat pump in optimal condition, ensuring it meets its performance expectations.
Optimizing the efficiency of your heat pump is essential for both comfort and cost-effectiveness. Homeowners can adopt several practices to ensure their system runs at peak performance, reducing the strain on the system and lowering energy consumption.
1. Proper Thermostat Settings: Set your thermostat to an ideal setting depending on the season. Avoid extreme temperatures that can overwork the system. Programmable and smart thermostats are excellent tools for maintaining the desired temperature without wasting energy.
2. Sealing and Insulation: Ensure your home is well-insulated and sealed. Preventing drafts through windows and doors can reduce the heat pump's workload, keeping your indoor temperature stable without excessive energy use.
3. Regular Filter Replacement: Change or clean filters every month or as needed. Clean filters enhance airflow and help the system function efficiently.
4. Routine Check-ups: Work with our professionals to arrange for periodic maintenance. This allows for adjustments that improve performance and efficiency.
By paying attention to these elements, you enhance the efficiency of your heat pump, prolonging its life while ensuring a comfortable home environment. Setting the correct thermostat levels and maintaining your system help reduce long-term operational costs, making it crucial to implement these practices diligently.
Proper maintenance and cleaning of heat pump components are vital for preventing wear and enhancing system efficiency. One essential task is ensuring that air filters are clean and replaced as needed.
Dirty filters can hinder airflow, forcing the system to work harder and reducing its overall lifespan. Regularly cleaning or changing filters can prevent these issues and maintain optimal air quality in your home.
Another critical task is cleaning the coils. Both the evaporator and condenser coils play pivotal roles in heat transfer; dust and debris can accumulate on these coils, reducing their efficiency. Keeping these components clean promotes better heat absorption and dissipation, preventing unnecessary strain on the system.
Attention to airflow is also crucial. Inspect ducts and registers to ensure they're free from obstructions, promoting unrestricted air circulation. If airflow is compromised, the system may overheat or freeze, leading to preventable repairs. Regular checks and cleaning enhance durability and keep your heat pump running smoothly.
Adapting your heat pump's usage based on seasonal demands can significantly extend its life. By making strategic adjustments, you ensure that the system runs efficiently throughout the year without experiencing unnecessary wear.
1. Seasonal Temperature Settings: Adjust your thermostat settings according to seasonal changes to minimize load. Use energy-efficient settings that keep your home comfortable while reducing the system's workload.
2. Regular Defrost Cycles: In colder months, monitor automatic defrost cycles. If your heat pump doesn't defrost properly, it could lead to inefficiencies or damage. Ensuring the system remains frost-free contributes to optimal performance.
3. Protecting from Extreme Weather: Shielding your heat pump from harsh weather conditions is essential. In winter, ensure snow or ice does not accumulate on the outdoor unit. A cover designed for your heat pump can provide protection without restricting airflow.
Seasonal adjustments help optimize system operations, ensuring that your heat pump handles temperature variations effectively while maintaining longevity.
Understanding the intricacies of maintaining a residential heat pump enables you to create a comfortable and efficient home environment. By focusing on routine maintenance, regular professional inspections, and making appropriate seasonal adjustments, you can significantly extend the life of your system.
Looking to maximize the efficiency and lifespan of your residential heat pumps in Dartmouth? Our expert team is ready to help ensure your heat pump operates at its best, providing the comfort and savings you deserve. Contact us at Presidential Ventilation Systems Ltd. to schedule a professional inspection or maintenance service.
A residential heat pump is a vital component of any home's heating and cooling system, providing year-round comfort and efficiency. However, to ensure this reliability over time, proper care and maintenance are essential. Various strategies can be employed to extend the lifespan of your heat pump, maximizing its performance and ensuring it remains cost-effective.
Regular maintenance and professional inspections are key factors in preserving heat pump functionality. Routine upkeep not only enhances efficiency but also helps prevent wear and tear that could lead to costly repairs. Additionally, optimizing system efficiency and making seasonal adjustments can greatly contribute to longevity.
Implementing these measures can help prevent premature failure and keep your heat pump running smoothly. By paying attention to details such as airflow and component care, homeowners can make informed decisions to protect their investment.
Regular maintenance is essential for extending the lifespan of a residential heat pump. Routine upkeep ensures that the system operates smoothly and efficiently, preventing wear and tear that could lead to costly repairs. By maintaining your heat pump consistently, you can enjoy reliable comfort in your home while maximizing energy savings.
Key maintenance activities include checking refrigerant levels, inspecting ducts for leaks, and ensuring that electrical connections are tight and secure. Regularly lubricating moving parts can also reduce friction, which helps in sustaining efficiency. Cleaning or replacing air filters regularly is crucial, as it ensures proper airflow and maintains indoor air quality.
Scheduling professional inspections is equally important. Our professionals are equipped to provide thorough assessments of your system. They have the expertise to identify potential issues before they escalate, saving you from unexpected breakdowns and expensive fixes. With regular check-ups, our technicians can maintain your heat pump in optimal condition, ensuring it meets its performance expectations.
Optimizing the efficiency of your heat pump is essential for both comfort and cost-effectiveness. Homeowners can adopt several practices to ensure their system runs at peak performance, reducing the strain on the system and lowering energy consumption.
1. Proper Thermostat Settings: Set your thermostat to an ideal setting depending on the season. Avoid extreme temperatures that can overwork the system. Programmable and smart thermostats are excellent tools for maintaining the desired temperature without wasting energy.
2. Sealing and Insulation: Ensure your home is well-insulated and sealed. Preventing drafts through windows and doors can reduce the heat pump's workload, keeping your indoor temperature stable without excessive energy use.
3. Regular Filter Replacement: Change or clean filters every month or as needed. Clean filters enhance airflow and help the system function efficiently.
4. Routine Check-ups: Work with our professionals to arrange for periodic maintenance. This allows for adjustments that improve performance and efficiency.
By paying attention to these elements, you enhance the efficiency of your heat pump, prolonging its life while ensuring a comfortable home environment. Setting the correct thermostat levels and maintaining your system help reduce long-term operational costs, making it crucial to implement these practices diligently.
Proper maintenance and cleaning of heat pump components are vital for preventing wear and enhancing system efficiency. One essential task is ensuring that air filters are clean and replaced as needed.
Dirty filters can hinder airflow, forcing the system to work harder and reducing its overall lifespan. Regularly cleaning or changing filters can prevent these issues and maintain optimal air quality in your home.
Another critical task is cleaning the coils. Both the evaporator and condenser coils play pivotal roles in heat transfer; dust and debris can accumulate on these coils, reducing their efficiency. Keeping these components clean promotes better heat absorption and dissipation, preventing unnecessary strain on the system.
Attention to airflow is also crucial. Inspect ducts and registers to ensure they're free from obstructions, promoting unrestricted air circulation. If airflow is compromised, the system may overheat or freeze, leading to preventable repairs. Regular checks and cleaning enhance durability and keep your heat pump running smoothly.
Adapting your heat pump's usage based on seasonal demands can significantly extend its life. By making strategic adjustments, you ensure that the system runs efficiently throughout the year without experiencing unnecessary wear.
1. Seasonal Temperature Settings: Adjust your thermostat settings according to seasonal changes to minimize load. Use energy-efficient settings that keep your home comfortable while reducing the system's workload.
2. Regular Defrost Cycles: In colder months, monitor automatic defrost cycles. If your heat pump doesn't defrost properly, it could lead to inefficiencies or damage. Ensuring the system remains frost-free contributes to optimal performance.
3. Protecting from Extreme Weather: Shielding your heat pump from harsh weather conditions is essential. In winter, ensure snow or ice does not accumulate on the outdoor unit. A cover designed for your heat pump can provide protection without restricting airflow.
Seasonal adjustments help optimize system operations, ensuring that your heat pump handles temperature variations effectively while maintaining longevity.
Understanding the intricacies of maintaining a residential heat pump enables you to create a comfortable and efficient home environment. By focusing on routine maintenance, regular professional inspections, and making appropriate seasonal adjustments, you can significantly extend the life of your system.
Looking to maximize the efficiency and lifespan of your residential heat pumps in Dartmouth? Our expert team is ready to help ensure your heat pump operates at its best, providing the comfort and savings you deserve. Contact us at Presidential Ventilation Systems Ltd. to schedule a professional inspection or maintenance service.

In our 30+ years of serving Nova Scotia, our commercial installation team frequently hears the same frustrating paradox from facility managers: half the building is uncomfortably hot, while the other half is freezing. Utilizing Heat Recovery VRF Systems for Simultaneous Heating and Cooling in Office Buildings solves this exact problem by modernizing how thermal energy moves through a structure. Traditional commercial HVAC setups often struggle to balance interior zones—like a crowded, heat-generating boardroom—with exterior zones exposed to the elements. The result is a constant stream of tenant temperature complaints and wasted energy as the system fights itself to maintain an impossible equilibrium.
Deciding to retrofit traditional, inefficient commercial HVAC setups with modern Variable Refrigerant Flow (VRF) technology represents a major turning point for building efficiency. Instead of simply generating new heat or chilled air, these advanced systems capture extracted heat from cooling zones and redistribute it to heating zones. If you are exploring commercial heating services to upgrade an aging facility, understanding how this thermal transfer works is the first step toward a permanent solution.
What our team typically sees in Mount Uniacke and greater Nova Scotia office buildings is that standard rooftop units and VAV (Variable Air Volume) boxes simply cannot keep up with diverse zone demands. During our unpredictable shoulder seasons and harsh winters, the perimeter of a building loses heat rapidly through the glass, while the core of the building accumulates heat from servers, copiers, and dense human occupancy. Traditional systems either cool the whole building or heat the whole building. When a traditional system tries to do both, it often relies on inefficient electric reheat strips, driving operational costs through the roof.
• Zone Control — Traditional Commercial HVAC (VAV/RTU): Broad zones, often leading to over-conditioning. — Heat Recovery VRF Technology: Hyper-localized microclimates for individual offices.
• Energy Transfer — Traditional Commercial HVAC (VAV/RTU): Expels waste heat outdoors, generating new heat elsewhere. — Heat Recovery VRF Technology: Captures waste heat from one zone to warm another.
• Efficiency Profile — Traditional Commercial HVAC (VAV/RTU): Lower part-load efficiency; compressors run at fixed speeds. — Heat Recovery VRF Technology: Exceptional IEER ratings due to inverter-driven compressors.
• Tenant Comfort — Traditional Commercial HVAC (VAV/RTU): Frequent hot/cold spots and temperature swings. — Heat Recovery VRF Technology: Consistent, simultaneous heating and cooling across the floorplan.
By moving heat rather than constantly generating it, facility managers can drastically reduce their energy consumption while finally putting an end to the daily thermostat wars.
To understand how this technology transforms a building, it helps to look at the fundamental mechanics at play. As an established HVAC and electrical contractor, we often find that the distinction between standard heat pump systems and heat recovery systems is misunderstood by property owners. A standard heat pump VRF system is highly efficient, but it can only heat or cool a building at one time. A heat recovery VRF system, however, can perform both functions simultaneously across different zones on the exact same refrigerant loop. For a deeper dive into the broader technology, you can review our comprehensive guide to VRV HVAC systems.
The process of simultaneous conditioning relies on a few critical engineering components working in perfect synchronization:
1. Inverter-Driven Compressors: As a Daikin Comfort Pro, our team frequently installs these advanced compressors. Unlike traditional units that slam on at 100% capacity and then shut off, inverter compressors operate on a variable frequency drive to smoothly match the building's fluctuating load requirements in real-time.
2. Refrigerant State Manipulation: The system moves thermal energy by changing the state of the refrigerant from a high-pressure gas (which releases heat) to a low-pressure liquid (which absorbs heat).
3. Thermal Extraction: When a crowded interior room requires cooling, the indoor unit absorbs the ambient heat into the refrigerant line.
4. Thermal Redistribution: Instead of pumping that absorbed heat all the way back to the outdoor condenser to be wasted, the system intercepts it and routes it to a perimeter office that is currently calling for heat.
The magic of simultaneous heating and cooling happens inside the branch selector box (also known as a branch controller). Depending on the manufacturer, these utilize either a specialized 2-pipe or a robust 3-pipe system design. The 3-pipe design features dedicated lines for high-pressure gas (heating), low-pressure gas (cooling return), and liquid refrigerant.
The traffic cop of thermal energy: The branch selector box sits between the outdoor condensing unit and the indoor air handlers. It acts as an intelligent intersection. When a thermostat in Zone A calls for cooling, the controller routes liquid refrigerant to that indoor unit. As the refrigerant absorbs heat and turns into a gas, the controller evaluates the rest of the building. If Zone B is calling for heat, the controller diverts that hot gas directly to Zone B instead of sending it outside.
This localized redistribution is where the massive efficiency gains occur. By repurposing waste heat rather than expelling it outdoors via the condenser, the outdoor unit's compressor doesn't have to work nearly as hard. The building essentially heats itself using the thermal energy generated by its own occupants and equipment.

Regional weather patterns dictate how a building's HVAC system must perform, and our commercial clients know firsthand that Nova Scotia's fluctuating maritime climate presents unique challenges. The unpredictable nature of our shoulder seasons and winters mandates simultaneous heating and cooling, making heat recovery a necessity rather than a luxury for modern commercial spaces. During the spring and fall, outdoor temperatures can swing wildly from morning to afternoon, creating distinct microclimates within a single building.
The solar gain challenge: Consider a building with a large expanse of south-facing windows. Even on a crisp, 10°C October morning, the direct solar gain pouring through the glass can quickly drive the temperature in those offices up to 26°C. Those south-facing rooms desperately need cooling. Meanwhile, the north-facing walls of the same building are being battered by cold maritime winds, receiving no direct sunlight, and requiring constant heating to remain comfortable.
Internal heat loads: Beyond the exterior weather, modern office buildings generate massive amounts of internal heat. Dense occupancy in interior zones, such as server rooms, large conference centers, and open-plan workspaces, creates a continuous cooling demand. This internal heat load often offsets the exterior cold entirely in the core of the building.
If a facility relies on a standard system, the facility manager must constantly toggle between heating and cooling modes, leaving half the building unsatisfied. Heat recovery VRF creates localized microclimates, allowing individual offices to set their own temperatures independently. The system simply harvests the heat from the sun-baked southern offices and the crowded interior conference rooms, and pipes it directly to the shivering employees on the northern perimeter. Upgrading to commercial heat pump systems with recovery capabilities ensures that every zone is treated as its own independent environment.
Looking beyond mechanical airflow, a successful commercial retrofit requires comprehensive structural and electrical planning. Swapping out a rooftop unit is one thing; retrofitting an older commercial building with a sprawling VRF network requires extensive coordination. This is where having integrated trades working in tandem becomes critical. With approximately 70 employees spanning our HVAC, electrical, and sheet-metal divisions, Presidential Ventilation Systems has the in-house expertise to prevent the costly project delays that happen when sub-contractors fall out of sync.
A major consideration is the existing ductwork. In some retrofits, the existing sheet metal can be integrated with new ducted VRF air handlers. In other scenarios, the old ductwork is too degraded or improperly sized for the precise airflow requirements of modern equipment. Our dedicated sheet-metal division frequently fabricates custom transitions to blend the new high-efficiency equipment seamlessly into the building's existing architecture. If you are considering ducted heat pump systems for your commercial space, our team will perform a thorough static pressure and airflow assessment before any equipment is ordered.
The most commonly overlooked aspect of a commercial HVAC retrofit is the electrical infrastructure. Modern inverter-driven compressors are incredibly efficient, but they require specific electrical parameters to operate safely and effectively.
• Assessing Current Building Load: Our licensed electricians frequently encounter older commercial buildings with electrical panels that are maxed out or utilizing outdated voltages. A full load calculation must be performed to ensure the existing service can handle the new VRF condensers and branch controller boxes.
• Safety and Compliance: Commercial electrical upgrades during an HVAC retrofit involve running new dedicated circuits, installing appropriate disconnects, and ensuring everything meets current commercial electrical codes.
• Seamless Integration: Because we handle both the mechanical and electrical scopes in-house, the transition from pulling wire to brazing refrigerant lines happens concurrently, minimizing downtime for the building's tenants.
The long-term operational cost benefits of heat recovery systems are undeniable, largely due to how they perform under part-load conditions. In the commercial HVAC industry, efficiency is measured by the Integrated Energy Efficiency Ratio (IEER). Unlike older EER ratings that only measured efficiency at peak load (the hottest day of the year), IEER calculates how efficiently the system runs across a variety of partial loads. Because buildings rarely operate at 100% capacity, IEER is a much more accurate reflection of real-world energy costs.
Heat recovery VRF systems achieve exceptionally high IEER ratings for two reasons. First, the inverter compressors only consume the exact amount of electricity needed to meet the current demand—they never overwork. Second, by repurposing internal heat, the system drastically reduces the overall electrical load drawn from the grid. The outdoor condenser stays offline or runs at a bare minimum while the branch selector boxes simply shuffle existing thermal energy around the building.
Aligning with sustainability goals: For property owners looking to modernize their portfolios, these efficiencies align perfectly with commercial building energy standards and corporate sustainability goals. Reducing the building's carbon footprint makes the property more attractive to high-tier commercial tenants who prioritize green initiatives.
Furthermore, commercial rebates and incentives are often available for high-efficiency retrofits, particularly when replacing older, carbon-heavy heating systems. It is important to note that rebate programs, eligibility requirements, and funding pools frequently change, so we recommend confirming current programs with Presidential Ventilation Systems. When you reach out for comprehensive HVAC services, our team can help you navigate the current landscape of commercial incentives to maximize your return on investment. With our extensive commercial construction and retrofit experience, we ensure that the equipment specified meets the exact criteria required by local and federal efficiency programs.
A heat recovery VRF system heats and cools simultaneously by moving thermal energy between different zones inside the building rather than just relying on the outdoor condenser. It uses a branch selector box to route hot, high-pressure refrigerant gas to rooms that need heating, and low-pressure liquid refrigerant to rooms that need cooling. This allows one continuous system to absorb heat from a warm room (like a server room) and transfer that exact same heat to a cold room (like a perimeter office). In our experience performing commercial retrofits across Nova Scotia, this localized heat transfer is the most efficient way to manage varying building loads.
The primary difference lies in simultaneous operation capabilities. A standard heat pump VRF system can provide either heating or cooling to the entire building, but all connected indoor units must operate in the same mode at the same time. A heat recovery VRF system utilizes specialized branch controllers and a complex piping design (often 3-pipe) to allow some indoor units to heat while others cool simultaneously. Our team typically recommends heat recovery systems for large commercial buildings with diverse microclimates, while standard heat pump VRF is better suited for open-plan spaces with uniform temperature needs.
Yes, VRF technology is exceptionally well-suited for commercial buildings due to its modular design, zoning capabilities, and high energy efficiency. It allows facility managers to eliminate hot and cold spots by providing individualized temperature control for different offices, boardrooms, and common areas. Additionally, because the refrigerant piping is much smaller than traditional bulky ductwork, our installers find it much easier to retrofit into older commercial spaces with limited ceiling clearance. The long-term operational savings and improved tenant satisfaction make it a strong investment for commercial properties.
In a commercial HVAC context, a heat recovery system works by capturing waste thermal energy and repurposing it elsewhere in the facility. When an indoor unit operates in cooling mode, it extracts ambient heat from the room's air. Instead of pumping that heat outside to be released into the atmosphere, the system intercepts the heated refrigerant and redirects it to another zone that currently requires warming. This continuous recycling of thermal energy significantly reduces the workload on the main outdoor compressors, lowering overall electricity consumption.
A commercial VRF retrofit frequently requires upgrading the main electrical panel to support the specific voltage and amperage requirements of modern inverter-driven outdoor condensers. Additionally, new dedicated circuits must be run to the outdoor units, the indoor air handlers, and the branch selector boxes. Because these systems rely on complex communication wiring between all components, the electrical infrastructure must be meticulously planned and installed to meet commercial code. This is why utilizing a contractor like Presidential Ventilation Systems, with integrated HVAC and electrical divisions, ensures a safer, more compliant installation.
Solving tenant temperature complaints requires a holistic approach to building climate control, not just a series of spot-fixes. Utilizing Heat Recovery VRF Systems for Simultaneous Heating and Cooling in Office Buildings offers a permanent, energy-efficient solution to the hot-and-cold dilemma. By repurposing waste heat and creating individualized microclimates, facility managers can dramatically improve tenant comfort while lowering operational costs, even during the most unpredictable Nova Scotia shoulder seasons and winters.
However, successful implementation demands an experienced contractor with both mechanical and electrical expertise to handle the complex infrastructure requirements. If your commercial building is struggling with inefficient temperature control, aging equipment, or high energy bills, a professional assessment is the critical next step. Contact Presidential Ventilation Systems today to request a free estimate and determine if your facility is a strong candidate for a modern heat recovery VRF upgrade.

Verifying Red Seal certification when hiring HVAC technicians in Nova Scotia is the single most important step you can take to protect your home, your safety, and your financial investment. You are looking at a competitive quote for your new heating system, but there is a crucial detail that might be missing from the paperwork. Many homeowners assume that any general contractor offering installation services is fully qualified to handle the complex requirements of modern HVAC systems. Unfortunately, a pattern we see often in our service calls is that this assumption frequently leads to unsafe installations, voided warranties, and systems that fail long before their time.
When you are planning a major home upgrade and need professional heating services, the critical moment occurs when you are reviewing estimates. This is the exact point when verifying credentials becomes your strongest defense against sub-par workmanship. Whether you are looking into a ductless mini-split or a comprehensive central heat pump installation, ensuring the team has the legal authority and technical training to perform the work is non-negotiable.
A proper installation is not simply a matter of bolting a piece of equipment to a wall and plugging it in. Modern heat pumps are highly sophisticated machines that require specialized knowledge of refrigerant pressures, precise airflow dynamics, and high-voltage electrical systems. Drawing on our 30+ years of experience across residential retrofits, new construction, and commercial projects in Mount Uniacke and beyond, we frequently see the costly downstream consequences of uncertified installations. When an unqualified individual attempts to balance refrigerant lines or wire a high-draw compressor, the results range from poor energy efficiency to severe fire hazards.
Homeowners often trust a general contractor because that individual has done excellent carpentry, plumbing, or renovation work for them in the past. However, HVAC is a distinct, highly regulated field. Without the proper training, even the most well-intentioned handyman cannot properly commission a heat pump to manufacturer specifications. By understanding what to look for on an estimate, you can ensure your system is installed safely and optimized for long-term performance.
To make an informed decision, it is essential to understand the vast difference between a general contractor and a certified refrigeration mechanic. A general contractor manages broad construction projects, coordinating various trades to build or renovate a space. While they are highly skilled in project management and general carpentry, they rarely hold the specialized licensing required for handling regulated refrigerants.
The Refrigeration and Air Conditioning Mechanic designation is a highly regulated trade in Canada. Earning a Red Seal refrigeration mechanic certification requires thousands of hours of hands-on apprenticeship, rigorous classroom instruction, and passing a comprehensive interprovincial examination. Only professionals who have earned this specific credential possess the legal authority and technical expertise to handle refrigerants safely.
At Presidential Ventilation Systems, we maintain a roster of approximately 70 employees, which allows us to deploy dedicated, skilled Red Seal tradespeople for every phase of a project. Hiring a multi-trade team—encompassing HVAC, electrical, ventilation, and sheet-metal experts—ensures that the specific complexities of your heating system are managed by dedicated specialists rather than generalists. When you work with certified HVAC technicians, you are paying for an uncompromising standard of technical proficiency.
• Refrigerant Handling — General Contractor: Legally prohibited without specific certification. — Red Seal Refrigeration Mechanic: Fully licensed and trained to handle, recover, and charge refrigerants safely.
• System Commissioning — General Contractor: Relies on basic manufacturer manuals, often missing technical nuances. — Red Seal Refrigeration Mechanic: Uses specialized gauges to calculate superheat and subcooling for exact performance.
• Warranty Authorization — General Contractor: Installations often result in immediate warranty denial by major brands. — Red Seal Refrigeration Mechanic: Recognized by premium manufacturers to validate and register full warranties.
• Environmental Compliance — General Contractor: High risk of accidental venting due to lack of specialized recovery equipment. — Red Seal Refrigeration Mechanic: Strict adherence to provincial and federal environmental protection laws.
Handling refrigerants without proper certification is a direct violation of environmental regulations and poses severe safety risks to your property. Beyond the legal implications, the physical behavior of refrigerant inside your heat pump dictates how well the system will heat and cool your home. Inaccurate refrigerant charges lead to immediate efficiency losses, causing the system to overwork, consume excess electricity, and eventually fail prematurely.
Nova Scotia's freezing Maritime winters and humid summers demand absolute precision in refrigerant charging to prevent system failure during extreme temperature swings. When a heat pump is extracting ambient heat from sub-zero winter air, the refrigerant must be balanced perfectly. If the system is undercharged, the compressor will overheat trying to meet the thermostat's demand. If it is overcharged, liquid refrigerant can flood back into the compressor, destroying the internal valves.
Certified technicians use specialized digital gauges, temperature probes, and mathematical formulas to achieve the exact charge required by the manufacturer. A pattern we see often across the province is systems completely breaking down because the initial installer lacked the training to correctly balance the refrigerant lines. Last summer, one Nova Scotia homeowner reached out to our team during a heat wave after going without a working heat pump since the previous August. Previous uncertified technicians had failed to diagnose and fix the broken system. A skilled technician from our team properly diagnosed the issue—which was completely different from what was previously claimed—and accurately repaired the system.
Installing a modern heating system is not just a plumbing or refrigeration job; it requires integrating high-voltage electrical components safely into your home's existing infrastructure. A heat pump requires dedicated circuits, properly sized breakers, and specific wire gauges to handle the significant electrical draw of the compressor and auxiliary heating elements.
Because our team handles comprehensive electrical panel upgrades and installations daily, we know firsthand that improperly sized wiring or incorrect breaker installations by uncertified workers pose severe fire hazards. If an installer uses a wire gauge that is too small for the circuit's amperage, the wire will generate extreme heat inside your walls, potentially melting the insulation and sparking an electrical fire. Furthermore, failing to install the required outdoor disconnect switches violates local building codes and puts future service technicians at risk of electrocution.
A true HVAC contractor provides a seamless integration of both refrigeration and electrical expertise to ensure the system operates safely. Because the installation spans multiple disciplines, homeowners must ensure that the electrical portion of the hookup is performed by appropriately licensed professionals to meet provincial building codes. Understanding the Red Seal electrician requirements for heat pump hookups is just as critical as verifying the refrigeration credentials. When a multi-trade company handles the installation, both the mechanical and electrical permits are pulled and executed by specialized tradespeople, leaving no room for dangerous guesswork.
Premium equipment manufacturers, such as Daikin and Lennox, strictly mandate that their systems be installed by licensed professionals. These companies invest heavily in engineering highly efficient equipment, and they know that the lifespan of that equipment is entirely dependent on the quality of the installation. If a system fails and the manufacturer discovers it was installed by an uncertified general contractor, the warranty claim is instantly denied.
Working with recognized, certified dealers ensures that your investment is protected for the full duration of the warranty period. For example, maintaining our Daikin Comfort Pro status requires strict adherence to manufacturer installation guidelines, continuous factory training, and a proven track record of technical excellence. When an installation is completed by a contractor holding this status, the manufacturer registers the equipment with full confidence.
Last fall, a homeowner contacted us because their mini-split heat pumps were not working properly after a poor initial service by a different company. The previous company had failed to identify the root problem. One of our certified technicians quickly diagnosed the issue and confirmed warranty coverage for the necessary parts, completely solving the problem and restoring the system to proper operation. Proper diagnostics by a certified technician can often salvage a system and restore its warranty standing after a poor initial installation, but we always recommend preventing the issue entirely by hiring a certified professional from day one.
Government and provincial rebate programs are designed to make energy-efficient upgrades more accessible to homeowners. Programs like Efficiency Nova Scotia offer significant incentives for upgrading to modern heating systems, particularly for oil-to-heat-pump conversions. However, these programs almost universally require that the installation be completed by an approved, certified contractor.
Submitting an invoice from an uncertified handyman or general contractor will result in a rejected rebate application. The administrative bodies governing these funds require strict proof of compliance, including the contractor's credentials, the exact AHRI (Air-Conditioning, Heating, and Refrigeration Institute) matching numbers of the equipment, and detailed commissioning reports. An uncertified installer simply cannot provide the necessary documentation to satisfy the auditors.
Because rebate programs, funding caps, and eligibility criteria can change frequently, we strongly recommend confirming current programs with Presidential Ventilation Systems before starting work. A reputable HVAC company will not only hold the necessary Red Seal certifications to keep you eligible, but their administrative team will also be familiar with the latest program updates. They can guide you through the required pre-approval steps, ensure the equipment selected qualifies for the highest possible incentive, and provide the exact invoicing format the provincial programs demand.
Protecting yourself during the estimate phase requires asking direct questions and requesting physical proof of credentials. Do not wait until the equipment is sitting in your driveway to confirm the installer's qualifications. Follow these actionable steps to verify a contractor's Red Seal certification before signing any agreements:
1. Ask for the Nova Scotia Apprenticeship Agency certification number: During the initial consultation, request the lead technician's certification number. Legitimate contractors are proud of their credentials and will provide this information without hesitation.
2. Request proof of dedicated Red Seal refrigeration mechanics: Ensure the company actually employs technicians with a Red Seal refrigeration mechanic certification on staff, rather than sub-contracting the work to unverified third parties.
3. Verify specialized liability insurance: Check that the contractor carries appropriate liability insurance and workers' compensation coverage specifically rated for HVAC and electrical work, not just general carpentry or landscaping.
4. Review the written estimate for trade specifics: Ensure the written quote clearly outlines who will be handling the electrical integration, who will be pulling the electrical permits, and who is responsible for the refrigerant charging.
5. Plan for ongoing professional care: Once verified and installed, ongoing care by these same certified professionals ensures the system maintains its efficiency. Securing preventative HVAC maintenance from a credentialed team extends the lifespan of your investment.

Yes, Refrigeration and Air Conditioning Mechanic is a designated Red Seal trade across Canada. It requires extensive apprenticeship hours and passing a rigorous interprovincial examination. This designation ensures the technician has mastered the complex thermodynamics, electrical troubleshooting, and environmental safety protocols required to work on modern heating and cooling systems.
Homeowners can ask the contractor directly for their certification card before the project begins. Credentials can also be cross-referenced with the Nova Scotia Apprenticeship Agency to ensure they are current and valid. A reputable HVAC company will always be transparent about the qualifications of the technicians they send to your home.
Yes, handling the refrigerants within a heat pump requires a certified refrigeration mechanic by law. Additionally, the electrical connections required to power the unit demand appropriate electrical licensing and permits. Attempting to bypass these licensing requirements can result in severe fines, voided warranties, and dangerous operating conditions.
It can lead to unsafe operation, voided manufacturer warranties, and rejected provincial rebate applications. Improper refrigerant handling can also cause premature system failure, meaning you may have to replace the entire unit years before its expected lifespan. Furthermore, uncertified electrical work poses a significant fire hazard to your property.
No, unless the general contractor personally holds a valid Red Seal refrigeration certification or directly employs someone who does. Environmental regulations strictly prohibit uncertified individuals from handling, recovering, or charging regulated refrigerants due to the severe environmental impact of accidental venting and the technical precision required for safe operation.
Protecting your home, your warranty, and your investment starts with asking the right questions during the estimate process. In our 30+ years of experience serving Mount Uniacke and greater Nova Scotia, we have found that transparency regarding credentials is the foundation of a trustworthy contractor relationship. You deserve the peace of mind that comes from knowing your equipment is being handled by professionals who respect the trade and adhere to all provincial safety standards.
Choosing a multi-trade team with verified tradespeople ensures your system is installed safely, efficiently, and in full compliance with warranty and rebate requirements. If you are planning an upgrade, explore your options with a team that prioritizes certification and ongoing education. Contact Presidential Ventilation Systems today to request a free estimate for your heat pump installation.