


How to know if your home electrical panel needs an upgrade before installing a new heating system comes down to a few key factors you can check before any contractor sets foot in your home.
Here's a quick answer:
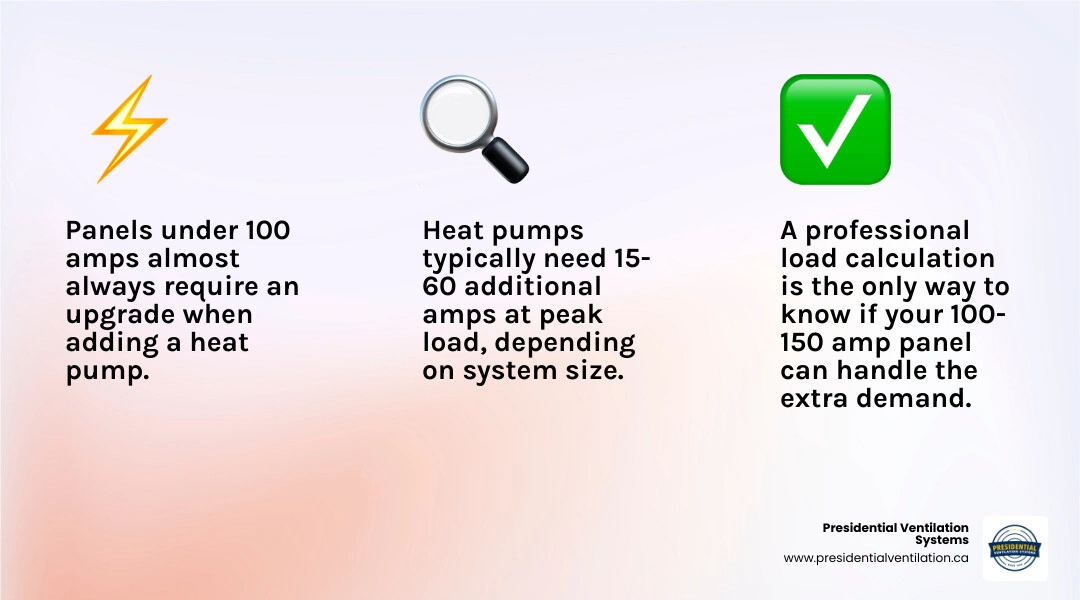
• Check your main breaker rating - Open your electrical panel and look for the number on the main breaker (60, 100, 150, or 200 amps)
• 100 amps or less - A panel upgrade is very likely needed, especially if you already run multiple major electric appliances
• 100 to 150 amps - You may or may not need an upgrade; a proper load calculation is required to be sure
• 150 amps or more - You can likely add a new heating system without a full panel upgrade in most cases
• Look for warning signs - Flickering lights, frequently tripped breakers, or a fuse box instead of circuit breakers all point toward a panel that is already strained
• Know your new system's draw - Depending on system size, a modern heating and cooling system can require anywhere from 15 to 60 additional amps at peak load
• Get a load calculation - This is the only reliable way to know for certain whether your existing panel can handle the added demand
Many homeowners only discover their panel is undersized after a contractor is already standing in their home quoting a significant upgrade. That surprise can throw off an entire project budget and timeline. The good news is that with a little preparation, you can walk into that conversation knowing exactly where you stand - and whether the recommendation you're getting is genuinely necessary.
When we think about home comfort, we usually focus on the physical equipment: the outdoor compressor, the indoor air handlers, or the ductwork running through the attic. But the true unsung hero of any home comfort system is the electrical panel.
Think of your electrical panel as the central distribution hub for your entire home. Power flows from the utility lines on your street, through your electrical meter, and directly into this metal box. From there, individual circuit breakers distribute that power to your lights, wall outlets, and major appliances.
If your home was built several decades ago, its electrical system was designed for a completely different lifestyle. Back then, a home might have only needed to power a few light bulbs, a refrigerator, and a television. Today, we are plugging in high-powered induction stoves, electric vehicle chargers, smart devices, and modern heating systems.
When you transition to a highly efficient heating and cooling system, you are shifting your home's energy demand from fossil fuels to electricity. While this is an excellent move for long-term comfort and energy efficiency, it does mean your panel has to work harder.
Interestingly, data shows that many homes actually have more breathing room than we think. Industry statistics indicate that:
• 92% of single-family homes with 200-amp panels use half or less of their overall panel capacity.
• 71% of single-family homes with 100-to-200-amp panels still have half or more of their capacity completely unused.
• Nearly one-third of homes with panels under 100 amps still have 50% or more of their capacity available.
In fact, the average home uses only about 4% of its panel's rated capacity at any given moment. However, the critical factor isn't your average daily usage; it is your peak load—the absolute maximum amount of electricity your home draws when your heating, clothes dryer, stove, and water heater all happen to run at the exact same time on a freezing winter morning.
If you are planning to make the switch to a modern, energy-efficient comfort system, assessing your electrical foundation is the first logical step. You can explore our dedicated Electrical Panel Upgrade Services to understand how we help homeowners transition their electrical systems safely.
Before we can determine if your panel has room for a new major appliance, we have to understand its current limits. To do this, we use a simple "water pipe" analogy:
• Voltage is the water pressure. In Canadian homes, this is typically standard 120-volt service for standard outlets and 240-volt service for heavy-duty appliances.
• Amperage (Amps) is the width of the pipe. It dictates how much electrical current can flow through the system at any one time.
• Wattage (Watts) is the total volume of water flowing out of the pipe (Amps × Volts = Watts).
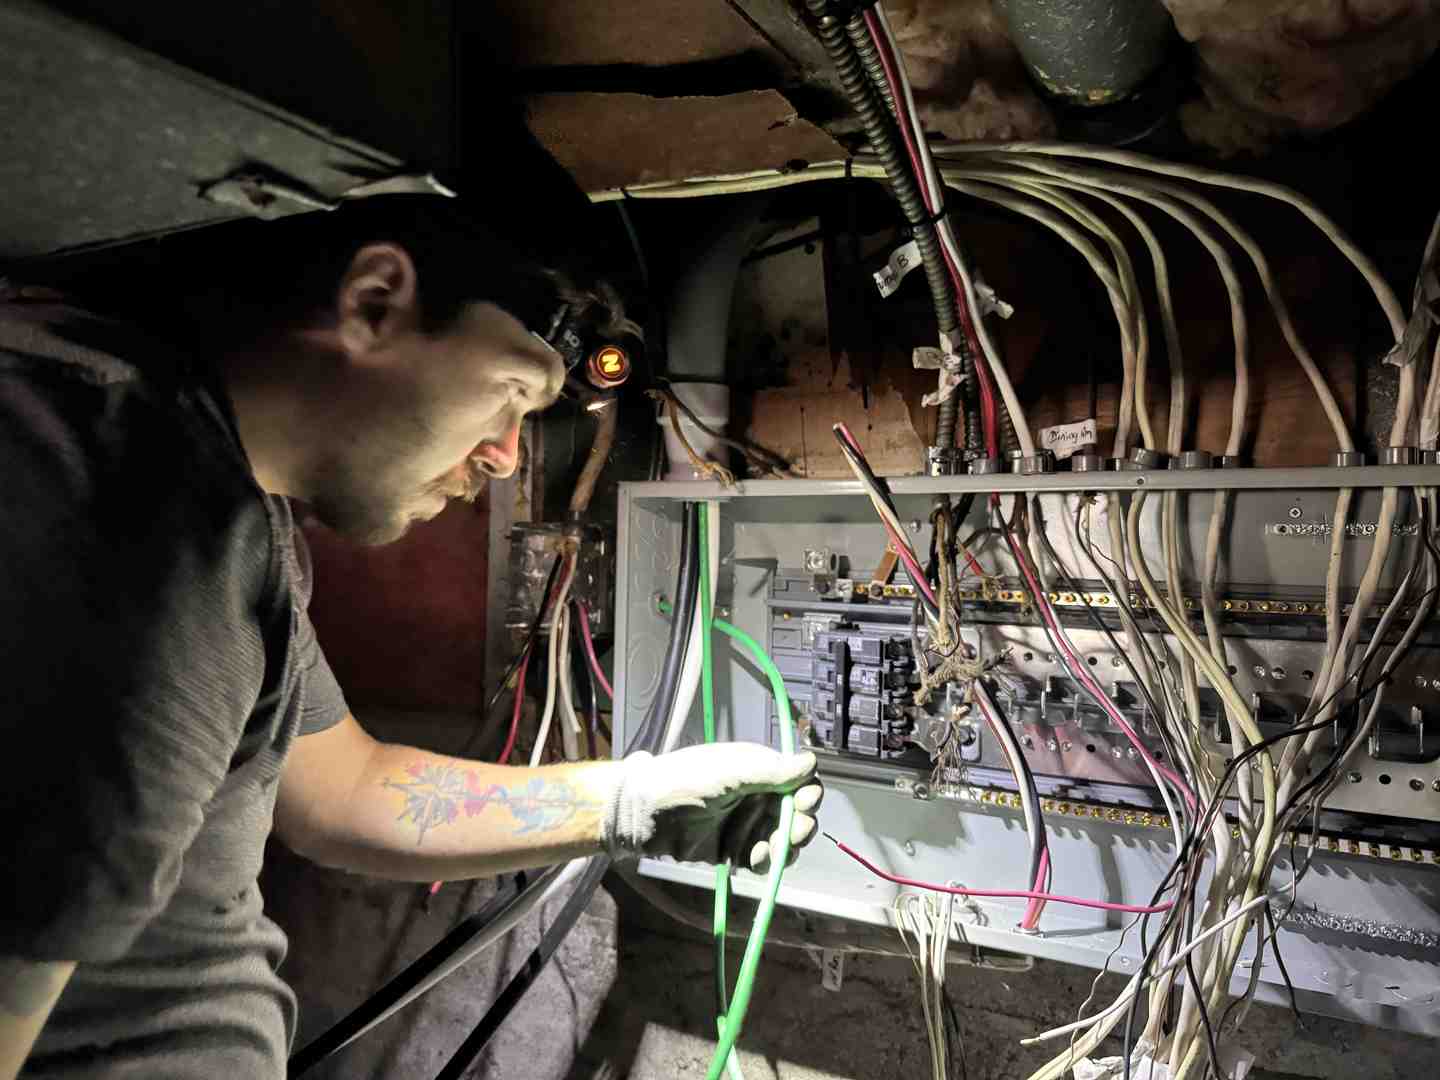
To find your panel's current limit, open the metal door of your panel and locate the main breaker. This is usually a large double breaker located at the very top or bottom of the panel. It will have a number stamped on the switch toggle—most commonly 100, 125, 150, or 200.
Once you know your main breaker's amperage, you can begin to assess your existing electrical loads. Electrical codes require that a panel should not be loaded beyond 80% of its maximum rating for continuous loads. For a standard 100-amp panel, that means your safe continuous operating limit is 80 amps.
To get a clear picture of how we evaluate these limits and perform professional load calculations, you can read our comprehensive Electrical Service Upgrade Guide.
If you live in Timberlea or surrounding areas like Halifax, Dartmouth, or Bedford, you might be living in a beautifully established home built in the 1970s, 80s, or earlier. Many of these homes were originally equipped with 60-amp or 100-amp panels.
While these panels may have served your family reliably for years, they often exhibit clear physical warning signs when they are reaching their capacity limits. If you notice any of the following symptoms, your panel is telling you it needs attention before you add any new electrical demand:
1. Flickering or Dimming Lights: If your hallway or living room lights briefly dim when your clothes dryer spins up or your old air conditioner kicks on, your system is struggling to handle the sudden inrush of current.
2. Frequently Tripped Breakers: Circuit breakers are safety devices designed to cut power when a circuit is overloaded. If you find yourself frequently walking down to the basement to flip a breaker back on, your circuits are already operating at their limits.
3. Warm Panel Cover or Discolouration: If you touch the metal door of your panel and it feels warm, or if you notice any signs of scorching, discolouration, or a faint burning smell, this is an electrical emergency. It indicates loose connections or overloaded bus bars that pose a direct fire hazard.
4. Physical Hissing or Buzzing Sounds: A healthy electrical panel should be completely silent. Any buzzing or clicking sounds point to failing breakers or electrical arcing.
5. No Physical Space Left: If every single slot in your panel is filled with a breaker and there is no physical room to add a new double-pole breaker, you cannot simply "squeeze" a new system in without modifying the panel layout or upgrading the service.
If you are experiencing these issues in our local community, check out our guide on finding an Electrical Service Upgrade in Timberlea to ensure you are working with qualified, licensed local professionals who understand Nova Scotia's specific electrical regulations.
To understand why a new heating and cooling system impacts your electrical panel, it helps to compare its electrical draw against other common household appliances.
• Standard Light Circuit — Typical Voltage (V): 120V — Typical Amperage (A): 15A — Dedicated Circuit Required?: No (shared)
• Microwave / Hair Dryer — Typical Voltage (V): 120V — Typical Amperage (A): 15A — Dedicated Circuit Required?: Yes (recommended)
• Electric Clothes Dryer — Typical Voltage (V): 240V — Typical Amperage (A): 30A — Dedicated Circuit Required?: Yes
• Electric Range / Stove — Typical Voltage (V): 240V — Typical Amperage (A): 40A - 50A — Dedicated Circuit Required?: Yes
• Electric Water Heater — Typical Voltage (V): 240V — Typical Amperage (A): 30A — Dedicated Circuit Required?: Yes
• Level 2 EV Charger — Typical Voltage (V): 240V — Typical Amperage (A): 40A - 50A — Dedicated Circuit Required?: Yes
• Mini-Split System (1-2 Tons) — Typical Voltage (V): 240V — Typical Amperage (A): 15A - 25A — Dedicated Circuit Required?: Yes
• Central Heating System (3-5 Tons) — Typical Voltage (V): 240V — Typical Amperage (A): 30A - 50A — Dedicated Circuit Required?: Yes
As you can see, a central climate control system is one of the largest electrical consumers in your home. It operates on a dedicated 240-volt circuit and can draw a significant amount of current when working hard in extreme weather.
The physical size of your home dictates the capacity (measured in tons or BTUs) of the comfort system you need. Consequently, the larger the system, the more electrical current it requires.
When evaluating a system's electrical needs, we look at two critical numbers on the manufacturer's specification sheet:
• Minimum Circuit Ampacity (MCA): This is the minimum current-carrying capacity that the circuit wires must have to safely operate the system. It determines the gauge of the wire that must be run from your panel to the outdoor unit.
• Maximum Overcurrent Protection (MOCP): This is the maximum rating for the circuit breaker protecting the equipment. It ensures the breaker will trip in the event of a short circuit without damaging the system's delicate electronics.
For example, a smaller, highly efficient 1.5-ton mini-split system might only have an MCA of 15 amps and require a 20-amp breaker. This is a relatively light load that can often be integrated into an existing 100-amp panel. On the other hand, a large 5-ton central system might require an MCA of 45 amps and a 60-amp breaker. Adding a 60-amp load to a 100-amp panel that is already powering a stove, dryer, and water heater is simply not possible without overloading the system.
However, modern technology has made a massive difference here. Older, single-stage systems draw a massive spike of electricity the moment they turn on to force the compressor to start spinning. Modern inverter-driven (variable-speed) systems start up incredibly slowly and smoothly, completely eliminating that harsh startup spike. This means variable-speed systems are much gentler on your electrical panel.
To learn more about how these dedicated electrical lines are safely run and connected to your outdoor and indoor units, explore our specialized Electrical Hookup Services.
If a load calculation reveals that your panel is right on the edge of its capacity, you don't always have to jump straight to a full panel replacement. There are several highly effective, modern engineering workarounds that can help you maximize your existing service:
• Tandem Breakers: If your panel is physically full but still has electrical capacity, we can sometimes replace single breakers with "tandem" or "slim" breakers. These allow two separate 120-volt circuits to occupy a single physical slot in your panel, freeing up the physical space needed for a new double-pole breaker.
• Load-Sharing Devices (Circuit Splitters): These smart devices allow two heavy-duty appliances to share a single circuit. For example, if you have an EV charger and an electric clothes dryer, a load-sharer will automatically pause power to the EV charger whenever the dryer is running, resuming it once the cycle is complete. This prevents the two appliances from ever drawing power simultaneously, effectively removing one from your peak load calculation.
• Smart Panels and Dynamic Load Managers: Modern smart panels or add-on energy monitors can actively monitor your home's total electricity draw. If you approach your panel's limit, the system can temporarily throttle back non-essential loads (like an EV charger or a hot tub) to prioritize your heating system.
• "Watt Tidying" (The Appliance Diet): Sometimes, the easiest way to free up 30 amps of capacity is to replace an old, inefficient appliance. Replacing an old standard electric clothes dryer with a modern energy-efficient dryer can cut that appliance's draw by up to two-thirds, immediately freeing up space for your new heating system without touching your main panel.
If you are planning a home comfort upgrade, taking a systematic approach will prevent unexpected delays and keep your project running smoothly. Here is the exact process we recommend:
1. Perform a Visual Self-Assessment: Locate your panel, identify your main breaker size, check for physical empty spaces, and note down the age and brand of your panel.
2. Consult an HVAC Professional First: Have a professional heat load calculation performed on your home to determine the exact size and electrical requirements of the comfort system you need.
3. Request an Official Load Calculation: Do not rely on quick rules of thumb or square-footage estimates. A licensed electrician should perform a formal load calculation according to Section 8 of the Canadian Electrical Code (CEC). This calculation takes into account your home's square footage, your heating loads, and the specific wattage of all permanent appliances.
4. Coordinate with the Local Utility: If a service upgrade is required (for example, moving from 100-amp to 200-amp service), your electrician must coordinate with Nova Scotia Power to pull permits, schedule a temporary power disconnect, and install a new, heavier-gauge service mast and meter base.
In the home services industry, we occasionally see contractors recommend a full electrical service upgrade reflexively. While upgrading to a 200-amp panel is always a fantastic investment in your home's future value and electrification readiness, it is not always strictly necessary for your immediate project.
To protect yourself and ensure you are making an informed decision, keep these best practices in mind:
• Ask to See the Math: If a contractor tells you that you must upgrade your panel, ask them to provide the written CEC load calculation sheet. A legitimate professional will gladly show you the exact numbers and explain how they arrived at their conclusion.
• Separate the Work if Needed: You do not have to use the same contractor for both the HVAC installation and the electrical work. Getting a separate, independent opinion from a licensed electrician is a highly effective way to verify if an upgrade is truly required.
• Watch Out for "Breaker Space" Confusion: Ensure the contractor isn't confusing a lack of physical breaker slots with a lack of actual electrical capacity. As mentioned earlier, physical space issues can often be solved with simple subpanels or tandem breakers for a fraction of the effort of a full service upgrade.
For a deeper dive into the planning process and what to expect during a system assessment, read our guide on Breaker Panel Upgrade Details.
The primary difference lies in the total electrical capacity (measured in watts) that your home can safely draw at any single moment.
Under standard Canadian 240-volt electrical service, the math is simple:
• 100-Amp Service: 100 Amps × 240 Volts = 24,000 Watts of total capacity. Applying the 80% continuous safety rule, your safe continuous limit is 19,200 Watts.
• 200-Amp Service: 200 Amps × 240 Volts = 48,000 Watts of total capacity. Applying the 80% safety rule, your safe continuous limit is 38,400 Watts.
A 100-amp panel is perfectly adequate for a home that uses natural gas, oil, or propane for heating, hot water, and cooking. However, if you want to run a central electric heating system, an electric range, an electric water heater, and a fast EV charger, a 200-amp panel is highly recommended to ensure you never have to worry about which appliances you run simultaneously.
Yes, in many cases you absolutely can. If you choose a highly efficient, variable-speed system, the electrical demand is significantly lower than that of older, single-stage units.
To make a comfort system work on a 100-amp panel, you must plan carefully. If your home has a gas range and a gas water heater, you will have plenty of spare capacity on a 100-amp panel. However, if your home is fully electric, you may need to utilize smart load-sharing devices or prioritize highly efficient appliances (like a highly efficient hybrid water heater) to keep your peak demand within safe limits.
If your home contains certain brands of electrical panels manufactured between the 1960s and 1980s, they should be replaced immediately regardless of whether you are installing new equipment. These panels have documented design flaws that can prevent breakers from tripping during an overload, creating a severe fire hazard:
• Federal Pacific Electric (FPE) Stab-Lok Panels: These breakers have an incredibly high failure rate, frequently failing to trip during standard overloads.
• Zinsco Panels: These panels are prone to a design flaw where the breakers can melt directly onto the bus bar, preventing them from ever tripping and creating a major fire risk.
• Old Fuse Boxes: While fuses are actually highly reliable safety devices, old fuse boxes are rarely large enough for modern electrical needs. Furthermore, they are often modified over time by homeowners using incorrect fuse sizes, which bypasses their safety features.
Determining whether your electrical panel is ready for a modern heating and cooling system doesn't have to be a guessing game. By locating your main breaker, looking for physical warning signs, and requesting a formal load calculation, you can approach your home upgrade with absolute confidence.
At Presidential Ventilation Systems Ltd., we have spent over 30 years helping homeowners across Nova Scotia—from Halifax and Dartmouth to Timberlea, Bedford, and beyond—achieve perfect year-round comfort. As a leading Daikin Comfort Pro Dealer, we bring a wealth of expertise in both home comfort systems and electrical installations.
Our team of licensed professionals can handle your entire project start-to-finish, ensuring your electrical system is perfectly matched to your new comfort equipment. If you are ready to evaluate your home's electrical capacity, contact us today to learn more about our Electrical Hookup Services and schedule a professional assessment.

How to know if your home electrical panel needs an upgrade before installing a new heating system comes down to a few key factors you can check before any contractor sets foot in your home.
Here's a quick answer:
• Check your main breaker rating - Open your electrical panel and look for the number on the main breaker (60, 100, 150, or 200 amps)
• 100 amps or less - A panel upgrade is very likely needed, especially if you already run multiple major electric appliances
• 100 to 150 amps - You may or may not need an upgrade; a proper load calculation is required to be sure
• 150 amps or more - You can likely add a new heating system without a full panel upgrade in most cases
• Look for warning signs - Flickering lights, frequently tripped breakers, or a fuse box instead of circuit breakers all point toward a panel that is already strained
• Know your new system's draw - Depending on system size, a modern heating and cooling system can require anywhere from 15 to 60 additional amps at peak load
• Get a load calculation - This is the only reliable way to know for certain whether your existing panel can handle the added demand
Many homeowners only discover their panel is undersized after a contractor is already standing in their home quoting a significant upgrade. That surprise can throw off an entire project budget and timeline. The good news is that with a little preparation, you can walk into that conversation knowing exactly where you stand - and whether the recommendation you're getting is genuinely necessary.
When we think about home comfort, we usually focus on the physical equipment: the outdoor compressor, the indoor air handlers, or the ductwork running through the attic. But the true unsung hero of any home comfort system is the electrical panel.
Think of your electrical panel as the central distribution hub for your entire home. Power flows from the utility lines on your street, through your electrical meter, and directly into this metal box. From there, individual circuit breakers distribute that power to your lights, wall outlets, and major appliances.
If your home was built several decades ago, its electrical system was designed for a completely different lifestyle. Back then, a home might have only needed to power a few light bulbs, a refrigerator, and a television. Today, we are plugging in high-powered induction stoves, electric vehicle chargers, smart devices, and modern heating systems.
When you transition to a highly efficient heating and cooling system, you are shifting your home's energy demand from fossil fuels to electricity. While this is an excellent move for long-term comfort and energy efficiency, it does mean your panel has to work harder.
Interestingly, data shows that many homes actually have more breathing room than we think. Industry statistics indicate that:
• 92% of single-family homes with 200-amp panels use half or less of their overall panel capacity.
• 71% of single-family homes with 100-to-200-amp panels still have half or more of their capacity completely unused.
• Nearly one-third of homes with panels under 100 amps still have 50% or more of their capacity available.
In fact, the average home uses only about 4% of its panel's rated capacity at any given moment. However, the critical factor isn't your average daily usage; it is your peak load—the absolute maximum amount of electricity your home draws when your heating, clothes dryer, stove, and water heater all happen to run at the exact same time on a freezing winter morning.
If you are planning to make the switch to a modern, energy-efficient comfort system, assessing your electrical foundation is the first logical step. You can explore our dedicated Electrical Panel Upgrade Services to understand how we help homeowners transition their electrical systems safely.
Before we can determine if your panel has room for a new major appliance, we have to understand its current limits. To do this, we use a simple "water pipe" analogy:
• Voltage is the water pressure. In Canadian homes, this is typically standard 120-volt service for standard outlets and 240-volt service for heavy-duty appliances.
• Amperage (Amps) is the width of the pipe. It dictates how much electrical current can flow through the system at any one time.
• Wattage (Watts) is the total volume of water flowing out of the pipe (Amps × Volts = Watts).
To find your panel's current limit, open the metal door of your panel and locate the main breaker. This is usually a large double breaker located at the very top or bottom of the panel. It will have a number stamped on the switch toggle—most commonly 100, 125, 150, or 200.
Once you know your main breaker's amperage, you can begin to assess your existing electrical loads. Electrical codes require that a panel should not be loaded beyond 80% of its maximum rating for continuous loads. For a standard 100-amp panel, that means your safe continuous operating limit is 80 amps.
To get a clear picture of how we evaluate these limits and perform professional load calculations, you can read our comprehensive Electrical Service Upgrade Guide.
If you live in Timberlea or surrounding areas like Halifax, Dartmouth, or Bedford, you might be living in a beautifully established home built in the 1970s, 80s, or earlier. Many of these homes were originally equipped with 60-amp or 100-amp panels.
While these panels may have served your family reliably for years, they often exhibit clear physical warning signs when they are reaching their capacity limits. If you notice any of the following symptoms, your panel is telling you it needs attention before you add any new electrical demand:
1. Flickering or Dimming Lights: If your hallway or living room lights briefly dim when your clothes dryer spins up or your old air conditioner kicks on, your system is struggling to handle the sudden inrush of current.
2. Frequently Tripped Breakers: Circuit breakers are safety devices designed to cut power when a circuit is overloaded. If you find yourself frequently walking down to the basement to flip a breaker back on, your circuits are already operating at their limits.
3. Warm Panel Cover or Discolouration: If you touch the metal door of your panel and it feels warm, or if you notice any signs of scorching, discolouration, or a faint burning smell, this is an electrical emergency. It indicates loose connections or overloaded bus bars that pose a direct fire hazard.
4. Physical Hissing or Buzzing Sounds: A healthy electrical panel should be completely silent. Any buzzing or clicking sounds point to failing breakers or electrical arcing.
5. No Physical Space Left: If every single slot in your panel is filled with a breaker and there is no physical room to add a new double-pole breaker, you cannot simply "squeeze" a new system in without modifying the panel layout or upgrading the service.
If you are experiencing these issues in our local community, check out our guide on finding an Electrical Service Upgrade in Timberlea to ensure you are working with qualified, licensed local professionals who understand Nova Scotia's specific electrical regulations.
To understand why a new heating and cooling system impacts your electrical panel, it helps to compare its electrical draw against other common household appliances.
• Standard Light Circuit — Typical Voltage (V): 120V — Typical Amperage (A): 15A — Dedicated Circuit Required?: No (shared)
• Microwave / Hair Dryer — Typical Voltage (V): 120V — Typical Amperage (A): 15A — Dedicated Circuit Required?: Yes (recommended)
• Electric Clothes Dryer — Typical Voltage (V): 240V — Typical Amperage (A): 30A — Dedicated Circuit Required?: Yes
• Electric Range / Stove — Typical Voltage (V): 240V — Typical Amperage (A): 40A - 50A — Dedicated Circuit Required?: Yes
• Electric Water Heater — Typical Voltage (V): 240V — Typical Amperage (A): 30A — Dedicated Circuit Required?: Yes
• Level 2 EV Charger — Typical Voltage (V): 240V — Typical Amperage (A): 40A - 50A — Dedicated Circuit Required?: Yes
• Mini-Split System (1-2 Tons) — Typical Voltage (V): 240V — Typical Amperage (A): 15A - 25A — Dedicated Circuit Required?: Yes
• Central Heating System (3-5 Tons) — Typical Voltage (V): 240V — Typical Amperage (A): 30A - 50A — Dedicated Circuit Required?: Yes
As you can see, a central climate control system is one of the largest electrical consumers in your home. It operates on a dedicated 240-volt circuit and can draw a significant amount of current when working hard in extreme weather.
The physical size of your home dictates the capacity (measured in tons or BTUs) of the comfort system you need. Consequently, the larger the system, the more electrical current it requires.
When evaluating a system's electrical needs, we look at two critical numbers on the manufacturer's specification sheet:
• Minimum Circuit Ampacity (MCA): This is the minimum current-carrying capacity that the circuit wires must have to safely operate the system. It determines the gauge of the wire that must be run from your panel to the outdoor unit.
• Maximum Overcurrent Protection (MOCP): This is the maximum rating for the circuit breaker protecting the equipment. It ensures the breaker will trip in the event of a short circuit without damaging the system's delicate electronics.
For example, a smaller, highly efficient 1.5-ton mini-split system might only have an MCA of 15 amps and require a 20-amp breaker. This is a relatively light load that can often be integrated into an existing 100-amp panel. On the other hand, a large 5-ton central system might require an MCA of 45 amps and a 60-amp breaker. Adding a 60-amp load to a 100-amp panel that is already powering a stove, dryer, and water heater is simply not possible without overloading the system.
However, modern technology has made a massive difference here. Older, single-stage systems draw a massive spike of electricity the moment they turn on to force the compressor to start spinning. Modern inverter-driven (variable-speed) systems start up incredibly slowly and smoothly, completely eliminating that harsh startup spike. This means variable-speed systems are much gentler on your electrical panel.
To learn more about how these dedicated electrical lines are safely run and connected to your outdoor and indoor units, explore our specialized Electrical Hookup Services.
If a load calculation reveals that your panel is right on the edge of its capacity, you don't always have to jump straight to a full panel replacement. There are several highly effective, modern engineering workarounds that can help you maximize your existing service:
• Tandem Breakers: If your panel is physically full but still has electrical capacity, we can sometimes replace single breakers with "tandem" or "slim" breakers. These allow two separate 120-volt circuits to occupy a single physical slot in your panel, freeing up the physical space needed for a new double-pole breaker.
• Load-Sharing Devices (Circuit Splitters): These smart devices allow two heavy-duty appliances to share a single circuit. For example, if you have an EV charger and an electric clothes dryer, a load-sharer will automatically pause power to the EV charger whenever the dryer is running, resuming it once the cycle is complete. This prevents the two appliances from ever drawing power simultaneously, effectively removing one from your peak load calculation.
• Smart Panels and Dynamic Load Managers: Modern smart panels or add-on energy monitors can actively monitor your home's total electricity draw. If you approach your panel's limit, the system can temporarily throttle back non-essential loads (like an EV charger or a hot tub) to prioritize your heating system.
• "Watt Tidying" (The Appliance Diet): Sometimes, the easiest way to free up 30 amps of capacity is to replace an old, inefficient appliance. Replacing an old standard electric clothes dryer with a modern energy-efficient dryer can cut that appliance's draw by up to two-thirds, immediately freeing up space for your new heating system without touching your main panel.
If you are planning a home comfort upgrade, taking a systematic approach will prevent unexpected delays and keep your project running smoothly. Here is the exact process we recommend:
1. Perform a Visual Self-Assessment: Locate your panel, identify your main breaker size, check for physical empty spaces, and note down the age and brand of your panel.
2. Consult an HVAC Professional First: Have a professional heat load calculation performed on your home to determine the exact size and electrical requirements of the comfort system you need.
3. Request an Official Load Calculation: Do not rely on quick rules of thumb or square-footage estimates. A licensed electrician should perform a formal load calculation according to Section 8 of the Canadian Electrical Code (CEC). This calculation takes into account your home's square footage, your heating loads, and the specific wattage of all permanent appliances.
4. Coordinate with the Local Utility: If a service upgrade is required (for example, moving from 100-amp to 200-amp service), your electrician must coordinate with Nova Scotia Power to pull permits, schedule a temporary power disconnect, and install a new, heavier-gauge service mast and meter base.
In the home services industry, we occasionally see contractors recommend a full electrical service upgrade reflexively. While upgrading to a 200-amp panel is always a fantastic investment in your home's future value and electrification readiness, it is not always strictly necessary for your immediate project.
To protect yourself and ensure you are making an informed decision, keep these best practices in mind:
• Ask to See the Math: If a contractor tells you that you must upgrade your panel, ask them to provide the written CEC load calculation sheet. A legitimate professional will gladly show you the exact numbers and explain how they arrived at their conclusion.
• Separate the Work if Needed: You do not have to use the same contractor for both the HVAC installation and the electrical work. Getting a separate, independent opinion from a licensed electrician is a highly effective way to verify if an upgrade is truly required.
• Watch Out for "Breaker Space" Confusion: Ensure the contractor isn't confusing a lack of physical breaker slots with a lack of actual electrical capacity. As mentioned earlier, physical space issues can often be solved with simple subpanels or tandem breakers for a fraction of the effort of a full service upgrade.
For a deeper dive into the planning process and what to expect during a system assessment, read our guide on Breaker Panel Upgrade Details.
The primary difference lies in the total electrical capacity (measured in watts) that your home can safely draw at any single moment.
Under standard Canadian 240-volt electrical service, the math is simple:
• 100-Amp Service: 100 Amps × 240 Volts = 24,000 Watts of total capacity. Applying the 80% continuous safety rule, your safe continuous limit is 19,200 Watts.
• 200-Amp Service: 200 Amps × 240 Volts = 48,000 Watts of total capacity. Applying the 80% safety rule, your safe continuous limit is 38,400 Watts.
A 100-amp panel is perfectly adequate for a home that uses natural gas, oil, or propane for heating, hot water, and cooking. However, if you want to run a central electric heating system, an electric range, an electric water heater, and a fast EV charger, a 200-amp panel is highly recommended to ensure you never have to worry about which appliances you run simultaneously.
Yes, in many cases you absolutely can. If you choose a highly efficient, variable-speed system, the electrical demand is significantly lower than that of older, single-stage units.
To make a comfort system work on a 100-amp panel, you must plan carefully. If your home has a gas range and a gas water heater, you will have plenty of spare capacity on a 100-amp panel. However, if your home is fully electric, you may need to utilize smart load-sharing devices or prioritize highly efficient appliances (like a highly efficient hybrid water heater) to keep your peak demand within safe limits.
If your home contains certain brands of electrical panels manufactured between the 1960s and 1980s, they should be replaced immediately regardless of whether you are installing new equipment. These panels have documented design flaws that can prevent breakers from tripping during an overload, creating a severe fire hazard:
• Federal Pacific Electric (FPE) Stab-Lok Panels: These breakers have an incredibly high failure rate, frequently failing to trip during standard overloads.
• Zinsco Panels: These panels are prone to a design flaw where the breakers can melt directly onto the bus bar, preventing them from ever tripping and creating a major fire risk.
• Old Fuse Boxes: While fuses are actually highly reliable safety devices, old fuse boxes are rarely large enough for modern electrical needs. Furthermore, they are often modified over time by homeowners using incorrect fuse sizes, which bypasses their safety features.
Determining whether your electrical panel is ready for a modern heating and cooling system doesn't have to be a guessing game. By locating your main breaker, looking for physical warning signs, and requesting a formal load calculation, you can approach your home upgrade with absolute confidence.
At Presidential Ventilation Systems Ltd., we have spent over 30 years helping homeowners across Nova Scotia—from Halifax and Dartmouth to Timberlea, Bedford, and beyond—achieve perfect year-round comfort. As a leading Daikin Comfort Pro Dealer, we bring a wealth of expertise in both home comfort systems and electrical installations.
Our team of licensed professionals can handle your entire project start-to-finish, ensuring your electrical system is perfectly matched to your new comfort equipment. If you are ready to evaluate your home's electrical capacity, contact us today to learn more about our Electrical Hookup Services and schedule a professional assessment.

At Presidential Ventilation Systems, our team knows firsthand that before the first freeze hits and the damp Nova Scotia shoulder season takes hold, there is a narrow window to secure reliable heating for your home. If you are planning an HVAC upgrade, managing the removal of abandoned oil tanks during a heat pump conversion in Sackville, NS, is one of the most time-sensitive projects you can tackle. The transition from an aging fossil fuel system to a modern, efficient electric setup is a smart investment, but it requires precise logistical coordination to execute safely.
Ready to upgrade your home's comfort? Explore your heat pump installation options today.
Sackville's freezing winters are unforgiving. When temperatures plummet, your home cannot sit without an active heat source for days while you wait for different contractors to finish their part of a project. A delayed heating transition does not just mean a few days of wearing extra sweaters; it introduces the severe risk of frozen pipes, burst plumbing, and structural cold damage. Upgrading from an aging oil furnace to a modern electric heat pump involves two massive tasks that must happen in tandem: achieving environmental compliance by safely decommissioning your old oil tank, and maintaining a warm, safe home throughout the installation process.
The core logistical challenge lies in the overlap. You cannot simply leave an old oil tank sitting in your basement or yard once it is disconnected, and you cannot install a high-efficiency electric heating system without ensuring your home's electrical panel is ready for the load. Professional coordination is absolutely required to bridge the gap between safely removing the environmental hazard of an old tank and activating your new heating system without losing heat when you need it most.
When you decide to switch away from oil heating, dealing with the leftover tank is not an optional step—it is a strict regulatory requirement. In our 30+ years serving Nova Scotia, our technicians have seen countless homeowners completely unaware of the liability sitting in their basements or side yards. The Nova Scotia Environment and Climate Change (NSECC) guidelines clearly dictate how unused domestic oil tanks must be handled to protect the local environment.
Leaving an unused oil tank on your property presents significant environmental and financial risks. Over time, steel tanks corrode from the inside out due to condensation and sludge buildup. Even if a tank is empty, residual oil and sludge remain at the bottom.
• Soil Contamination: A corroded outdoor tank can leak residual sludge into the surrounding soil, leading to a costly environmental cleanup.
• Groundwater Risks: Contaminants can quickly reach local groundwater, creating hazards for your property and your neighbors.
• Indoor Air Quality: Indoor tanks that slowly degrade can release strong petroleum odors into your basement, compromising your home's air quality.
Home insurance providers take aging and abandoned oil tanks very seriously during property transitions. If you transition to a heat pump and leave a disconnected oil tank on the premises, your insurance company may view the property as an active environmental liability. Many providers will refuse to renew a policy—or will drop coverage entirely—if they discover an abandoned, undecommissioned tank on the property. Safe decommissioning involves pumping out residual oil, safely disconnecting and capping fill pipes, and removing the tank structure entirely in compliance with NSECC standards. It is a protective measure for your property value, your insurance standing, and the local ecosystem.
A major oversight many homeowners make during an HVAC retrofit is ignoring the home's electrical capacity. Moving from a fossil fuel system to an electric heat pump fundamentally changes your home's electrical load. An old oil furnace relies on a small amount of electricity to run the blower motor and the igniter. A modern heat pump, however, uses electricity to power the compressor, the condenser fan, the indoor air handler, and often a set of auxiliary electric heat strips for extreme weather.
Because of this increased demand, a 200-amp service upgrade is frequently necessary. At Presidential Ventilation Systems, our in-house electrical division frequently encounters outdated 100-amp panels in older homes that simply cannot safely support new HVAC equipment. If you attempt to install a robust heating system on an outdated panel, you risk overloaded circuits, frequent breaker trips, and potential fire hazards. Having qualified electricians assess your panel before the HVAC installation begins is a critical safety step.
For example, one homeowner reached out to us during the summer with concerns about the efficiency and capacity of their existing setup. One of our specialists visited the home to review the system, explain efficiency options, and confirm that their electrical infrastructure could safely handle the transition to ducted heat pump systems. This proactive assessment ensured the new equipment would run smoothly without overtaxing the home's electrical grid. Ignoring your electrical capacity during a major retrofit is a recipe for system failure and safety hazards down the road.
Upgrading your heating system while decommissioning an oil tank usually involves a frustrating scheduling puzzle. The traditional approach requires hiring separate environmental contractors to pump the tank, a demolition crew to remove it, an electrician to upgrade the panel, and an HVAC company to install the heat pump.
Trying to align schedules for tank removal, electrical upgrades, and the new system installation is a common frustration. The specific risk here is severe heating downtime. If the electrician is delayed by two days, the HVAC installer cannot turn on the new heat pump. If the tank removal crew is late, the physical space needed for the new air handler might not be clear. When communication breakdowns occur between disparate companies, you are the one left shivering in a cold house.
The Integrated Solution: An integrated approach eliminates these delays. When you are transitioning from oil forced air to a central ducted heat pump, relying on a single-source contractor like Presidential Ventilation Systems means the schedule is managed internally. Our electricians, tank removal specialists, and HVAC technicians work under one roof, ensuring that as soon as the old system is safely decommissioned, the electrical panel is ready, and the new heat pump is immediately brought online.
• Scheduling — Multi-Contractor Approach: Requires coordinating 3-4 separate companies. — Single-Source Approach: One phone call, one unified project timeline.
• Heating Downtime — Multi-Contractor Approach: High risk of multi-day delays if one trade falls behind. — Single-Source Approach: Seamless transition, often completed within a single day.
• Accountability — Multi-Contractor Approach: Contractors may blame each other for delays or issues. — Single-Source Approach: One company holds full responsibility for the outcome.
• Electrical Prep — Multi-Contractor Approach: Requires a separate visit and permit from an outside electrician. — Single-Source Approach: In-house electricians handle upgrades concurrently.
Managing this complex transition requires a strict, authoritative step-by-step methodology. Because Presidential Ventilation Systems features in-house HVAC, electrical, ventilation, and sheet-metal divisions manned by a team of approximately 70 professionals, we execute this sequence seamlessly, eliminating the dangerous downtime that puts your home at risk.
Recently, a homeowner needed a new heat pump installed in the dead of winter. Because our team handles the entire process internally, the installation was completed efficiently within a single day, ensuring the house did not sit without heat during freezing temperatures. Here is how our professional, single-source team manages the sequence:
1. Comprehensive Site Assessment: Before any tools are lifted, a thorough evaluation of the existing oil tank, the home's electrical panel, and the ductwork layout is conducted. This ensures there are no surprises on installation day.
2. Electrical Panel Upgrade: Our Red Seal electricians upgrade the electrical service (often to 200 amps) prior to installation, ensuring the home can handle the new load safely and legally.
3. Safe Tank Decommissioning: The old oil tank is pumped, safely disconnected, and removed from the property in strict compliance with NSECC standards, eliminating environmental and insurance liabilities.
4. Heat Pump Installation and Commissioning: The new electric heating system is installed, connected to the upgraded panel, and thoroughly tested to ensure peak performance and immediate comfort.
By keeping every step under one roof, you receive professional heating services that prioritize both your safety and your comfort.

Upgrading your home's heating infrastructure is a significant investment, but there is often financial support available to ease the transition. Provincial and federal rebate programs frequently exist to support oil-to-heat-pump conversions, designed specifically to offset the costs of upgrading to energy-efficient electric systems.
These incentives can make a substantial difference in your project's overall return on investment. However, navigating the paperwork requires attention to detail. Proper documentation of the tank decommissioning and the new equipment's efficiency ratings is usually mandatory to qualify.
Important Disclaimer: Rebate programs, funding availability, and eligibility requirements can change frequently. We strongly advise homeowners to confirm current programs and eligibility directly with the Presidential Ventilation Systems team during an initial free estimate. By working with an experienced contractor, you ensure that the equipment selected meets the specific criteria required by current incentive programs, and that all necessary documentation is handled correctly from day one.
Environmental compliance and proper electrical sizing are universal requirements across the province. Whether you live in a historic neighborhood with tight property lines or a newer development, the rules regarding oil tank safety and electrical codes remain the same. As a Daikin Comfort Pro with over three decades of experience across residential, commercial, and new construction projects, our professional teams are equipped to handle complex retrofits regardless of the specific neighborhood challenges.
Maritime weather waits for no one, which reinforces the need to secure reliable heating before the temperature drops. Proactive scheduling is your best defense against winter emergencies. By coordinating your project early, you ensure your home is secure, compliant, and comfortable well before extreme weather arrives. Check our HVAC service areas to see how we can assist your property.
The process begins with safely pumping out any residual oil and sludge from the tank. Next, technicians disconnect and cap all fill and vent pipes to prevent accidental deliveries. Finally, the tank is physically removed from the property and disposed of at a certified facility in accordance with Nova Scotia environmental regulations.
In most cases, yes, an electrical panel upgrade is required when switching from fossil fuels to a heat pump. Oil furnaces use minimal electricity, while heat pumps require a dedicated 200-amp service to safely power the compressor, air handler, and auxiliary electric heat strips without overloading the system. Our in-house electricians can assess and upgrade your panel as part of the conversion process.
Yes, leaving an unused oil tank on your property is highly discouraged and often violates local environmental and insurance mandates. Unused tanks must be properly decommissioned to prevent soil contamination, groundwater pollution, and potential liability issues with your home insurance provider.
Abandoned oil tanks must be removed by qualified professionals who understand provincial environmental regulations. Hiring a comprehensive contractor like Presidential Ventilation Systems, who handles both the tank decommissioning and the new HVAC installation, ensures the removal is done safely and legally without interrupting your home's heating schedule.
Leaving an unused oil tank on your property is a significant risk that can lead to dropped insurance coverage and environmental fines. Even empty tanks contain residual sludge that can corrode the steel and leak into the surrounding soil, creating a hazardous and costly cleanup situation.
A single contractor prevents downtime by coordinating the electrical, environmental, and HVAC teams internally. Because our electricians and installers work together under one roof, the panel is upgraded and the new heat pump is installed the exact same day the old oil system is decommissioned, ensuring your home stays warm.
Abandoning an oil tank and upgrading to a heat pump does not have to be a stressful, multi-contractor ordeal. When you rely on experienced professionals who handle both the environmental decommissioning and the complex electrical demands, the process becomes streamlined and secure. Managing the removal of abandoned oil tanks during a heat pump conversion in Sackville, NS, requires precision, adherence to provincial regulations, and a commitment to keeping your home warm throughout the transition. By choosing an integrated approach with our in-house Red Seal tradespeople, you gain the peace of mind that your property is safe and your new system will operate flawlessly. Contact Presidential Ventilation Systems today to request a free estimate and discuss your home's conversion needs.

At Presidential Ventilation Systems, a pattern we see often in our residential and commercial projects is the misconception that a 200-square-foot glass enclosure requires the exact same cooling capacity as a standard residential bedroom. Selecting a ductless system primarily for summer cooling in south-facing sunrooms demands an entirely different approach than conditioning an interior hallway or den. If you buy an off-the-shelf unit based solely on room dimensions, you will likely encounter a frustrating problem our Red Seal tradespeople are frequently called to fix: a system that short-cycles, leaving the space feeling cold but distinctly clammy. True comfort requires balancing the temperature drop with active dehumidification.
To establish the right baseline for your home's unique layout, explore our ductless heat pumps and review the capabilities of Lennox ductless systems.
The standard rule of thumb for HVAC sizing relies heavily on square footage, assuming standard insulation, standard ceiling heights, and a typical number of windows. However, in our experience handling new construction and home renovations throughout Nova Scotia, a south-facing sunroom shatters all of these assumptions. The intense summer solar gain pouring through expansive glass walls creates a thermal environment completely unlike the rest of your house.
Furthermore, Nova Scotia's humid maritime summers compound the short-cycling problem. If a unit is oversized for the square footage to combat the heat, it blasts cold air and shuts off too fast. Because it shuts down prematurely, it fails to run long enough to remove the heavy maritime humidity from the air. The result is a room that hits 20°C on the thermostat but feels damp and uncomfortable. Understanding the difference between sensible cooling and latent cooling is the key to solving this issue.
The Problem: Sunrooms are designed to capture light, but in doing so, they also capture immense amounts of thermal energy. During peak July and August afternoons, a south-facing room acts like a thermal battery. The heat enters, but the glass prevents it from easily escaping, creating a dual-load challenge for any climate control system.
The Cause: This phenomenon is known as solar heat gain. Radiant energy from the sun passes through the glass and strikes the floors, furniture, and walls. These objects absorb the energy and reradiate it as infrared heat. Because standard window glass is largely opaque to infrared radiation, the heat becomes trapped inside the room. This is the classic greenhouse effect. If you compare a highly insulated interior room to a sunroom with extensive glazing, the sunroom might require two to three times the cooling capacity simply to counteract the sun, regardless of the square footage.
The Solution: Counteracting the greenhouse effect requires a system designed specifically for high sensible heat loads. It means looking beyond the physical dimensions of the room and calculating the exact amount of solar energy entering the space during the hottest part of the day.
The type of glass in your sunroom plays a massive role in how much heat enters the space. The Solar Heat Gain Coefficient (SHGC) is a metric that measures the fraction of solar radiation admitted through a window. A lower SHGC means less heat is transmitted.
• Single-pane glass: Offers almost no resistance to solar heat gain, resulting in massive temperature spikes.
• Standard double-pane: Provides better insulation but still allows significant radiant heat through.
• Low-E coated glass: Reflects a portion of the infrared energy, reducing the cooling load, though rapid temperature spikes on sunny days still occur.
Even in a well-insulated sunroom with high-quality Low-E windows, the sheer volume of glass means the space will experience rapid temperature spikes on sunny days, demanding a highly responsive cooling solution.
To properly condition a high-glass space, you have to understand how air conditioners actually treat the air. An air conditioning system performs two distinct jobs simultaneously: lowering the temperature and removing moisture. These two functions are technically referred to as sensible cooling and latent cooling.
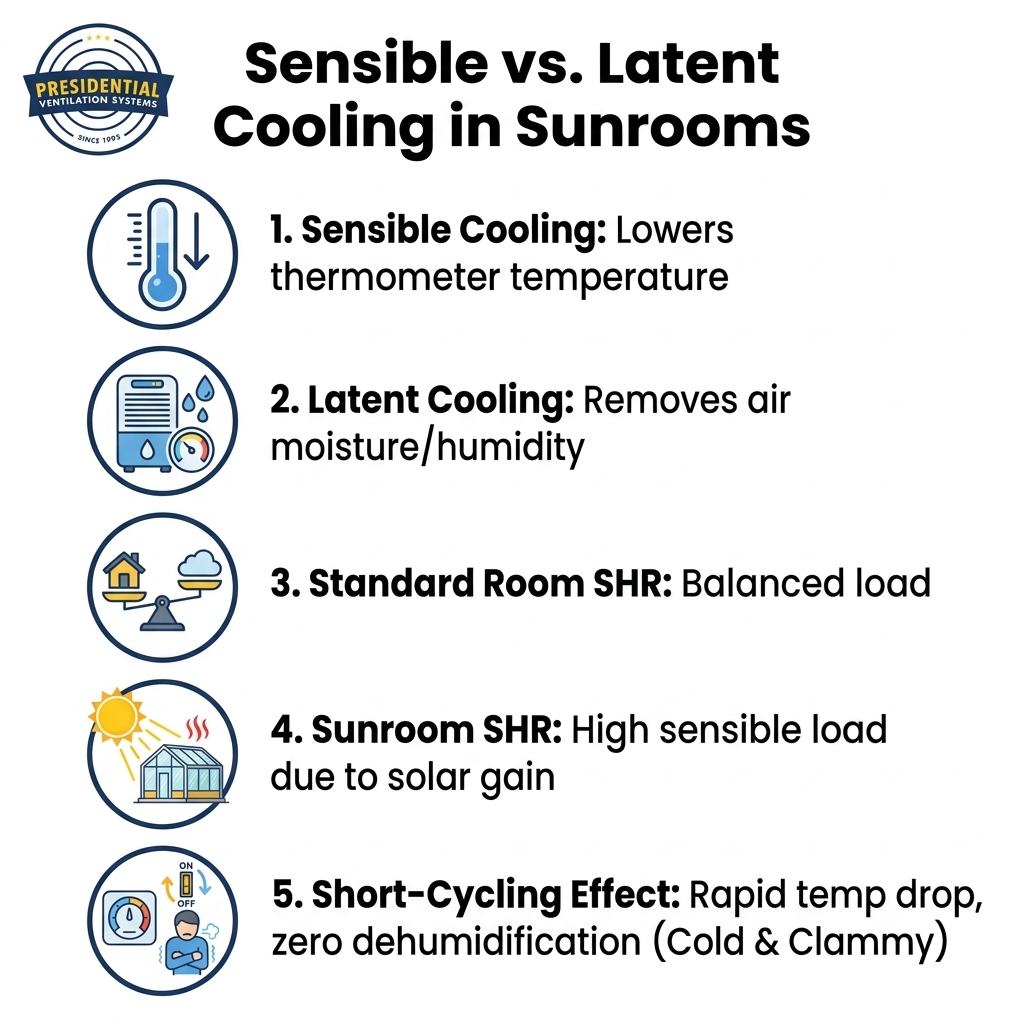
Sensible cooling is the system's ability to lower the actual air temperature—the metric you feel on your skin and read on a thermometer. Latent cooling is the system's ability to extract moisture and humidity from the air. The ratio between these two functions is called the Sensible Heat Ratio (SHR). A standard living room might require an SHR of 0.75 (meaning 75% of the system's effort goes to dropping the temperature and 25% goes to removing humidity). However, a sunroom baking in the afternoon sun requires a system optimized for a much higher sensible heat load.
• Sensible Cooling — What It Does: Lowers the measurable air temperature (thermometer reading). — Sunroom Impact: Must be exceptionally high to combat direct solar radiation entering through glass.
• Latent Cooling — What It Does: Removes water vapor and humidity from the air. — Sunroom Impact: Requires sustained system run-time to pull moisture out of humid maritime air.
• Sensible Heat Ratio (SHR) — What It Does: The balance between temperature drop and moisture removal. — Sunroom Impact: Sunrooms need a specific SHR to avoid dropping the temperature faster than the humidity.
If you are exploring different equipment options, our best ductless heat pumps guide outlines how different systems balance these critical ratios.
Short-cycling occurs when an oversized unit blasts a massive amount of cold air into a small space, satisfying the thermostat in a matter of minutes. Because the thermostat only measures sensible heat (temperature), it tells the system to shut off.
The problem is that the indoor evaporator coil needs sustained, continuous run time to effectively pull moisture from the air. When the system shuts down after five minutes, the latent cooling process stops entirely. The result is a rapid temperature drop with zero dehumidification, leading directly to the dreaded "cold and clammy" effect.
Finding the right equipment for a sunroom means looking beyond familiar brand names and focusing on the technical specifications that dictate performance. As a Daikin Comfort Pro contractor, our team recommends prioritizing one critical feature for a sunroom: a variable-speed (inverter) compressor. Unlike older single-stage units that only run at 100% capacity or 0%, an inverter compressor can modulate its output to perfectly match the fluctuating solar load.
As the sun shifts behind a cloud, the compressor slows down. As the afternoon sun hits the glass directly, the compressor ramps up. This continuous, modulated operation is the absolute best way to maintain long run times, ensuring both the sensible temperature is managed and the latent humidity is consistently extracted.
We see the importance of this careful selection frequently in our field work around the Mount Uniacke NS area. Last summer, a homeowner reached out to have heat pumps installed with careful attention to detail for their specific layout. By thoroughly assessing the space and taking the time to answer their questions about handling intense solar loads, our installation team delivered a finished product that left the customer completely satisfied.
When selecting the physical indoor unit, you also have to consider airflow. In a glass-heavy space, wall space is often at a premium. While traditional high-wall mounts are common, floor-mounted indoor units (often installed on dwarf walls beneath windows) can provide excellent upward airflow that washes the glass, preventing condensation and maintaining an even temperature profile. Because of these variables, relying on professional load calculations (Manual J) is necessary. Generic online BTU calculators cannot account for the specific orientation, glass type, and shading of your sunroom. For a system engineered to handle these precise demands, many homeowners turn to Lennox ductless systems.
The Problem: Adding a dedicated ductless system for a sunroom isn't just an HVAC project; it is an electrical project. A new heat pump requires a dedicated circuit, and simply adding breakers to an existing panel without verification can lead to overloaded circuits and tripped breakers.
The Cause: Many older Nova Scotia homes operate on 100-amp electrical services or have panels that are already physically full. When homeowners attempt to add a new 15-amp or 20-amp 240V circuit for a sunroom mini-split, they often discover their electrical infrastructure cannot safely support the additional load.
The Solution: Verifying panel capacity before finalizing the HVAC design is a non-negotiable step. In our 30+ years of multi-trade expertise across Nova Scotia, we have seen the pitfalls of the fragmented approach—where a homeowner hires a heat pump installer, only to be told halfway through the job that they need to go find an electrician. Because Presidential Ventilation Systems maintains in-house electrical and HVAC divisions, we handle both the precise load calculations and the licensed electrical panel upgrades under one roof. This ensures the installation process remains seamless, compliant, and safe.
The physical environment of a sunroom presents unique installation challenges that dictate the long-term performance and lifespan of the equipment. Proper planning by an experienced contractor is required to ensure the system operates efficiently without obstructing the view.
1. Assessing Available Wall Space: Sunrooms are primarily glass, leaving very little structural wall space for mounting indoor units. Technicians must carefully locate solid framing that can support the unit's weight while ensuring the airflow isn't blocked by furniture or architectural features.
2. Routing Line Sets and Drainage: The refrigerant lines and condensate drains must be routed to the exterior. In a room made of glass, hiding these lines requires careful planning to maintain the aesthetic appeal of the space. Gravity-fed condensate drains must have a proper slope, or a condensate pump must be integrated.
3. Evaluating Multi-Zone vs. Single-Zone: Homeowners often ask if they can just add a new head to an existing multi-zone heat pump system. While sometimes possible, sunrooms experience peak cooling demand at different times than the rest of the house. A completely independent single-zone system often provides better dedicated climate control for the extreme solar load.
4. Ensuring Proper Placement: Where the unit is placed affects both sensible and latent cooling efficiency. If installed too high in a vaulted sunroom, it may struggle to condition the living space below. Professional installation ensures the unit is positioned to optimize air distribution.
Last fall, a homeowner expressed concerns regarding an existing, inefficient heat pump system that another company had installed in their sunroom. After inspecting the system, our technicians provided helpful advice and efficiency tips, giving the customer clear guidance on improving their setup to better handle the space. To ensure your project is handled correctly from day one, trust a professional heat pump installation team.
Because sunroom systems operate under heavy loads during peak summer months, they require diligent upkeep to maintain their efficiency and protect the compressor.
• Clean the indoor filters frequently: High run-times mean more air is circulating through the filters. Check and wash the reusable filters every few weeks during peak summer to ensure unrestricted airflow.
• Keep the outdoor condenser clear: The outdoor unit needs to dissipate the massive amount of heat extracted from the sunroom. Keep vegetation, debris, and outdoor furniture at least two feet away from the condenser coil.
• Monitor for proper drainage: Because the system is doing heavy latent cooling (dehumidification), it will produce a significant amount of condensate water. Ensure the drain line remains clear and flows freely away from the home's foundation.
• Schedule professional deep cleaning: Over time, the indoor blower wheel and evaporator coil will accumulate micro-dust and organic growth. A professional deep clean restores the system's ability to transfer heat and extract moisture efficiently.
Preventive maintenance protects the compressor from the strain of heavy solar loads. To keep your system running at peak performance, consider enrolling in a comprehensive preventive maintenance plan.
Why is my sunroom mini split not dehumidifying?
If your system isn't removing moisture, it is likely short-cycling due to being oversized for the space. When a unit cools the room too quickly, it shuts off before the evaporator coil has time to extract humidity from the air. This results in a cold but clammy environment. A professional load calculation can determine if your system's sensible heat ratio is mismatched to the room.
What size mini split do I need for a 200 sq ft sunroom?
Sizing a system for a sunroom cannot be done accurately using only square footage. Because of the intense solar heat gain through the glass, a 200-square-foot sunroom often requires significantly more capacity than a standard room of the same size. A licensed HVAC technician must perform a Manual J load calculation to account for your specific glass type, insulation, and sun exposure.
Can you put a mini split in a 4 season room?
Yes, a ductless mini-split is often the ideal solution for a 4-season room. These systems provide both high-efficiency summer cooling and reliable winter heating without requiring ductwork. However, the installation requires careful planning regarding unit placement and electrical capacity to ensure it can handle the room's unique thermal loads year-round.
What is the best way to cool a sunroom?
The most effective way to cool a sunroom is by installing a dedicated ductless heat pump with a variable-speed inverter compressor. This technology modulates its cooling output to match the shifting solar load throughout the day. It provides consistent temperature control and superior dehumidification compared to window units or extending existing central ductwork.
How does sensible cooling differ from latent cooling in HVAC?
Sensible cooling refers to the system's ability to lower the actual air temperature, which is what you read on a thermometer. Latent cooling is the system's ability to remove moisture and humidity from the air. In high-glass spaces, balancing these two factors is critical to preventing the room from feeling damp and uncomfortable.
Do I need an electrical panel upgrade to add a heat pump to my sunroom?
Adding a new dedicated heat pump requires an available 240V circuit on your electrical panel. If your home has an older 100-amp service or a panel that is already full, an upgrade or a sub-panel may be required. As a multi-trade contractor, Presidential Ventilation Systems can assess your electrical capacity and handle both the HVAC and electrical requirements safely.
Cooling a sunroom effectively requires more than just guessing at square footage; it requires a precise understanding of sensible cooling ratios and proper electrical integration. With over 30 years of multi-trade expertise in Nova Scotia and a team of approximately 70 employees, Presidential Ventilation Systems ensures your system is sized perfectly and installed safely. If you are considering an installation, retrofit, or oil-to-heat-pump conversion, there may be rebates available. Because rebate programs and eligibility can change, we recommend confirming current programs directly with our team. Contact Presidential Ventilation Systems today to request a free estimate for your sunroom project.