


If you are starting your January and February mornings with a towel in hand to wipe down soaking wet window sills, you are dealing with one of the most common homeowner questions answered by our ventilation professionals every winter. At Presidential Ventilation Systems Ltd., we hear from frustrated residents who turn up the heat, feel warm, yet watch heavy droplets of water—or worse, a thick layer of frost—continue to build up on the inside of their glass. This is a damaging cycle that ruins wood trim, promotes mold growth, and leaves you wondering if your windows are failing.
The truth our team frequently shares is that window condensation is rarely a problem with the windows themselves. It is a fundamental conflict between how modern homes are built and how we live inside them. Tightly sealed homes are excellent at trapping heat, but they are equally effective at trapping moisture. As a homeowner, you have to decide if this excess humidity can be managed with simple daily habits or if it requires a dedicated mechanical solution. Whether you rely on baseboards, a furnace, or ductless heat pumps, treating your home's heating and breathing as a single integrated system is the only way to protect your indoor air quality during deep winter cold snaps.
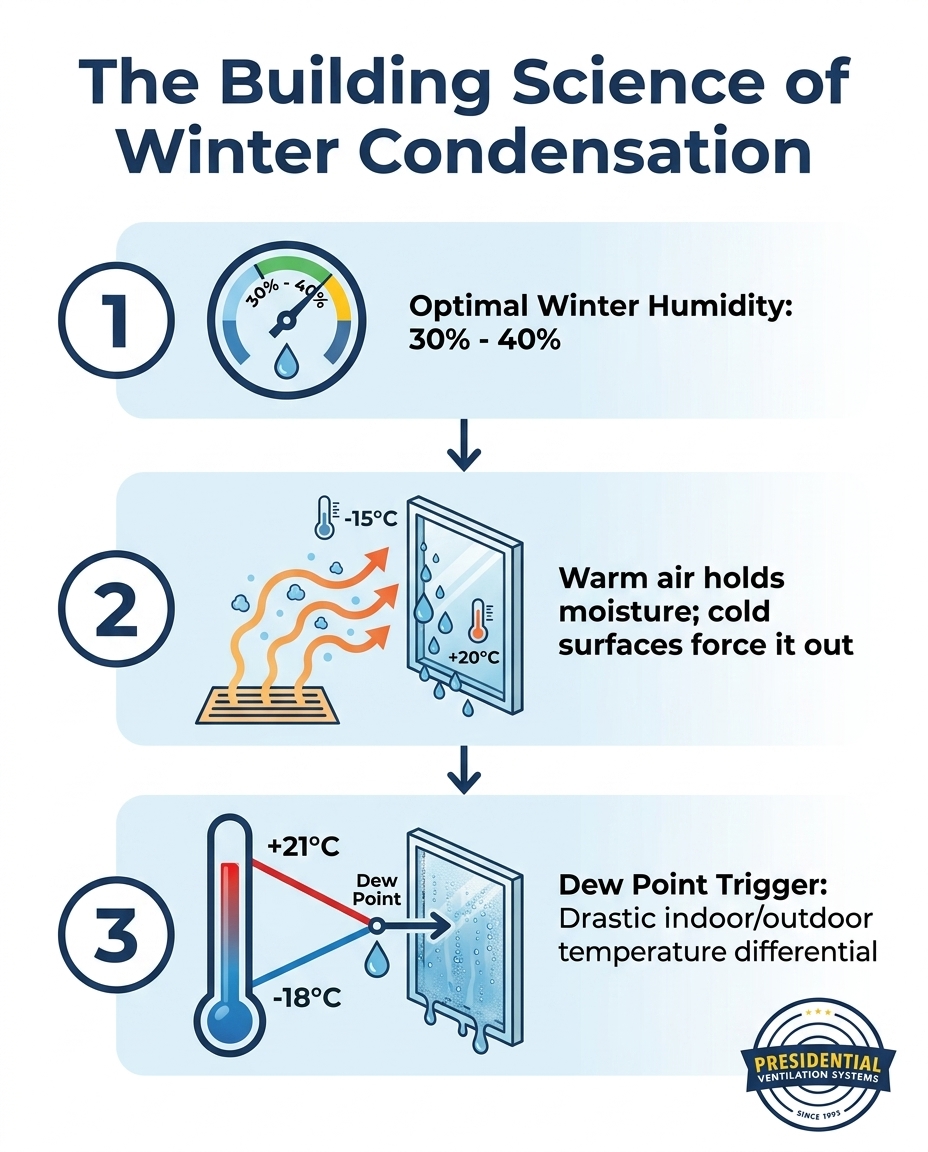
To stop water from pooling on your sills, you first need to understand why it forms. The physics of condensation come down to temperature and the air's capacity to hold water. Warm air acts like a sponge; it naturally holds a significant amount of invisible water vapor. Cold air, on the other hand, is dense and cannot hold much moisture at all. When the warm, humid air inside your living room drifts over to a freezing cold window pane, that air cools rapidly. Because it can no longer hold all its moisture, it drops the excess water directly onto the glass.
The symptom of a larger issue: Wiping down the glass removes the water, but it does not remove the humidity from your home. When our technicians measure indoor environments across Mount Uniacke, we frequently see homes sitting at a staggering 55% to 60% relative humidity while outdoor temperatures hover around -10°C. Condensation is simply a visual indicator of this overarching indoor air quality imbalance. If water is collecting on your windows, that same moisture is likely seeping into your attic, your wall cavities, and your insulation.
The exact moment when air releases its moisture is called the dew point. The dew point is driven by the temperature differential between the inside and outside of your home. If your house is 21°C inside, but the glass surface is cooled to 2°C by the outdoor weather, any air touching that glass will instantly reach its dew point. To prevent this physical reaction, you have to monitor your optimal indoor relative humidity percentages carefully.
• Above 4°C — Recommended Maximum Indoor Humidity: 40% - 50% — Risk of Condensation: Low risk on double-pane windows
• -6°C to 4°C — Recommended Maximum Indoor Humidity: 35% - 40% — Risk of Condensation: Moderate risk, especially overnight
• -12°C to -6°C — Recommended Maximum Indoor Humidity: 30% - 35% — Risk of Condensation: High risk without active ventilation
• Below -12°C — Recommended Maximum Indoor Humidity: 25% - 30% — Risk of Condensation: Severe risk during deep cold snaps
Building standards have changed dramatically over the last few decades. Modern properties—and older homes that have been retrofitted between 2010 and 2023 with new R-20+ wall insulation and siding—are built tightly to conserve energy. We often explain to our clients that draft sealing is incredibly effective for keeping your heating bills low, but it completely eliminates the natural ventilation that older, draftier homes relied on to stay dry.
In the past, a drafty house naturally cycled dry outdoor air through the living space, pushing humid indoor air out through the cracks. Today, that moisture has nowhere to go. Every daily activity adds a surprising amount of water vapor to your sealed indoor environment.
• Cooking and boiling water: Releasing steam directly into the kitchen air.
• Hot showers and baths: Pumping dense water vapor into hallways and bedrooms.
• Drying clothes indoors: Hanging damp laundry adds massive amounts of moisture as it dries.
• Simply breathing: A family of four releases several liters of water vapor into the air every single day just by exhaling.
This trapped moisture becomes a serious problem in the Mount Uniacke and surrounding Nova Scotia region. We experience freezing, damp maritime winters. Unlike dry inland climates where the winter air is completely devoid of moisture, our coastal environment maintains high ambient outdoor humidity even during freezing temperatures. This damp cold makes mechanical moisture management absolutely necessary, as the natural drying effect of winter air is much lower here.
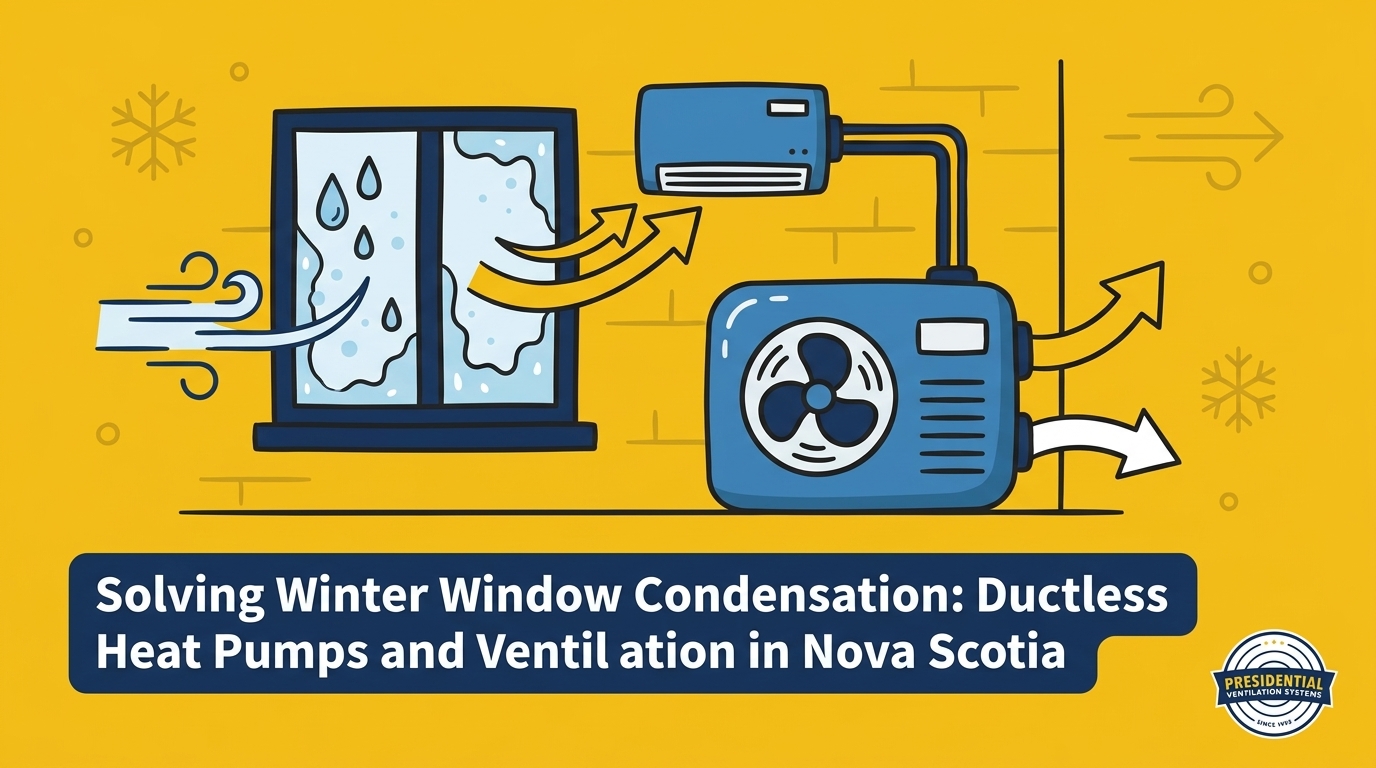
A frequent misunderstanding our installation crew hears is that installing a heat pump will automatically fix a home's stuffy air. Many homeowners assume that because a heat pump has an outdoor unit and an indoor unit, it must be pulling fresh outdoor air inside. This is a myth. Whether you are running a standard model or a high-efficiency cold-climate unit rated for -25°C, ductless systems are highly efficient heating and cooling machines, but they are not ventilators.
The reality of refrigerant cycles: A ductless system transfers heat energy, not air volume. The outdoor compressor extracts heat from the outside air and moves that heat through copper refrigerant lines into your home. The indoor head unit on your wall simply draws in the existing, stale room air, passes it over a warm coil to heat it, and blows that exact same air back into the room.
Because they do not introduce a single drop of fresh outside air, heat pumps do not inherently solve indoor humidity buildup in the winter. They condition the temperature perfectly, but the moisture remains trapped inside the room. If you are researching the specific operational mechanics of these units, checking out a guide to the best ductless heat pumps will show you exactly how they maximize heating efficiency without acting as an exhaust system. To maintain optimal indoor relative humidity percentages, you need a separate strategy for moving air in and out of the building.
When you spot condensation forming during the first major November frost, your first step should be evaluating your daily habits. Sometimes, minor lifestyle adjustments are enough to keep the humidity in check during mild winter weather. Our team recommends taking immediate, manual control over the moisture you generate.
• Run exhaust fans longer: Leave your standard 50 CFM or 80 CFM bathroom fan running for at least 30 minutes after a shower.
• Use your range hood: Always run the kitchen exhaust fan when boiling water or cooking on the stovetop.
• Open interior doors: Keep bedroom and closet doors open to allow air to circulate freely throughout the house, preventing cold pockets where moisture settles.
• Track your numbers: Purchase a basic digital hygrometer to monitor your optimal indoor relative humidity percentages daily.
Spot-ventilation, like a bathroom fan, only addresses localized moisture. It pulls steam out of one specific room, but it does not create a balanced exchange of air for the whole house. During extreme temperature drops, these manual methods usually hit their limit. The tipping point occurs when you are running your exhaust fans constantly, keeping doors open, and wiping windows down, yet the ice still forms. At this stage, lifestyle changes have failed. To protect your home's structural integrity from rot and your family's lungs from mold spores, a dedicated mechanical solution becomes necessary.
When tightly sealed homes need a permanent solution for trapped moisture, our ventilation experts point to Heat Recovery Ventilators (HRVs) and Energy Recovery Ventilators (ERVs). These systems act as the lungs of your home. They provide a continuous, controlled exchange of stale, moist indoor air for fresh, dry outdoor air, often utilizing a high-performance 75% or greater sensible recovery efficiency core.
How the heat exchange core works:
1. The system pulls warm, humid, stale air from high-moisture areas like kitchens and bathrooms.
2. Simultaneously, it draws in freezing, fresh air from outside.
3. Both airstreams pass through a central heat exchange core, but they never actually mix.
4. The heat from the outgoing stale air is transferred to the incoming cold air.
5. The home receives a constant supply of fresh air that is already pre-warmed, preserving your heating efficiency while dumping the excess humidity outside.
Treating heating and breathing as an integrated whole-home system is the ultimate fix for winter condensation. If your home uses localized mini-splits, pairing them with a centralized HRV ensures every room stays fresh and dry. For homeowners looking at larger renovations, ducted heat pump systems can often be integrated directly with advanced ventilation units, creating a seamless climate control network that handles both temperature and humidity automatically during deep winter cold snaps.
Proper sizing and integration of ventilation equipment require building science expertise, not guesswork. Every home breathes differently depending on its age, insulation levels, and layout. If your windows are sweating constantly, having your current heating and ventilation setup evaluated by a neutral expert will give you a clear path forward. A professional assessment provides a detailed explanation of your system's pros, cons, and overall efficiency, ensuring you do not install a ventilator that is too large or too small for your square footage.
One local Mount Uniacke homeowner reached out to our team last fall because their heat pump required an inspection and deep clean. During the professional and thorough service, our technician tested everything and provided valuable product information about how their specific system interacts with the home's overall airflow. This kind of comprehensive evaluation helps identify whether your condensation is caused by a failing exhaust fan, an unbalanced HRV, or simply a lack of mechanical ventilation entirely.
Because of our unique maritime weather, you need a system designed for this environment. Presidential Ventilation Systems Ltd. brings deep local expertise in designing and installing integrated HVAC systems specifically built to withstand and perform efficiently in Nova Scotia's demanding coastal climate. Furthermore, if you decide to upgrade your equipment, a professional evaluation is usually required. Generic energy rebates and tax incentive programs often require certified professional installation to qualify, making expert professional heating services a smart starting point.
Condensation forms when warm, moist indoor air comes into contact with cold window glass. The warm air rapidly cools and reaches its dew point, forcing it to release water vapor as liquid droplets. This is a common symptom in tightly sealed homes that lack proper ventilation to exhaust daily humidity.
No, a standard ductless heat pump does not bring in fresh outside air. It works by transferring heat energy from the outdoors into your home through refrigerant lines. The indoor unit simply recirculates and heats the existing air inside the room, which is why a separate ventilation system is often needed.
In our experience, the optimal indoor relative humidity during the winter months should generally be kept between 30% and 40%. Maintaining this range ensures the air is comfortable to breathe while remaining dry enough to prevent heavy condensation and ice buildup on cold window panes.
Ice forms on the inside of your windows when the outdoor temperature drops so low that the interior surface of the glass falls below the freezing mark. When the high indoor humidity touches this freezing glass, the resulting condensation freezes instantly into frost or solid ice.
In a modern, tightly sealed home, pairing an HRV with a heat pump is highly recommended. While the heat pump efficiently warms the home, the HRV continuously exhausts stale, humid air and brings in fresh air, preventing the moisture buildup that leads to window condensation and poor air quality.
Maritime winters feature high ambient outdoor humidity even during freezing temperatures, unlike dry inland climates. This damp, heavy cold means homes naturally dry out much slower, making mechanical moisture management and active ventilation critical to maintaining healthy indoor air quality.
Managing winter moisture is ultimately about balancing temperature, draft sealing, and active ventilation. Understanding this building science framework empowers you to make informed decisions about your home's health. You do not have to spend every winter morning wiping down window sills and worrying about water damage. By addressing the root cause of the humidity, you can protect your property and breathe easier. If you are ready to complete your whole-home comfort strategy, our team is here to help you explore professional heat pump installation and ventilation options to keep your air fresh, warm, and perfectly balanced all season long.

If you are starting your January and February mornings with a towel in hand to wipe down soaking wet window sills, you are dealing with one of the most common homeowner questions answered by our ventilation professionals every winter. At Presidential Ventilation Systems Ltd., we hear from frustrated residents who turn up the heat, feel warm, yet watch heavy droplets of water—or worse, a thick layer of frost—continue to build up on the inside of their glass. This is a damaging cycle that ruins wood trim, promotes mold growth, and leaves you wondering if your windows are failing.
The truth our team frequently shares is that window condensation is rarely a problem with the windows themselves. It is a fundamental conflict between how modern homes are built and how we live inside them. Tightly sealed homes are excellent at trapping heat, but they are equally effective at trapping moisture. As a homeowner, you have to decide if this excess humidity can be managed with simple daily habits or if it requires a dedicated mechanical solution. Whether you rely on baseboards, a furnace, or ductless heat pumps, treating your home's heating and breathing as a single integrated system is the only way to protect your indoor air quality during deep winter cold snaps.
To stop water from pooling on your sills, you first need to understand why it forms. The physics of condensation come down to temperature and the air's capacity to hold water. Warm air acts like a sponge; it naturally holds a significant amount of invisible water vapor. Cold air, on the other hand, is dense and cannot hold much moisture at all. When the warm, humid air inside your living room drifts over to a freezing cold window pane, that air cools rapidly. Because it can no longer hold all its moisture, it drops the excess water directly onto the glass.
The symptom of a larger issue: Wiping down the glass removes the water, but it does not remove the humidity from your home. When our technicians measure indoor environments across Mount Uniacke, we frequently see homes sitting at a staggering 55% to 60% relative humidity while outdoor temperatures hover around -10°C. Condensation is simply a visual indicator of this overarching indoor air quality imbalance. If water is collecting on your windows, that same moisture is likely seeping into your attic, your wall cavities, and your insulation.
The exact moment when air releases its moisture is called the dew point. The dew point is driven by the temperature differential between the inside and outside of your home. If your house is 21°C inside, but the glass surface is cooled to 2°C by the outdoor weather, any air touching that glass will instantly reach its dew point. To prevent this physical reaction, you have to monitor your optimal indoor relative humidity percentages carefully.
• Above 4°C — Recommended Maximum Indoor Humidity: 40% - 50% — Risk of Condensation: Low risk on double-pane windows
• -6°C to 4°C — Recommended Maximum Indoor Humidity: 35% - 40% — Risk of Condensation: Moderate risk, especially overnight
• -12°C to -6°C — Recommended Maximum Indoor Humidity: 30% - 35% — Risk of Condensation: High risk without active ventilation
• Below -12°C — Recommended Maximum Indoor Humidity: 25% - 30% — Risk of Condensation: Severe risk during deep cold snaps
Building standards have changed dramatically over the last few decades. Modern properties—and older homes that have been retrofitted between 2010 and 2023 with new R-20+ wall insulation and siding—are built tightly to conserve energy. We often explain to our clients that draft sealing is incredibly effective for keeping your heating bills low, but it completely eliminates the natural ventilation that older, draftier homes relied on to stay dry.
In the past, a drafty house naturally cycled dry outdoor air through the living space, pushing humid indoor air out through the cracks. Today, that moisture has nowhere to go. Every daily activity adds a surprising amount of water vapor to your sealed indoor environment.
• Cooking and boiling water: Releasing steam directly into the kitchen air.
• Hot showers and baths: Pumping dense water vapor into hallways and bedrooms.
• Drying clothes indoors: Hanging damp laundry adds massive amounts of moisture as it dries.
• Simply breathing: A family of four releases several liters of water vapor into the air every single day just by exhaling.
This trapped moisture becomes a serious problem in the Mount Uniacke and surrounding Nova Scotia region. We experience freezing, damp maritime winters. Unlike dry inland climates where the winter air is completely devoid of moisture, our coastal environment maintains high ambient outdoor humidity even during freezing temperatures. This damp cold makes mechanical moisture management absolutely necessary, as the natural drying effect of winter air is much lower here.
A frequent misunderstanding our installation crew hears is that installing a heat pump will automatically fix a home's stuffy air. Many homeowners assume that because a heat pump has an outdoor unit and an indoor unit, it must be pulling fresh outdoor air inside. This is a myth. Whether you are running a standard model or a high-efficiency cold-climate unit rated for -25°C, ductless systems are highly efficient heating and cooling machines, but they are not ventilators.
The reality of refrigerant cycles: A ductless system transfers heat energy, not air volume. The outdoor compressor extracts heat from the outside air and moves that heat through copper refrigerant lines into your home. The indoor head unit on your wall simply draws in the existing, stale room air, passes it over a warm coil to heat it, and blows that exact same air back into the room.
Because they do not introduce a single drop of fresh outside air, heat pumps do not inherently solve indoor humidity buildup in the winter. They condition the temperature perfectly, but the moisture remains trapped inside the room. If you are researching the specific operational mechanics of these units, checking out a guide to the best ductless heat pumps will show you exactly how they maximize heating efficiency without acting as an exhaust system. To maintain optimal indoor relative humidity percentages, you need a separate strategy for moving air in and out of the building.
When you spot condensation forming during the first major November frost, your first step should be evaluating your daily habits. Sometimes, minor lifestyle adjustments are enough to keep the humidity in check during mild winter weather. Our team recommends taking immediate, manual control over the moisture you generate.
• Run exhaust fans longer: Leave your standard 50 CFM or 80 CFM bathroom fan running for at least 30 minutes after a shower.
• Use your range hood: Always run the kitchen exhaust fan when boiling water or cooking on the stovetop.
• Open interior doors: Keep bedroom and closet doors open to allow air to circulate freely throughout the house, preventing cold pockets where moisture settles.
• Track your numbers: Purchase a basic digital hygrometer to monitor your optimal indoor relative humidity percentages daily.
Spot-ventilation, like a bathroom fan, only addresses localized moisture. It pulls steam out of one specific room, but it does not create a balanced exchange of air for the whole house. During extreme temperature drops, these manual methods usually hit their limit. The tipping point occurs when you are running your exhaust fans constantly, keeping doors open, and wiping windows down, yet the ice still forms. At this stage, lifestyle changes have failed. To protect your home's structural integrity from rot and your family's lungs from mold spores, a dedicated mechanical solution becomes necessary.
When tightly sealed homes need a permanent solution for trapped moisture, our ventilation experts point to Heat Recovery Ventilators (HRVs) and Energy Recovery Ventilators (ERVs). These systems act as the lungs of your home. They provide a continuous, controlled exchange of stale, moist indoor air for fresh, dry outdoor air, often utilizing a high-performance 75% or greater sensible recovery efficiency core.
How the heat exchange core works:
1. The system pulls warm, humid, stale air from high-moisture areas like kitchens and bathrooms.
2. Simultaneously, it draws in freezing, fresh air from outside.
3. Both airstreams pass through a central heat exchange core, but they never actually mix.
4. The heat from the outgoing stale air is transferred to the incoming cold air.
5. The home receives a constant supply of fresh air that is already pre-warmed, preserving your heating efficiency while dumping the excess humidity outside.
Treating heating and breathing as an integrated whole-home system is the ultimate fix for winter condensation. If your home uses localized mini-splits, pairing them with a centralized HRV ensures every room stays fresh and dry. For homeowners looking at larger renovations, ducted heat pump systems can often be integrated directly with advanced ventilation units, creating a seamless climate control network that handles both temperature and humidity automatically during deep winter cold snaps.
Proper sizing and integration of ventilation equipment require building science expertise, not guesswork. Every home breathes differently depending on its age, insulation levels, and layout. If your windows are sweating constantly, having your current heating and ventilation setup evaluated by a neutral expert will give you a clear path forward. A professional assessment provides a detailed explanation of your system's pros, cons, and overall efficiency, ensuring you do not install a ventilator that is too large or too small for your square footage.
One local Mount Uniacke homeowner reached out to our team last fall because their heat pump required an inspection and deep clean. During the professional and thorough service, our technician tested everything and provided valuable product information about how their specific system interacts with the home's overall airflow. This kind of comprehensive evaluation helps identify whether your condensation is caused by a failing exhaust fan, an unbalanced HRV, or simply a lack of mechanical ventilation entirely.
Because of our unique maritime weather, you need a system designed for this environment. Presidential Ventilation Systems Ltd. brings deep local expertise in designing and installing integrated HVAC systems specifically built to withstand and perform efficiently in Nova Scotia's demanding coastal climate. Furthermore, if you decide to upgrade your equipment, a professional evaluation is usually required. Generic energy rebates and tax incentive programs often require certified professional installation to qualify, making expert professional heating services a smart starting point.
Condensation forms when warm, moist indoor air comes into contact with cold window glass. The warm air rapidly cools and reaches its dew point, forcing it to release water vapor as liquid droplets. This is a common symptom in tightly sealed homes that lack proper ventilation to exhaust daily humidity.
No, a standard ductless heat pump does not bring in fresh outside air. It works by transferring heat energy from the outdoors into your home through refrigerant lines. The indoor unit simply recirculates and heats the existing air inside the room, which is why a separate ventilation system is often needed.
In our experience, the optimal indoor relative humidity during the winter months should generally be kept between 30% and 40%. Maintaining this range ensures the air is comfortable to breathe while remaining dry enough to prevent heavy condensation and ice buildup on cold window panes.
Ice forms on the inside of your windows when the outdoor temperature drops so low that the interior surface of the glass falls below the freezing mark. When the high indoor humidity touches this freezing glass, the resulting condensation freezes instantly into frost or solid ice.
In a modern, tightly sealed home, pairing an HRV with a heat pump is highly recommended. While the heat pump efficiently warms the home, the HRV continuously exhausts stale, humid air and brings in fresh air, preventing the moisture buildup that leads to window condensation and poor air quality.
Maritime winters feature high ambient outdoor humidity even during freezing temperatures, unlike dry inland climates. This damp, heavy cold means homes naturally dry out much slower, making mechanical moisture management and active ventilation critical to maintaining healthy indoor air quality.
Managing winter moisture is ultimately about balancing temperature, draft sealing, and active ventilation. Understanding this building science framework empowers you to make informed decisions about your home's health. You do not have to spend every winter morning wiping down window sills and worrying about water damage. By addressing the root cause of the humidity, you can protect your property and breathe easier. If you are ready to complete your whole-home comfort strategy, our team is here to help you explore professional heat pump installation and ventilation options to keep your air fresh, warm, and perfectly balanced all season long.
You finally have the keys to your brand-new build, but despite the pristine floors and fresh paint, a fine layer of white dust keeps settling on your countertops. At Presidential Ventilation Systems Ltd., our team often encounters a frustrating reality for many property owners: What happens when you skip HRV duct cleaning in a newly constructed home means your state-of-the-art ventilation network is already compromised before you even move your furniture inside. For example, in homes completed during the recent 2022-2024 residential and commercial construction boom, we routinely find significant amounts of drywall dust, heavy sawdust, and fiberglass particles accumulated heavily during the final stages of home construction, settling deep inside the ductwork.
To ensure your new property operates as efficiently as it was designed to, exploring professional ventilation and HVAC services is the best first step you can take.
The most common decision point for new homeowners is whether to schedule a post-build cleaning or simply assume the system is spotless because the house has never been lived in. Modern construction practices generate massive amounts of ultrafine particulate matter. Even with diligent contractors sweeping up daily, microscopic debris becomes airborne and inevitably finds its way into the ventilation returns. As we remind our Mount Uniacke NS clients, a "new" home does not automatically equal a "clean" ventilation system.
The unseen accumulation process:
• Drywall sanding: Produces a flour-like dust that stays suspended in the air for hours, easily drifting into open vent boots.
• Hardwood cutting: Heavy sawdust falls into floor registers before grilles are officially installed.
• Insulation installation: Airborne fiberglass particles get pulled into the return ducting if the system is tested prematurely.
If left unaddressed, this debris travels straight to the HRV heat recovery core, turning a brand-new mechanical system into a strained, inefficient unit from day one.
The timeline of a new build is complex, with multiple trades overlapping to meet deadlines. During the busy spring and summer building seasons, heavy particulate matter is introduced into the environment daily. One local homeowner recently noted how crucial a tidy, efficient installation is during a summer project; when contractors prioritize a clean work environment, it helps, but even the best crews cannot stop airborne dust from entering an active air exchange network.
When you run the heating or cooling during the construction or major renovation phase—often done to dry drywall mud faster or keep workers comfortable—the system pulls this debris directly into the return vents. This creates an immediate burden on your HRV systems right out of the gate.
Sanding drywall and cutting wood generate suspended particles—often measuring as small as 2.5 microns (PM2.5)—that behave very differently than normal household dust. Standard household dust is primarily made of fabric fibers, pet dander, and skin cells. Construction dust is heavy, abrasive, and highly concentrated.
• Standard Household Dust — Particle Characteristics: Light, easily trapped by basic filters, organic material. — Impact on Ventilation Systems: Gradual buildup over months; easily managed with standard maintenance.
• Construction Debris — Particle Characteristics: Ultrafine, abrasive, inorganic (silica, gypsum, wood). — Impact on Ventilation Systems: Rapid clogging; coats internal components and bypasses basic filters.
Because systems are often tested or run temporarily before the final cleanup is complete, the ductwork acts as a vacuum for the entire job site.
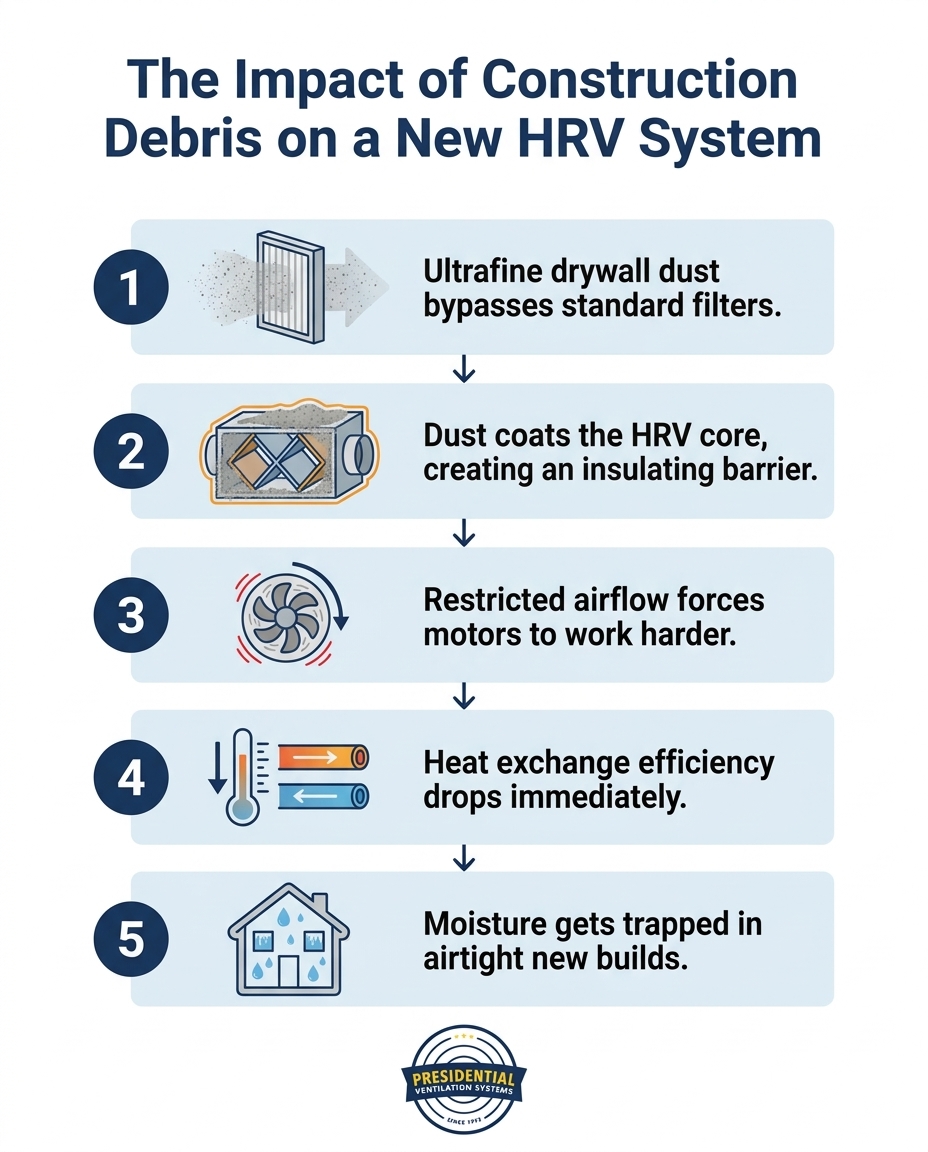
You might assume the disposable filter installed by the builder will catch the mess. Unfortunately, standard construction-grade fiberglass filters are designed to stop large debris like hair and large dust bunnies, not ultrafine drywall powder. These microscopic particles bypass basic filters entirely. The dust settles deep within the ductwork, waiting to be circulated, ultimately leading to restricted airflow and reduced heat exchange efficiency the moment you take occupancy.
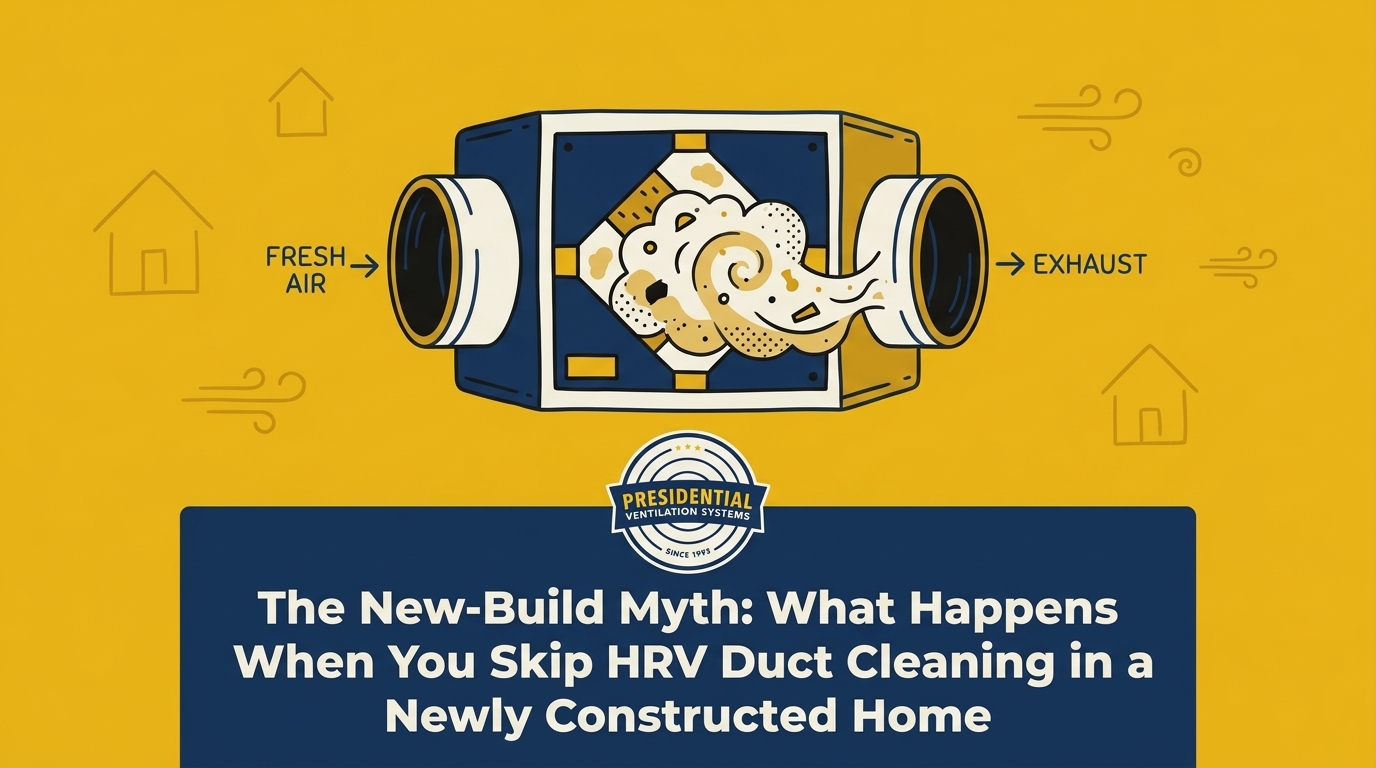
To understand why this specific type of dust is so damaging, you have to look at the mechanical heart of your ventilation setup: the HRV heat recovery core. This component is an intricate, honeycomb-like structure made of thin aluminum or specialized plastic plates. Its job is to cross outgoing stale indoor air with incoming fresh outdoor air, transferring the heat without mixing the air streams.
When our technicians open these units in Mount Uniacke NS, we see firsthand how skipping a post-construction cleaning sends a continuous stream of ultrafine dust straight into this delicate honeycomb structure. If you are wondering what happens if you don't maintain your HRV, the core is the first place to look for failure, often causing standard 75% to 80% Sensible Recovery Efficiency (SRE) ratings to plummet.
Ultrafine dust easily navigates through the ducts to the central unit. Once it reaches the core, a damaging chemical reaction occurs. Drywall dust is highly absorbent. When it combines with normal indoor humidity—or the moisture from fresh paint and curing concrete—it acts exactly like a paste. This paste coats the core's delicate transfer surfaces.
The mechanical breakdown:
• Insulating barrier: The drywall paste hardens into an insulating layer over the heat exchange plates.
• Blocked transfer: Heat can no longer pass efficiently from the warm exhaust air to the cold incoming air.
• Physical blockage: The narrow channels of the honeycomb structure physically plug up, stopping air from moving through the unit.
This buildup happens rapidly in new builds. Without intervention, a high-end, brand-new piece of equipment is quickly reduced to the efficiency of a heavily aged, neglected unit.
The secondary mechanical failures caused by a clogged core are often what homeowners notice first. The primary symptom is a sudden spike in energy usage or a home that feels stuffy despite the system running constantly. This is the direct result of restricted airflow and reduced heat exchange efficiency.
In a brand-new, airtight home, airflow must be perfectly balanced. When the channels of the HRV core become clogged with drywall dust, the volume of fresh air entering the home is drastically reduced. This creates a bottleneck. The static pressure inside the ductwork increases, forcing the system out of its optimal operating range. The blower motors, which are designed to push air with minimal resistance, suddenly have to push past 2,000 RPMs just to force air through the physical blockage.
Energy is wasted trying to overcome this resistance. The motors draw more electricity to maintain the required RPMs, negating the financial benefits of installing high-efficiency equipment in your new build. Furthermore, because the heat transfer surfaces are insulated by a layer of dust, the heat recovery rates plummet. Instead of capturing the heat from your outgoing air to warm the incoming winter air, that energy is lost to the outside, forcing your primary heating system to run longer and harder to make up the difference. This constant electrical strain leads directly to premature wear on blower motors and electrical components.
Modern new construction homes are built to rigorous energy codes, meaning they are highly airtight to prevent drafts and heat loss. While this is fantastic for your heating bill, it creates a unique challenge: airtight homes rely entirely on mechanical ventilation to expel indoor moisture. In Nova Scotia's damp maritime climate, managing high indoor humidity—especially keeping it below the critical 50% threshold during winter—is critical. The regional moisture levels make an efficiently running HRV heat recovery core essential to protect a brand-new airtight home from severe moisture damage.
Airtight construction traps moisture inside. Everyday activities like cooking, bathing, and even breathing generate significant humidity. More importantly, new building materials—such as fresh lumber, poured concrete, and interior paint—release gallons of moisture into the air during the first year of occupancy as they dry and cure.
The risks of trapped moisture:
• Window condensation: Water pools on sills, damaging brand-new trim and drywall.
• Poor indoor air quality: High humidity breeds mold and mildew in dark corners and closets.
• Material warping: Hardwood floors and cabinetry can swell or warp when indoor humidity remains unchecked.
In our years of servicing Mount Uniacke NS, we have seen how a dust-clogged HRV fails to expel this moisture effectively. When the airflow is restricted by construction debris, the damp, stale air stays trapped inside, putting your brand-new investment at immediate risk.
The transition from the installation phase to the occupancy phase is a critical window for your HVAC system's health. The final steps of an air exchanger installation involve balancing the airflow and testing the controls, but the job isn't truly finished until the post-build environment is completely clean. Because commercial and residential construction timelines often overlap, dust continues to enter newly installed systems right up until move-in day.
Our team at Presidential Ventilation Systems Ltd. brings deep local expertise in new construction HVAC, understanding exactly how Maritime building practices and timelines impact brand-new ventilation systems. Professional HVAC installers view the transition from a messy construction site to an occupied home as the most vulnerable time for mechanical equipment. If you have complementary systems, such as ducted heat pump systems, coordinating a professional cleaning immediately after construction protects the entire HVAC ecosystem. It ensures that restricted airflow and reduced heat exchange efficiency don't compromise the lifespan of your interconnected climate control units, while also maintaining system efficiency to ensure you qualify for regional energy rebates.
Assuming your system is clean simply because it is new is a costly mistake. One local homeowner scheduled a routine fall inspection and deep cleaning within the first 6 months of occupancy, only to realize the immense value of thorough testing and product care information after seeing the heavy particulate buildup removed from their seemingly "clean" new system. The evidence is clear: the HRV heat recovery core cannot process construction debris.
The immediate consequences of skipping a post-build cleaning include:
• Immediate reduction in heat exchange efficiency: Dust insulates the core, preventing heat transfer.
• Increased strain on blower motors: Motors overwork to push air through clogged channels, leading to higher electrical energy consumption.
• Poor indoor air quality: Ultrafine drywall dust recirculates continuously into your living spaces.
• Inability to manage indoor humidity: Airtight homes suffer from condensation and potential mold growth when ventilation fails.
• Premature component failure: Overworked motors and sensors burn out faster than their expected lifespan.
Highlighting the value of a thorough, professional inspection and deep clean to verify system health before move-in is essential. For property owners across our local service areas, scheduling this service is the ultimate peace-of-mind check.
A clear, technical understanding of how construction debris interacts with modern ventilation validates the absolute necessity of a post-build cleaning. Protecting the core from the abrasive, paste-like buildup of drywall dust ensures the system operates at peak efficiency from the moment you move in. By clearing out the hidden threats, our team ensures you eliminate the risks of restricted airflow and reduced heat exchange efficiency, allowing your equipment to properly manage the unique moisture loads of a new, airtight build.
Don't let the "new build myth" compromise your comfort. Consult with our local experts at Presidential Ventilation Systems Ltd. to clear out construction dust thoroughly, ensuring you start your new home journey with truly clean, healthy air.
Your new home is likely dusty because ultrafine construction debris, such as drywall dust and sawdust, has settled inside your ductwork. When the HVAC system kicks on, it continuously blows these hidden particles back into your living spaces. A professional duct cleaning removes this trapped debris at the source.
Yes, new builds almost always require duct cleaning before or immediately after move-in. During commercial and residential construction, the open ductwork acts as a collection point for sawdust, fiberglass, and drywall powder. Cleaning the system ensures this abrasive debris doesn't damage your brand-new HVAC equipment.
If an HRV core is clogged, the system cannot efficiently transfer heat between the incoming and outgoing air streams. This blockage restricts fresh airflow, forces the blower motors to overwork, and traps stale, humid air inside your home. In new airtight builds, this often leads to rapid window condensation.
Drywall dust affects an air exchanger installation by bypassing standard filters and coating the internal heat recovery core. Because drywall dust absorbs moisture, it forms a thick paste that blocks the narrow air channels. This immediately reduces the newly installed unit's efficiency and lifespan.
Yes, construction dust can permanently damage a new HRV system if left unaddressed. The constant electrical strain of pushing air through a clogged core can burn out the blower motors prematurely. Additionally, the abrasive nature of the dust can wear down delicate internal sensors and moving parts.
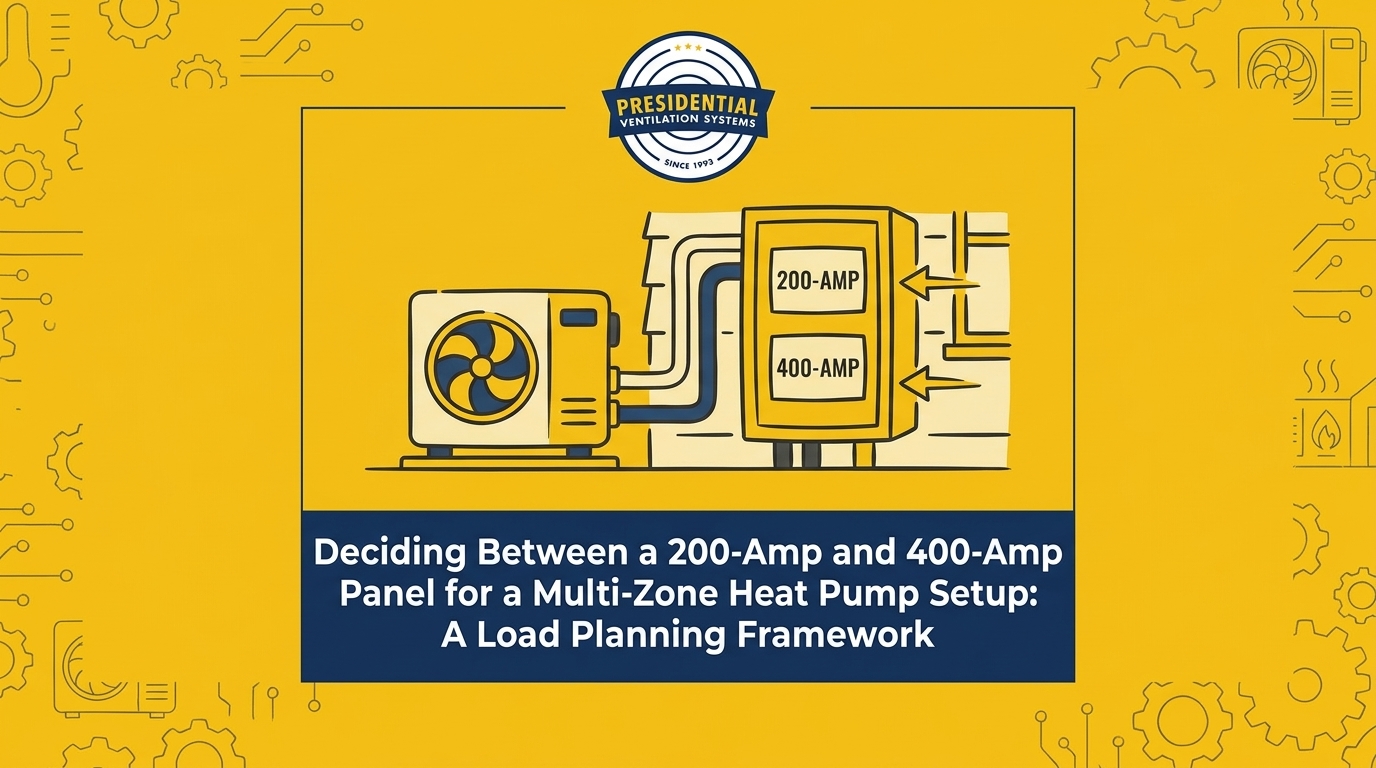
When it comes to new construction, a common myth is that a standard electrical service is automatically robust enough to handle anything a modern homeowner throws at it, making the process of Deciding Between a 200-Amp and 400-Amp Panel for a Multi-Zone Heat Pump Setup feel like an afterthought. The reality is far more complex. A standard 200-amp service has been the baseline for decades, but total home electrification has drastically shifted the goalposts. Today's custom homes are no longer relying on fossil fuels for heating, cooking, or transportation. Instead, they are powered entirely by electricity, which requires a fundamental shift in how we plan residential infrastructure.
The specific challenge lies in balancing total home electrification without overloading the system. You might assume that because your appliances are high-efficiency, they draw less power overall. While they use energy more effectively, the sheer number of high-draw systems operating simultaneously—like induction ranges, electric water heaters, and comprehensive Heat Pump Systems—creates a massive cumulative demand. If this demand exceeds the capacity of the main breaker, you face nuisance tripping, system lockouts, or the need for a highly disruptive electrical overhaul shortly after moving in.
At Presidential Ventilation Systems Ltd., we've found this creates a critical decision point for anyone planning Mount Uniacke custom home builds. Evaluating your current and future power needs during the blueprint phase is the only way to avoid expensive retrofits once the drywall is up and the landscaping is finished. Electrical load planning is a strict professional requirement dictated by national safety codes, not a casual DIY estimate. Getting it right from day one ensures that your home functions smoothly, safely, and efficiently, regardless of how many systems are running at once.
To understand why upgrading your electrical service might be necessary, you have to break down the actual electrical demands of modern, high-efficiency home systems. This process is governed by strict regulations, specifically the Canadian Electrical Code (CEC) Rule 8-200, which dictates how residential load calculations must be performed. Our electrical and HVAC teams know that a licensed electrician doesn't just guess your power needs; they use a precise mathematical formula to ensure safety and compliance.
1. Assess the square footage baseline: The CEC assigns a base wattage requirement based on the livable square footage of the home to cover general lighting and standard receptacles.
2. Factor in major appliances: Dedicated circuits for induction stoves, electric dryers, and electric water heaters are added to the calculation, often carrying a demand factor that accounts for the reality that not everything runs at 100% capacity simultaneously.
3. Calculate HVAC loads: This is where the math gets serious. The amperage requirements for large-scale heating and cooling systems are significant. Multi-zone configurations draw substantial power, especially when multiple compressor units are required to service a large footprint.
4. Add electric vehicle infrastructure: Integrating a Level 2 electric vehicle charger adds a massive continuous load. These chargers typically require dedicated 40-50 amp circuits, and unlike an oven that cycles on and off, an EV charger pulls maximum current for hours at a time.
The cumulative effect of running these systems simultaneously alongside standard household appliances is what pushes a standard panel to its absolute limit. When you combine Multi-zone heat pump + Level 2 EV charger loads, you are consuming a vast portion of a 200-amp panel's available capacity before you even turn on a light switch. This is a pattern we see often, which is why thorough planning is essential for anyone installing Multi-Zone Ductless Heat Pumps in a fully electrified home.
Summing up the baseline requirements for a modern home reveals just how quickly amperage is consumed. An induction stove might require a 40-amp breaker, an electric dryer needs 30 amps, and an electric water heater requires another 30 amps. While the CEC applies a demand factor to these non-continuous loads (assuming you won't bake a turkey, dry three loads of laundry, and take a long shower all at the exact same moment), the baseline draw remains exceptionally high.
The critical distinction in residential planning is understanding continuous versus non-continuous loads. A continuous load operates for three hours or more at a time. EV chargers and heating systems fall into this category. The electrical code requires that continuous loads only utilize 80% of a breaker's rated capacity to prevent overheating. This means a 50-amp circuit for an EV charger can only safely provide 40 amps of continuous power, further complicating the load calculation and eating into the panel's overall budget.
The Problem: In mild climates, a heat pump operates with incredible efficiency, drawing a relatively moderate and steady amount of power to move heat from the outside air into your home. However, local climate conditions drastically impact peak electrical loads. When temperatures plummet, the electrical math changes completely.
The Cause: In our years of installing systems across Nova Scotia, we always focus heavily on the impact of our cold winters here. Robust multi-zone heat pump systems draw significant continuous power to maintain indoor temperatures during deep winter freezes. As the outside air gets colder, the compressor has to work harder and longer to extract heat. More importantly, when the temperature drops below the heat pump's optimal operating range, the system relies on auxiliary electrical resistance heat strips. These heat strips function like a giant toaster inside your ductwork or air handler. They are incredibly effective at warming the air, but they require a massive amperage spike to operate. This auxiliary heat draw is often overlooked in mild-climate load calculations, but it is a harsh reality for Mount Uniacke custom home builds.
The Solution: You must factor worst-case winter scenarios into the initial electrical plan. Sufficient electrical capacity is critical for uninterrupted heating. If your load calculation only accounts for the heat pump's base compressor draw and ignores the 60-to-100-amp spike that occurs when the auxiliary heat strips activate on a -20°C night, your main breaker will trip. Planning for extreme cold ensures that your family stays warm without plunging the house into darkness.
A 200-amp service is the current standard for most new construction, and for many homes, it is perfectly adequate. However, providing a realistic assessment of when a 200-amp service is sufficient and when it falls short requires looking at the specific appliance profile of the home.
• Gas Heat, Gas Appliances, No EV — 200-Amp Panel Suitability: Highly Suitable — Potential Bottlenecks: None. Plenty of capacity for future minor additions.
• Electric Heat (Standard), Electric Appliances, No EV — 200-Amp Panel Suitability: Suitable — Potential Bottlenecks: Approaching limits during peak winter usage.
• Multi-Zone Heat Pump, Electric Appliances, One EV — 200-Amp Panel Suitability: Borderline / Requires Load Shedding — Potential Bottlenecks: Combining Multi-zone heat pump + Level 2 EV charger loads often exceeds safe continuous limits.
• Multi-Zone Heat Pump, Electric Appliances, Multiple EVs, Hot Tub — 200-Amp Panel Suitability: Inadequate — Potential Bottlenecks: Guaranteed to fail CEC load calculations without a service upgrade.
From what our technicians typically see in the field, a 200-amp panel can safely support a moderately sized home (under 2,500 square feet) with standard electric appliances and a basic HVAC system. However, adding a single heavy continuous load—like a Level 2 EV charger—to a home that already relies on electric heat can push a 200-amp panel to its absolute limit.
The load-shedding workaround: If you are locked into a 200-amp service, load-shedding devices or smart electrical panels offer a potential workaround. These devices monitor the total power draw and automatically pause specific heavy loads (like the EV charger) when the HVAC system requires maximum power. While effective, they have limitations for large properties and can be frustrating if you need your car fully charged on a cold winter morning. Ultimately, any panel evaluation and load calculation must be conducted by a licensed professional to ensure safety and code compliance.
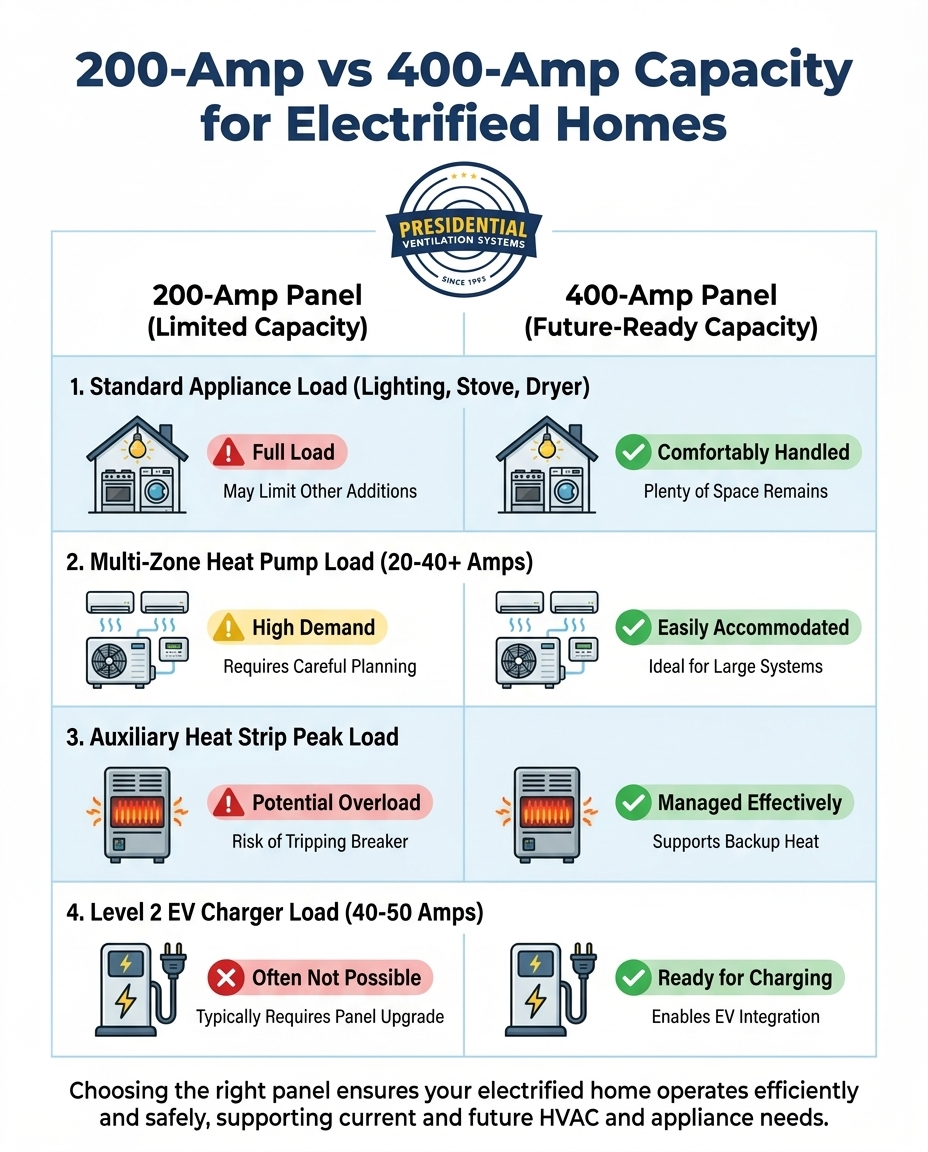
When our team's math clearly shows that 200 amps won't cut it, we recommend upgrading to a 400-amp service during the construction phase as the most logical step for Mount Uniacke custom home builds. But what exactly does this upgrade entail? In residential applications, a "400-amp service" usually consists of a 320-amp continuous meter base installed on the exterior of the home, which then feeds into two separate 200-amp breaker panels inside.
Unlocking total flexibility: This expanded capacity easily accommodates multiple heat pumps, multiple electric vehicles, and luxury amenities that draw heavy power, such as hot tubs, electrically heated outbuildings, or large commercial-style workshop equipment. With two 200-amp panels, you have an abundance of breaker spaces, ensuring that every high-draw appliance can have its own dedicated circuit without compromising the safety of the main feed.
The long-term value: The true benefit of this upgrade is future-proofing. The automotive industry is moving rapidly toward total electrification, and home heating is following suit. Installing this infrastructure during the initial build is vastly more efficient than attempting a retrofit later. While the initial investment for a larger meter base, heavier gauge wiring, and dual panels is higher upfront, it prevents costly teardowns, drywall patching, and service interruptions down the road. If you are curious about the mechanics of upgrading, understanding the factors involved in breaker panel upgrade cost and scope can help you budget accurately during the blueprint stage.
One of the most common pitfalls in custom construction is treating the HVAC system and the electrical system as entirely separate entities. Illustrating the necessity of having mechanical and electrical teams aligned is crucial to prevent installation bottlenecks. Common scenarios arise where a perfectly planned HVAC installation is suddenly halted because the existing or planned electrical panel simply lacks the capacity to power the equipment.
Holistic planning prevents these last-minute scrambles and ensures seamless system integration. When the mechanical load requirements are calculated in tandem with the electrical infrastructure, there are no surprises on installation day. For example, our team had a Mount Uniacke homeowner reach out during a summer heat wave when an issue arose with their electrical panel upgrade during a central heat pump installation. Because our teams communicated effectively, our specialist Jack helped resolve the panel concerns on-site, ensuring the electrical infrastructure could safely support the new equipment, and the system now works flawlessly.
This highlights the immense value of working with professionals who understand the complete picture. As a comprehensive HVAC installer, Presidential Ventilation Systems Ltd. understands both the mechanical load requirements and the electrical infrastructure needed to support high-efficiency systems in large custom homes. When you are balancing Multi-zone heat pump + Level 2 EV charger loads, having a unified strategy ensures your project stays on schedule and your home operates safely.
Building a custom home with robust electrical and HVAC systems is a significant investment, but there are financial incentives available that can help offset the initial outlay. Provincial and federal rebates are increasingly tied directly to home electrification and energy efficiency, rewarding homeowners who choose to move away from fossil fuels.
Unlocking incentive tiers: Upgrading electrical panels in conjunction with qualifying heat pumps often unlocks specific incentive tiers. Many government and utility programs recognize that older electrical infrastructure is a barrier to heat pump adoption. As a result, they offer valuable rebates specifically designed to help cover the cost of electrical service upgrades when they are required to support high-efficiency heating and cooling systems.
Budgeting for efficiency: Our team strongly encourages homeowners planning Mount Uniacke custom home builds to factor these rebates into their initial construction budgets. Exploring HVAC and Electrical Financing alongside available rebates can make the decision to upgrade to a 400-amp service much easier. However, it is important to note that professional installation is almost always a strict requirement to ensure all equipment meets rebate eligibility standards. DIY installations or unpermitted electrical work will immediately disqualify you from receiving these valuable financial incentives.
Is 200 amps enough for a heat pump and EV charger?
In our experience, it depends entirely on the size of the home and the other appliances in use. While a 200-amp panel can sometimes support a heat pump and a single EV charger in a smaller home with gas appliances, combining Multi-zone heat pump + Level 2 EV charger loads in a fully electrified home usually exceeds safe continuous load limits, requiring load-shedding devices or a panel upgrade.
When should I upgrade to 400 amp service for a custom build?
We advise planning for a 400-amp service during the blueprint phase if your home will feature total electrification. This includes multi-zone heating, multiple electric vehicles, an induction range, electric water heating, and luxury additions like a hot tub or heated outbuilding. Doing this during the initial build avoids highly disruptive retrofits later.
How much power does a multi-zone heat pump use?
The power draw varies significantly based on the tonnage of the system and the outdoor temperature. A standard multi-zone compressor might draw 20 to 40 amps during normal operation, but this number can spike drastically if extreme cold forces the system to activate auxiliary electrical resistance heat strips.
Do auxiliary heat strips require their own dedicated breaker?
Yes, auxiliary heat strips require their own heavy-duty dedicated circuits. Because they use electrical resistance to generate heat, they draw a massive amount of amperage—often requiring 60 to 100 amps depending on the size of the air handler—which must be carefully factored into the home's total load calculation.
Can a load calculation be done after the house is framed?
While a load calculation can technically be performed at any time, doing it after framing is incredibly risky. If the calculation reveals that a 400-amp service is required, you may have to tear out framing or alter the utility connection point, causing major delays and budget overruns. Load calculations should always be finalized during the architectural design phase.
The choice between a 200-amp and 400-amp service ultimately dictates the future flexibility, safety, and comfort of your home. Assuming that standard infrastructure will support total electrification is a risk that modern custom builds simply cannot afford. A professional load calculation that factors in your specific HVAC goals, EV charging needs, and extreme weather variables is the only way to ensure your electrical panel is up to the task.
Before you finalize your blueprints for your Mount Uniacke custom home builds, ensure your mechanical and electrical plans are perfectly aligned. We encourage you to Schedule a Consultation with our team to review your load requirements, discuss high-efficiency heat pump options, and secure a power strategy that supports your home for decades to come.