


Knowing how to coordinate electrical and HVAC installation in a new build in Nova Scotia can mean the difference between a smooth build and a project full of significant rework and delays. In a standard new build, both trades need to work in the same walls, ceilings, and mechanical spaces — and when they're not properly sequenced, one trade ends up undoing the other's work.
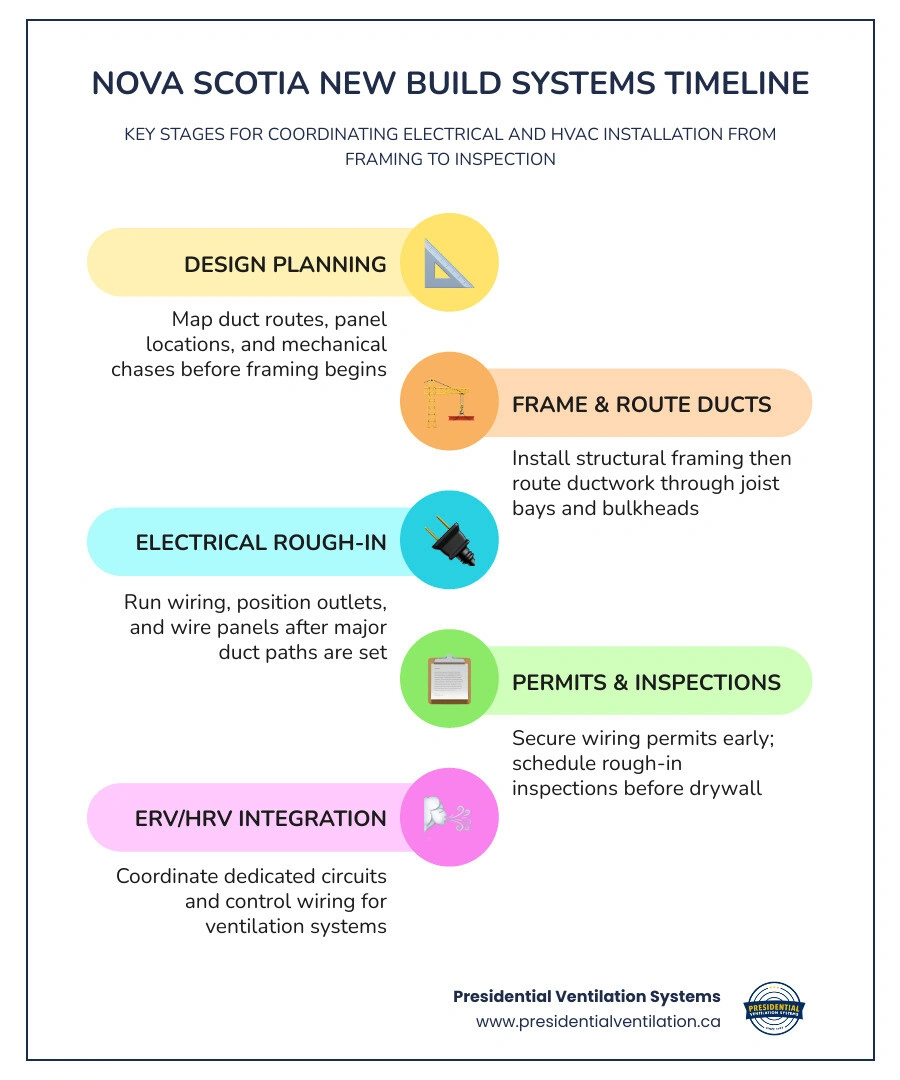
Here is a quick overview of how to coordinate these systems:
1. Plan during design - Identify duct routes, electrical panel location, and shared mechanical chases before framing begins
2. Frame first, route ducts second - Ductwork routing should be mapped to joist bays and bulkheads during the framing stage
3. Electrical rough-in follows ductwork - Wire runs, outlet placement, and panel wiring happen after major duct pathways are established
4. Pull permits early - Wiring permits and building permits must be in place before rough-in work begins; Halifax Regional Municipality alone takes 8–12 weeks to approve permits
5. Schedule rough-in inspections before drywall - Both electrical and HVAC systems need to pass rough-in inspections before walls close
6. Coordinate ERV/HRV wiring with your electrician - Ventilation systems require dedicated circuits and control wiring that must be planned alongside HVAC layout
7. Get everything in writing - Clarify which trade is responsible for each scope item, including disconnects, control wiring, and permit ownership
Building a standard home in Nova Scotia takes 9 to 12 months from planning to move-in, and the systems installation phase alone — covering electrical, HVAC, plumbing, and weatherproofing — typically runs 6 to 10 weeks. That window is tight, especially when you factor in Nova Scotia's unpredictable coastal weather and municipal permit timelines that vary significantly by region.
The good news is that with the right sequencing, clear communication between trades, and an understanding of Nova Scotia's building code requirements, you can keep this phase on track.
Building a new home in locations like Bedford, Dartmouth, or Lower Sackville is an exciting journey, but it requires a strict chronological approach. The entire systems and exterior work phase typically takes 6 to 10 weeks. Because multiple trades must occupy the same tight spaces, establishing a clear line of progression is essential.
In Nova Scotia, seasonal timing plays a massive role in this scheduling. If we begin structural framing in the late spring, we can ensure that the home is fully weatherproofed before the autumn rains and winter freeze set in. When we coordinate the interior systems, we must follow a strict "largest-to-smallest" physical hierarchy.
First, the plumbing drains and main HVAC ductwork are installed because they require the largest, least flexible pathways. Only after these rigid components are secured can we run flexible electrical wiring and gas lines around them. For a deeper look at planning these pathways, you can review our Ductwork Installation Guide Bedford NS.
During the structural framing stage, we must map out the exact routes for all ductwork. Rigid ducts cannot bend around obstacles, meaning they must have priority over all other utilities.
We work closely with the framing crew to ensure that joist bays, bulkheads, and mechanical chases are sized correctly to accommodate the distribution system without compromising the structural integrity of the home. Designing bulkheads in finished basements or upper-level closets allows us to keep the ductwork entirely within the conditioned envelope of the home, which drastically improves overall system efficiency.
To prevent airflow restrictions and noisy registers, we utilize a Custom Ductwork Design Halifax NS process that aligns perfectly with the home's architectural blueprint.
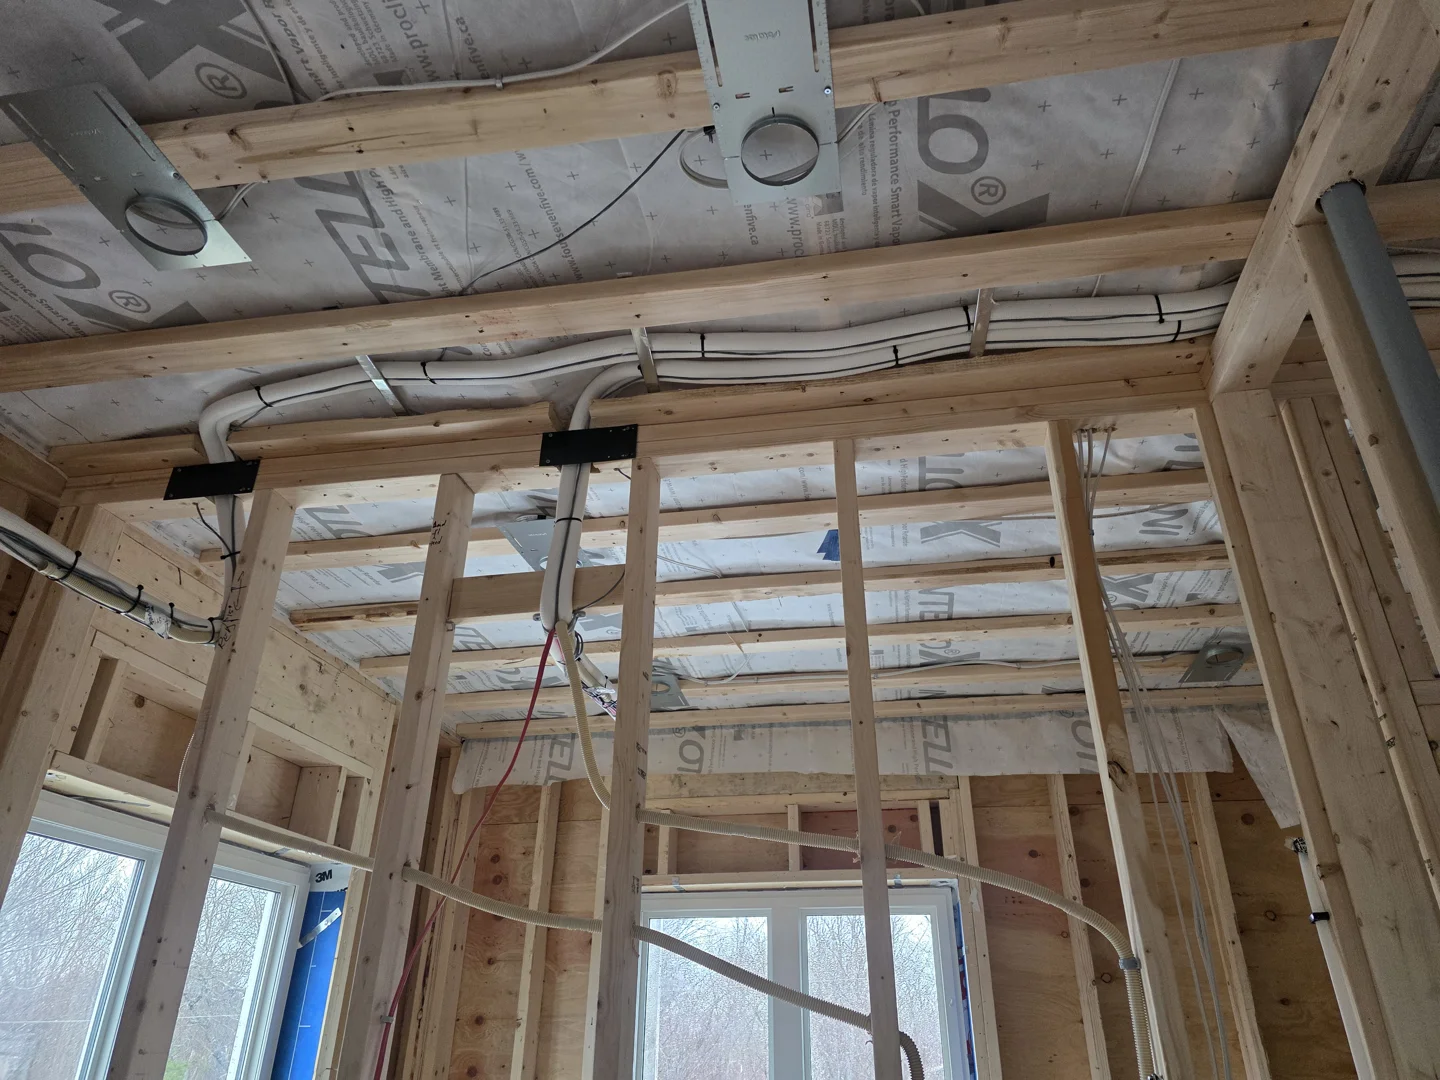
Once the main duct trunks and branch runs are securely mounted, the electrical rough-in can begin. This sequence is vital: an electrician can easily route a flexible non-metallic sheathed cable (Romex) around a pre-installed duct, but an HVAC technician cannot easily route a 10-inch sheet metal trunk line around a pre-installed bundle of structural electrical wires.
During this stage, we determine the optimal location for the main electrical service panel. It must be easily accessible, safe from moisture, and central enough to minimize long wire runs to heavy mechanical equipment.
We also plan the exact locations of all lighting, wall outlets, and dedicated utility circuits. For a comprehensive breakdown of modern wiring standards and safety measures, consult our Electrical Wiring Guide 2025.
Successful trade collaboration prevents the "space wars" that often occur behind drywall. When trades work in isolation, an electrician might run a major wire harness directly through a joist space that was specifically designated for a return air duct. The result is a significant delay while one trade backs out their work.
To prevent this, we hold pre-construction site meetings where the general contractor, the electrical lead, and the HVAC designer walk the framed structure together. We identify potential conflict zones, establish clear boundaries, and agree on shared pathways.
For projects in the capital region, partnering with a unified team that understands both disciplines is highly beneficial. You can learn more about our local services by visiting our Electrical Services Halifax NS page.
A mechanical chase is a dedicated vertical or horizontal shaft designed to carry utilities through the home. By consolidating ductwork, plumbing stacks, and electrical conduits into shared chases, we minimize the amount of square footage lost to bulkheads and decorative chases.
When designing these corridors, we must respect structural load-bearing walls. Electricians and HVAC installers must never notch or drill structural studs or joists beyond the limits permitted by the National Building Code. Consolidating these paths simplifies the framing process and makes future system maintenance much easier.
Modern homes rely heavily on smart controls, automated ventilation, and zoned climates. This requires early coordination for low-voltage communication wiring.
While the main power lines run at 120V or 240V, thermostat signals, smart home integration lines, and ventilation sensors run on low-voltage (typically 24V) lines. We must plan the routes of these control wires so they do not run parallel to high-voltage power lines, which can cause electromagnetic interference and communication errors within your smart system.
Every new build in Nova Scotia must comply with the Nova Scotia Building Code Regulations, which adopt the National Building Code (NBC) 2020. These regulations exist to ensure structural safety, fire protection, and energy efficiency.
Before a single wire is run or a duct is hung, the appropriate municipal permits must be secured. In the Halifax Regional Municipality, permit processing can take 8 to 12 weeks, whereas rural areas may take 4 to 6 weeks.
If your new build design requires substantial power to support modern air handling, ventilation, and vehicle charging infrastructure, you may need to coordinate with Nova Scotia Power for a service upgrade. For details on how we manage this process, see our guide on Electrical Service Upgrade.
Under the Nova Scotia Building Code, professional design and field reviews are required for complex systems. Municipal building officials will not issue an occupancy permit without proof of successful electrical and mechanical inspections.
1. Rough-In Inspection: Occurs after all framing, ductwork, plumbing, and wiring are in place, but before insulation and drywall are installed. The walls must remain open so the inspector can verify code compliance, proper support spacing, and fire-stopping.
2. Commitment Certificates (Forms 5 & 6): For certain residential and commercial builds, registered professionals must submit Letters of Undertaking to certify that the mechanical and electrical systems have been designed and reviewed in accordance with the building code.
3. Final Inspection: Completed once the home is finished, all fixtures are installed, and the systems are fully operational. A final inspection sticker is applied to the electrical meter, allowing Nova Scotia Power to establish permanent connection.
The NBC 2020 places a massive emphasis on building envelope airtightness and energy conservation. Modern homes are built to be incredibly tight to prevent conditioned air from escaping. However, an airtight home can trap stale air, moisture, and indoor pollutants.
This makes mechanical ventilation a code requirement, not an option. We must design and install ventilation systems that provide continuous fresh air exchange while preserving the integrity of the home's air barrier. Every electrical box, wire penetration, and duct penetration through the exterior envelope must be meticulously sealed with approved acoustical sealant, gaskets, or vapor barrier boots to maintain the home’s airtightness rating.
A high-performance home requires a robust electrical backbone to support continuous ventilation and air filtration systems. An Energy Recovery Ventilator (ERV) or Heat Recovery Ventilator (HRV) is the heart of a modern home's breathing system.
Because these units run continuously or on duty cycles to replace indoor air every few hours, they require dedicated, stable electrical circuits. To ensure your main service panel is up to the task of powering these continuous loads alongside your daily appliances, a Panel Upgrade is often planned during the initial design phase.
This electrical integration must be paired with precision ductwork, especially in multi-level builds. For details on routing these systems, see our guide on Ductwork Installation in Lower Sackville NS.
To help you understand the electrical demands of different ventilation setups, we have compiled a comparison table below:
• Central Ducted ERV/HRV — Typical Voltage: 120V — Amperage Requirement: 15A — Dedicated Circuit Required?: Yes — Key Electrical Considerations: Continuous run rating; proximity to drain for condensate.
• In-Line Exhaust Fans — Typical Voltage: 120V — Amperage Requirement: 15A (Shared) — Dedicated Circuit Required?: No (Can share lighting circuit) — Key Electrical Considerations: Must be interlocked with main bathroom switches or humidity sensors.
• Dedicated Air Handler Units — Typical Voltage: 120V or 240V — Amperage Requirement: 15A to 30A — Dedicated Circuit Required?: Yes — Key Electrical Considerations: Requires HACR-rated circuit breakers; auxiliary heat integration.
• Localized HRV Units — Typical Voltage: 120V — Amperage Requirement: 15A (Shared) — Dedicated Circuit Required?: No — Key Electrical Considerations: Plug-in or direct-wire options; ideal for targeted single-zone ventilation.
When sizing the electrical system for ventilation equipment, our licensed electricians calculate the specific ampacity requirements of the fans, dampers, and integrated controls. We install dedicated circuit breakers to prevent nuisance tripping when other household appliances start up.
Additionally, local codes require a dedicated electrical disconnect switch to be located within sight of the air handling unit. This allows service technicians to safely cut power to the equipment during routine filter changes or system maintenance without having to run down to the basement panel.
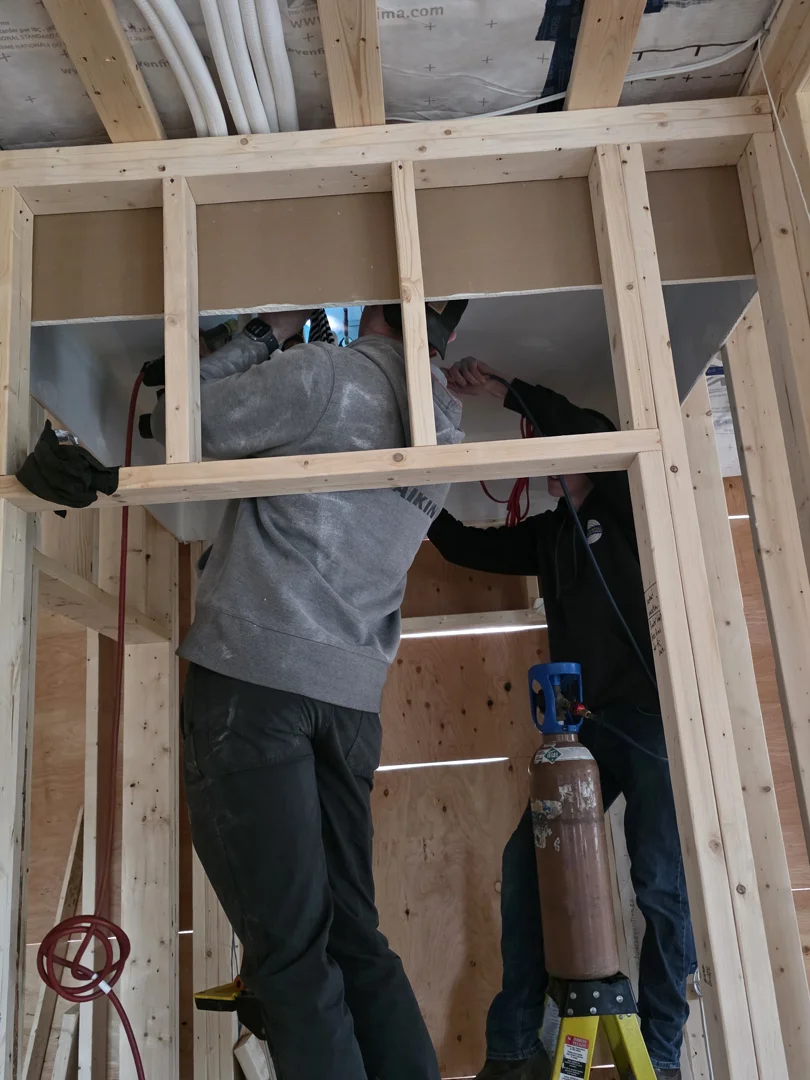
An ERV or HRV must be carefully coordinated between our ventilation technicians and electricians. The mechanical crew installs the physical unit, routes the insulated fresh air intake and stale air exhaust ducts to the exterior of the home, and installs the interior distribution ductwork.
Simultaneously, the electrical crew runs the dedicated 120V power supply to the unit and installs the low-voltage control wiring connecting the machine to the wall-mounted dehumidistats or smart controllers. Proper coordination ensures that the ventilation system is interlocked correctly with any main air handlers, preventing the systems from competing or causing backdrafts.
The key to a stress-free build is structured collaboration. We highly recommend the following best practices for homeowners and general contractors in Nova Scotia:
• Early Involvement: Bring your electrical and ventilation contractors into the design phase early. Do not wait until the framing is complete to hand them a set of blueprints.
• Review Engineering Plans Together: Ensure that the architectural drawings, structural framing plans, and mechanical layouts are cross-referenced to identify physical conflicts before construction begins.
• Hold Weekly Site Walks: A quick 15-minute walk-through with the electrical lead, HVAC lead, and site supervisor can resolve 95% of on-site spatial conflicts before they turn into construction delays.
• Establish Clear Boundaries of Scope: Document exactly who is responsible for supplying and installing items like thermostat wiring, equipment disconnects, and exterior vent hoods.
If you are building in the Dartmouth area, working with local experts who are familiar with municipal inspectors and coastal construction challenges is a major asset. You can reach out to our team via our Electrical Services Dartmouth NS page to coordinate your upcoming project.
The most common delays stem from poor sequencing and municipal permit backlogs. If the electrical rough-in is scheduled before the ductwork is completely installed, the electricians will have to pause or return later to reroute wires that block duct paths. Additionally, unpredictable coastal weather can delay framing, pushing back the entire indoor systems installation window.
These inspections must be scheduled after all framing, plumbing, ductwork, and electrical wiring are fully installed, but before the insulation is placed and the drywall is hung. The municipal building inspector must be able to clearly see all connections, supports, and fire-stopping. Both trades must pass their respective rough-in inspections before the builder is legally permitted to close the walls.
Nova Scotia's high humidity, coastal salt air, and freezing winter temperatures require strategic scheduling. Foundation pouring and framing should ideally occur during the drier, warmer months of late spring and summer.
Once the building envelope is weatherproof, interior electrical and mechanical installations can proceed safely during the colder months, provided temporary, dry heat is maintained inside the structure to protect sensitive equipment and materials.
Successfully coordinating your electrical and ventilation systems is one of the most critical steps in building a safe, comfortable, and energy-efficient home. By prioritizing ductwork routing during framing, sequencing your electrical rough-ins correctly, and ensuring strict adherence to the Nova Scotia Building Code, you can avoid significant delays and ensure your home's systems perform flawlessly for decades to come.
At Presidential Ventilation Systems Ltd., we bring over 30 years of experience to every residential and commercial project. As a leading service provider in Nova Scotia, we specialize in seamless project management, custom duct design, advanced ERV/HRV integration, and professional electrical installations.
Whether you are building in Halifax, Bedford, or surrounding areas, our team is here to help you design a home that breathes easily and functions efficiently. If you are starting a new build project in the Mount Uniacke area, contact our team through our Electrical Services Mount Uniacke NS page to schedule a professional consultation.

Knowing how to coordinate electrical and HVAC installation in a new build in Nova Scotia can mean the difference between a smooth build and a project full of significant rework and delays. In a standard new build, both trades need to work in the same walls, ceilings, and mechanical spaces — and when they're not properly sequenced, one trade ends up undoing the other's work.
Here is a quick overview of how to coordinate these systems:
1. Plan during design - Identify duct routes, electrical panel location, and shared mechanical chases before framing begins
2. Frame first, route ducts second - Ductwork routing should be mapped to joist bays and bulkheads during the framing stage
3. Electrical rough-in follows ductwork - Wire runs, outlet placement, and panel wiring happen after major duct pathways are established
4. Pull permits early - Wiring permits and building permits must be in place before rough-in work begins; Halifax Regional Municipality alone takes 8–12 weeks to approve permits
5. Schedule rough-in inspections before drywall - Both electrical and HVAC systems need to pass rough-in inspections before walls close
6. Coordinate ERV/HRV wiring with your electrician - Ventilation systems require dedicated circuits and control wiring that must be planned alongside HVAC layout
7. Get everything in writing - Clarify which trade is responsible for each scope item, including disconnects, control wiring, and permit ownership
Building a standard home in Nova Scotia takes 9 to 12 months from planning to move-in, and the systems installation phase alone — covering electrical, HVAC, plumbing, and weatherproofing — typically runs 6 to 10 weeks. That window is tight, especially when you factor in Nova Scotia's unpredictable coastal weather and municipal permit timelines that vary significantly by region.
The good news is that with the right sequencing, clear communication between trades, and an understanding of Nova Scotia's building code requirements, you can keep this phase on track.
Building a new home in locations like Bedford, Dartmouth, or Lower Sackville is an exciting journey, but it requires a strict chronological approach. The entire systems and exterior work phase typically takes 6 to 10 weeks. Because multiple trades must occupy the same tight spaces, establishing a clear line of progression is essential.
In Nova Scotia, seasonal timing plays a massive role in this scheduling. If we begin structural framing in the late spring, we can ensure that the home is fully weatherproofed before the autumn rains and winter freeze set in. When we coordinate the interior systems, we must follow a strict "largest-to-smallest" physical hierarchy.
First, the plumbing drains and main HVAC ductwork are installed because they require the largest, least flexible pathways. Only after these rigid components are secured can we run flexible electrical wiring and gas lines around them. For a deeper look at planning these pathways, you can review our Ductwork Installation Guide Bedford NS.
During the structural framing stage, we must map out the exact routes for all ductwork. Rigid ducts cannot bend around obstacles, meaning they must have priority over all other utilities.
We work closely with the framing crew to ensure that joist bays, bulkheads, and mechanical chases are sized correctly to accommodate the distribution system without compromising the structural integrity of the home. Designing bulkheads in finished basements or upper-level closets allows us to keep the ductwork entirely within the conditioned envelope of the home, which drastically improves overall system efficiency.
To prevent airflow restrictions and noisy registers, we utilize a Custom Ductwork Design Halifax NS process that aligns perfectly with the home's architectural blueprint.
Once the main duct trunks and branch runs are securely mounted, the electrical rough-in can begin. This sequence is vital: an electrician can easily route a flexible non-metallic sheathed cable (Romex) around a pre-installed duct, but an HVAC technician cannot easily route a 10-inch sheet metal trunk line around a pre-installed bundle of structural electrical wires.
During this stage, we determine the optimal location for the main electrical service panel. It must be easily accessible, safe from moisture, and central enough to minimize long wire runs to heavy mechanical equipment.
We also plan the exact locations of all lighting, wall outlets, and dedicated utility circuits. For a comprehensive breakdown of modern wiring standards and safety measures, consult our Electrical Wiring Guide 2025.
Successful trade collaboration prevents the "space wars" that often occur behind drywall. When trades work in isolation, an electrician might run a major wire harness directly through a joist space that was specifically designated for a return air duct. The result is a significant delay while one trade backs out their work.
To prevent this, we hold pre-construction site meetings where the general contractor, the electrical lead, and the HVAC designer walk the framed structure together. We identify potential conflict zones, establish clear boundaries, and agree on shared pathways.
For projects in the capital region, partnering with a unified team that understands both disciplines is highly beneficial. You can learn more about our local services by visiting our Electrical Services Halifax NS page.
A mechanical chase is a dedicated vertical or horizontal shaft designed to carry utilities through the home. By consolidating ductwork, plumbing stacks, and electrical conduits into shared chases, we minimize the amount of square footage lost to bulkheads and decorative chases.
When designing these corridors, we must respect structural load-bearing walls. Electricians and HVAC installers must never notch or drill structural studs or joists beyond the limits permitted by the National Building Code. Consolidating these paths simplifies the framing process and makes future system maintenance much easier.
Modern homes rely heavily on smart controls, automated ventilation, and zoned climates. This requires early coordination for low-voltage communication wiring.
While the main power lines run at 120V or 240V, thermostat signals, smart home integration lines, and ventilation sensors run on low-voltage (typically 24V) lines. We must plan the routes of these control wires so they do not run parallel to high-voltage power lines, which can cause electromagnetic interference and communication errors within your smart system.
Every new build in Nova Scotia must comply with the Nova Scotia Building Code Regulations, which adopt the National Building Code (NBC) 2020. These regulations exist to ensure structural safety, fire protection, and energy efficiency.
Before a single wire is run or a duct is hung, the appropriate municipal permits must be secured. In the Halifax Regional Municipality, permit processing can take 8 to 12 weeks, whereas rural areas may take 4 to 6 weeks.
If your new build design requires substantial power to support modern air handling, ventilation, and vehicle charging infrastructure, you may need to coordinate with Nova Scotia Power for a service upgrade. For details on how we manage this process, see our guide on Electrical Service Upgrade.
Under the Nova Scotia Building Code, professional design and field reviews are required for complex systems. Municipal building officials will not issue an occupancy permit without proof of successful electrical and mechanical inspections.
1. Rough-In Inspection: Occurs after all framing, ductwork, plumbing, and wiring are in place, but before insulation and drywall are installed. The walls must remain open so the inspector can verify code compliance, proper support spacing, and fire-stopping.
2. Commitment Certificates (Forms 5 & 6): For certain residential and commercial builds, registered professionals must submit Letters of Undertaking to certify that the mechanical and electrical systems have been designed and reviewed in accordance with the building code.
3. Final Inspection: Completed once the home is finished, all fixtures are installed, and the systems are fully operational. A final inspection sticker is applied to the electrical meter, allowing Nova Scotia Power to establish permanent connection.
The NBC 2020 places a massive emphasis on building envelope airtightness and energy conservation. Modern homes are built to be incredibly tight to prevent conditioned air from escaping. However, an airtight home can trap stale air, moisture, and indoor pollutants.
This makes mechanical ventilation a code requirement, not an option. We must design and install ventilation systems that provide continuous fresh air exchange while preserving the integrity of the home's air barrier. Every electrical box, wire penetration, and duct penetration through the exterior envelope must be meticulously sealed with approved acoustical sealant, gaskets, or vapor barrier boots to maintain the home’s airtightness rating.
A high-performance home requires a robust electrical backbone to support continuous ventilation and air filtration systems. An Energy Recovery Ventilator (ERV) or Heat Recovery Ventilator (HRV) is the heart of a modern home's breathing system.
Because these units run continuously or on duty cycles to replace indoor air every few hours, they require dedicated, stable electrical circuits. To ensure your main service panel is up to the task of powering these continuous loads alongside your daily appliances, a Panel Upgrade is often planned during the initial design phase.
This electrical integration must be paired with precision ductwork, especially in multi-level builds. For details on routing these systems, see our guide on Ductwork Installation in Lower Sackville NS.
To help you understand the electrical demands of different ventilation setups, we have compiled a comparison table below:
• Central Ducted ERV/HRV — Typical Voltage: 120V — Amperage Requirement: 15A — Dedicated Circuit Required?: Yes — Key Electrical Considerations: Continuous run rating; proximity to drain for condensate.
• In-Line Exhaust Fans — Typical Voltage: 120V — Amperage Requirement: 15A (Shared) — Dedicated Circuit Required?: No (Can share lighting circuit) — Key Electrical Considerations: Must be interlocked with main bathroom switches or humidity sensors.
• Dedicated Air Handler Units — Typical Voltage: 120V or 240V — Amperage Requirement: 15A to 30A — Dedicated Circuit Required?: Yes — Key Electrical Considerations: Requires HACR-rated circuit breakers; auxiliary heat integration.
• Localized HRV Units — Typical Voltage: 120V — Amperage Requirement: 15A (Shared) — Dedicated Circuit Required?: No — Key Electrical Considerations: Plug-in or direct-wire options; ideal for targeted single-zone ventilation.
When sizing the electrical system for ventilation equipment, our licensed electricians calculate the specific ampacity requirements of the fans, dampers, and integrated controls. We install dedicated circuit breakers to prevent nuisance tripping when other household appliances start up.
Additionally, local codes require a dedicated electrical disconnect switch to be located within sight of the air handling unit. This allows service technicians to safely cut power to the equipment during routine filter changes or system maintenance without having to run down to the basement panel.
An ERV or HRV must be carefully coordinated between our ventilation technicians and electricians. The mechanical crew installs the physical unit, routes the insulated fresh air intake and stale air exhaust ducts to the exterior of the home, and installs the interior distribution ductwork.
Simultaneously, the electrical crew runs the dedicated 120V power supply to the unit and installs the low-voltage control wiring connecting the machine to the wall-mounted dehumidistats or smart controllers. Proper coordination ensures that the ventilation system is interlocked correctly with any main air handlers, preventing the systems from competing or causing backdrafts.
The key to a stress-free build is structured collaboration. We highly recommend the following best practices for homeowners and general contractors in Nova Scotia:
• Early Involvement: Bring your electrical and ventilation contractors into the design phase early. Do not wait until the framing is complete to hand them a set of blueprints.
• Review Engineering Plans Together: Ensure that the architectural drawings, structural framing plans, and mechanical layouts are cross-referenced to identify physical conflicts before construction begins.
• Hold Weekly Site Walks: A quick 15-minute walk-through with the electrical lead, HVAC lead, and site supervisor can resolve 95% of on-site spatial conflicts before they turn into construction delays.
• Establish Clear Boundaries of Scope: Document exactly who is responsible for supplying and installing items like thermostat wiring, equipment disconnects, and exterior vent hoods.
If you are building in the Dartmouth area, working with local experts who are familiar with municipal inspectors and coastal construction challenges is a major asset. You can reach out to our team via our Electrical Services Dartmouth NS page to coordinate your upcoming project.
The most common delays stem from poor sequencing and municipal permit backlogs. If the electrical rough-in is scheduled before the ductwork is completely installed, the electricians will have to pause or return later to reroute wires that block duct paths. Additionally, unpredictable coastal weather can delay framing, pushing back the entire indoor systems installation window.
These inspections must be scheduled after all framing, plumbing, ductwork, and electrical wiring are fully installed, but before the insulation is placed and the drywall is hung. The municipal building inspector must be able to clearly see all connections, supports, and fire-stopping. Both trades must pass their respective rough-in inspections before the builder is legally permitted to close the walls.
Nova Scotia's high humidity, coastal salt air, and freezing winter temperatures require strategic scheduling. Foundation pouring and framing should ideally occur during the drier, warmer months of late spring and summer.
Once the building envelope is weatherproof, interior electrical and mechanical installations can proceed safely during the colder months, provided temporary, dry heat is maintained inside the structure to protect sensitive equipment and materials.
Successfully coordinating your electrical and ventilation systems is one of the most critical steps in building a safe, comfortable, and energy-efficient home. By prioritizing ductwork routing during framing, sequencing your electrical rough-ins correctly, and ensuring strict adherence to the Nova Scotia Building Code, you can avoid significant delays and ensure your home's systems perform flawlessly for decades to come.
At Presidential Ventilation Systems Ltd., we bring over 30 years of experience to every residential and commercial project. As a leading service provider in Nova Scotia, we specialize in seamless project management, custom duct design, advanced ERV/HRV integration, and professional electrical installations.
Whether you are building in Halifax, Bedford, or surrounding areas, our team is here to help you design a home that breathes easily and functions efficiently. If you are starting a new build project in the Mount Uniacke area, contact our team through our Electrical Services Mount Uniacke NS page to schedule a professional consultation.

At Presidential Ventilation Systems, a pattern we see often in our residential and commercial projects is the misconception that a 200-square-foot glass enclosure requires the exact same cooling capacity as a standard residential bedroom. Selecting a ductless system primarily for summer cooling in south-facing sunrooms demands an entirely different approach than conditioning an interior hallway or den. If you buy an off-the-shelf unit based solely on room dimensions, you will likely encounter a frustrating problem our Red Seal tradespeople are frequently called to fix: a system that short-cycles, leaving the space feeling cold but distinctly clammy. True comfort requires balancing the temperature drop with active dehumidification.
To establish the right baseline for your home's unique layout, explore our ductless heat pumps and review the capabilities of Lennox ductless systems.
The standard rule of thumb for HVAC sizing relies heavily on square footage, assuming standard insulation, standard ceiling heights, and a typical number of windows. However, in our experience handling new construction and home renovations throughout Nova Scotia, a south-facing sunroom shatters all of these assumptions. The intense summer solar gain pouring through expansive glass walls creates a thermal environment completely unlike the rest of your house.
Furthermore, Nova Scotia's humid maritime summers compound the short-cycling problem. If a unit is oversized for the square footage to combat the heat, it blasts cold air and shuts off too fast. Because it shuts down prematurely, it fails to run long enough to remove the heavy maritime humidity from the air. The result is a room that hits 20°C on the thermostat but feels damp and uncomfortable. Understanding the difference between sensible cooling and latent cooling is the key to solving this issue.
The Problem: Sunrooms are designed to capture light, but in doing so, they also capture immense amounts of thermal energy. During peak July and August afternoons, a south-facing room acts like a thermal battery. The heat enters, but the glass prevents it from easily escaping, creating a dual-load challenge for any climate control system.
The Cause: This phenomenon is known as solar heat gain. Radiant energy from the sun passes through the glass and strikes the floors, furniture, and walls. These objects absorb the energy and reradiate it as infrared heat. Because standard window glass is largely opaque to infrared radiation, the heat becomes trapped inside the room. This is the classic greenhouse effect. If you compare a highly insulated interior room to a sunroom with extensive glazing, the sunroom might require two to three times the cooling capacity simply to counteract the sun, regardless of the square footage.
The Solution: Counteracting the greenhouse effect requires a system designed specifically for high sensible heat loads. It means looking beyond the physical dimensions of the room and calculating the exact amount of solar energy entering the space during the hottest part of the day.
The type of glass in your sunroom plays a massive role in how much heat enters the space. The Solar Heat Gain Coefficient (SHGC) is a metric that measures the fraction of solar radiation admitted through a window. A lower SHGC means less heat is transmitted.
• Single-pane glass: Offers almost no resistance to solar heat gain, resulting in massive temperature spikes.
• Standard double-pane: Provides better insulation but still allows significant radiant heat through.
• Low-E coated glass: Reflects a portion of the infrared energy, reducing the cooling load, though rapid temperature spikes on sunny days still occur.
Even in a well-insulated sunroom with high-quality Low-E windows, the sheer volume of glass means the space will experience rapid temperature spikes on sunny days, demanding a highly responsive cooling solution.
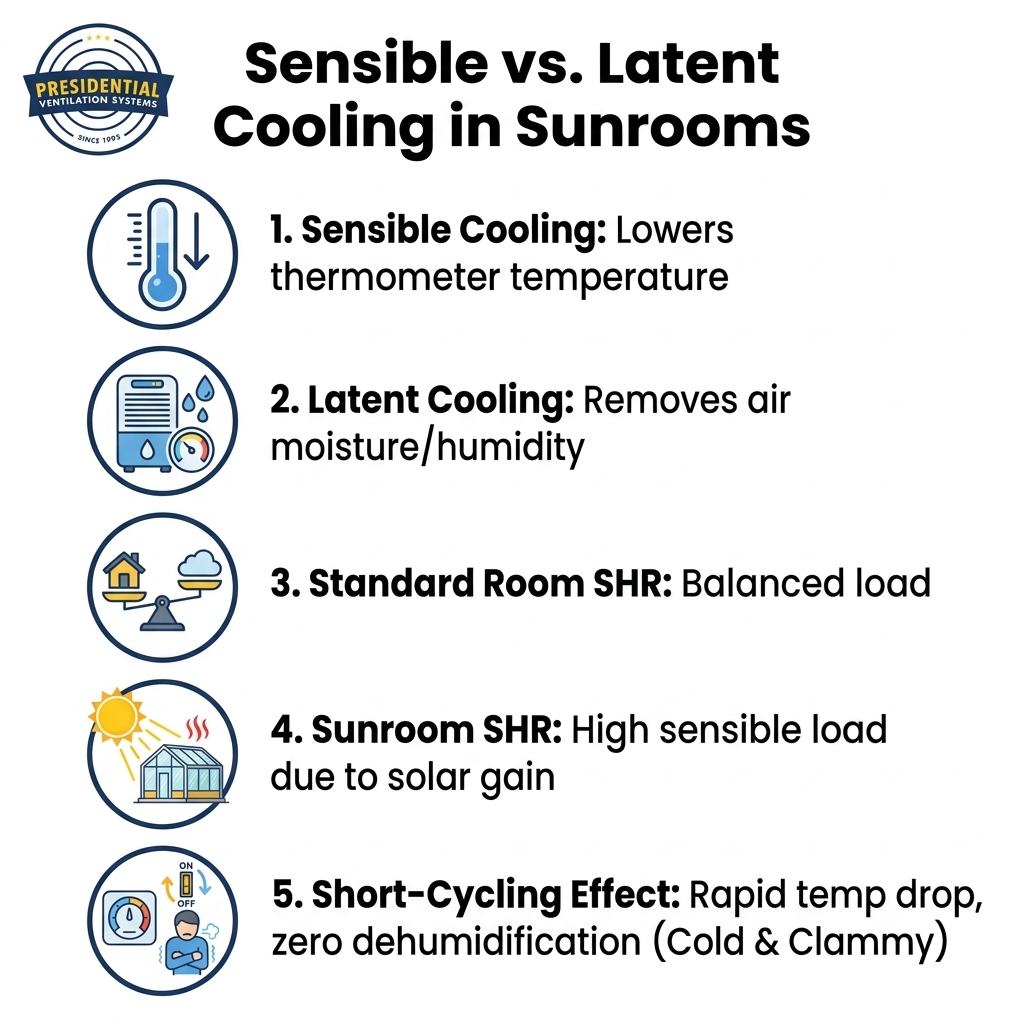
To properly condition a high-glass space, you have to understand how air conditioners actually treat the air. An air conditioning system performs two distinct jobs simultaneously: lowering the temperature and removing moisture. These two functions are technically referred to as sensible cooling and latent cooling.
Sensible cooling is the system's ability to lower the actual air temperature—the metric you feel on your skin and read on a thermometer. Latent cooling is the system's ability to extract moisture and humidity from the air. The ratio between these two functions is called the Sensible Heat Ratio (SHR). A standard living room might require an SHR of 0.75 (meaning 75% of the system's effort goes to dropping the temperature and 25% goes to removing humidity). However, a sunroom baking in the afternoon sun requires a system optimized for a much higher sensible heat load.
• Sensible Cooling — What It Does: Lowers the measurable air temperature (thermometer reading). — Sunroom Impact: Must be exceptionally high to combat direct solar radiation entering through glass.
• Latent Cooling — What It Does: Removes water vapor and humidity from the air. — Sunroom Impact: Requires sustained system run-time to pull moisture out of humid maritime air.
• Sensible Heat Ratio (SHR) — What It Does: The balance between temperature drop and moisture removal. — Sunroom Impact: Sunrooms need a specific SHR to avoid dropping the temperature faster than the humidity.
If you are exploring different equipment options, our best ductless heat pumps guide outlines how different systems balance these critical ratios.
Short-cycling occurs when an oversized unit blasts a massive amount of cold air into a small space, satisfying the thermostat in a matter of minutes. Because the thermostat only measures sensible heat (temperature), it tells the system to shut off.
The problem is that the indoor evaporator coil needs sustained, continuous run time to effectively pull moisture from the air. When the system shuts down after five minutes, the latent cooling process stops entirely. The result is a rapid temperature drop with zero dehumidification, leading directly to the dreaded "cold and clammy" effect.
Finding the right equipment for a sunroom means looking beyond familiar brand names and focusing on the technical specifications that dictate performance. As a Daikin Comfort Pro contractor, our team recommends prioritizing one critical feature for a sunroom: a variable-speed (inverter) compressor. Unlike older single-stage units that only run at 100% capacity or 0%, an inverter compressor can modulate its output to perfectly match the fluctuating solar load.
As the sun shifts behind a cloud, the compressor slows down. As the afternoon sun hits the glass directly, the compressor ramps up. This continuous, modulated operation is the absolute best way to maintain long run times, ensuring both the sensible temperature is managed and the latent humidity is consistently extracted.
We see the importance of this careful selection frequently in our field work around the Mount Uniacke NS area. Last summer, a homeowner reached out to have heat pumps installed with careful attention to detail for their specific layout. By thoroughly assessing the space and taking the time to answer their questions about handling intense solar loads, our installation team delivered a finished product that left the customer completely satisfied.
When selecting the physical indoor unit, you also have to consider airflow. In a glass-heavy space, wall space is often at a premium. While traditional high-wall mounts are common, floor-mounted indoor units (often installed on dwarf walls beneath windows) can provide excellent upward airflow that washes the glass, preventing condensation and maintaining an even temperature profile. Because of these variables, relying on professional load calculations (Manual J) is necessary. Generic online BTU calculators cannot account for the specific orientation, glass type, and shading of your sunroom. For a system engineered to handle these precise demands, many homeowners turn to Lennox ductless systems.
The Problem: Adding a dedicated ductless system for a sunroom isn't just an HVAC project; it is an electrical project. A new heat pump requires a dedicated circuit, and simply adding breakers to an existing panel without verification can lead to overloaded circuits and tripped breakers.
The Cause: Many older Nova Scotia homes operate on 100-amp electrical services or have panels that are already physically full. When homeowners attempt to add a new 15-amp or 20-amp 240V circuit for a sunroom mini-split, they often discover their electrical infrastructure cannot safely support the additional load.
The Solution: Verifying panel capacity before finalizing the HVAC design is a non-negotiable step. In our 30+ years of multi-trade expertise across Nova Scotia, we have seen the pitfalls of the fragmented approach—where a homeowner hires a heat pump installer, only to be told halfway through the job that they need to go find an electrician. Because Presidential Ventilation Systems maintains in-house electrical and HVAC divisions, we handle both the precise load calculations and the licensed electrical panel upgrades under one roof. This ensures the installation process remains seamless, compliant, and safe.
The physical environment of a sunroom presents unique installation challenges that dictate the long-term performance and lifespan of the equipment. Proper planning by an experienced contractor is required to ensure the system operates efficiently without obstructing the view.
1. Assessing Available Wall Space: Sunrooms are primarily glass, leaving very little structural wall space for mounting indoor units. Technicians must carefully locate solid framing that can support the unit's weight while ensuring the airflow isn't blocked by furniture or architectural features.
2. Routing Line Sets and Drainage: The refrigerant lines and condensate drains must be routed to the exterior. In a room made of glass, hiding these lines requires careful planning to maintain the aesthetic appeal of the space. Gravity-fed condensate drains must have a proper slope, or a condensate pump must be integrated.
3. Evaluating Multi-Zone vs. Single-Zone: Homeowners often ask if they can just add a new head to an existing multi-zone heat pump system. While sometimes possible, sunrooms experience peak cooling demand at different times than the rest of the house. A completely independent single-zone system often provides better dedicated climate control for the extreme solar load.
4. Ensuring Proper Placement: Where the unit is placed affects both sensible and latent cooling efficiency. If installed too high in a vaulted sunroom, it may struggle to condition the living space below. Professional installation ensures the unit is positioned to optimize air distribution.
Last fall, a homeowner expressed concerns regarding an existing, inefficient heat pump system that another company had installed in their sunroom. After inspecting the system, our technicians provided helpful advice and efficiency tips, giving the customer clear guidance on improving their setup to better handle the space. To ensure your project is handled correctly from day one, trust a professional heat pump installation team.
Because sunroom systems operate under heavy loads during peak summer months, they require diligent upkeep to maintain their efficiency and protect the compressor.
• Clean the indoor filters frequently: High run-times mean more air is circulating through the filters. Check and wash the reusable filters every few weeks during peak summer to ensure unrestricted airflow.
• Keep the outdoor condenser clear: The outdoor unit needs to dissipate the massive amount of heat extracted from the sunroom. Keep vegetation, debris, and outdoor furniture at least two feet away from the condenser coil.
• Monitor for proper drainage: Because the system is doing heavy latent cooling (dehumidification), it will produce a significant amount of condensate water. Ensure the drain line remains clear and flows freely away from the home's foundation.
• Schedule professional deep cleaning: Over time, the indoor blower wheel and evaporator coil will accumulate micro-dust and organic growth. A professional deep clean restores the system's ability to transfer heat and extract moisture efficiently.
Preventive maintenance protects the compressor from the strain of heavy solar loads. To keep your system running at peak performance, consider enrolling in a comprehensive preventive maintenance plan.
Why is my sunroom mini split not dehumidifying?
If your system isn't removing moisture, it is likely short-cycling due to being oversized for the space. When a unit cools the room too quickly, it shuts off before the evaporator coil has time to extract humidity from the air. This results in a cold but clammy environment. A professional load calculation can determine if your system's sensible heat ratio is mismatched to the room.
What size mini split do I need for a 200 sq ft sunroom?
Sizing a system for a sunroom cannot be done accurately using only square footage. Because of the intense solar heat gain through the glass, a 200-square-foot sunroom often requires significantly more capacity than a standard room of the same size. A licensed HVAC technician must perform a Manual J load calculation to account for your specific glass type, insulation, and sun exposure.
Can you put a mini split in a 4 season room?
Yes, a ductless mini-split is often the ideal solution for a 4-season room. These systems provide both high-efficiency summer cooling and reliable winter heating without requiring ductwork. However, the installation requires careful planning regarding unit placement and electrical capacity to ensure it can handle the room's unique thermal loads year-round.
What is the best way to cool a sunroom?
The most effective way to cool a sunroom is by installing a dedicated ductless heat pump with a variable-speed inverter compressor. This technology modulates its cooling output to match the shifting solar load throughout the day. It provides consistent temperature control and superior dehumidification compared to window units or extending existing central ductwork.
How does sensible cooling differ from latent cooling in HVAC?
Sensible cooling refers to the system's ability to lower the actual air temperature, which is what you read on a thermometer. Latent cooling is the system's ability to remove moisture and humidity from the air. In high-glass spaces, balancing these two factors is critical to preventing the room from feeling damp and uncomfortable.
Do I need an electrical panel upgrade to add a heat pump to my sunroom?
Adding a new dedicated heat pump requires an available 240V circuit on your electrical panel. If your home has an older 100-amp service or a panel that is already full, an upgrade or a sub-panel may be required. As a multi-trade contractor, Presidential Ventilation Systems can assess your electrical capacity and handle both the HVAC and electrical requirements safely.
Cooling a sunroom effectively requires more than just guessing at square footage; it requires a precise understanding of sensible cooling ratios and proper electrical integration. With over 30 years of multi-trade expertise in Nova Scotia and a team of approximately 70 employees, Presidential Ventilation Systems ensures your system is sized perfectly and installed safely. If you are considering an installation, retrofit, or oil-to-heat-pump conversion, there may be rebates available. Because rebate programs and eligibility can change, we recommend confirming current programs directly with our team. Contact Presidential Ventilation Systems today to request a free estimate for your sunroom project.

Are you noticing weak airflow from your vents or rising energy bills, even though you change your air filter regularly? If you are researching why standard one-inch filters choke high-efficiency ducted heat pumps, you are likely dealing with a fundamental mismatch between modern HVAC technology and outdated filtration methods. Many homeowners upgrade to advanced, energy-efficient climate control systems but continue sliding the same basic disposable filters into the return grille, completely unaware that they are suffocating their equipment.
The core issue rarely stems from a mechanical defect in the heat pump itself. Instead, the typical pattern we see is a homeowner trying to improve their indoor air quality by purchasing a restrictive high-MERV 1-inch pleated filter from a big-box store. While these dense filters capture fine dust and allergens, they also act like a brick wall against the air trying to return to your system. This creates a severe bottleneck.
Proper filtration is a holistic airflow issue, not just a disposable product choice. You eventually reach a critical decision point: continue replacing 1-inch filters every single month while your system struggles to breathe, or upgrade the physical ductwork to accommodate a high-capacity filtration system that actually supports your equipment's performance.
Related resource: Learn more about how proper airflow supports our ducted heat pump systems.
To understand why your heat pump is struggling, you first need to understand a mechanical concept called static pressure. In simple terms, static pressure is the measurement of resistance to airflow within your ductwork. Every component in your HVAC system—from the sweeping curves of the sheet metal to the grilles in your floor—adds a certain amount of resistance. Your system's blower motor is engineered to overcome a very specific, calculated amount of this resistance.
Think of your heat pump's blower motor like your own lungs. If you go for a run while breathing normally, your lungs easily pull in the volume of air you need. Now, try running that same distance while breathing entirely through a narrow drinking straw. The intense strain you feel in your chest is exactly what your system's blower motor experiences when it faces high static pressure. It is forced to work exponentially harder just to pull the same volume of air, measured in cubic feet per minute (CFM), through the ductwork.
When you install a dense filter into a narrow slot, you drastically increase that resistance. If you need to order replacement heat pump filters, understanding how surface area dictates this pressure drop is critical to keeping your system healthy.
The fatal flaw of the high-MERV 1-inch pleated filter is its severe lack of surface area. MERV stands for Minimum Efficiency Reporting Value, which measures how effectively a filter traps microscopic particles. To achieve a high MERV rating, manufacturers pack the filter media tightly to catch more debris.
• Dense pleating: In a 1-inch space, the pleats are incredibly shallow and tightly packed together, leaving almost no open space for air to bypass the trapped dust.
• Rapid clogging: Because there is so little surface area, the face of the filter loads up with dust, pet dander, and hair almost immediately.
• Spiking pressure: Within just a few weeks of use, that 1-inch filter becomes severely clogged, causing the static pressure inside your ductwork to spike to unsafe levels.
Your heat pump requires a massive, continuous volume of air to transfer heat effectively. When that air is blocked by a small, dense filter, the entire thermodynamic process begins to break down.
The static pressure problem becomes even more destructive when we look at the specific technology inside modern high-efficiency heat pumps. Older furnaces used basic motors that simply moved less air when the filter got dirty. Modern systems use advanced ECM (Electronically Commutated Motors) that behave very differently when faced with a restriction.
Here is exactly how a high-MERV 1-inch pleated filter damages a modern ECM blower motor:
1. Sensing the restriction: ECM motors have built-in microprocessors programmed to maintain a precise, constant airflow (CFM). When the dense 1-inch filter restricts the air, the motor's sensors detect the drop in volume.
2. Ramping up RPMs: To compensate for the blockage and hit its programmed airflow target, the ECM automatically increases its speed and torque. It begins spinning faster and pulling more electricity to fight the resistance.
3. Constant maximum output: In Nova Scotia, heat pumps run almost continuously through freezing winters and humid summers. This near-constant operation means the blower motor is running at maximum RPMs year-round just to overcome the dense filter.
4. Overheating and failure: Electric motors are cooled by the air flowing over them. With restricted airflow and maximum electrical draw, the motor quickly overheats. Over time, this constant strain degrades the bearings and internal electronics, leading to premature motor failure.
Blower motor replacements are major, costly repairs. The most frustrating part for homeowners is that these failures are entirely preventable. By correcting the structural airflow design, you allow the ECM motor to operate at a low, quiet, and highly efficient speed exactly as the manufacturer intended.
The permanent solution to this airflow crisis is not found in the filter aisle of a hardware store. It requires a structural modification to your ductwork known as a 4-inch media cabinet. This is a dedicated, custom-fitted sheet-metal housing installed directly into the return air drop next to your indoor air handler.
Instead of a shallow 1-inch filter, this cabinet houses a massive, deeply pleated 4-inch filter. The difference in performance comes down to simple geometry. A 4-inch filter contains exponentially more physical filter media folded into those deep pleats. This massive increase in surface area means you can finally use a high-MERV filter to capture allergens without creating a restrictive wall. The air easily flows through the vast surface area, keeping static pressure low and protecting your ECM blower motor.
Because there is so much more material to hold dust and debris, a 4-inch media filter only needs to be replaced every 6 to 12 months, rather than every 30 days.
You cannot simply shove a 4-inch filter into a 1-inch slot, nor can you tape a larger box to the side of your system and expect it to work. Upgrading your filtration requires professional mechanical modification.
With our 30+ years Nova Scotia HVAC and sheet-metal expertise, we advocate for custom-fabricated media cabinets because aerodynamic flow is highly sensitive. The return air drop must be properly sized and transitioned. If the sheet metal is poorly designed, the air will create turbulence, bypassing the filter entirely or whistling through gaps. Custom sheet-metal fabrication ensures an airtight seal, preventing dirty basement or utility room air from being sucked into your pristine heating system. This commitment to proper mechanical design separates a long-lasting system from one plagued by constant breakdowns.

When a heat pump's airflow is choked, the consequences extend far beyond the mechanical room. Your central ductwork is the respiratory system of your entire home. If the air cannot move freely through the central air handler, the air in your living spaces quickly stagnates.
During the humid summer months, your heat pump removes moisture from the air by passing it over a cold indoor coil. If high static pressure slows that airflow to a crawl, the coil can actually freeze solid into a block of ice, shutting down your cooling completely. Even if it doesn't freeze, the weak airflow prevents the system from properly circulating and dehumidifying the distant rooms in your home, leaving bedrooms feeling sticky and uncomfortable.
In the winter, poor circulation prevents the warm air from reaching the furthest corners of your house, resulting in cold spots and uneven heating. Furthermore, your central heat pump often works in tandem with other indoor air quality equipment. For example, maintaining your HRV system is critical for fresh air exchange, but if your primary ductwork is choked by a restrictive filter, that fresh air cannot be properly distributed throughout the home. Maintaining clear, low-pressure airflow is the absolute foundation of a healthy, comfortable indoor environment.
When deciding how to handle your home's filtration, it helps to look at the hidden costs and daily frustrations of the standard 1-inch filter compared to the peace of mind that comes with a structural upgrade. Relying on 1-inch filters is an ongoing burden that actively puts your expensive heat pump at risk.
Most homeowners forget to change their 1-inch filter every 30 days. When life gets busy and that filter stays in place for 60 or 90 days, the static pressure reaches critical levels, causing severe wear and tear on the system's internal components. Positioning a 4-inch cabinet as a permanent upgrade is an investment in the heat pump's lifespan.
• Surface Area — High-MERV 1-Inch Pleated Filter: Extremely limited; pleats are shallow and tightly packed. — Custom 4-Inch Media Cabinet: Massive; deep pleats allow high volume of air to pass easily.
• Static Pressure — High-MERV 1-Inch Pleated Filter: High; severely restricts airflow and strains the ECM motor. — Custom 4-Inch Media Cabinet: Low; supports optimal CFM and allows the motor to run efficiently.
• Replacement Frequency — High-MERV 1-Inch Pleated Filter: Must be replaced every 30 days to prevent system damage. — Custom 4-Inch Media Cabinet: Only requires replacement every 6 to 12 months.
• System Protection — High-MERV 1-Inch Pleated Filter: Causes overheating, coil freezing, and premature breakdowns. — Custom 4-Inch Media Cabinet: Protects the blower motor and extends the lifespan of the heat pump.
• Installation — High-MERV 1-Inch Pleated Filter: Slides into standard, often leaky, factory filter slots. — Custom 4-Inch Media Cabinet: Requires professional sheet-metal fabrication for an airtight seal.
Addressing airflow is a critical part of comprehensive system care. We highly encourage homeowners to have their static pressure and ductwork evaluated during their next service visit. Incorporating this check into a preventative HVAC maintenance plan ensures your system is always breathing easily and operating at peak efficiency.
Weak airflow is most commonly caused by a clogged or highly restrictive air filter that creates high static pressure within the ductwork. When you use a dense filter, the system's blower motor cannot push air through the dense physical barrier, resulting in a very low volume of air making it to your room vents. Checking and replacing a dirty filter is the first step, but if the airflow remains weak, your ductwork may be undersized or you may need a deeper filter cabinet to reduce the resistance.
Yes, a restrictive filter forces the blower motor to overwork, which can lead to overheating, premature motor failure, and frozen indoor coils. Modern heat pumps rely on a specific, constant volume of air to transfer heat safely. When a high-MERV 1-inch pleated filter chokes that airflow, the internal components run hotter and harder than designed. This constant strain dramatically shortens the lifespan of the equipment, turning a simple maintenance oversight into a major mechanical failure.
Yes, 4-inch media cabinets provide exponentially more surface area, allowing for excellent indoor air quality filtration without choking the system. Because the filter media is folded deeply, air can pass through easily while still trapping microscopic dust and allergens. Beyond protecting your expensive heat pump from blower motor failure, they offer incredible convenience, as you only need to remember to change the filter once or twice a year instead of every single month.
You can use a high-MERV filter only if you have a media cabinet deep enough (like a 4-inch or 5-inch model) to handle the increased airflow resistance. We strongly warn against using high-MERV 1-inch filters, as they almost always cause unsafe static pressure levels that suffocate the system. If you want hospital-grade filtration or have severe allergies, you must upgrade the physical ductwork to accommodate a thicker filter so the system can still breathe.
For standard 1-inch filter slots, a MERV 8 filter is usually the maximum recommended rating to prevent severe airflow restriction and equipment issues. Anything higher in a 1-inch format becomes too dense. However, if you upgrade to a professionally installed 4-inch media cabinet, you can safely use MERV 11 or even MERV 13 filters without harming the equipment, giving you superior air cleaning and optimal system performance simultaneously.
In Nova Scotia, where heat pumps run year-round to combat freezing winters and humid summers, you should inspect a 4-inch filter every 6 months and replace it at least annually. Because your system rarely gets a break, it is filtering air constantly. Homes with multiple pets, recent renovations, or heavy dust accumulation may require more frequent changes, so pulling the filter out for a visual inspection at the change of seasons is a wise habit.
You do not have to settle for weak airflow, noisy vents, or the constant chore of replacing restrictive 1-inch filters every few weeks. Airflow issues can be permanently solved with the right mechanical modifications, ensuring your home stays perfectly comfortable without destroying your equipment in the process. Stop fighting with dense, undersized filters and take the steps necessary to protect your heat pump investment.
With our 30+ years Nova Scotia HVAC and sheet-metal expertise, our team can evaluate your system's static pressure and design a custom solution. Reach out to Presidential Ventilation Systems today to request a free estimate for a custom 4-inch media cabinet upgrade, and give your heat pump the clear, unrestricted airflow it needs to perform flawlessly for years to come.