


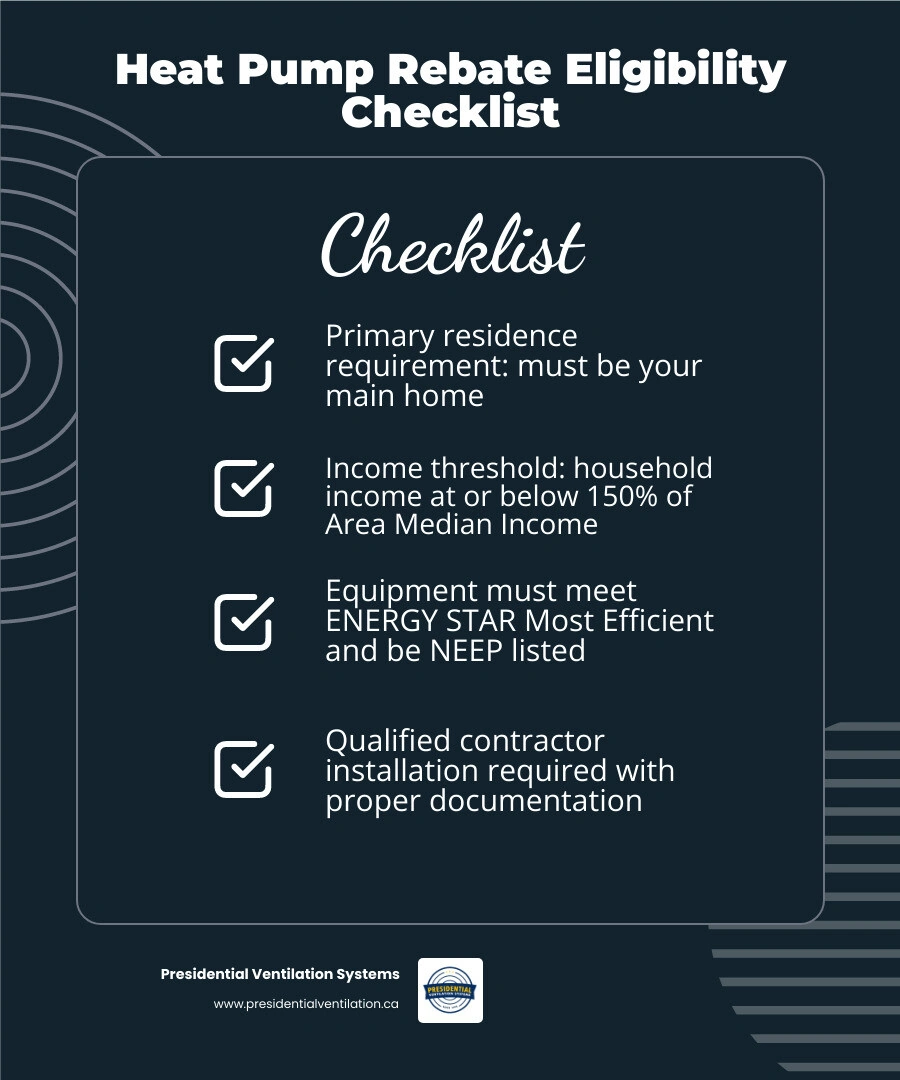
The eligibility requirements for home comfort upgrades vary depending on your income, property type, location, and the equipment you choose — but most homeowners qualify for at least one meaningful incentive. Here's a quick overview of the core requirements:
Key eligibility factors at a glance:
• Property type: Most programs require the home to be your primary residence
• Income level: Federal programs prioritize households at or below 150% of the Area Median Income (AMI)
• Equipment certification: Systems must typically meet ENERGY STAR Most Efficient standards and be listed on the NEEP Cold Climate product list
• Efficiency ratings: Minimum SEER2, EER2, and HSPF2 thresholds must be met
• Installation method: Work must be completed by a qualified, program-approved contractor
• Documentation: Depending on the program, you may need a Product Identification Number (PIN), proof of installation, and a home energy assessment
Upgrading your climate control system is one of the most impactful home improvements you can make. Studies show homeowners see significant improvements in heating and cooling efficiency after switching — and with federal tax credits and state or provincial programs offering additional support, the upfront investment becomes much more manageable. But accessing those benefits starts with understanding exactly what each program requires before you begin.
Discover more about eligibility requirements for home comfort upgrades:
• efficiency Nova Scotia process explained
• how programs make installation affordable
• how to maximize your program savings
Navigating the financial landscape of home comfort upgrades can feel overwhelming, but understanding federal tax credits is the first step toward significant savings. In the tax code, Section 25C governs the Energy Efficient Home Improvement Credit. This incentive allows homeowners to claim a tax credit on qualified energy-efficiency improvements.
For high-efficiency systems, this tax credit has an annual limit. Because this is an annual cap rather than a lifetime limit, strategic planning allows homeowners to spread out upgrades over multiple tax years. For example, you might install a qualifying system this year and upgrade your electrical panel or insulation next year to maximize separate annual limits.
The overall annual limit for all efficiency tax credits combined under Section 25C is capped. This means you can combine your system credit with other home envelope improvements (such as windows, doors, or insulation) up to that maximum cap. To learn how these financial mechanisms lower your barrier to entry, read about How Programs Make Installation Affordable.
Eligibility for federal and provincial programs depends heavily on who owns the property, how it is used, and the household's financial profile.
• Primary Residence Requirements: To qualify for the Section 25C tax credit and most low-to-moderate-income programs, the home must be your primary residence. Second homes and seasonal vacation properties generally do not qualify for these specific federal tax credits.
• Rental Properties and Landlords: Landlords face different rules. While standard residential energy tax credits are reserved for primary owner-occupiers, commercial energy credits or specific provincial multi-unit residential programs may apply to rental properties.
• Income-Based Programs: Some federally funded programs are administered locally. Certain programs focus strictly on income levels, offering substantial point-of-sale discounts for households earning below 150% of their Area Median Income (AMI). If a household falls below 80% of the AMI, these programs can cover the installation costs up to program caps. Other programs focus on modeled or measured energy reduction rather than income, though low-income households still qualify for elevated incentive caps.
To protect consumers and ensure actual energy reduction, programs enforce strict technical performance standards. You cannot simply install any off-the-shelf system and expect to receive an incentive.
• ENERGY STAR and CEE Tiers: Eligible equipment must meet or exceed specific efficiency tiers. For tax credit eligibility, systems must align with the highest non-advanced tier established by the Consortium for Energy Efficiency (CEE) at the beginning of the installation year. Many programs also mandate an ENERGY STAR Most Efficient certification.
• Efficiency Metrics (SEER2 and HSPF2): Systems must meet minimum Seasonal Energy Efficiency Ratio 2 (SEER2) and Heating Seasonal Performance Factor 2 (HSPF2) ratings. For split ducted systems, a SEER2 of 15.2 or higher is typically required, while ductless systems often require a SEER2 of 16.0 or higher.
• NEEP Listing and Cold-Climate Performance: In colder regions like Nova Scotia, systems must maintain heating capacity at low temperatures. Programs rely on the Northeast Energy Efficiency Partnerships (NEEP) Cold Climate Product List to verify that a system can deliver reliable, energy-efficient warmth even when outdoor temperatures plunge below freezing.
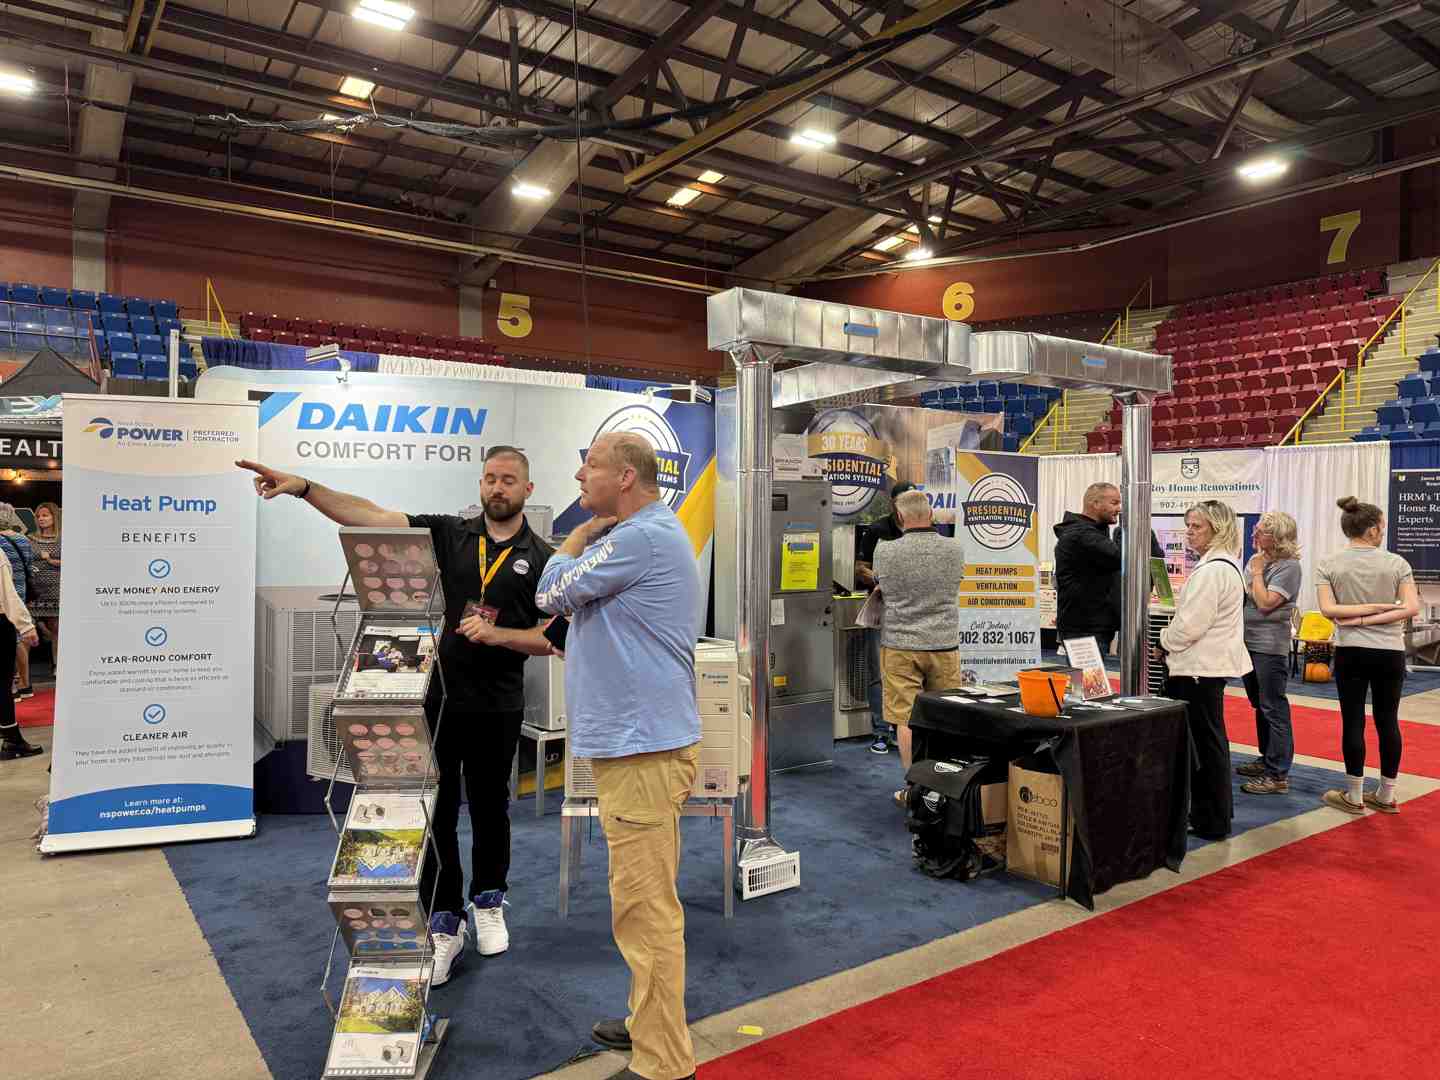
While federal tax credits provide a solid foundation, state and provincial programs offer direct, localized relief. The primary difference lies in how you receive the support. Federal tax credits are non-refundable and claimed when you file your annual tax return, reducing your tax liability. Other programs, however, are often paid out as cash-back checks or direct point-of-sale discounts from the installing contractor.
In Nova Scotia, regional programs are designed to help homeowners transition away from fossil fuels. Programs managed by Efficiency Nova Scotia provide structured pathways to verify your home's current efficiency and identify the most impactful upgrades. Understanding how these local programs compare to federal tax credits is crucial for optimizing your project.
To help you visualize the differences, here is a comparison of how these programs operate:
• Primary Method — Federal Tax Credits (Section 25C): Tax liability reduction — State/Provincial Programs (e.g., Efficiency Nova Scotia): Point-of-sale discount or cash-back check
• Administration — Federal Tax Credits (Section 25C): Federal government (IRS/CRA) — State/Provincial Programs (e.g., Efficiency Nova Scotia): Provincial/State energy offices & utilities
• Audit Required? — Federal Tax Credits (Section 25C): No, but highly recommended — State/Provincial Programs (e.g., Efficiency Nova Scotia): Yes, pre- and post-retrofit assessments are mandatory
• Income Limits — Federal Tax Credits (Section 25C): None (flat credit up to caps) — State/Provincial Programs (e.g., Efficiency Nova Scotia): Tiered structures with higher support for lower incomes
• Equipment Lists — Federal Tax Credits (Section 25C): CEE Tiers / ENERGY STAR — State/Provincial Programs (e.g., Efficiency Nova Scotia): Program-specific qualified product lists (NEEP)
To ensure you follow the correct steps for local incentives, read our detailed guide on the Efficiency Nova Scotia Process Explained. You can also explore the specific regional pathways available by reading about Nova Scotia Energy Programs for Home Comfort Upgrades.
Claiming your incentives requires careful attention to detail and thorough documentation. Missing a single form or choosing an unapproved contractor can disqualify your entire project.
To secure your tax credits and program benefits, follow this step-by-step documentation workflow:
1. Schedule a Home Energy Assessment: Before any installation begins, have a certified energy advisor perform a pre-retrofit home evaluation. This establishes your home's baseline energy performance.
2. Select a Qualified Manufacturer and System: Work with your contractor to choose a system that features a registered Product Identification Number (PIN) or a Qualified Manufacturer Identification Number (QMID).
3. Hire a Certified Installer: Ensure your HVAC provider is fully licensed and registered with your local utility or provincial program network.
4. Collect All Invoices and Receipts: Keep itemized receipts showing the equipment make, model, outdoor and indoor unit serial numbers, and labor costs.
5. Obtain the Manufacturer’s Certification Statement: This document proves the system meets the exact SEER2 and HSPF2 ratings required for the credit.
6. File the Correct Tax Forms: When filing your federal taxes, complete and submit IRS Form 5695 (or the corresponding provincial tax form) along with your standard return.
For a deeper look at optimizing this process, read our guide on How to Maximize Your Program Savings.
One of the most effective strategies for reducing the cost of an HVAC upgrade is "incentive stacking." This involves combining federal tax credits, provincial programs, local utility incentives, and manufacturer promotional offers on a single project.
Many manufacturers offer seasonal promotions on high-efficiency ductless systems and central ducted systems. When these promotional discounts are applied at the point of purchase, they lower your initial invoice. From there, provincial programs can cover a portion of the remaining balance, and federal tax credits can be applied to the net cost when you file your taxes.
However, rules govern how these incentives interact. For federal tax credits, you must subtract any utility or manufacturer incentives from your total project cost before calculating your credit.
For residents in our service areas, localized municipal and utility programs provide tailored pathways to save. You can explore regional opportunities and savings expectations through these helpful resources:
• Learn how much you can expect to save on utility bills by reading How Much Will a New System Save.
• If you live in the Halifax area, find local incentives by checking out Incentives Halifax NS.
• For those residing in Mount Uniacke and surrounding communities, view targeted options at Incentives Mount Uniacke NS.
For most federal tax credits and low-income programs, the rules state that the property must be your primary residence. However, landlords can often access commercial energy-efficiency programs, multi-family building incentives, or specific utility programs designed to improve rental housing stock. Always check your local program guidelines, as tenant-occupied properties may qualify if the utility account is in the tenant's name or if the landlord meets specific program conditions.
Yes. Because standard systems lose efficiency as outdoor temperatures drop, cold-climate systems must meet more stringent standards to qualify for northern programs. They must be listed on the NEEP Cold Climate Product List, which verifies they can operate efficiently at low temperatures. Additionally, some whole-home programs require you to legally decommission your legacy oil or gas heating system, or install integrated smart controls to manage backup heating systems efficiently.
Manufacturer promotions that are applied directly to your invoice reduce the purchase price of the system. Under federal tax rules, you must calculate your tax credit based on the actual net cost you paid out of pocket. This means you must subtract any upfront manufacturer or utility incentives from the total invoice before calculating your tax credit.
Understanding the eligibility requirements for home comfort upgrades is the key to maximizing your investment in home comfort and energy efficiency. By matching certified equipment with professional installation and thorough documentation, you can transition to a modern HVAC system while keeping your upfront costs as low as possible.
At Presidential Ventilation, we bring over 30 years of experience to homeowners across Halifax, Dartmouth, Bedford, and surrounding communities. As a leading Daikin Comfort Pro Dealer, we specialize in designing custom ventilation, heating, and air handling solutions tailored to our local climate. We help you navigate local utility guidelines, select qualifying cold-climate systems, and ensure your installation meets all provincial standards.
Ready to upgrade your home’s comfort and efficiency? Explore our services at Presidential Ventilation Systems or learn about local Dartmouth opportunities at Incentives Dartmouth NS. Contact our team today to schedule your consultation!

The eligibility requirements for home comfort upgrades vary depending on your income, property type, location, and the equipment you choose — but most homeowners qualify for at least one meaningful incentive. Here's a quick overview of the core requirements:
Key eligibility factors at a glance:
• Property type: Most programs require the home to be your primary residence
• Income level: Federal programs prioritize households at or below 150% of the Area Median Income (AMI)
• Equipment certification: Systems must typically meet ENERGY STAR Most Efficient standards and be listed on the NEEP Cold Climate product list
• Efficiency ratings: Minimum SEER2, EER2, and HSPF2 thresholds must be met
• Installation method: Work must be completed by a qualified, program-approved contractor
• Documentation: Depending on the program, you may need a Product Identification Number (PIN), proof of installation, and a home energy assessment
Upgrading your climate control system is one of the most impactful home improvements you can make. Studies show homeowners see significant improvements in heating and cooling efficiency after switching — and with federal tax credits and state or provincial programs offering additional support, the upfront investment becomes much more manageable. But accessing those benefits starts with understanding exactly what each program requires before you begin.
Discover more about eligibility requirements for home comfort upgrades:
• efficiency Nova Scotia process explained
• how programs make installation affordable
• how to maximize your program savings
Navigating the financial landscape of home comfort upgrades can feel overwhelming, but understanding federal tax credits is the first step toward significant savings. In the tax code, Section 25C governs the Energy Efficient Home Improvement Credit. This incentive allows homeowners to claim a tax credit on qualified energy-efficiency improvements.
For high-efficiency systems, this tax credit has an annual limit. Because this is an annual cap rather than a lifetime limit, strategic planning allows homeowners to spread out upgrades over multiple tax years. For example, you might install a qualifying system this year and upgrade your electrical panel or insulation next year to maximize separate annual limits.
The overall annual limit for all efficiency tax credits combined under Section 25C is capped. This means you can combine your system credit with other home envelope improvements (such as windows, doors, or insulation) up to that maximum cap. To learn how these financial mechanisms lower your barrier to entry, read about How Programs Make Installation Affordable.
Eligibility for federal and provincial programs depends heavily on who owns the property, how it is used, and the household's financial profile.
• Primary Residence Requirements: To qualify for the Section 25C tax credit and most low-to-moderate-income programs, the home must be your primary residence. Second homes and seasonal vacation properties generally do not qualify for these specific federal tax credits.
• Rental Properties and Landlords: Landlords face different rules. While standard residential energy tax credits are reserved for primary owner-occupiers, commercial energy credits or specific provincial multi-unit residential programs may apply to rental properties.
• Income-Based Programs: Some federally funded programs are administered locally. Certain programs focus strictly on income levels, offering substantial point-of-sale discounts for households earning below 150% of their Area Median Income (AMI). If a household falls below 80% of the AMI, these programs can cover the installation costs up to program caps. Other programs focus on modeled or measured energy reduction rather than income, though low-income households still qualify for elevated incentive caps.
To protect consumers and ensure actual energy reduction, programs enforce strict technical performance standards. You cannot simply install any off-the-shelf system and expect to receive an incentive.
• ENERGY STAR and CEE Tiers: Eligible equipment must meet or exceed specific efficiency tiers. For tax credit eligibility, systems must align with the highest non-advanced tier established by the Consortium for Energy Efficiency (CEE) at the beginning of the installation year. Many programs also mandate an ENERGY STAR Most Efficient certification.
• Efficiency Metrics (SEER2 and HSPF2): Systems must meet minimum Seasonal Energy Efficiency Ratio 2 (SEER2) and Heating Seasonal Performance Factor 2 (HSPF2) ratings. For split ducted systems, a SEER2 of 15.2 or higher is typically required, while ductless systems often require a SEER2 of 16.0 or higher.
• NEEP Listing and Cold-Climate Performance: In colder regions like Nova Scotia, systems must maintain heating capacity at low temperatures. Programs rely on the Northeast Energy Efficiency Partnerships (NEEP) Cold Climate Product List to verify that a system can deliver reliable, energy-efficient warmth even when outdoor temperatures plunge below freezing.
While federal tax credits provide a solid foundation, state and provincial programs offer direct, localized relief. The primary difference lies in how you receive the support. Federal tax credits are non-refundable and claimed when you file your annual tax return, reducing your tax liability. Other programs, however, are often paid out as cash-back checks or direct point-of-sale discounts from the installing contractor.
In Nova Scotia, regional programs are designed to help homeowners transition away from fossil fuels. Programs managed by Efficiency Nova Scotia provide structured pathways to verify your home's current efficiency and identify the most impactful upgrades. Understanding how these local programs compare to federal tax credits is crucial for optimizing your project.
To help you visualize the differences, here is a comparison of how these programs operate:
• Primary Method — Federal Tax Credits (Section 25C): Tax liability reduction — State/Provincial Programs (e.g., Efficiency Nova Scotia): Point-of-sale discount or cash-back check
• Administration — Federal Tax Credits (Section 25C): Federal government (IRS/CRA) — State/Provincial Programs (e.g., Efficiency Nova Scotia): Provincial/State energy offices & utilities
• Audit Required? — Federal Tax Credits (Section 25C): No, but highly recommended — State/Provincial Programs (e.g., Efficiency Nova Scotia): Yes, pre- and post-retrofit assessments are mandatory
• Income Limits — Federal Tax Credits (Section 25C): None (flat credit up to caps) — State/Provincial Programs (e.g., Efficiency Nova Scotia): Tiered structures with higher support for lower incomes
• Equipment Lists — Federal Tax Credits (Section 25C): CEE Tiers / ENERGY STAR — State/Provincial Programs (e.g., Efficiency Nova Scotia): Program-specific qualified product lists (NEEP)
To ensure you follow the correct steps for local incentives, read our detailed guide on the Efficiency Nova Scotia Process Explained. You can also explore the specific regional pathways available by reading about Nova Scotia Energy Programs for Home Comfort Upgrades.
Claiming your incentives requires careful attention to detail and thorough documentation. Missing a single form or choosing an unapproved contractor can disqualify your entire project.
To secure your tax credits and program benefits, follow this step-by-step documentation workflow:
1. Schedule a Home Energy Assessment: Before any installation begins, have a certified energy advisor perform a pre-retrofit home evaluation. This establishes your home's baseline energy performance.
2. Select a Qualified Manufacturer and System: Work with your contractor to choose a system that features a registered Product Identification Number (PIN) or a Qualified Manufacturer Identification Number (QMID).
3. Hire a Certified Installer: Ensure your HVAC provider is fully licensed and registered with your local utility or provincial program network.
4. Collect All Invoices and Receipts: Keep itemized receipts showing the equipment make, model, outdoor and indoor unit serial numbers, and labor costs.
5. Obtain the Manufacturer’s Certification Statement: This document proves the system meets the exact SEER2 and HSPF2 ratings required for the credit.
6. File the Correct Tax Forms: When filing your federal taxes, complete and submit IRS Form 5695 (or the corresponding provincial tax form) along with your standard return.
For a deeper look at optimizing this process, read our guide on How to Maximize Your Program Savings.
One of the most effective strategies for reducing the cost of an HVAC upgrade is "incentive stacking." This involves combining federal tax credits, provincial programs, local utility incentives, and manufacturer promotional offers on a single project.
Many manufacturers offer seasonal promotions on high-efficiency ductless systems and central ducted systems. When these promotional discounts are applied at the point of purchase, they lower your initial invoice. From there, provincial programs can cover a portion of the remaining balance, and federal tax credits can be applied to the net cost when you file your taxes.
However, rules govern how these incentives interact. For federal tax credits, you must subtract any utility or manufacturer incentives from your total project cost before calculating your credit.
For residents in our service areas, localized municipal and utility programs provide tailored pathways to save. You can explore regional opportunities and savings expectations through these helpful resources:
• Learn how much you can expect to save on utility bills by reading How Much Will a New System Save.
• If you live in the Halifax area, find local incentives by checking out Incentives Halifax NS.
• For those residing in Mount Uniacke and surrounding communities, view targeted options at Incentives Mount Uniacke NS.
For most federal tax credits and low-income programs, the rules state that the property must be your primary residence. However, landlords can often access commercial energy-efficiency programs, multi-family building incentives, or specific utility programs designed to improve rental housing stock. Always check your local program guidelines, as tenant-occupied properties may qualify if the utility account is in the tenant's name or if the landlord meets specific program conditions.
Yes. Because standard systems lose efficiency as outdoor temperatures drop, cold-climate systems must meet more stringent standards to qualify for northern programs. They must be listed on the NEEP Cold Climate Product List, which verifies they can operate efficiently at low temperatures. Additionally, some whole-home programs require you to legally decommission your legacy oil or gas heating system, or install integrated smart controls to manage backup heating systems efficiently.
Manufacturer promotions that are applied directly to your invoice reduce the purchase price of the system. Under federal tax rules, you must calculate your tax credit based on the actual net cost you paid out of pocket. This means you must subtract any upfront manufacturer or utility incentives from the total invoice before calculating your tax credit.
Understanding the eligibility requirements for home comfort upgrades is the key to maximizing your investment in home comfort and energy efficiency. By matching certified equipment with professional installation and thorough documentation, you can transition to a modern HVAC system while keeping your upfront costs as low as possible.
At Presidential Ventilation, we bring over 30 years of experience to homeowners across Halifax, Dartmouth, Bedford, and surrounding communities. As a leading Daikin Comfort Pro Dealer, we specialize in designing custom ventilation, heating, and air handling solutions tailored to our local climate. We help you navigate local utility guidelines, select qualifying cold-climate systems, and ensure your installation meets all provincial standards.
Ready to upgrade your home’s comfort and efficiency? Explore our services at Presidential Ventilation Systems or learn about local Dartmouth opportunities at Incentives Dartmouth NS. Contact our team today to schedule your consultation!
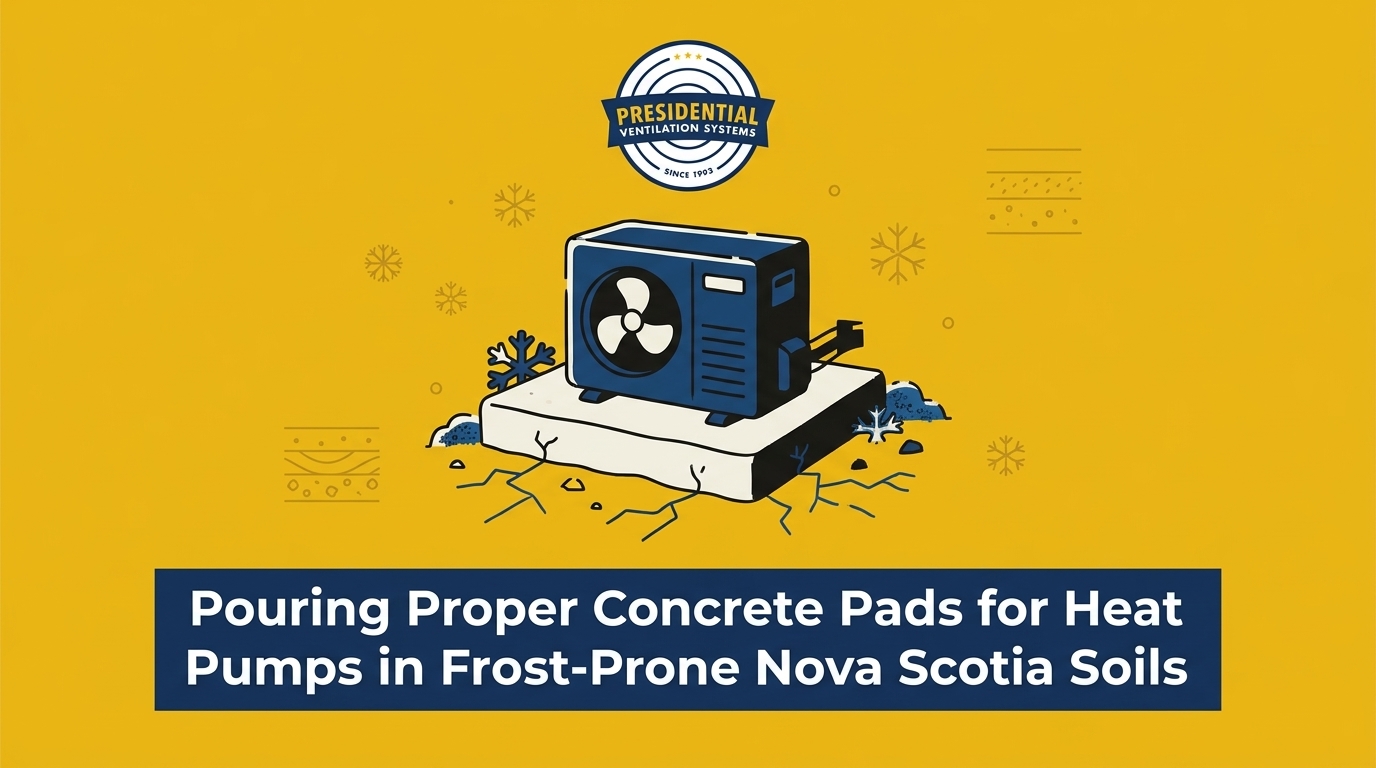
Winter in Nova Scotia is relentless. Over our 30+ years serving Mount Uniacke and the surrounding province, our team at Presidential Ventilation Systems has seen firsthand that pouring proper concrete pads for heat pumps in frost-prone Nova Scotia soils is an absolute necessity before the deep freeze arrives. Before the first major snowstorm hits, many homeowners do not realize the hidden danger lurking right beneath their outdoor HVAC equipment. The seasonal reality is that aggressive temperature fluctuations wreak havoc on improperly installed systems. A pattern we see often is that when an outdoor unit is placed on a basic plastic pad directly over raw dirt, it inevitably tilts, sinks, and strains critical electrical and refrigerant lines as the ground shifts beneath it.
The decision point for homeowners is clear: protecting your investment requires choosing professional excavation, proper gravel drainage, and solid concrete foundations over fast industry shortcuts. A system is only as reliable as the ground it sits on, and our technicians know that ignoring the foundation inevitably leads to mechanical failures just when you need heating the most.
If you are looking to upgrade your home comfort, learning about reliable heat pumps and scheduling a professional ductless heat pump installation is the best place to start.
The underlying issue: Nova Scotia freeze-thaw cycles are particularly brutal on surface-level objects. As the ground freezes, thaws, and refreezes throughout the winter, the soil expands and contracts violently. Without a professionally poured foundation, the equipment is entirely at the mercy of the earth's movement, turning a high-efficiency heating system into a liability.
When our Red Seal tradespeople arrive at a residential or commercial site to diagnose a tilted unit, we always explain the geotechnical science behind the ground itself. The earth does not just get cold; it undergoes a physical transformation that exerts massive force on anything resting on the surface. Understanding this process is the first step in recognizing why standard installation shortcuts fail so frequently in our specific climate.
The basic physics: Water expands by approximately 9% when it freezes. While that percentage might sound small, the sheer force it generates is immense. When the moisture trapped in the ground freezes, it has nowhere to go but up, creating a powerful upward pressure known as frost heave. This expansion can lift heavy boulders, crack asphalt, and easily push an unanchored HVAC unit out of alignment.
The surface impact: Because the top layers of soil freeze first, the upward force is concentrated directly beneath surface-level objects. A lightweight plastic pad offers zero structural resistance to this 9% expansion. As the ice lenses form beneath the soil, they push unevenly, causing one side of the equipment to rise higher than the other. When the ice melts during a mid-winter thaw, the ground collapses back down, leaving the unit permanently tilted.
The maritime factor: Our region's specific moisture-heavy soils maximize the destructive nature of these cycles. Clay and loam mixtures act like a sponge, holding onto autumn rain and melting snow rather than allowing it to drain away deeply. This high moisture retention means there is significantly more water available to freeze and expand directly beneath your equipment.
The cycle of destruction: Nova Scotia freeze-thaw cycles are characterized by frequent temperature swings above and below the freezing mark. We do not just freeze once in December and thaw in April; the ground thaws and refreezes repeatedly throughout the season. Every single cycle compounds the shifting effect, making soils highly susceptible to violent heaving. Any object without proper sub-grade preparation will inevitably be pushed out of alignment by spring.
A shifting outdoor unit is not just a cosmetic issue; it triggers a cascade of mechanical failures that can destroy the system from the inside out. Moving from mechanical strain to potential warranty voids, the consequences of a poor foundation are severe and costly.
The winter defrost cycle: During normal winter operation, outdoor units accumulate frost on their coils. The system periodically enters a defrost mode, temporarily melting this ice so the water can drain out of the bottom chassis. This is a critical function for maintaining efficiency and preventing the fan blades from becoming encased in solid ice.
The pooling problem: A frequent issue we encounter during winter HVAC repairs is poor drainage caused by frost heave. When a unit tilts, it prevents proper defrost drainage. Instead of flowing out of the designated weep holes, the water pools in the lower corner of the tilted chassis. As soon as the defrost cycle ends, that pooled water freezes solid. Over several weeks, this ice buildup can expand into the fan blades, crush the delicate aluminum fins, and cause catastrophic internal damage to Daikin and Lennox heat pump installations.
The physical tension: Your outdoor unit is connected to your indoor system via a set of copper refrigerant lines and electrical wiring. These connections are designed to remain stationary. When the unit sinks or shifts unevenly, it places severe mechanical strain on these copper lines. Over time, this stretching can cause the copper to kink, crack, or rupture at the flare joints, leading to a complete loss of refrigerant and a system breakdown.
The warranty reality: Manufacturer guidelines strictly require units to remain perfectly level to ensure proper compressor lubrication and drainage. If a compressor fails because it was running on a 15-degree tilt, or if a refrigerant line snaps due to ground shifting, failing to maintain a level unit due to poor foundation preparation can void manufacturer warranties. Before choosing the best ductless heat pump, ensure the contractor is committed to protecting that investment with a proper base.
Dropping a plastic pad directly on raw dirt is a fast, common industry shortcut. It takes minutes to execute and costs very little in materials. However, this method completely fails to address sub-surface moisture and frost heave, leaving the homeowner vulnerable to all the mechanical failures discussed above.
The structural failure: Lightweight plastic pads offer no structural resistance to the upward pressure of expanding frozen soil. They simply ride the wave of the heaving dirt. Because they are often placed directly on topsoil without removing the organic material, they actually trap moisture right at the surface, creating the perfect environment for aggressive freezing and shifting.
The quality standard: With a team of approximately 70 employees handling everything from residential oil-to-heat-pump conversions to large commercial new construction projects, our refusal to use this shortcut is a strict quality standard. Diagnosing winter HVAC failures year after year has proven that cutting corners on the foundation always costs the homeowner more in the long run. We rely on Red Seal methodology and commercial-grade preparation to protect your investment, ensuring the system remains stable for its entire lifespan.
• Plastic Pad on Dirt — Moisture Control: Traps surface water beneath the unit. — Frost Heave Resistance: None. Shifts immediately with soil expansion. — Long-Term Stability: High risk of tilting, sinking, and line strain.
• Concrete on Gravel Base — Moisture Control: Promotes rapid deep drainage away from the surface. — Frost Heave Resistance: High. Weight and rigid structure resist upward pressure. — Long-Term Stability: Permanent, level support protecting the warranty.

Preparing the ground before concrete is even poured is the most important phase of the project. The following is an overview of our professional methodology, not a DIY guide. Excavation, structural preparation, and electrical panel integration require licensed professionals to ensure safety, proper load bearing, and code compliance.
1. Removing the organic layer: The mandatory first step is excavating the topsoil. Organic material holds water like a sponge and compresses easily under weight. We dig down to remove this moisture-holding material, creating a clean, stable sub-grade.
2. Establishing the drainage base: Once excavated, the void is filled with crushed gravel. This creates a porous drainage layer that allows water to escape deep into the earth rather than pooling and freezing directly under the pad.
1. Creating a frost buffer: The gravel layer acts as a buffer against deep frost heave. Because gravel does not retain water the way loam and clay do, it does not expand violently when the temperature drops. This effectively neutralizes the Nova Scotia freeze-thaw cycles directly beneath the equipment.
2. Professional compaction: The gravel must be mechanically compacted. Proper gravel compaction prevents future settling when the spring thaw arrives, ensuring the base remains solid and unyielding year-round.
With the moisture mitigated and the drainage base established, the final foundation step is the concrete pour. The weight and rigidity of concrete are necessary for long-term stability, acting as an anchor against minor ground shifts.
The advantage of mass: The sheer weight of a properly poured concrete pad resists the upward force of the freezing earth. Unlike a hollow plastic shell, a solid slab of concrete distributes the weight of the heavy outdoor unit evenly across the compacted gravel base. Before pouring, our installers ensure the form is perfectly level, guaranteeing a flat surface for the unit to operate on for decades.
• Rigid support: Provides unbending support across the entire footprint of the equipment.
• Heave resistance: Resists the upward force of frost heave far better than lightweight alternatives.
• Drainage optimization: Ensures optimal defrost drainage by remaining perfectly level year after year.
• Line protection: Protects sensitive electrical and refrigerant lines from stretching, shifting, or breaking.
• Warranty compliance: Maintains compliance with strict manufacturer warranties that require a perpetually level operating surface.
This level of commercial-grade preparation is standard practice for a reliable residential installation. As a Daikin Comfort Pro contractor with decades of field experience, we know that skipping this step is a disservice to the homeowner.
Because Presidential Ventilation Systems provides comprehensive electrical, ventilation, and sheet-metal services alongside HVAC, we look at every system holistically. A shifting pad does not just threaten the refrigerant lines; it directly threatens your home's high-voltage electrical supply.
Safeguarding the power supply: An outdoor unit requires a dedicated exterior electrical disconnect and thick wiring whips. When a unit sinks into the mud or tilts backward, it pulls on these electrical connections. A stable concrete pad protects the exterior electrical disconnect and wiring from being stretched, torn, or exposed to the elements, preventing dangerous shorts and complete system failures.
Winter accessibility: Proper clearance and a stable base make winter maintenance, such as clearing snow around the unit, safer and easier. You can shovel around a raised concrete pad without worrying about striking the unit or severing a wire hidden in the dirt. Furthermore, a rock-solid foundation simplifies annual professional servicing, allowing our technicians to easily access panels and measure refrigerant levels accurately.
While provincial rebates may be available for efficiency upgrades and oil-to-heat-pump conversions, protecting that financial investment starts from the ground up. Programs and eligibility can change, but the physical requirement for a stable foundation never does. To keep your system running efficiently, staying proactive with a heat pump maintenance plan ensures that your perfectly leveled heat pump continues to perform flawlessly.
Yes, our team highly recommends a concrete pad in cold climates to combat frost heave. The rigid structure and heavy mass of concrete, when poured over a proper gravel drainage base, prevent the unit from shifting during violent freeze-thaw cycles. Without this solid foundation, the equipment is prone to sinking, tilting, and suffering severe mechanical damage.
In our experience, a unit is likely tilting because it was installed on a lightweight plastic pad directly over topsoil. As the ground absorbs moisture and freezes, it expands unevenly, pushing the pad upward. When the ground thaws, the soil settles unevenly, causing the pad to sink into the mud and permanently tilt the equipment.
Placing a unit directly on loose gravel without a concrete or heavy composite pad is not recommended. While gravel provides excellent drainage, it can shift, wash out during heavy rains, or become unlevel due to the vibration of the running compressor. A solid concrete pad poured over the compacted gravel is required to distribute the weight evenly and maintain a perfectly flat surface.
A concrete pad for residential HVAC equipment should typically be at least 3 to 4 inches thick. This thickness provides the necessary structural integrity and weight to resist cracking and ground movement. The pad must also be paired with an appropriately excavated and compacted gravel base to ensure long-term stability.
No, snow stands do not replace the need for a concrete pad; they work together. A snow stand elevates the unit 12 to 18 inches to keep it above average snowfall and allow for defrost drainage, but the stand itself must be bolted to a solid, level concrete foundation. If the stand is placed on shifting dirt, the entire assembly will still tilt and strain the connections.
Understanding why the foundation matters is the very first step to a reliable, long-lasting installation. The mechanics of frost heave are undeniable, and relying on cheap plastic pads is a gamble that homeowners inevitably lose. By prioritizing professional excavation, proper drainage, and poured concrete, you safeguard the delicate electrical and refrigerant lines that keep your home comfortable.
Choosing a contractor who utilizes rigorous, commercial-grade preparation methods ensures your system will survive harsh winters without voiding the manufacturer's warranty. With 30+ years of local HVAC, electrical, and ventilation experience, Presidential Ventilation Systems refuses to cut corners on the foundation. Reach out to our team today for a professional assessment or a free estimate, and let us get your next project started correctly from the ground up.
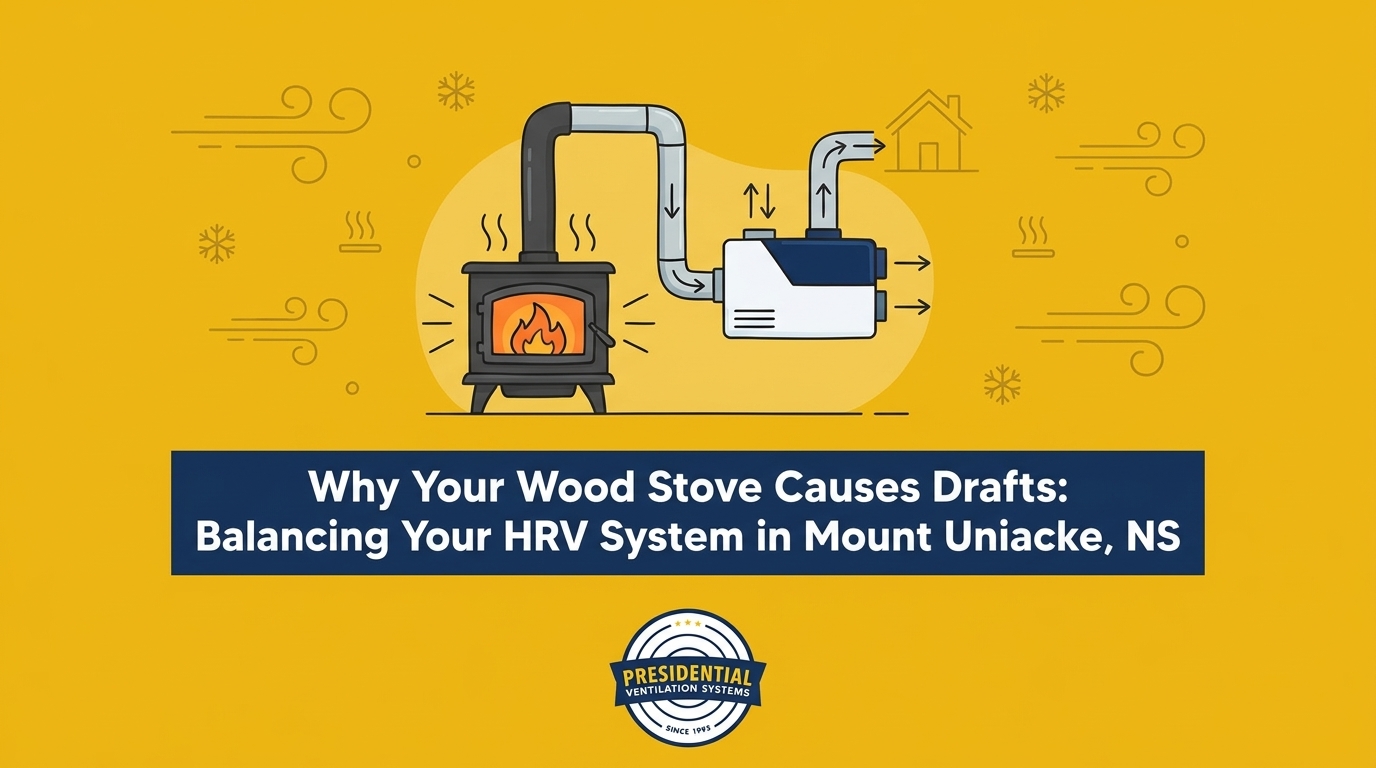
That strange cold draft across the living room floor isn't going away on its own. If you are struggling with unexplained cold drafts or smoke puffing back into your living room, balancing your HRV system after adding a wood stove in Mount Uniacke, NS, is often the exact solution you need. At Presidential Ventilation Systems, our team sees this scenario every winter: you fire up a brand-new wood stove expecting a cozy, warm evening, but instead, you are greeted by the sharp smell of woodsmoke trapped indoors and a room that somehow feels colder than before. This is a frustrating and incredibly common problem for homeowners across Mount Uniacke and rural Nova Scotia.
To resolve these airflow issues, we highly recommend exploring professional HVAC and ventilation services to keep your home safe and comfortable.
Most homeowners assume their chimney is blocked or their wood stove is defective. The truth is usually much more complex. Modern homes are built to be remarkably airtight. They do not have enough natural air leakage to feed a secondary heating source like a wood stove. When the fire starts burning, it desperately searches for oxygen, disrupting your home's mechanical ventilation in the process.
This creates a dangerous pressure imbalance between the inside of your house and the outdoors. Your Heat Recovery Ventilator (HRV) is suddenly thrown completely out of sync, fighting a losing battle against the powerful draw of the chimney. Resolving this hidden struggle requires a professional assessment of your home's total airflow, not guesswork or trial and error.
To understand why your wood stove smokes, you have to look at how air moves through a modern house. Fire requires oxygen to burn. A standard wood stove consumes anywhere from 10 to 50 cubic feet of air per minute (CFM) during active combustion. Without a dedicated external air intake, the stove pulls every single cubic foot of that air directly from your living space.
In older, drafty homes, this wasn't a noticeable issue. Air simply leaked in through poorly insulated walls, gaps around doors, and single-pane windows to replace the air going up the chimney. However, in our three decades of working on both new construction and home retrofits across Nova Scotia, we have seen how modern building practices change the game. Many newly built or renovated homes are sealed exceptionally tight, often testing below 2.0 ACH50 (Air Changes per Hour at 50 Pascals of pressure). This means air cannot easily enter the house to replace what the stove is consuming.
When the wood stove exhausts air up the chimney and no replacement air can get inside, your house experiences a vacuum effect known as negative pressure. During severe, cold Maritime winters, this problem peaks. Homeowners tightly seal their windows and doors to keep the freezing temperatures out, which inadvertently maximizes the negative pressure effect when the wood stove is running.
Negative pressure forces your house to seek air from any available opening, no matter how small. This air starvation completely undermines your heating efforts in several ways:
• Freezing drafts: The house pulls freezing outdoor air in through tiny cracks around windows, doors, and baseboards, creating uncomfortable cold streams across your floors.
• Wasted energy: The cold air entering the home counteracts the radiant heat being generated by the wood stove, forcing your primary heating system to work harder.
• Reversed exhaust flows: If the negative pressure is strong enough, it will pull air down through bathroom exhaust fans or range hoods, bringing cold air and frost directly into those rooms.
The resulting drafts make the home feel colder despite your secondary heat source running at full capacity. The fire is literally fighting your house for air.
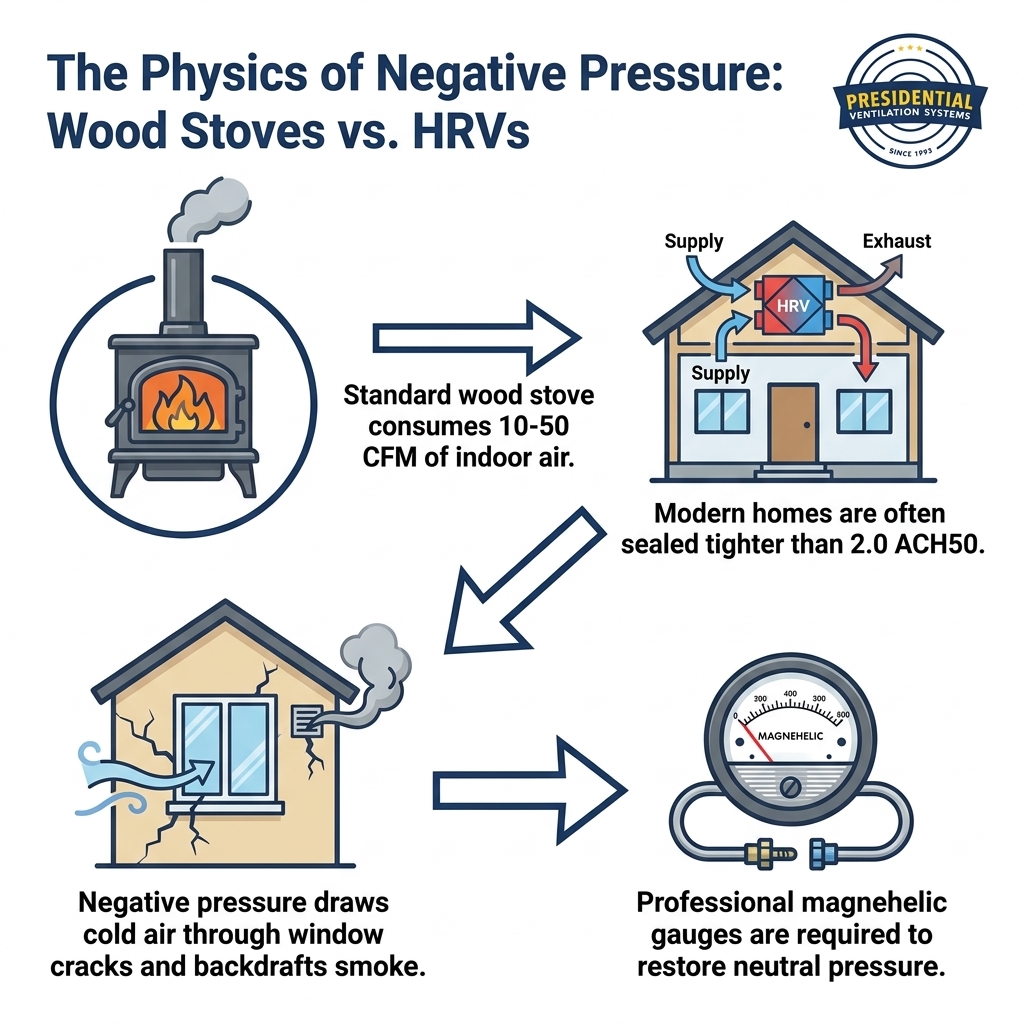
Your Heat Recovery Ventilator (HRV) is the lungs of your airtight home. It is meticulously calibrated to bring in exactly as much fresh air as it exhausts, maintaining a perfectly neutral pressure. This delicate balance ensures you get fresh, filtered air without creating drafts or vacuum effects.
When our Red Seal ventilation experts inspect these systems, we often find that adding a wood stove acts as a massive, unplanned exhaust fan. It pulls large amounts of air out of the equation, instantly destroying the baseline calibration of your HRV. The HRV system is suddenly fighting against the wood stove. Because the house is under negative pressure, the HRV's exhaust fan struggles to push stale air outside, while the intake fan is forced to pull in far more cold air than the system's core can effectively warm.
This imbalance causes the HRV to malfunction on a fundamental level. Instead of recovering heat, it becomes a conduit for freezing outdoor air. Furthermore, because the exhaust function is restricted by the negative pressure, the HRV fails to remove stale, moist air from your bathrooms and kitchen. This trapped excess winter moisture quickly leads to heavy window condensation, peeling paint, and a damp, uncomfortable indoor environment.
Restoring this delicate equilibrium requires precise HRV system installation and balancing to ensure your mechanical ventilation and your wood stove can operate simultaneously without conflict.
• Perfectly Balanced HRV — Airflow Dynamics: Intake and exhaust CFM are exactly equal. — Impact on the Home: Neutral pressure, dry windows, optimal heat recovery.
• Unbalanced (Stove Running) — Airflow Dynamics: Stove exhausts 30+ CFM; HRV exhaust is choked. — Impact on the Home: Negative pressure, cold drafts, heavy window condensation.
• Professionally Re-balanced — Airflow Dynamics: HRV adjusted to account for secondary combustion air. — Impact on the Home: Neutral or slightly positive pressure, safe wood burning.
The consequences of an unbalanced HRV and an air-starved wood stove go far beyond cold drafts and foggy windows. If the negative pressure in your home becomes strong enough, it will overcome the natural draft of your chimney. When this happens, the house literally sucks air down the flue.
This phenomenon, known as backdrafting, pulls exhaust gases, soot, and smoke directly back into your living room. You will usually notice this when you open the stove door to add a log, and a cloud of smoke immediately billows into your face instead of drafting upward. Backdrafting introduces harmful particulates, volatile organic compounds (VOCs), and dangerous carbon monoxide into your tightly sealed home.
Normally, an HRV helps clear out indoor pollutants. But an improperly balanced HRV, choked by negative pressure, can no longer dilute these contaminants. The stale, toxic air simply circulates inside the house, severely degrading your indoor air quality during the long winter heating season. Ignoring these warning signs puts your family at risk of poor air quality and creates long-term structural moisture issues.
Understanding what happens if you don't maintain your HRV is crucial, but knowing how other appliances impact that maintenance is just as important for your safety.
When faced with drafts or a smoking stove, many homeowners turn to internet forums for a quick fix. You will often find DIY tutorials suggesting you can balance an HRV using a garbage bag and a stopwatch, or by simply adjusting the dampers until the airflow "feels" right. These methods are highly inaccurate and can actually make your negative pressure problem much worse.
Proper balancing is a complex science that requires professional expertise. Here is why you should never attempt to balance your HRV yourself:
1. Inaccurate Measurements: A garbage bag cannot measure total static pressure. Proper balancing requires specialized tools, such as magnehelic gauges or digital manometers, to measure exact cubic feet per minute (CFM) across the HRV core.
2. Hidden Exhaust Factors: Balancing isn't just about the HRV. You must calculate the total exhaust rate of the home, including range hoods, central vacuums, bathroom fans, and the wood stove. Missing even one factor throws the whole calculation off.
3. Code Compliance: Nova Scotia building codes mandate that mechanical ventilation must be properly calibrated to manage moisture safely and provide adequate fresh air. A DIY job rarely meets these strict safety standards.
4. Increased Backdraft Risks: Attempting to balance an HRV without understanding the entire home's pressure dynamics often leads to over-pressurizing or under-pressurizing the house, directly worsening the backdrafting risks of your wood stove.
As an established Nova Scotia contractor with a team of approximately 70 employees, Presidential Ventilation Systems relies on our Red Seal certified sheet-metal and ventilation experts who use calibrated, professional-grade instruments to ensure safety and code compliance. If you live within the Mount Uniacke service area, relying on our 30+ years of local ventilation experience guarantees your system is calibrated correctly the first time.
Resolving negative pressure requires a comprehensive, whole-home approach. When our Red Seal tradespeople arrive at your home, they don't just look at the HRV box; they evaluate how every system in your house interacts.
A pattern we see often in our retrofit and renovation projects is that any major modification to your home's energy profile requires professional problem-solving. For example, when one local homeowner transitioned from an older oil system to a central heat pump last summer, the project required an unexpected electrical panel upgrade. Our skilled technician, Jack, stepped in to coordinate and resolve the electrical concerns, ensuring the entire system operated safely and flawlessly. (If you are planning a similar oil-to-heat-pump conversion or major heating upgrade, provincial and federal rebates may be available; we always recommend confirming current programs and eligibility with our team.) Adding a wood stove requires that same level of whole-home coordination, particularly regarding your ventilation.
The technician will first assess the home's total exhaust requirements. They will measure the draw of your new wood stove, your kitchen range hood, and all bathroom fans. Once the total air consumption is calculated, they can determine exactly how much makeup air your home needs to remain neutral.
In many airtight homes, simply adjusting the HRV isn't enough to feed a hungry wood stove. The technician may recommend installing a dedicated combustion air intake. This is an insulated duct that runs directly from the outdoors to the air intake of the wood stove.
A dedicated air intake isolates the wood stove from the home's ambient air. The stove pulls its oxygen directly from outside, rather than robbing the HRV of its required airflow. This is often the safest, most reliable fix for airtight homes, completely eliminating the vacuum effect and stopping cold drafts in their tracks.
Once the combustion air is addressed, the HRV dampers are professionally adjusted using precise magnehelic gauges. The technician sets the system to provide slightly positive or perfectly neutral pressure, even when the stove is burning hot. Finally, you receive honest, expert advice on how to manage the system efficiently going forward.
Once your HRV is professionally balanced to accommodate your wood stove, keeping it running optimally requires regular attention. The balance of your system relies on unobstructed airflow, and even minor blockages can shift the pressure dynamics back into the negative.
To ensure your home remains comfortable and safe throughout the winter heating season, our maintenance team recommends these essential steps:
• Clean the filters monthly: The filters inside your HRV catch dust, pet dander, and outdoor debris. When they clog, the intake fan has to work harder, reducing fresh air and altering the system's balance. Wash or vacuum them regularly.
• Inspect the exterior hoods: Check the outdoor intake and exhaust vents frequently. Snowdrifts, ice buildup, or even bird nests can block the airflow, immediately throwing the system out of balance.
• Monitor for condensation: Keep a close eye on your windows during cold snaps. Excessive, pooling condensation is often the first indicator that your filters are clogged and the HRV is failing to exhaust stale, moist air.
• Maintain the core: The heat recovery core should be removed and gently washed according to the manufacturer's instructions at least once a year to ensure optimal heat transfer.
Because ventilation dynamics are so precise, it is wise to schedule annual check-ups. A professional can verify that the system is still calibrated correctly, especially if you have completed other home renovations like installing new windows or upgrading insulation. Enrolling in a preventative maintenance plan takes the guesswork out of this process, ensuring your equipment is always operating at peak efficiency.
A wood stove and an HRV do not have to fight for air. When a home's pressure dynamics are properly understood and the ventilation system is accurately calibrated, you can enjoy the cozy warmth of a wood fire without sacrificing your indoor air quality or enduring freezing floor drafts.
Adding a secondary heat source fundamentally changes how your house breathes. Prioritizing safety means acknowledging that these complex changes require specialized tools and deep expertise to manage correctly. Don't let negative pressure compromise your comfort or your health. Reach out to the experienced team at Presidential Ventilation Systems to request a free estimate or book a service call, and let our Red Seal tradespeople restore perfect, healthy airflow to your home.
At Presidential Ventilation Systems, we often explain to customers that your wood stove smokes when you open the door because your home is under negative pressure, which reverses the natural draft of the chimney. Instead of smoke rising up and out, the vacuum effect inside your airtight home pulls the smoke down and into the living room. This is a clear sign that your wood stove is struggling to find enough combustion air. A professional assessment can determine if a dedicated air intake or an HRV re-balancing is required to fix the draft.
Yes, a wood stove can easily cause negative pressure in a tightly sealed modern house. A standard stove consumes up to 50 cubic feet of air per minute to keep the fire burning. If your home is airtight and doesn't have a dedicated way to replace that consumed air, it creates a vacuum effect. This negative pressure pulls cold outdoor air in through window cracks and disrupts your home's mechanical ventilation.
If you have a modern, airtight home, you absolutely need an HRV, regardless of whether you have a wood stove. Building codes require HRVs to ensure stale, moist indoor air is exhausted and fresh outdoor air is brought in. However, when you add a wood stove, the HRV must be professionally balanced to account for the air the stove consumes, ensuring both systems can operate safely at the same time.
An HRV works alongside a wood stove by maintaining the overall air quality and moisture levels in the home, provided the system is properly balanced. The HRV continuously swaps stale indoor air for fresh outdoor air, transferring heat in the process. If balanced correctly, the HRV maintains neutral pressure so the wood stove can draft properly up the chimney without pulling cold exhaust air backward through the ventilation system.
Fixing negative pressure requires introducing enough makeup air to replace the air being exhausted by appliances like wood stoves, range hoods, and bathroom fans. Our team typically achieves this by installing a dedicated combustion air intake directly to the wood stove and professionally re-balancing the HRV system using magnehelic gauges. It is not a DIY project; a ventilation expert must measure the total airflow to ensure the home returns to a safe, neutral pressure.
Yes, an unbalanced HRV is a primary cause of severe window condensation during the winter. If negative pressure prevents the HRV from exhausting stale air, the moisture generated by cooking, bathing, and breathing becomes trapped inside the house. When this warm, humid air hits freezing window glass, it instantly condenses into water droplets. Properly balancing the HRV restores the exhaust flow and eliminates the trapped humidity.