


What does a new construction electrical installation include in nova scotia? Here's a quick overview:
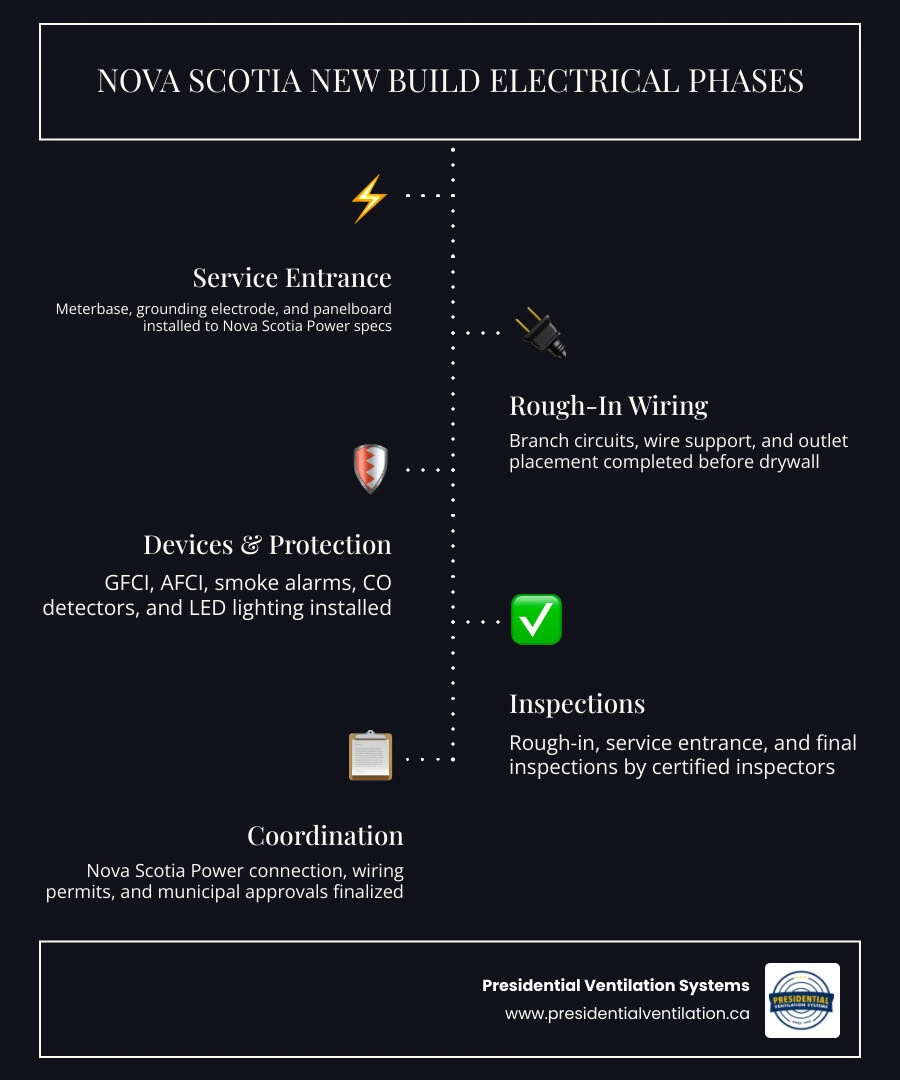
• Service Entrance — What's Included: Meterbase, point of attachment, grounding electrode, panelboard
• Rough-In Wiring — What's Included: Branch circuits, wire support, cable stapling, outlet placement
• Devices & Protection — What's Included: GFCI outlets, AFCI breakers, smoke alarms, CO detectors, lighting
• Inspections — What's Included: Rough-in inspection, service entrance inspection, final inspection
• Coordination — What's Included: Nova Scotia Power connection, wiring permits, municipal permit
• Modern Additions — What's Included: EV charger wiring, ventilation system circuits, sub panels
Building a new home in Nova Scotia means navigating a detailed electrical process that goes well beyond simply running wire through walls. From the moment your foundation is poured to the day Nova Scotia Power flips the switch, your electrical system must meet strict provincial standards, pass multiple inspections, and be completed by a certified professional. Getting any part of this wrong can delay your project, affect your insurance, and create real safety risks for the people who will live in the home.
The rules around who can do the work, what permits are required, and what each phase of installation must include are clearly defined under Nova Scotia's Electrical Installation and Inspection Act and the Canadian Electrical Code. Understanding these requirements upfront saves builders and homeowners from costly surprises down the road.
Basic what does a new construction electrical installation include in nova scotia terms:
• how electrical planning for new construction differs from retrofit work in atlantic canada
• how to coordinate electrical and hvac installation in a new build in nova scotia
• how to find a licensed electrician for new construction or commercial work in nova scotia
When you are planning a new build, you cannot simply buy a roll of Romex wire and start stringing it up. The legal framework in Nova Scotia is highly regulated to prevent fire and shock hazards. The provincial standard is based on the Canadian Electrical Code (CEC), Part I, which is updated regularly to reflect the latest safety advancements.
In Nova Scotia, safety regulations dictate that every new construction project must have an active electrical wiring permit before any work starts. This permit acts as a formal registration of the work with the inspection authority—which in our province is managed by Nova Scotia Power. Without this permit, you cannot legally connect your new home to the electrical grid, and your local municipality will not issue an occupancy permit.
To protect homeowners and properties, the province of Nova Scotia mandates that only qualified professionals can perform electrical installations on new construction. Construction Electrician is a compulsory certified Red Seal trade in Nova Scotia. This means it is illegal for anyone to perform this work unless they hold a valid Certificate of Qualification issued by the provincial government, or they are a registered apprentice working under the direct supervision of a certified journeyperson.
Hiring a certified construction electrician ensures that your home is wired to handle modern electrical loads safely. They understand the complexities of the Canadian Electrical Code and maintain the proper liability insurance to protect your investment. If you want to dive deeper into the general standards of modern residential wiring, you can check out our Electrical Wiring Guide 2025.
The permitting process begins with a formal wiring permit application submitted to the Nova Scotia Power Wiring Permit Centre. Only a certified electrical contractor or an eligible certified electrician can pull this permit.
For a typical new build, the permitting process includes coordinating with your local municipality. You must first secure a municipal building permit and obtain a municipal permit number. Nova Scotia Power will not begin planning your service connection or processing your electrical files until this municipal number is provided.
Are there any permit exemptions? In Nova Scotia, very minor maintenance tasks are exempt from permits—such as replacing an existing light fixture, changing an identical wall switch, or replacing a plug receptacle in an existing home. However, for new construction, there are absolutely no permit exemptions. Every single wire, box, panel, and connection in a brand-new build must be covered under an official wiring permit and undergo formal inspections. To understand how we structure these services for new residential projects, read more about our New Construction Electrical Services in Nova Scotia.
An electrical installation for a new home is a multi-layered process. It is a highly structured system designed to bring power safely from the street, distribute it to your appliances, and protect your family from electrical faults.
Every piece of equipment, from the main panel down to the smallest wire nut, must be approved and certified for use in Canada. This means looking for recognized certification marks such as CSA, cUL, or QPS. The Department of Labour and Advanced Education strictly regulates these standards, and inspectors will reject any unapproved equipment.
Understanding the scope of a new build's electrical system helps you plan your layout more effectively. For a detailed breakdown of how this initial layout phase differs from working on an existing home, see our guide on how electrical planning for new construction differs from retrofit work in atlantic canada.
The service entrance is the gateway for electricity entering your home. Nova Scotia has strict physical and geographical requirements for these installations:
• Meterbase Height: The meter socket must be installed on the exterior of the home, with the centerline of the meter base positioned between 1.4 meters and 1.8 meters above the finished rough grade.
• Point of Attachment (POA): The point where Nova Scotia Power's overhead lines attach to your home must be a minimum of 4.5 meters and a maximum of 7.5 meters above the ground.
• Grounding Electrode: The system must be connected to the earth using approved grounding electrodes (typically two copper-clad ground rods driven into the earth) and secured with an approved grounding clamp.
• Panelboard Working Space: The main electrical panel must have a clear working space of at least 1 meter in front of it, and a vertical head clearance of at least 2 meters. This area must be kept clear of storage and plumbing lines.
If you are planning a large home with high power demands, ensuring you install a panel with adequate capacity is essential. To learn more about modern panel capacities, read our resource on Electrical Service Upgrade.
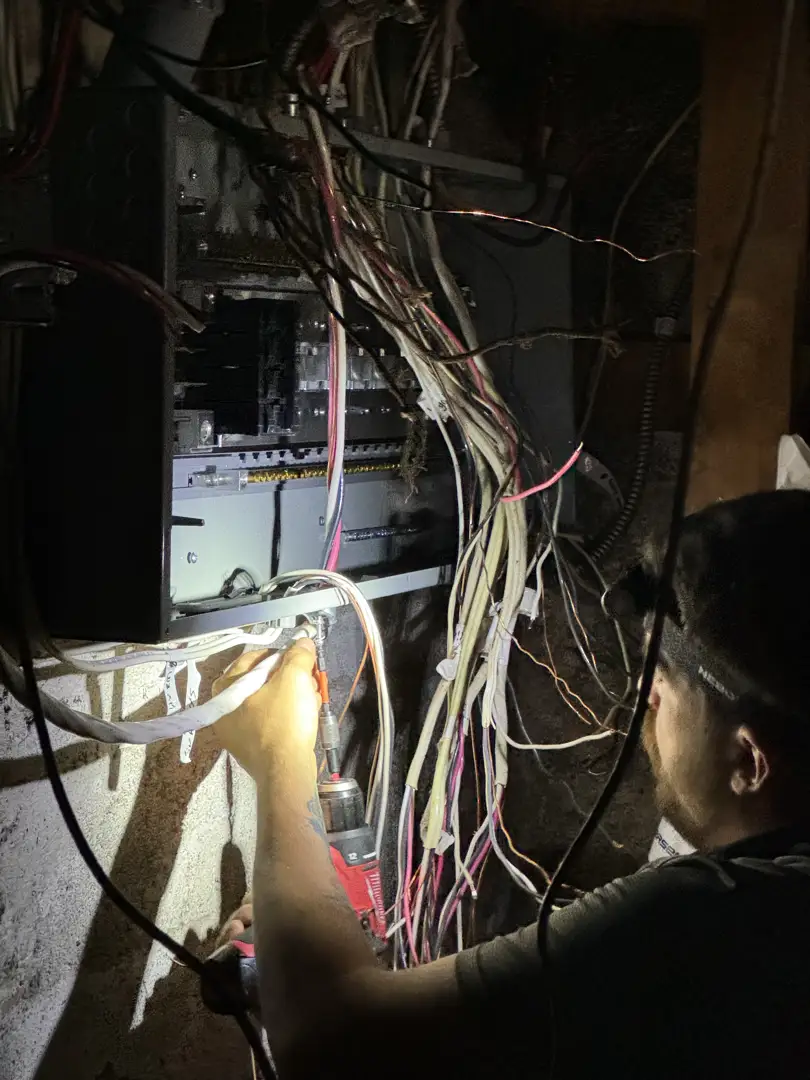
The rough-in phase occurs after the home is framed and sheathed, but before the insulation and drywall are installed. This is when the electrician runs cables through the studs and ceiling joists.
• Branch Circuits: These are the individual paths that carry electricity from the panel to your outlets and lights. The Canadian Electrical Code restricts general-purpose branch circuits to a maximum of 12 outlets (which includes a combination of receptacles and lighting fixtures) on a single circuit.
• Wire Support and Cable Stapling: Cables must be supported securely using approved staples. These staples must be placed within 300 mm of every electrical box and spaced no more than 1.5 meters apart along the studs. To prevent damage from drywall screws, cables must be kept at least 32 mm away from the front face of any wood stud or joist.
• Preventing Derating: Electricians must avoid bundling multiple cables tightly together for distances exceeding 600 mm, as this traps heat and reduces the safe current-carrying capacity of the wires.
For those building in the surrounding regions, we have localized resources such as our guide on Electrical System Installation in Truro NS.
Modern electrical systems rely heavily on advanced safety devices to prevent fires and electrocution.
• GFCI Protection: Ground Fault Circuit Interrupter (GFCI) protection is mandatory in wet areas. Receptacles must be installed within 1 meter of bathroom sinks but cannot be closer than 500 mm to a bathtub or shower stall. Outdoor outlets and kitchen counter outlets near sinks also require GFCI protection.
• AFCI Protection: Arc Fault Circuit Interrupter (AFCI) protection is required for almost all residential branch circuits supplying outlets in living spaces. These breakers detect dangerous electrical arcing (sparking) behind walls before a fire can start.
• Smoke and Carbon Monoxide (CO) Alarms: These life-saving devices must be hardwired into the electrical system and interconnected so that if one sounds, they all sound. Code requires them to be wired on a circuit that also contains lighting, ensuring that if the circuit trips, residents will notice because the lights go out.
• LED Lighting: Modern new builds rely almost exclusively on LED lighting. LEDs are incredibly efficient, lasting between 25,000 to 50,000 hours compared to just 1,000 hours for old incandescent bulbs. Additionally, LEDs only use 6 to 8 watts to produce the same brightness that once required a 60-watt bulb.
For more information on modern residential device layouts, check out our Electrical System Installation Guide Kentville NS.
No new construction electrical installation is complete without passing formal inspections. In Nova Scotia, this is a multi-step process designed to verify safety at every major milestone of the build.
Before any drywall is hung or insulation is placed, the rough-in inspection must occur. The inspector will visit the site to check all box placements, wire routing, cable stapling, and grounding connections. No wiring may be concealed until the inspector has officially signed off on the rough-in.
At this stage, the service entrance inspection is also conducted to ensure the meter base, conduit, and main panel are correctly positioned. During this phase, you or your contractor will coordinate with a Nova Scotia Power planner. If you require overhead lines, Nova Scotia Power provides up to 92 meters of pole and service line installation under normal circumstances. However, you must clear a right-of-way (12 meters of clearance for high-voltage lines and 5 meters for standard service lines) of any tall trees or brush before they will run the line. If you need power during construction, the inspector must also approve a temporary power pole setup.
The final inspection occurs when the home is fully finished—drywall is painted, plates are on the outlets, light fixtures are hung, and the primary heating system is fully wired and operational.
During the final walk-through, the inspector will verify:
• That all outlets are active and correctly wired.
• That GFCI and AFCI devices trip and reset properly.
• That the panelboard legend is neatly and permanently labeled, identifying what every single breaker controls.
• The results of a megger test (insulation resistance testing) to ensure there are no short circuits in the walls.
Once the inspector is satisfied, they will apply an official final inspection sticker to the electrical meter base. This sticker signals to Nova Scotia Power that it is safe to permanently energize the home.
A major component of modern home construction is the integration of mechanical systems. Your home's ventilation system—including custom duct design, air handling units, and Energy Recovery Ventilators (ERVs) or Heat Recovery Ventilators (HRVs)—requires careful electrical coordination to operate efficiently.
To maintain excellent indoor air quality and prevent drafts, modern homes rely on dedicated ventilation systems. These mechanical systems require their own dedicated electrical circuits and control wiring.
When building, we work closely with your framing and electrical teams to ensure that:
• Adequate space is left in the joist cavities for both custom ductwork and electrical runs without overcrowding.
• Dedicated circuits are run to the mechanical room to power air handlers and ERV/HRV units.
• Control wiring is pulled from the ventilation units to centrally located smart controllers or wall sensors.
Proper coordination prevents scheduling conflicts and ensures your mechanical systems operate at peak efficiency. To learn more about how we manage this process, see our guides on how to coordinate electrical and HVAC installation in a new build in nova scotia and how to decide between ducted and ductless when building a new home in nova scotia.
Modern homes must be built to handle future energy demands. This means planning your electrical system to accommodate high-draw devices like electric vehicle (EV) chargers and advanced ventilation equipment.
During the rough-in phase, it is highly recommended to run dedicated conduit and wiring for an EV charging station in your garage or driveway, even if you do not own an electric vehicle yet. Retrofitting these lines through finished drywall later is far more difficult. Installing a 200-amp main panel—or adding a sub-panel in a detached garage—ensures your home has the electrical capacity to power these systems safely.
No. Under Nova Scotia's Electrical Installation and Inspection Act, homeowners are not legally permitted to perform electrical wiring installations on new construction projects. Because of the high safety risks associated with improper wiring, all new construction electrical work must be performed by a certified construction electrician holding a valid provincial license.
All electrical equipment, devices, and materials installed in Nova Scotia must bear an approved certification mark from an accredited testing agency recognized by the Province of Nova Scotia and the Department of Labour. Common acceptable marks include CSA (Canadian Standards Association), cUL (Underwriters Laboratories of Canada), and QPS. Unapproved equipment will be rejected by the electrical inspector.
According to the Canadian Electrical Code, a standard 15-amp residential branch circuit can supply a maximum of 12 outlets. This includes any combination of general-purpose plug receptacles and permanent lighting fixtures. Dedicated circuits are required for major appliances such as refrigerators, microwaves, and laundry machines.
A successful new construction electrical installation requires planning, professional expertise, and strict adherence to provincial safety codes. From securing the initial wiring permits to the final inspection walk-through, every step must be handled with precision to ensure your new home is safe, efficient, and ready for the future.
At Presidential Ventilation Systems Ltd., we bring over 30 years of experience to residential and commercial projects across mainland Nova Scotia—including Halifax, Dartmouth, Bedford, Sackville, and Mount Uniacke. Our expert team is here to help you coordinate your electrical layout, ventilation systems, and custom duct designs seamlessly.
If you are planning a new build and want to ensure your systems are installed safely and professionally, contact us today. For residents in the Mount Uniacke area, you can connect directly with our local team through our Electrical Services in Mount Uniacke, NS page to discuss your upcoming project.

What does a new construction electrical installation include in nova scotia? Here's a quick overview:
• Service Entrance — What's Included: Meterbase, point of attachment, grounding electrode, panelboard
• Rough-In Wiring — What's Included: Branch circuits, wire support, cable stapling, outlet placement
• Devices & Protection — What's Included: GFCI outlets, AFCI breakers, smoke alarms, CO detectors, lighting
• Inspections — What's Included: Rough-in inspection, service entrance inspection, final inspection
• Coordination — What's Included: Nova Scotia Power connection, wiring permits, municipal permit
• Modern Additions — What's Included: EV charger wiring, ventilation system circuits, sub panels
Building a new home in Nova Scotia means navigating a detailed electrical process that goes well beyond simply running wire through walls. From the moment your foundation is poured to the day Nova Scotia Power flips the switch, your electrical system must meet strict provincial standards, pass multiple inspections, and be completed by a certified professional. Getting any part of this wrong can delay your project, affect your insurance, and create real safety risks for the people who will live in the home.
The rules around who can do the work, what permits are required, and what each phase of installation must include are clearly defined under Nova Scotia's Electrical Installation and Inspection Act and the Canadian Electrical Code. Understanding these requirements upfront saves builders and homeowners from costly surprises down the road.
Basic what does a new construction electrical installation include in nova scotia terms:
• how electrical planning for new construction differs from retrofit work in atlantic canada
• how to coordinate electrical and hvac installation in a new build in nova scotia
• how to find a licensed electrician for new construction or commercial work in nova scotia
When you are planning a new build, you cannot simply buy a roll of Romex wire and start stringing it up. The legal framework in Nova Scotia is highly regulated to prevent fire and shock hazards. The provincial standard is based on the Canadian Electrical Code (CEC), Part I, which is updated regularly to reflect the latest safety advancements.
In Nova Scotia, safety regulations dictate that every new construction project must have an active electrical wiring permit before any work starts. This permit acts as a formal registration of the work with the inspection authority—which in our province is managed by Nova Scotia Power. Without this permit, you cannot legally connect your new home to the electrical grid, and your local municipality will not issue an occupancy permit.
To protect homeowners and properties, the province of Nova Scotia mandates that only qualified professionals can perform electrical installations on new construction. Construction Electrician is a compulsory certified Red Seal trade in Nova Scotia. This means it is illegal for anyone to perform this work unless they hold a valid Certificate of Qualification issued by the provincial government, or they are a registered apprentice working under the direct supervision of a certified journeyperson.
Hiring a certified construction electrician ensures that your home is wired to handle modern electrical loads safely. They understand the complexities of the Canadian Electrical Code and maintain the proper liability insurance to protect your investment. If you want to dive deeper into the general standards of modern residential wiring, you can check out our Electrical Wiring Guide 2025.
The permitting process begins with a formal wiring permit application submitted to the Nova Scotia Power Wiring Permit Centre. Only a certified electrical contractor or an eligible certified electrician can pull this permit.
For a typical new build, the permitting process includes coordinating with your local municipality. You must first secure a municipal building permit and obtain a municipal permit number. Nova Scotia Power will not begin planning your service connection or processing your electrical files until this municipal number is provided.
Are there any permit exemptions? In Nova Scotia, very minor maintenance tasks are exempt from permits—such as replacing an existing light fixture, changing an identical wall switch, or replacing a plug receptacle in an existing home. However, for new construction, there are absolutely no permit exemptions. Every single wire, box, panel, and connection in a brand-new build must be covered under an official wiring permit and undergo formal inspections. To understand how we structure these services for new residential projects, read more about our New Construction Electrical Services in Nova Scotia.
An electrical installation for a new home is a multi-layered process. It is a highly structured system designed to bring power safely from the street, distribute it to your appliances, and protect your family from electrical faults.
Every piece of equipment, from the main panel down to the smallest wire nut, must be approved and certified for use in Canada. This means looking for recognized certification marks such as CSA, cUL, or QPS. The Department of Labour and Advanced Education strictly regulates these standards, and inspectors will reject any unapproved equipment.
Understanding the scope of a new build's electrical system helps you plan your layout more effectively. For a detailed breakdown of how this initial layout phase differs from working on an existing home, see our guide on how electrical planning for new construction differs from retrofit work in atlantic canada.
The service entrance is the gateway for electricity entering your home. Nova Scotia has strict physical and geographical requirements for these installations:
• Meterbase Height: The meter socket must be installed on the exterior of the home, with the centerline of the meter base positioned between 1.4 meters and 1.8 meters above the finished rough grade.
• Point of Attachment (POA): The point where Nova Scotia Power's overhead lines attach to your home must be a minimum of 4.5 meters and a maximum of 7.5 meters above the ground.
• Grounding Electrode: The system must be connected to the earth using approved grounding electrodes (typically two copper-clad ground rods driven into the earth) and secured with an approved grounding clamp.
• Panelboard Working Space: The main electrical panel must have a clear working space of at least 1 meter in front of it, and a vertical head clearance of at least 2 meters. This area must be kept clear of storage and plumbing lines.
If you are planning a large home with high power demands, ensuring you install a panel with adequate capacity is essential. To learn more about modern panel capacities, read our resource on Electrical Service Upgrade.
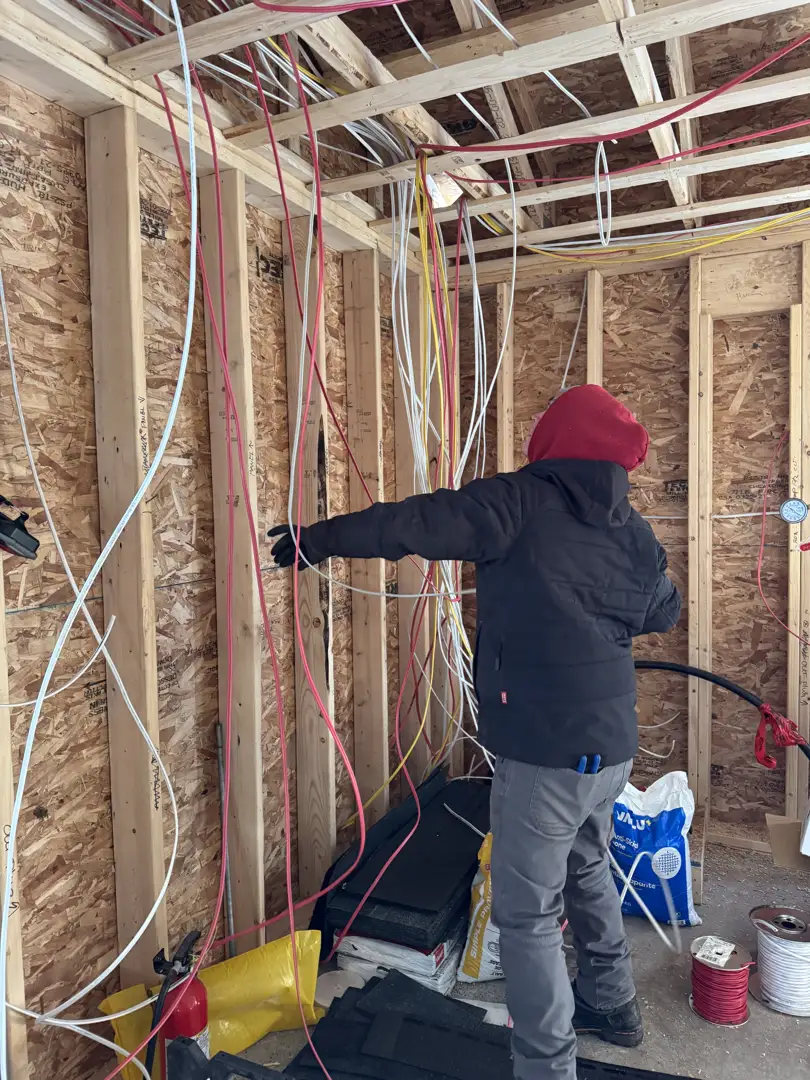
The rough-in phase occurs after the home is framed and sheathed, but before the insulation and drywall are installed. This is when the electrician runs cables through the studs and ceiling joists.
• Branch Circuits: These are the individual paths that carry electricity from the panel to your outlets and lights. The Canadian Electrical Code restricts general-purpose branch circuits to a maximum of 12 outlets (which includes a combination of receptacles and lighting fixtures) on a single circuit.
• Wire Support and Cable Stapling: Cables must be supported securely using approved staples. These staples must be placed within 300 mm of every electrical box and spaced no more than 1.5 meters apart along the studs. To prevent damage from drywall screws, cables must be kept at least 32 mm away from the front face of any wood stud or joist.
• Preventing Derating: Electricians must avoid bundling multiple cables tightly together for distances exceeding 600 mm, as this traps heat and reduces the safe current-carrying capacity of the wires.
For those building in the surrounding regions, we have localized resources such as our guide on Electrical System Installation in Truro NS.
Modern electrical systems rely heavily on advanced safety devices to prevent fires and electrocution.
• GFCI Protection: Ground Fault Circuit Interrupter (GFCI) protection is mandatory in wet areas. Receptacles must be installed within 1 meter of bathroom sinks but cannot be closer than 500 mm to a bathtub or shower stall. Outdoor outlets and kitchen counter outlets near sinks also require GFCI protection.
• AFCI Protection: Arc Fault Circuit Interrupter (AFCI) protection is required for almost all residential branch circuits supplying outlets in living spaces. These breakers detect dangerous electrical arcing (sparking) behind walls before a fire can start.
• Smoke and Carbon Monoxide (CO) Alarms: These life-saving devices must be hardwired into the electrical system and interconnected so that if one sounds, they all sound. Code requires them to be wired on a circuit that also contains lighting, ensuring that if the circuit trips, residents will notice because the lights go out.
• LED Lighting: Modern new builds rely almost exclusively on LED lighting. LEDs are incredibly efficient, lasting between 25,000 to 50,000 hours compared to just 1,000 hours for old incandescent bulbs. Additionally, LEDs only use 6 to 8 watts to produce the same brightness that once required a 60-watt bulb.
For more information on modern residential device layouts, check out our Electrical System Installation Guide Kentville NS.
No new construction electrical installation is complete without passing formal inspections. In Nova Scotia, this is a multi-step process designed to verify safety at every major milestone of the build.
Before any drywall is hung or insulation is placed, the rough-in inspection must occur. The inspector will visit the site to check all box placements, wire routing, cable stapling, and grounding connections. No wiring may be concealed until the inspector has officially signed off on the rough-in.
At this stage, the service entrance inspection is also conducted to ensure the meter base, conduit, and main panel are correctly positioned. During this phase, you or your contractor will coordinate with a Nova Scotia Power planner. If you require overhead lines, Nova Scotia Power provides up to 92 meters of pole and service line installation under normal circumstances. However, you must clear a right-of-way (12 meters of clearance for high-voltage lines and 5 meters for standard service lines) of any tall trees or brush before they will run the line. If you need power during construction, the inspector must also approve a temporary power pole setup.
The final inspection occurs when the home is fully finished—drywall is painted, plates are on the outlets, light fixtures are hung, and the primary heating system is fully wired and operational.
During the final walk-through, the inspector will verify:
• That all outlets are active and correctly wired.
• That GFCI and AFCI devices trip and reset properly.
• That the panelboard legend is neatly and permanently labeled, identifying what every single breaker controls.
• The results of a megger test (insulation resistance testing) to ensure there are no short circuits in the walls.
Once the inspector is satisfied, they will apply an official final inspection sticker to the electrical meter base. This sticker signals to Nova Scotia Power that it is safe to permanently energize the home.
A major component of modern home construction is the integration of mechanical systems. Your home's ventilation system—including custom duct design, air handling units, and Energy Recovery Ventilators (ERVs) or Heat Recovery Ventilators (HRVs)—requires careful electrical coordination to operate efficiently.
To maintain excellent indoor air quality and prevent drafts, modern homes rely on dedicated ventilation systems. These mechanical systems require their own dedicated electrical circuits and control wiring.
When building, we work closely with your framing and electrical teams to ensure that:
• Adequate space is left in the joist cavities for both custom ductwork and electrical runs without overcrowding.
• Dedicated circuits are run to the mechanical room to power air handlers and ERV/HRV units.
• Control wiring is pulled from the ventilation units to centrally located smart controllers or wall sensors.
Proper coordination prevents scheduling conflicts and ensures your mechanical systems operate at peak efficiency. To learn more about how we manage this process, see our guides on how to coordinate electrical and HVAC installation in a new build in nova scotia and how to decide between ducted and ductless when building a new home in nova scotia.
Modern homes must be built to handle future energy demands. This means planning your electrical system to accommodate high-draw devices like electric vehicle (EV) chargers and advanced ventilation equipment.
During the rough-in phase, it is highly recommended to run dedicated conduit and wiring for an EV charging station in your garage or driveway, even if you do not own an electric vehicle yet. Retrofitting these lines through finished drywall later is far more difficult. Installing a 200-amp main panel—or adding a sub-panel in a detached garage—ensures your home has the electrical capacity to power these systems safely.
No. Under Nova Scotia's Electrical Installation and Inspection Act, homeowners are not legally permitted to perform electrical wiring installations on new construction projects. Because of the high safety risks associated with improper wiring, all new construction electrical work must be performed by a certified construction electrician holding a valid provincial license.
All electrical equipment, devices, and materials installed in Nova Scotia must bear an approved certification mark from an accredited testing agency recognized by the Province of Nova Scotia and the Department of Labour. Common acceptable marks include CSA (Canadian Standards Association), cUL (Underwriters Laboratories of Canada), and QPS. Unapproved equipment will be rejected by the electrical inspector.
According to the Canadian Electrical Code, a standard 15-amp residential branch circuit can supply a maximum of 12 outlets. This includes any combination of general-purpose plug receptacles and permanent lighting fixtures. Dedicated circuits are required for major appliances such as refrigerators, microwaves, and laundry machines.
A successful new construction electrical installation requires planning, professional expertise, and strict adherence to provincial safety codes. From securing the initial wiring permits to the final inspection walk-through, every step must be handled with precision to ensure your new home is safe, efficient, and ready for the future.
At Presidential Ventilation Systems Ltd., we bring over 30 years of experience to residential and commercial projects across mainland Nova Scotia—including Halifax, Dartmouth, Bedford, Sackville, and Mount Uniacke. Our expert team is here to help you coordinate your electrical layout, ventilation systems, and custom duct designs seamlessly.
If you are planning a new build and want to ensure your systems are installed safely and professionally, contact us today. For residents in the Mount Uniacke area, you can connect directly with our local team through our Electrical Services in Mount Uniacke, NS page to discuss your upcoming project.

The damp, biting cold of a Nova Scotia winter is already settling in, making a reliable heating system an absolute necessity for your home's safety. If you are dealing with a sudden, complete system failure, understanding exactly how we execute same-day heat pump replacements during freezing Maritime temperatures is critical. When a heat pump dies in January or February, waiting days for a replacement is simply not an option. You are immediately faced with the concrete problem of rapid home heat loss and the very real threat of frozen pipes. The critical decision point becomes finding a contractor capable of the specific staging and multi-trade team coordination required to rip out a dead system and install a new one before your home drops below freezing. If you are facing a sudden breakdown, learn more about our heat pump systems and ductless heat pump replacement solutions.
When your primary heating system fails in the middle of a freezing Nova Scotia winter, the clock immediately starts ticking. Nova Scotia's unique climate features high humidity combined with rapid, aggressive temperature fluctuations. This damp cold penetrates building materials much faster than dry cold, accelerating indoor heat loss. Understanding the physical realities of this heat loss explains why a rapid, same-day response is not just a convenience, but a structural necessity for your property.
Once a heat pump stops producing warm air, a standard home's internal temperature can plummet below 10 degrees Celsius within a mere 24 hours. As the ambient temperature inside the house drops, the risk profile shifts from personal discomfort to severe property damage. The primary danger zone involves your indoor plumbing infrastructure. Water lines running through exterior walls, basements, and crawlspaces are the first to freeze. When water freezes, it expands, causing copper and PEX pipes to split. The ensuing water damage from a burst pipe often requires extensive renovations, making the initial heating failure seem minor in comparison. The 24-hour window following a breakdown is the critical timeframe for taking decisive action.
Many homeowners attempt to bridge the gap during a heating failure by purchasing multiple temporary space heaters. While this might keep a single bedroom tolerable, it is an inadequate and highly expensive stopgap for whole-home heating. Space heaters cannot circulate warm air into the hidden cavities of your home where plumbing resides. Furthermore, running multiple high-wattage space heaters simultaneously overloads residential electrical panels, creating significant fire hazards and frequent breaker trips. Restoring your central or primary ductless heat is the only safe, effective way to protect your entire property.
• Portable Space Heaters — Coverage Area: Single small room only — Safety Risks: High fire risk, overloaded circuits — Effectiveness in Freezing Weather: Inadequate for protecting home plumbing
• Wood/Pellet Stoves — Coverage Area: Localized main living area — Safety Risks: Requires constant monitoring and fuel — Effectiveness in Freezing Weather: Leaves distant rooms and basements vulnerable
• New Heat Pump System — Coverage Area: Whole-home or multi-zone coverage — Safety Risks: Safe, dedicated electrical circuits — Effectiveness in Freezing Weather: Maintains consistent, safe ambient temperatures
Executing a true same-day replacement requires far more than just rushing a unit to your driveway. Modern heat pump installations are complex projects that demand both mechanical (HVAC) and electrical expertise. In our 30+ years of experience serving Nova Scotia, we have seen that relying on third-party electrical subcontractors is the number one cause of installation delays across the industry. When a company has to wait for a separate electrical contractor to fit your emergency into their schedule, a one-day job easily stretches into a three-day freezing ordeal.
The traditional multi-day wait for an electrician is entirely bypassed by our operational model. With approximately 70 employees and multiple skilled trades operating under one roof, we eliminate the scheduling bottlenecks that paralyze other contractors. When you call our team, you are not waiting for two different companies to coordinate their calendars. A single call dispatches a complete, unified team ready to handle every aspect of the project from start to finish.
Speed must never come at the expense of safety, especially when dealing with high-voltage electricity and pressurized refrigerants. Having in-house Red Seal HVAC and electrical tradespeople ensures that every phase of your emergency replacement meets strict Nova Scotia building codes. Licensed professionals guarantee that the work is done safely, legally, and flawlessly, maintaining the highest quality standards even under intense emergency time constraints.
• Unified Dispatch: HVAC technicians and electricians arrive together, eliminating standby time.
• Code Compliance: All electrical tie-ins and mechanical mountings are performed by Red Seal certified experts.
• Seamless Communication: In-house teams communicate directly, preventing the missteps common with outsourced labor.
• Guaranteed Accountability: One company handles the entire warranty and installation process, leaving no room for finger-pointing.
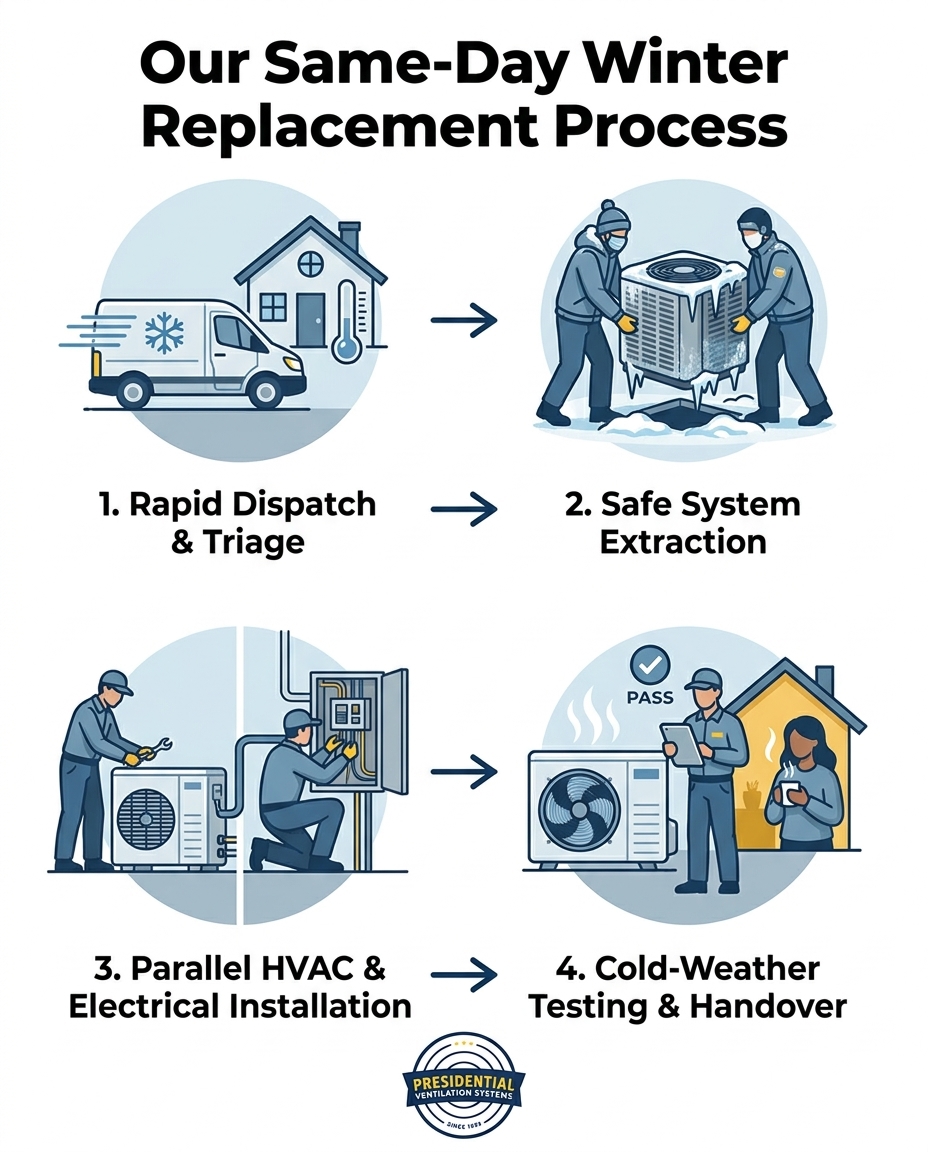
The moment an emergency call comes in, our methodology kicks into gear. True same-day replacement begins before the technicians even pull into your driveway. It requires precision staging, accurate diagnostics, and a warehouse infrastructure capable of supporting immediate deployment.
The first step is a rapid but thorough initial diagnostic phase. We must confirm that the system is truly dead and not simply in need of a 24/7 central heat pump repair. If a component like a compressor has catastrophically failed and replacement is the only safe, viable option, the technician immediately sizes the replacement unit accurately based on your home's specific heating load requirements.
While the technician is completing the assessment on-site, our warehouse logistics team is already in motion. Maintaining a robust local inventory is crucial. As a Daikin Comfort Pro, we have immediate access to premium Daikin and Lennox units. The warehouse team pulls the exact required unit, pre-stages the necessary materials—including insulated line sets, electrical whips, and mounting brackets—and loads the secondary dispatch vehicles.
1. Initial Diagnostic: Technician confirms catastrophic failure and rules out simple repairs.
2. System Sizing: Immediate calculation of the correct tonnage and BTUs for the replacement unit.
3. Inventory Pull: Warehouse team secures the specific heat pump model from local stock.
4. Material Staging: All required copper, wiring, and mounting hardware are loaded for immediate transport.
5. Simultaneous Dispatch: The installation crew, including both mechanical and electrical trades, is deployed to the home.
Removing the old unit safely is a critical phase of the operation. Working outdoors in ice, snow, and biting wind requires specific safety protocols. The extraction must be done swiftly to prepare the site for the new installation, but it must also adhere to strict environmental and safety regulations.
Environmental compliance is mandatory, regardless of the weather. Before any lines are cut, the old refrigerant must be safely recovered. Handling pressurized systems in the cold presents specific challenges, as refrigerant pressures drop significantly in freezing Maritime winter storms. Our technicians utilize specialized recovery machines designed to extract the chemical safely, ensuring nothing is vented into the atmosphere.
Once the system is depressurized, the physical removal begins. This involves removing outdated line sets, disconnecting old control wiring, and physically hauling away the dead compressor and indoor heads. The outdoor pad must be completely cleared of ice or snow buildup to ensure a level, stable foundation for the new equipment. The wall penetrations are also inspected and prepped, ensuring they are clear and ready to accept the new, properly insulated line sets without allowing winter drafts into the home.
The core of our same-day promise lies in the synchronized, parallel workflow of our multi-trade team. This is where the Presidential Advantage truly shines. While the HVAC technicians are managing the mechanical side of the installation, the electricians are simultaneously handling the electrical panel and high-voltage connections. One local homeowner reached out in the dead of winter when their primary heating system failed completely. Because we dispatched both mechanical and electrical teams simultaneously, we successfully completed the winter installation quickly and professionally within a single day, restoring heat before the home's plumbing was ever at risk.
The mechanical team begins by securing the new outdoor unit. In Nova Scotia, it is critical that the compressor is mounted on a stand above the anticipated snow line to prevent ice accumulation from blocking airflow during defrost cycles. Concurrently, the indoor heads are mounted, and the team begins flaring and connecting the new copper line sets. These lines must be heavily insulated to prevent heat loss as the refrigerant travels between the indoor and outdoor units.
While the mechanical connections are being made, our in-house Red Seal electricians are hard at work. They ensure the electrical panel can safely handle the load of the new system, wiring the dedicated circuits and installing the required outdoor disconnect switch. Nova Scotia building codes mandate strict electrical safety checks for heat pump installations. Because our electricians are on staff, this electrical tie-in happens exactly when the HVAC team needs it, cutting the standard installation time in half and preventing hours of idle waiting.
With the physical installation complete, the final phase is system commissioning. This is the rigorous testing process that ensures the new heat pump will perform flawlessly against the freezing Nova Scotia winter. We do not leave the property until we have verified that the home is actively warming up.
Before any refrigerant is released into the new lines, the system undergoes a high-pressure nitrogen test to check for microscopic leaks, followed by a deep vacuum process to remove all moisture from the copper piping. Once a perfect seal is confirmed, the system is charged. Cold-weather commissioning involves verifying the refrigerant charge in low ambient temperatures and manually triggering the defrost cycles to ensure the outdoor unit can effectively shed ice during winter storms.
The final step is handing the system over to you. The lead technician will walk you through the operation of your new heat pump, ensuring you are comfortable with the controls.
1. Thermostat Operation: Demonstrating how to set schedules, adjust temperatures, and use the remote controls effectively.
2. Airflow Direction: Explaining how to adjust the vanes for optimal winter heat distribution.
3. Winter Maintenance: Providing clear instructions on keeping the outdoor unit clear of snowdrifts and ice buildup.
4. Filter Cleaning: Showing you how to easily remove and wash the indoor filters to maintain efficiency.
5. Temperature Verification: Measuring the ambient air output to confirm the home is actively recovering its heat.
A sudden winter heat pump failure is an unexpected and stressful event. Beyond the physical cold, there is the immediate anxiety regarding the logistics of an unplanned replacement. While speed is the absolute priority to protect your home, we understand that navigating the administrative and financial aspects is just as important for your peace of mind.
Even in an emergency, homeowners should explore available provincial and federal rebate programs. High-efficiency systems often qualify for significant incentives. It is important to note that professional installation by a licensed contractor is strictly required for rebate eligibility. While programs and eligibility requirements can change frequently, our team will help you understand the current landscape and provide the necessary documentation to support your applications. Always confirm current programs with our office during your initial consultation.
To help manage the upfront investment of an unexpected winter breakdown, flexible payment options may be available. Utilizing emergency heat pump financing can ease the immediate financial burden, allowing you to install a reliable, high-efficiency system without draining your emergency savings all at once. Because financing terms and eligibility vary, we encourage you to speak directly with our team to confirm the options that best suit your situation.
Can a heat pump be replaced in the winter?
Yes, a heat pump can absolutely be replaced during the winter months. Professional HVAC teams utilize specialized equipment to safely recover refrigerant and perform installations even in sub-freezing temperatures. The key is working with a contractor who has the resources to execute the replacement quickly before the home loses too much heat.
How long does it take to replace a heat pump?
A standard heat pump replacement typically takes between 4 to 8 hours, depending on the complexity of the system and the weather conditions. When a contractor utilizes a parallel workflow with in-house mechanical and electrical teams, the process is highly streamlined. This coordination ensures the entire rip-and-replace process can be completed in a single day.
What happens if my heat pump dies in the winter?
If your heat pump dies in the winter, your home's internal temperature will begin dropping rapidly, putting your plumbing at severe risk of freezing and bursting. It is critical to contact an emergency HVAC provider immediately to assess the system. Relying on temporary space heaters is not a safe or effective long-term solution for protecting your property.
Can you install a mini split in the freezing cold?
Yes, ductless mini splits can be installed in freezing conditions by experienced technicians. The process requires careful handling of the copper line sets and specialized vacuum procedures to ensure no moisture is trapped in the system. Proper cold-weather commissioning is essential to verify that the unit is operating correctly before the technicians leave.
Do I need to hire a separate electrician for a heat pump replacement?
If you hire a multi-trade contractor with in-house Red Seal electricians, you do not need to hire a separate electrical company. This in-house capability is crucial during an emergency, as it eliminates the multi-day delays often caused by waiting for third-party subcontractors to arrive and wire the system.
A dead heating system doesn't have to mean days of freezing temperatures and the looming threat of burst pipes. When you have the right team on your side, restoring comfort and safety to your property is a streamlined, highly coordinated process. Our in-house roster of Red Seal HVAC and electrical experts ensures that how we execute same-day heat pump replacements during freezing Maritime temperatures remains the standard for reliability. We provide a clear, reassuring breakdown of the exact staging and team coordination process that proves a same-day replacement is safe, efficient, and handled entirely by a single multi-trade contractor. Contact Presidential Ventilation Systems today for an immediate assessment and a free estimate to secure your home's heat.

In our 30+ years serving Nova Scotia homeowners, we find that believing a modern electric system will deliver the exact same physical sensation as a combustion furnace is a common misconception. In fact, if you are transitioning from oil forced air to a central ducted heat pump: airflow considerations are just as important as the anticipated energy savings. Many homeowners expect the new system to blast intensely hot air just like their old furnace did. When they place a hand over the vent and feel a milder breeze, they immediately worry that the new equipment is failing to heat the house.
This dramatic sensory difference requires a slight adjustment in how you perceive indoor comfort. The reality is that your new system is working perfectly, but it uses an entirely different method of heat transfer. Understanding how airflow volume and supply register temperatures change before you commit to a conversion is the single most important step in setting the right expectations for your home.
Explore our heat pumps and discover how our experienced team guides you through every step of this mechanical and sensory transition.
To fully appreciate the upgrade, you have to look at the mechanics behind the air coming out of your vents. Traditional combustion systems rely on extreme heat and short bursts, whereas modern electric heat transfer relies on consistent, steady airflow. This fundamental shift explains why custom ductwork adaptation becomes such a critical part of the installation process. If you force a high-volume system to breathe through ductwork designed for low-volume combustion, you will never achieve the comfort you expect.
The primary reason heat pump air feels different than oil heat comes down to the fundamental difference between creating heat through combustion and moving heat through refrigeration. An oil furnace burns fossil fuels at extremely high temperatures. As a result, the air it forces through your ductwork typically reaches supply register temperatures between 120F and 140F. This is a high-heat, low-volume approach. The air is so hot that it quickly raises the room temperature, allowing the furnace to shut off after a relatively short cycle.
Modern ducted heat pump systems operate on a completely different principle. Instead of burning fuel, they extract ambient heat from the outside air and transfer it indoors. Because of this highly efficient process, the air delivered to your supply registers generally sits between 90F and 105F. This is a lower-heat, high-volume approach.
Here is where human biology plays tricks on you. Your normal body temperature is 98.6F. When 90F air blows directly onto your skin, it is literally cooler than your body temperature, so it feels "cool" to the touch. However, that 90F air is still significantly warmer than your 70F thermostat set point. It is actively and efficiently heating the room, even if it does not feel hot against your hand.
• Supply Air Temperature — Traditional Oil Furnace: 120F - 140F — Modern Ducted Heat Pump: 90F - 105F
• Airflow Volume (CFM) — Traditional Oil Furnace: Lower volume, higher static pressure — Modern Ducted Heat Pump: Higher volume, requires larger ducts
• Operational Cycle — Traditional Oil Furnace: Short, intense bursts of heat — Modern Ducted Heat Pump: Long, continuous, steady operation
• Sensory Experience — Traditional Oil Furnace: Hot to the touch, noticeable temperature swings — Modern Ducted Heat Pump: Mild breeze, highly consistent room temperature
BTU (British Thermal Unit) delivery methods dictate how your home stays warm. Because an oil furnace delivers fewer cubic feet per minute (CFM) of very hot air, it achieves the required BTUs quickly. Because a heat pump delivers lower register temperatures, it must move a higher volume of air continuously to deliver those same BTUs and achieve the same ambient room temperature. This higher CFM requirement fundamentally changes the physical sensation of air moving through your vents, replacing the harsh blast of a furnace with a gentle, continuous circulation.

The problem: If you have lived with an oil furnace for years, you are intimately familiar with the "blast and chill" cycle. The thermostat calls for heat, the furnace ignites, and a rapid blast of intense heat floods the room. Within fifteen minutes, the house reaches the target temperature and the system shuts down abruptly. Over the next hour, the house slowly cools down. During the Nova Scotia winter heating season, this on/off cycling allows cold drafts and the damp, coastal chill to settle deep into the home's envelope before the next heating cycle kicks in.
The cause: Combustion systems are essentially oversized by design. They are built to overwhelm the cold quickly, rather than manage it steadily. This creates a rollercoaster effect in your indoor climate. You are often slightly too hot while the furnace is running, and slightly too cold right before it turns back on.
The solution: Our team at Presidential Ventilation Systems frequently hears from homeowners who are tired of this rollercoaster effect. Continuous, steady-state heat pump operation actively prevents this damp chill from settling into the home. Modern inverter-driven compressors do not just turn on and off; they ramp up and down like the accelerator pedal in a car. They supply a constant, gentle flow of warm air that matches the exact heat loss of your home in real-time. This maintains a perfectly even ambient temperature from floor to ceiling. The psychological adjustment for homeowners is realizing that a system running constantly is actually operating at peak efficiency, not struggling to keep up. It is working smarter, not harder, to keep the dampness at bay.
One of the most frequent questions we encounter involves ductwork compatibility. Many older homes were built with ductwork sized specifically for the low-volume, high-heat characteristics of an oil furnace. If you simply attach a high-efficiency heat pump to a restrictive, undersized duct system, you are going to encounter immediate problems.
Forcing high-volume heat pump air through undersized ducts is like trying to breathe through a drinking straw while running a marathon. It causes excessive static pressure, which leads to loud rushing noises at the vents, significantly reduced energy efficiency, and premature wear on the new blower motor. The equipment will struggle to deliver the correct volume of air, meaning some rooms will remain cold while the central unit works itself to death.
This is why custom duct transitions and modifications are almost always required to ensure proper static pressure and airflow. Never assume your existing ducts are instantly compatible. A professional assessment is strictly required to measure the existing ductwork's capacity against the new system's CFM requirements.
Our skilled Red Seal tradespeople see this exact scenario frequently across Mount Uniacke and the surrounding areas. During a major house renovation that was gutted to the studs, one local homeowner needed their old heat pump and oil furnace ducting completely replaced. Because our team handles sheet metal fabrication in-house, we designed and replaced all the ductwork to perfectly match the airflow requirements of their new top-of-the-line system. The new unit has been working flawlessly since the installation, proving the value of proper airflow design.
Off-the-shelf duct fittings often fail in retrofit scenarios because every older home has unique structural constraints. Relying on generic parts usually creates sharp angles and airflow bottlenecks. With over 30+ years of local HVAC and custom sheet-metal experience, our in-house fabrication ensures that old oil ducts are seamlessly and precisely adapted. We build the exact transition pieces required to smooth out the airflow, reducing static pressure and ensuring the system operates quietly and efficiently without relying on third-party subcontractors.
Moving from a fossil-fuel combustion appliance to a fully electric heating system fundamentally changes your home's electrical load. While you are focused on ductwork and airflow, it is crucial not to overlook the electrical panel upgrades that are often required during an oil-to-heat-pump conversion.
Older homes built during the peak of oil heating often have 100-amp electrical services. While 100 amps was plenty for running lights, appliances, and a small furnace fan, it is rarely enough to safely support a central heat pump system alongside backup electric heating elements.
Key electrical considerations during a conversion:
• Total load calculations: A fully electric home requires a comprehensive load calculation to ensure the main breaker will not trip during peak winter usage.
• Backup heating elements: Central ducted systems often include auxiliary electric heat strips for extreme cold snaps, which draw significant amperage and require dedicated high-capacity circuits.
• Panel capacity upgrades: Upgrading to a 200-amp service is frequently necessary to provide the safe, reliable power required for modern electric heating.
• Code compliance: All new electrical connections must meet current provincial safety codes, requiring licensed professionals to pull permits and complete the wiring.
With approximately 70 employees spanning multiple skilled trades, our team knows firsthand that upgrading from a forced air oil burner system often brings these unexpected electrical challenges to light. One recent customer experienced concerns regarding their electrical panel capacity during their central heat pump transition. Because we maintain multi-trade capabilities, our electrical staff stepped in immediately to resolve the panel concerns without delaying the project. The system works great, and the seamless coordination meant the homeowner did not have to juggle multiple contractors.
Proper equipment sizing is the linchpin of a successful conversion. You should never size a new electric system based solely on the square footage of your home, nor should you simply match the BTU output of your old oil furnace. Oil furnaces were historically oversized by default. If you install an oversized heat pump, it will short-cycle—turning on and off rapidly—which destroys its ability to dehumidify the air and ruins the continuous airflow comfort it was designed to provide.
A proper Manual J load calculation ensures the new system can deliver the correct volume of air without short-cycling. This calculation takes into account your home's insulation levels, window quality, layout, and regional climate data. Only a rigorous assessment guarantees that the equipment matches your actual heat loss.
High-quality equipment, such as Lennox ducted heat pumps, manages variable speeds to optimize continuous airflow. As a Daikin Comfort Pro and trusted Lennox installer, we know these advanced systems precisely modulate their output, delivering exactly the right amount of warm air to maintain your thermostat setting without wasting power.
It is also worth noting that various provincial and federal rebate programs may be available to help offset the costs of upgrading to high-efficiency equipment. However, program requirements and eligibility criteria change frequently. You should always confirm current rebate programs and your specific eligibility with Presidential Ventilation Systems during the assessment phase.
Your first winter without an oil furnace will be a distinctly different experience, but one that ultimately provides superior comfort. The most important thing to remember is that your home will feel different. You will notice fewer dramatic temperature swings and a much steadier, even warmth throughout the house.
During the peak of the Nova Scotia winter heating season, do not panic if the system runs for long periods—or even continuously. This is by design. Constant operation is how the system achieves its incredible energy efficiency, gently replacing the heat your home loses to the cold outside air. The air coming from the vents will feel milder, but the room itself will remain perfectly comfortable.
To keep this airflow optimal, regular maintenance is essential. Because the system moves a higher volume of air continuously, your air filters will capture more dust and debris than they did with your old furnace. Checking and replacing your filters regularly will protect the blower motor and ensure the static pressure remains balanced.
The initial sensory adjustment is entirely worth the long-term efficiency and comfort gains. If you are still exploring your options, reading up on the best ducted heat pumps for Halifax homes can provide additional insights into which systems perform best in our unique coastal climate.
A heat pump provides a milder, more consistent warmth compared to the intense, hot blast of an oil furnace. While an oil furnace delivers air at 120F to 140F, a heat pump delivers air between 90F and 105F. Because this supply temperature is slightly lower than your normal body temperature, the air may feel cool if it blows directly on your skin. However, this steady stream of milder air is highly efficient and perfectly capable of keeping your entire home at a comfortable 70F ambient temperature.
As our in-house sheet-metal fabricators will tell you, in most cases, existing oil ductwork must be modified or partially replaced to accommodate a heat pump. Oil furnaces operate with low-volume, high-heat airflow, meaning their ducts are often too small for modern electric systems. Heat pumps require a higher volume of continuous airflow (higher CFM) to heat the home effectively. Forcing this higher volume through undersized ducts causes loud rushing noises, poor efficiency, and excess static pressure, which is why custom sheet-metal transitions are usually required.
Your heat pump is designed to run continuously to maintain a steady, efficient temperature in your home. Unlike older combustion furnaces that blast heat and then shut off, modern variable-speed compressors ramp up and down to match your home's exact heat loss in real-time. Running constantly at a low speed uses significantly less electricity than constantly turning on and off, and it prevents cold drafts from settling into the house between cycles.
If your system is in heating mode, it may feel like it is blowing cool air because the 90F supply air is cooler than your 98.6F body temperature. This is a normal sensory difference when switching from oil heat. However, if the air is genuinely cold and the room temperature is dropping below your thermostat setting, the system may be in a temporary defrost cycle to remove ice from the outdoor unit, or it may require professional maintenance to check the refrigerant charge.
Many older homes require an electrical panel upgrade when transitioning from an oil furnace to a fully electric heating system. Oil furnaces use very little electricity, so a 100-amp service was historically sufficient. Central heat pumps, especially those equipped with auxiliary electric backup heating elements for extreme cold, draw significant amperage. Upgrading to a 200-amp service ensures your home can safely handle the increased electrical load without tripping the main breaker.
Understanding the sensory shift and the necessary mechanical requirements is the very first step toward a successful heating upgrade. Transitioning away from oil requires careful planning, from load calculations to ductwork adaptation and electrical panel upgrades. With 30+ years of local Nova Scotia HVAC, electrical, and custom sheet-metal experience, our multi-trade team of approximately 70 employees handles every aspect of the conversion seamlessly in-house.
You do not have to manage multiple contractors to achieve perfect indoor comfort. Contact Presidential Ventilation Systems today to request a free professional assessment and estimate, and let us design a customized heating solution that perfectly fits your home.