



Knowing the signs your commercial HVAC system needs professional service early can be the difference between a quick fix and a full system failure that shuts down your building's heating and cooling for days.
Commercial HVAC systems work hard. They run year-round, handle large spaces, and are under constant demand from employees, customers, and tenants. When something starts going wrong, the warning signs are often subtle at first — a strange noise here, a slightly higher energy use there. By the time the problem becomes obvious, it has usually been affecting your system's efficiency for a while.
According to industry data, regular HVAC maintenance can reduce energy use by 5 to 20% annually, and commercial systems that receive preventive care experience up to 95% fewer breakdowns than those that don't. That's a significant gap — and it starts with knowing what to look for.
Here's a quick overview of the most common warning signs:
• Inconsistent temperatures — hot and cold spots across different areas of your building
• Unusual noises or odors — grinding, banging, musty smells, or burning electrical odors
• Unexplained spikes in energy consumption — higher energy use without any change in usage
• Short cycling — the system turns on and off too frequently without completing a full cycle
• Poor airflow or weak performance from vents — reduced circulation or rooms that won't reach the set temperature
If you're noticing any of these in your facility, it's time to take action before a small issue becomes a major one.
Identifying issues with your commercial heating and cooling setup requires a mix of observation and proactive management. Because these systems are highly complex, a single failing part can trigger a chain reaction that compromises the entire unit.
When you notice changes in how your system sounds, smells, or performs, it is a clear message from your equipment that something is wrong. Let's break down the five most critical indicators that your commercial HVAC system requires professional diagnostic attention.
A primary job of any commercial climate control system is to maintain a uniform, comfortable environment throughout your facility. When you start noticing that the boardroom feels like a freezer while the corner offices are uncomfortably warm, your system is struggling.
Temperature fluctuations are rarely a simple thermostat issue. In commercial properties, these hot and cold spots often point to deeper system imbalances, such as:
• Zoning Malfunctions: Commercial systems often use dampers to direct air to specific zones. If a damper is stuck or a zone sensor is miscalibrated, some areas will receive too much conditioned air while others receive none.
• Thermostat Calibration Issues: Thermostats that read temperatures inaccurately can cause the HVAC system to shut off before all spaces reach the desired comfort level.
• System Calibration Issues: A failing control valve or damper can prevent the system from switching cleanly between heating and cooling modes, leading to lukewarm air delivery.
If your building layout has changed or if you are dealing with Commercial HVAC Systems Not Working in Halifax NS, professional diagnostic tools are required to re-balance the airflow and ensure even comfort across all zones.
While commercial HVAC systems are powerful, they are designed to operate with a consistent, low-level hum. Sudden, loud, or unusual sounds are immediate red flags that mechanical components are wearing out or failing.
• Grinding or Screeching: This typically points to a failing blower motor or worn-out bearings. If left unaddressed, the motor can seize entirely, leading to a complete system shutdown.
• Rattling or Banging: These sounds often indicate loose components, such as fan blades, brackets, or internal panels that have vibrated free over time.
• Musty Odors: A persistent musty smell suggests standing water in the condensate drain pan or mold growth on the evaporator coils. This not only affects performance but also degrades indoor air quality.
• Electrical Burning Smells: If you smell burning plastic or metal, shut down the system immediately. This indicates overheating wires, a failing capacitor, or a burnt-out motor winding that poses a serious fire hazard.
Ignoring these sensory warning signs can turn a minor belt replacement into a catastrophic motor failure. For a deeper look at identifying these sound and smell cues, check out our Commercial HVAC Repair Guide Stewiacke.
As a facility manager or business owner, you keep a close eye on operational efficiency. If your energy usage records show a sudden, unexplained increase — especially when compared to the same period in previous years — your HVAC system is likely losing its efficiency.
As of June 2026, energy efficiency benchmarks are tighter than ever, and an inefficient HVAC system is one of the fastest ways to reduce your operational efficiency. When internal components like the compressor, fan motors, or coils are dirty or failing, the system must work twice as hard and run much longer to achieve the same indoor temperatures.
• Dirty Heat Exchanger Coils: When outdoor or indoor coils are coated in dirt, dust, or pollen, they cannot transfer heat effectively. This forces the compressor to run constantly, spiking your electricity usage.
• Refrigerant Leaks: Low refrigerant levels force the system to cycle endlessly without ever fully cooling or heating the space, leading to massive energy waste.
Regular maintenance and timely interventions can prevent these energy spikes. Scheduling a professional Commercial HVAC Tune Up is the most effective way to restore your system's efficiency and optimize your system's performance.
Short cycling occurs when your commercial HVAC system turns on, runs for a brief period, and then abruptly shuts off before completing a standard heating or cooling cycle. This process repeats rapidly throughout the day.
This frequent on/off operation is incredibly damaging to your equipment. The startup phase of a compressor draws the most electrical current and subjects mechanical parts to the highest amount of physical stress. Constant starting and stopping accelerates component wear, shortens the overall system lifespan, and causes massive energy spikes.
Common causes of short cycling include:
1. Overheated Compressors: If the system is running too hot due to restricted airflow or low refrigerant, safety switches will trip to shut the system down before permanent damage occurs.
2. Thermostat and Sensor Errors: Faulty temperature sensors or poorly placed thermostats can trick the system into thinking it has reached its target temperature prematurely.
3. Oversized Equipment: A system that is too large for the building will quickly blast the space with conditioned air and shut off, leading to poor humidity control and uneven temperatures.
If your system is short cycling, consulting a professional is urgent. For businesses in the corridor region, our Mount Uniacke Commercial HVAC Repair Guide offers excellent insights into how local climate factors can trigger these cycling issues.
Have you noticed that the air coming from your supply vents feels weak, or that it takes hours for your building to cool down on a warm afternoon? Weak airflow is a clear sign of system restriction.
When airflow is restricted, your HVAC system cannot distribute conditioned air effectively, causing some zones to remain uncomfortable while the system runs continuously. This lack of circulation also allows stale air and humidity to build up indoors, lowering employee productivity and tenant satisfaction.
Airflow blockages are typically caused by:
• Severely Clogged Air Filters: Dust, pollen, and airborne debris quickly build up on commercial filters, choking off the system's air supply.
• Blocked or Leaky Ductwork: Damaged ducts, loose connections, or closed fire dampers can prevent air from reaching its destination.
• Dirty Evaporator Coils: Dirt buildup on the coils acts as an insulating blanket, physically blocking airflow and preventing heat transfer.
Keeping up with your Commercial Ventilation Maintenance Halifax NS ensures your ductwork, filters, and ventilation components remain clean, clear, and capable of delivering strong, healthy airflow to every corner of your property.
Deciding whether to continue repairing an aging commercial HVAC system or invest in a full system replacement is a major operational decision. Below is a quick comparison table to help guide your facilities team:
• Equipment Age — Choose Repair: Under 10 years old — Choose Replacement: 10 to 15+ years old
• Repair Frequency — Choose Repair: Infrequent, minor component wear — Choose Replacement: Constant breakdowns, major part failures
• Repair Scope — Choose Repair: Minor component replacement — Choose Replacement: Major system overhaul required
• Energy Efficiency — Choose Repair: Stable energy usage close to baseline — Choose Replacement: Consistently climbing energy usage, outdated technology
• Major Components — Choose Repair: Failed capacitor, contactor, or fan belt — Choose Replacement: Failed compressor, cracked coils, or rusted chassis
The most effective way to catch these warning signs before they escalate into a major business disruption is through structured, proactive care. Waiting for the system to break down before calling a technician — known as reactive or "run-to-fail" maintenance — is always the most disruptive path.
Implementing a preventive maintenance agreement delivers exceptional long-term reliability by catching minor issues, such as a worn belt or a small refrigerant leak, before they cause a complete system breakdown. To learn more about how structured care protects your facility's operations, read about How a Maintenance Agreement Extends Commercial HVAC Equipment Lifespan.
In Nova Scotia, our coastal climate brings unique environmental challenges that accelerate wear on outdoor HVAC equipment. High humidity, heavy seasonal storms, and salt-laden air can quickly corrode aluminum fins, rust structural brackets, and degrade electrical connections.
When minor warning signs are ignored in coastal environments, salt air corrosion accelerates the damage, leading to rapid refrigerant leaks, electrical shorts, and eventual complete system failure. Understanding How Salt Air and Coastal Conditions in Nova Scotia Affect Commercial HVAC Equipment highlights why prompt, professional service is so critical for businesses in our region.
Water leaks and high indoor humidity are usually caused by a clogged condensate drain line or frozen evaporator coils. Because cooling systems naturally dehumidify the air as they operate, they produce a significant amount of water. If the drain pan or drain lines are blocked by algae, dirt, or debris, this water will overflow, leading to stained ceiling tiles, mold growth, and potential water damage to your building's structure.
Regularly clearing these drains is a key part of our Commercial Central HVAC Maintenance Guide Dartmouth NS.
As a general rule, commercial air filters should be checked monthly and replaced at least every three months. However, in high-occupancy buildings or facilities prone to dust, more frequent changes may be required. Outdoor and indoor heat exchanger coils should be professionally inspected and cleaned at least once a year — typically in the spring before the heavy cooling season begins.
For reliable, scheduled upkeep, consider booking a Reliable Commercial HVAC Service in Cole Harbour NS.
When a commercial HVAC system is neglected, dirt and dust accumulate on the air filters and heat exchanger coils. This buildup restricts airflow and acts as an insulating barrier, making it much harder for the system to transfer heat. As a result, the compressor and fan motors must run longer and draw more electrical current to maintain the set temperature. This added strain can increase your annual energy consumption by 5% to 20%, leading to higher energy consumption and shortening the lifespan of your valuable equipment.
Your commercial HVAC system is a major investment that keeps your business running smoothly, comfortably, and productively. Paying close attention to the early warning signs of system failure — from minor temperature swings to unusual noises — is the key to avoiding unplanned downtime and premature equipment replacement.
At Presidential Ventilation Systems Ltd., we bring over 30 years of experience to commercial properties across Nova Scotia, including Halifax, Dartmouth, Bedford, Burnside, and surrounding areas. As a trusted Daikin Comfort Pro Dealer, our team is fully equipped to handle complex commercial diagnostics, routine maintenance, and system optimizations.
Don't wait for a complete system breakdown to address your heating and cooling needs. Contact us today to schedule a professional inspection and learn more about our high-efficiency Commercial HVAC services.
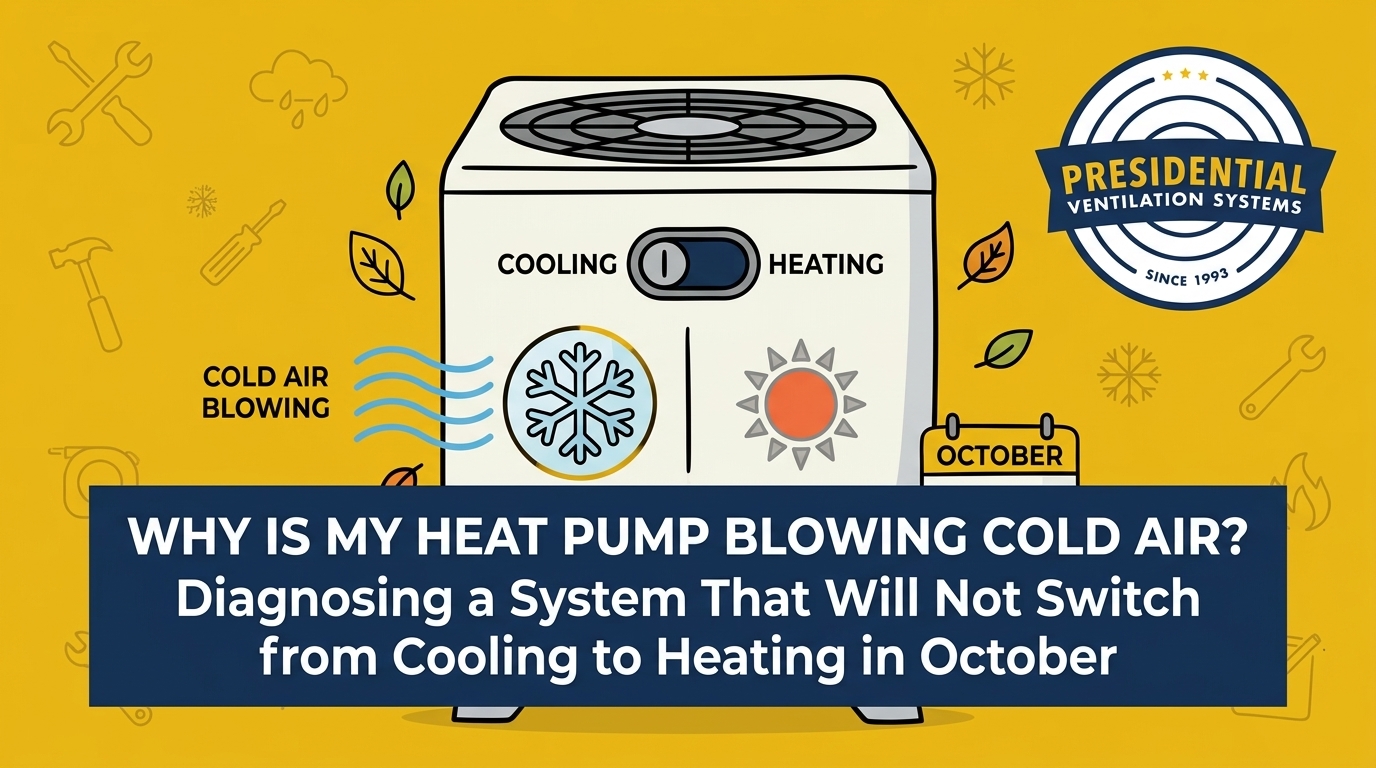
Why is your system actively chilling your house when you just turned the thermostat up? Diagnosing a heat pump that will not switch from cooling to heating in October usually comes down to one critical, stubborn component. It is incredibly frustrating to experience the first true cold snap of the October fall switchover, adjust your settings for warmth, and feel nothing but an icy breeze coming from your vents.
When this happens, you are immediately faced with a decision: is this a simple thermostat configuration error you can fix yourself, or a mechanical failure buried deep inside the outdoor unit? In most cases, a heat pump stuck in the wrong mode points directly to a malfunctioning reversing valve. This is the exact mechanism responsible for shifting your equipment between its summer and winter duties. If you are relying on heat pump systems to keep your home comfortable, understanding how this valve operates is the first step toward getting your heat back online.
Before you panic about a total system breakdown, it helps to know what you are looking for. Sometimes, the fix is as easy as adjusting a setting or waiting out a normal operational cycle. Other times, the sudden drop in temperature has exposed a hidden mechanical flaw that requires professional attention.
To understand why your system is blowing cold air, you have to look at how a heat pump actually works. Unlike a traditional furnace, a heat pump does not burn fuel or use electrical resistance coils to generate heat out of thin air. Instead, it moves existing heat from one place to another using refrigerant. During the summer, it absorbs heat from inside your house and dumps it outside. During the winter, it absorbs ambient heat from the outdoor air and pumps it inside.
The component that makes this two-way street possible is the reversing valve. It acts as a heavy-duty traffic cop for your refrigerant lines. If this valve fails or gets stuck, the system is physically trapped in one mode, regardless of what the thermostat on your wall says.
The reversing valve is not just a simple switch; it is a complex piece of engineering made up of two primary parts that must work in perfect harmony:
• The 24-volt electrical solenoid coil: This is the electronic brain of the valve. When you adjust your thermostat, it sends a low-voltage electrical signal to this coil.
• The pilot valve and magnetic field: Once energized, the solenoid creates a magnetic field that moves a tiny internal pilot valve.
• The main mechanical slider: The movement of the pilot valve changes the refrigerant pressure inside the main valve body. This pressure differential forces a heavy brass slider to shift from one side to the other, completely reversing the flow of refrigerant.
Interestingly, different manufacturers design their systems with different fail-safes. For example, brands like Daikin or Lennox engineer their reversing valves to default to a specific mode if the solenoid loses electrical power. Some systems are designed to default to heating, meaning a failed electrical coil will leave you warm but unable to cool your home in the summer. Other brands default to cooling, which means an electrical failure in the fall will leave you shivering. If the valve is trapped in the wrong position, your heat pump will continue to run its cooling cycle, blissfully unaware that you are freezing inside.
It might seem like your heat pump broke the very first time you tried to use the heat, but the damage was likely done months ago. In our 30+ years serving Nova Scotia, we see a distinct pattern every single autumn. The humid coastal summers require homeowners to run their air conditioning almost constantly for months on end. During this entire period, the reversing valve is locked tightly into the cooling position.
When October arrives, the weather in Nova Scotia can be notoriously unpredictable. You might have a warm, humid afternoon followed by a sharp drop to near-freezing temperatures overnight. When you switch your thermostat to heat for the first time in six months, you are asking a mechanical slider that has been sitting in one spot all summer to suddenly slide across the valve body.
Several factors contribute to the valve getting stuck during this critical transition:
• Sustained mechanical pressure: Sitting in one position under high refrigerant pressure for months can cause the internal brass slider to become physically jammed or sticky.
• Electrical degradation: The 24-volt solenoid coil sits outside in the harsh elements. Summer humidity, heavy rain, and constant operation can cause the electrical windings inside the coil to short out or degrade.
• Refrigerant charge issues: Because the slider relies on internal refrigerant pressure to move, a slow leak that developed over the summer might leave the system with too little pressure to physically force the valve over.
This is precisely why keeping up with a preventative maintenance plan is so valuable. A thorough inspection at the end of the cooling season can catch a degrading solenoid or a low refrigerant charge before you are left without heat on a cold night.
Before you assume the reversing valve is broken, it is important to rule out simple user errors or normal system behaviors. Heat pumps operate differently than traditional heating systems, and what seems like a breakdown might just be the system doing exactly what it was programmed to do.
Take a few minutes to walk through this basic diagnostic checklist:
• Verify the mode setting: Check your thermostat screen carefully. Is it explicitly set to "Heat"? Sometimes, programmable thermostats are accidentally left in "Auto" mode, or the schedule is still trying to run a summer cooling program.
• Check the fan setting: Ensure the fan is set to "Auto" rather than "On." If the fan is set to "On," it will blow air continuously, even when the heat pump is not actively running a heating cycle. This unheated air will feel cold coming out of the vents.
• Inspect the indoor air filter: A severely clogged air filter restricts airflow across the indoor coil. This can mess with the system's temperature sensors, causing it to behave erratically or shut down its heating cycle prematurely to prevent overheating.
• Wait for the defrost cycle to finish: This is the most common false alarm in the fall and winter. If frost builds up on the outdoor unit, the heat pump will temporarily switch itself back into cooling mode to melt the ice. During this 5-to-15-minute window, it is normal to feel cool air from the vents. Wait 20 minutes; if the hot air returns, the system is perfectly fine.
If you have run through these basic checks, confirmed the thermostat is set correctly, and the system is still blowing cold air after an hour, you have ruled out user error. At this point, the problem is internal, and it is time to call a professional.

Once a professional arrives, their primary job is to determine whether the reversing valve is suffering from a mechanical jam or an electrical failure. Guessing at the symptoms often leads to expensive, unnecessary part replacements.
For example, if you stand near the outdoor unit while someone switches the thermostat from cooling to heating, you might hear a distinct "click." That clicking sound usually means the electrical solenoid is receiving power and trying to do its job. If the system still doesn't switch, the issue is likely a mechanical slider jam or a lack of refrigerant pressure. Conversely, complete silence when switching modes often points to a dead 24-volt solenoid coil or a broken wire between the thermostat and the outdoor unit.
Misdiagnosing these symptoms is a common pitfall for inexperienced technicians. Replacing an entire reversing valve is a massive, labor-intensive job. If a technician replaces the whole valve when only the electrical coil was faulty, you end up paying for a major repair you didn't need.
This is why Presidential Ventilation Systems employs Red Seal tradespeople with dual HVAC and electrical expertise. Having technicians who deeply understand both the refrigeration cycle and complex electrical systems ensures the root cause is accurately identified. Last fall, a local homeowner reached out because their ductless heat pumps were stuck blowing cold air, and a previous technician from another company had failed to resolve it. Our technician arrived promptly, used their dual expertise to quickly diagnose the actual point of failure, verified the warranty coverage for the necessary parts, and fully restored proper operation to the system without unnecessary guesswork.
When your heating system acts up, you likely have immediate questions about what is happening and what you should do next. While you might need to read up on an air conditioner not working if you have issues in the summer, an October heating failure requires specific answers. Here is what our Red Seal technicians typically find when addressing stuck reversing valves.
It could be in a temporary defrost cycle, the thermostat may be misconfigured, or the reversing valve may be stuck in cooling mode. If the cold air only lasts for 10 to 15 minutes, the system is likely just melting frost off the outdoor unit. If it blows cold continuously for hours, the reversing valve has likely failed to shift.
Homeowners should never attempt to unstick a reversing valve themselves. It requires specialized tools to test electrical voltage and refrigerant pressures safely. Hitting the valve or tampering with the electrical connections can cause permanent damage to the compressor or result in severe electrical shock.
Symptoms include the system blowing cold air when set to heat, a clicking noise at the outdoor unit without a mode change, or the system being completely unresponsive to mode switches from the thermostat. You might also notice the outdoor unit icing up excessively if the valve is stuck halfway between modes.
It can be either. The electrical solenoid coil can fail, preventing the signal from reaching the valve, or the internal mechanical slider can become jammed due to wear, internal friction, or a lack of refrigerant pressure to push it over.
This depends entirely on the brand and model of your equipment. Some manufacturers design their reversing valves to default to heating if the solenoid loses power, ensuring you don't freeze in the winter. Others default to cooling when the solenoid is de-energized. A professional can check your specific model's technical data to confirm.
When faced with a cold house, it can be tempting to grab a multimeter or a wrench and try to fix the outdoor unit yourself. However, diagnosing and repairing a reversing valve is not a DIY project. The outdoor unit contains a mix of low-voltage controls (like the 24-volt solenoid) and high-voltage components (like the 240-volt compressor). Probing the wrong wire without proper training and safety equipment poses a severe risk of electrocution.
Furthermore, if the valve itself is mechanically jammed and needs to be replaced, the process is highly technical. A licensed professional must safely recover the existing refrigerant to prevent environmental contamination. Then, they must unbraze the old valve with a torch, carefully braze in a new one while wrapping it in wet rags to prevent heat damage to the new internal slider, pull a deep vacuum on the system, and precisely recharge the refrigerant.
Attempting any of this without the proper Red Seal credentials not only poses severe safety and frostbite risks, but it will also immediately void your manufacturer warranty. If you suspect an internal failure, rely on comprehensive heating services to handle the complex electrical and refrigerant work safely.
A clear understanding of how the reversing valve operates helps you recognize when it is time to stop adjusting the thermostat and call in a professional. Accurate, expert diagnosis prevents unnecessary expenses and ensures your system is truly ready for the long Nova Scotia winter ahead. If your system is struggling to make the switch this fall, contact Presidential Ventilation Systems to schedule a professional inspection and get your home's comfort back on track.

You finally finish draft-proofing your historic property, upgrading the insulation and sealing the windows to keep the winter chill out, only to wake up to a new, frustrating reality: water pooling heavily on the windowsills every morning. At Presidential Ventilation Systems, our team frequently encounters this scenario in Mount Uniacke and Halifax homes built between 1880 and 1940. The process of retrofitting air exchangers into Halifax homes without existing ductwork is rapidly becoming a structural necessity rather than a luxury. Older properties upgraded for energy efficiency suddenly trap everyday moisture inside, leading to severe winter window condensation, peeling paint, and poor indoor air quality.
Properties heated by traditional hot water boilers or electric baseboards lack the forced-air infrastructure to naturally circulate and exhaust this trapped, damp air. This leaves homeowners facing a difficult decision point: do you tear down historic plaster walls to install highly disruptive traditional ductwork, or do you utilize localized, decentralized heat recovery ventilation (HRV) systems? By choosing a decentralized approach, you preserve the home's architectural integrity while effectively managing moisture.
If you are tired of wiping down wet windows but refuse to destroy your home's character, integrating localized ventilation through professional HVAC services offers a clean, non-destructive path forward for older Halifax neighborhoods.
The problem: Modern draft-proofing and insulation are fantastic for lowering heating bills, but they trap indoor humidity that previously escaped through natural leaks in the building envelope. The cause: Homes relying solely on radiant or baseboard heat have zero mechanical air circulation to mix the air, allowing moisture to accumulate. The solution: Implementing mechanical ventilation to actively exhaust damp air and introduce fresh, dry air without relying on a central furnace fan.
Halifax's coastal maritime climate presents a unique challenge for historic building envelopes, particularly during the damp November-to-March heating season. High year-round humidity and damp winters exacerbate indoor moisture issues. When you combine the natural coastal dampness with everyday moisture generation—like cooking, showering, and even breathing—the humidity levels in a newly sealed home quickly skyrocket. In older Halifax neighborhoods, our ventilation experts frequently see winter indoor humidity pushed well above the recommended 30% to 50% range—sometimes spiking to 70%—resulting in frost buildup on the glass and eventual rot in the wooden window frames.
Without forced-air circulation, stagnant air pockets form in corners, behind furniture, and inside closets. This lack of movement allows moisture to settle and condense on the coldest surfaces in the room.
• Original (Drafty) Historic Home — Air Circulation: High (driven by wind and heat loss) — Moisture Management: Natural exhaust through leaks, but high energy waste
• Air-Sealed Ductless Home — Air Circulation: Zero (stagnant air pockets) — Moisture Management: Trapped moisture, severe window condensation
• Air-Sealed with Localized HRV — Air Circulation: Controlled mechanical exchange — Moisture Management: Balanced humidity, recovered heat, fresh air
Opening windows in the dead of winter is an inefficient and uncomfortable workaround that dumps your expensive heating energy right out into the cold. Mechanical ventilation steps in to solve this physics problem permanently, ensuring the home can breathe without sacrificing the comfort you just insulated it to achieve.
Trying to force modern, centralized HVAC infrastructure into a house built a century ago is a recipe for aesthetic disaster. It is physically impossible to run large 6-inch or 8-inch rigid sheet-metal trunk lines through 100-year-old plaster walls and solid timber framing without causing catastrophic damage to the home's interior.
Traditional HRV system installation requires a network of supply and return ducts connected to a large central unit. In a home with no existing ductwork, accommodating these bulky steel pipes means dropping ceilings, building intrusive drywall bulkheads, and sacrificing valuable square footage in closets and living spaces. Decentralized air exchangers act as the elegant, non-destructive alternative, providing the exact same fresh air benefits without the demolition.
In our 30+ years of working in Nova Scotia, the methodology at Presidential Ventilation Systems has shifted heavily toward protecting historic drywall and plaster rather than forcing standardized ductwork where it does not belong. The hidden costs of repairing historic wall materials after invasive retrofits are astronomical. Plaster is notoriously brittle; cutting into it for a 6-inch duct often causes massive spiderweb cracking that requires a specialized plasterer to fix.
• Zero bulkheads required: You maintain your original ceiling heights and crown moldings.
• No lost closet space: You do not have to surrender storage to house vertical duct runs.
• Targeted installation: The units are placed specifically where they are needed, leaving the rest of the wall completely untouched.
• Preserved structural integrity: No cutting through antique floor joists or load-bearing timber.
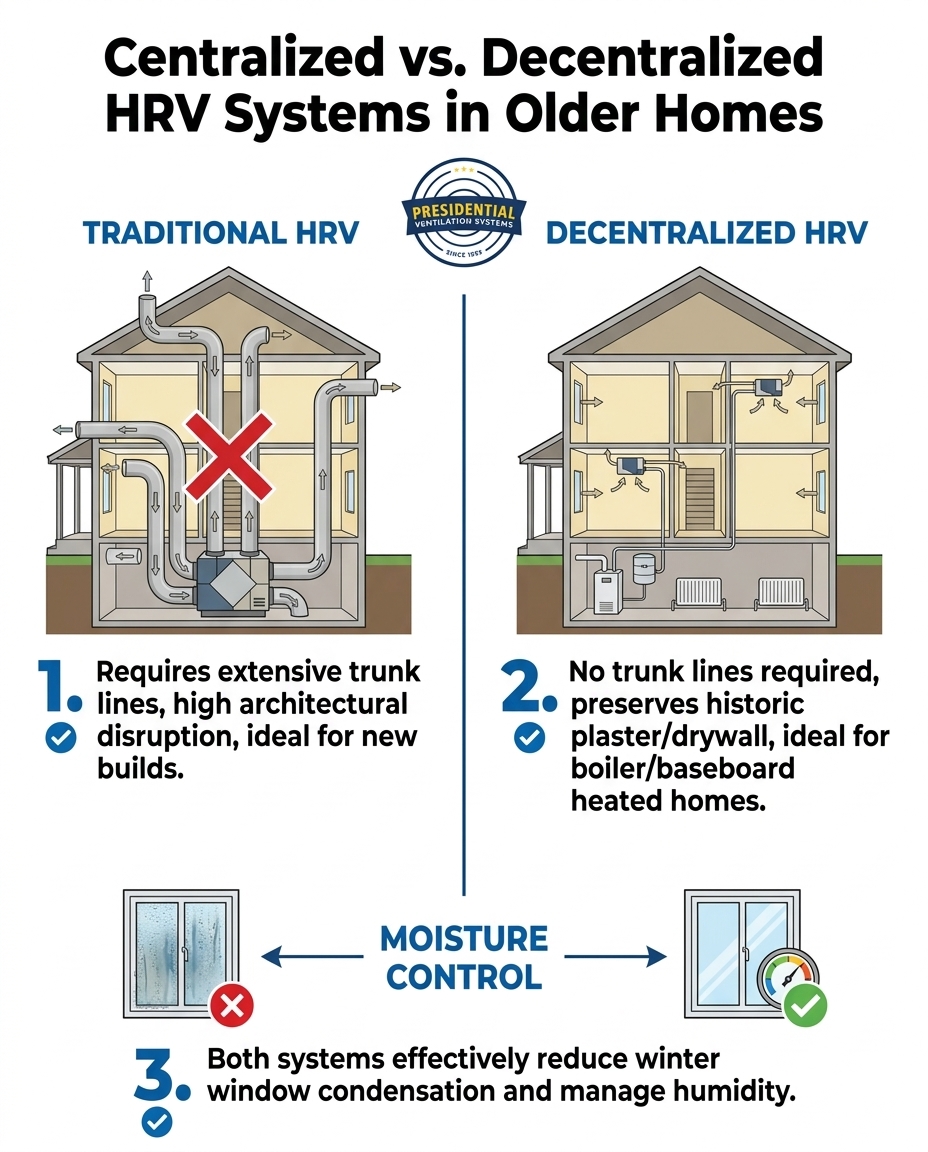
If there are no ducts to carry the air around the house, how does a decentralized system actually work? Instead of one large box in the basement trying to pull air from every room, a localized system uses compact, through-wall units strategically placed in the living space. These units manage moisture and recover heat completely independent of any central furnace.
The brilliance of a localized HRV lies in its internal ceramic core. Here is exactly how the heat recovery process functions in a ductless setup:
1. The Exhaust Phase: The unit's fan pulls warm, stale, damp air from inside the room and pushes it outside. As this air passes through the unit, the thermal energy is captured and stored in a highly conductive ceramic core.
2. The Reversal: After about 70 seconds, the fan automatically reverses direction.
3. The Intake Phase: The unit now pulls fresh, cold outside air indoors. As this freezing winter air passes over the warmed ceramic core, it absorbs the stored heat.
4. The Delivery: The fresh air enters your room pre-warmed, ensuring you get ventilation without creating a freezing draft or spiking your heating bills.
Homes upgrading away from heavy oil boilers often need simultaneous ventilation strategies. When you switch to ductless heat pumps for efficient heating and cooling, you are still utilizing a ductless distribution method. Heat pumps circulate the air within the room, but they do not bring in fresh oxygen from outside. Pairing decentralized air exchangers with modern heat pumps—such as the high-efficiency Daikin ductless systems our team regularly installs—creates a perfect synergy: the heat pump handles the temperature, and the localized HRV handles the moisture and air quality, resulting in an exceptionally comfortable, healthy living space.
A successful ductless HRV retrofit requires absolute precision. You are cutting directly through the exterior envelope of a finished, occupied home. This process demands seamless coordination between electrical and ventilation trades. Hiring separate contractors often leads to miscommunication, improper electrical sizing for the new continuous-duty motors, and messy wall penetrations that leak air.
What our team of approximately 70 employees—including Red Seal HVAC, electrical, and sheet-metal tradespeople—has learned over decades of retrofits is that keeping the electrical and sheet-metal work in-house guarantees safety and precision. The homeowner never has to act as a general contractor trying to coordinate an electrician's schedule with the HVAC installer's timeline.
The electrical reality: Localized air exchangers require dedicated power. You cannot simply plug them into an existing bedroom outlet with an extension cord. Assessing older electrical panels for new ventilation circuits is a critical first step. Because these units feature continuous-duty motors designed to run 24/7, the electrical integration must meet strict safety codes. Licensed electrical work ensures the new circuits are properly sized, grounded, and integrated into your existing panel—often revealing the need for a 200-amp panel upgrade to support modern electrical loads without overloading older wiring infrastructure.
The weather-sealing requirement: Drilling a core through a 100-year-old exterior wall requires navigating varied historic siding materials, from original wood clapboard to multiple layers of retrofitted vinyl. The exterior penetrations must be perfectly pitched and expertly weather-proofed against driving maritime storms. Proper draft-stopping and insulating around the localized unit housing prevent cold air from bypassing the ceramic core and seeping into the wall cavity, which would otherwise cause hidden rot.
Because you are not relying on a central fan to push air everywhere, professionals must determine exactly where to place these localized units for maximum impact. We map out the home to identify dead-air zones and high-moisture generation areas, calculating the required air changes per hour (ACH) for specific room volumes. For instance, our technicians typically target an optimal 0.35 ACH for healthy residential indoor air quality.
To create balanced pressure and optimal cross-ventilation across a ductless historic home, we follow a specific zoning strategy:
1. Targeting the Moisture Sources: Exhaust-heavy units are prioritized in high-moisture zones, such as bathroom proximities, laundry areas, and near kitchens. This captures the damp air before it can migrate to the colder bedrooms.
2. Establishing Cross-Ventilation: In a multi-story property, units are often installed in pairs. While one unit on the main floor exhausts stale air, a synchronized unit on the second floor intakes fresh air. They communicate wirelessly to alternate cycles, creating a gentle, invisible sweep of fresh air through the hallways and stairwells.
3. Addressing Dead-Air Zones: Rooms historically heated by a single radiator at the far end of the house often suffer from severe air stagnation. Placing a unit in these specific bedrooms ensures the occupants have continuous fresh oxygen while sleeping.
Once the zones are established, keeping them effective requires simple but consistent upkeep. Knowing what happens if you don't maintain your HRV—such as clogged filters reducing airflow and freezing the core—highlights why routine professional maintenance is just as important as the initial strategic placement.
Adding mechanical ventilation aligns perfectly with overall home energy efficiency goals. When you seal a home tight enough to stop heat loss, you must ventilate it right to stop moisture damage. Recognizing this, provincial programs in Nova Scotia often support structural energy upgrades that improve both efficiency and indoor air quality.
It is important to note that rebate programs and eligibility criteria frequently change. What qualifies for an incentive this season might shift by next year. Therefore, verification is essential. A professional assessment ensures that the specific decentralized system chosen for your property meets the current technical requirements for any available rebates. We strongly advise homeowners to confirm current programs directly with our team at Presidential Ventilation Systems during the estimate phase, ensuring your retrofit is both architecturally respectful and financially optimized.
Older ductless homes in Nova Scotia can absolutely achieve excellent, modern indoor air quality without sacrificing their architectural charm. You do not have to live with winter window condensation, and you certainly do not have to tear down your historic plaster walls to fix it. Decentralized HRV methods are the proven key to managing moisture effectively, recovering heat, and breathing easily all winter long.
By relying on a multi-trade contractor with the in-house expertise to handle the core drilling, the electrical integration, and the ventilation strategy, the entire process remains clean and stress-free. Discovering that these localized methods exist is the first step; mapping them to your specific floor plan is the next. Reach out to Presidential Ventilation Systems today to request a free estimate, and let our experienced team design a customized, non-invasive ventilation strategy for your home.
Can you install an air exchanger without ductwork?
Yes, you can install an air exchanger without traditional ductwork by utilizing a decentralized or localized system. These compact units are installed directly through the exterior wall of specific rooms. They operate independently to exhaust stale air and bring in fresh air, completely bypassing the need for a central furnace or extensive sheet-metal trunk lines.
How do you ventilate an old house without ducts?
Ventilating an old house without ducts requires strategically placing localized heat recovery ventilators (HRVs) in high-moisture areas and dead-air zones. These units work in pairs, communicating wirelessly to alternate between intake and exhaust cycles. This creates a gentle cross-ventilation effect throughout the home, ensuring fresh air circulates without relying on a central blower.
What is a decentralized HRV system?
A decentralized HRV system is a room-specific ventilation unit that provides fresh air and exhausts stale air without connecting to central ductwork. It features a built-in ceramic core that captures the heat from outgoing indoor air and transfers it to the cold, incoming outdoor air. This allows ductless homes to enjoy energy-efficient mechanical ventilation on a room-by-room basis.
Are through-wall air exchangers effective for whole-home ventilation?
Through-wall air exchangers are highly effective for whole-home ventilation when properly zoned and synchronized. By installing multiple paired units across different floors and living spaces, they establish a continuous, balanced airflow pattern. A professional assessment calculates the necessary air changes per hour to ensure the combined units adequately ventilate the entire square footage.
How much wall damage occurs during a ductless HRV retrofit?
During a professional ductless HRV retrofit, wall damage is virtually non-existent beyond the exact footprint of the unit itself. The installation requires a precise core-drilled hole straight through the exterior wall, leaving the surrounding interior plaster and exterior siding completely intact. There is no need to open up ceilings, build bulkheads, or tear into interior partition walls.
Do localized air exchangers require dedicated electrical circuits?
Yes, localized air exchangers typically require dedicated electrical circuits to operate safely and reliably. Because these units feature continuous-duty motors designed to run constantly, they must be hardwired or plugged into properly sized, dedicated receptacles. A licensed electrician will assess your existing panel to ensure the new circuits meet all current safety codes.